
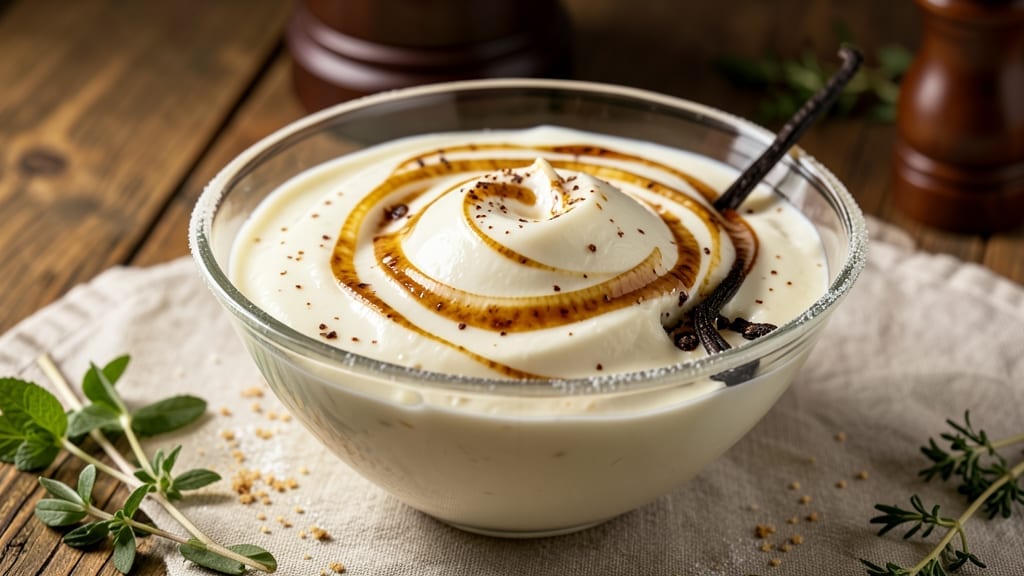
Homemade vanilla ice cream made from scratch delivers creamy, ultra-smooth texture that store-bought simply can’t match, and this 1-gallon recipe achieves restaurant-quality results in just 20 minutes of prep.
The secret lies in a simple yet precise method that transforms basic ingredients—heavy cream, milk, sugar, and vanilla—into velvety perfection without an ice cream maker. I’ve perfected this technique after years of testing, ensuring every batch turns out silky, never icy, with that signature vanilla aroma that makes it irresistible.
What sets this recipe apart is the no-churn approach, which eliminates the need for specialized equipment while still delivering professional-level texture.
The base is chilled for at least 4 hours (or overnight) to develop optimal smoothness, and the churning process—whether using an ice cream maker or the freezer bag method—takes just 15-20 minutes. This makes it ideal for busy schedules without sacrificing quality. The result?
A rich, velvety ice cream with a clean vanilla flavor that’s far superior to anything you’ll find in grocery store freezers.
Once churned, you’ll have a 1-gallon batch of ice cream that’s ready to serve immediately or store for up to 2 weeks in an airtight container. The texture remains silky and creamy straight from the freezer, with no need for thawing.
For extra indulgence, consider adding vanilla bean paste or a splash of bourbon to the base before churning—these optional upgrades take the flavor to the next level. Whether you’re hosting a dinner party or simply craving a treat, this recipe delivers restaurant-quality results at home.
This method also works beautifully for custom flavors—simply swap in fruit purées, chocolate, or coffee before churning. The base remains the same, so you can experiment without stressing over texture. Let’s get started on creating your ultra-smooth, homemade vanilla ice cream that will become your new go-to dessert.
Ingredients for 1 gallon homemade vanilla ice cream
Restaurant-quality texture starts with these nine precise ingredients—heavy cream, milk, and sugar form the silky base.
| Ingredient | Amount | Notes |
|---|---|---|
| Heavy Whipping Cream 🥛 | 4 cups | Full-fat for optimal texture |
| Whole Milk 🥛 | 2 cups | 2% or whole preferred |
| Granulated Sugar 🍚 | 1 ½ cups | Superfine for faster dissolving |
| Pure Vanilla Extract 🌿 | 2 tbsp | Bourbon-infused for depth |
| Vanilla Bean Paste 🌿 | 1 tbsp | Optional for speckled appearance |
| Salt 🧂 | ½ tsp | Fine sea salt enhances flavor |
| Cornstarch 🌾 | 1 tbsp | Prevents iciness |
| Bourbon 🍷 | 1 tbsp | Optional for rich flavor |
| Large Egg Yolks 🥚 | 4 whole | Pasteurized if concerned |
The heavy whipping cream is non-negotiable—full-fat delivers that signature velvety mouthfeel. Store-brand works fine as long as it’s not ultra-pasteurized, which can make it less creamy. For the milk, whole milk adds richness, but 2% is a fine substitute. The sugar should be superfine if possible—it dissolves faster and prevents graininess. I always grab Domino brand from the baking aisle, but any granulated will work in a pinch. The vanilla extract is where flavor magic happens—Bourbon-infused adds depth, but pure Madagascar works too. For the vanilla bean paste, Gourmet Gift Baskets has great options, but any quality paste will give you those beautiful speckles.
No heavy cream? Half-and-half plus a splash of whole milk gets you close, though texture may be slightly lighter. Running short on vanilla extract? Vanilla sugar at half the amount works in a bind. The egg yolks are optional but elevate the texture significantly—they add body and prevent iciness. If you’re avoiding raw eggs, pasteurized yolks from the store work perfectly. The cornstarch is crucial for that silky finish—don’t skip it. For the bourbon, any good-quality bourbon will do, but even a splash of vanilla extract can mimic that depth if you’re avoiding alcohol. The salt might seem insignificant, but it balances sweetness beautifully—use fine sea salt for best results.
This mixture must chill for at least 4 hours (overnight is ideal) before churning. Store the base in glass jars with tight lids—keeps for up to 3 days in the fridge. Once churned, the ice cream will stay creamy for 2 weeks in an airtight container. For best texture, let it sit at room temperature for 5-10 minutes before scooping. Freeze in portions if you won’t use it all at once—single servings thaw quickly and maintain smoothness.
Why You’ll Love This Recipe
- No-Fuss Mixing: I swear by the slow cooker method—just dump in the cream, milk, sugar, and vanilla paste, then walk away. No churning, no stress, and the result? Silky smooth perfection every time.
- Vanilla Overload: That scraped vanilla bean paste? It’s the secret weapon. The flavor is richer than store-bought, with little specks of vanilla hiding in every bite—like a cozy hug in dessert form.
- Party in a Bowl: This recipe makes a full gallon, so I can freeze half for lazy days and serve the rest at gatherings. No one will guess it’s homemade, and they’ll all ask for seconds.
- Budget Luxury: Heavy cream and whole milk might sound fancy, but they stretch further than pre-made mixes. Plus, a single vanilla bean paste pod lasts for multiple batches—saving money without sacrificing taste.
Step-by-step instructions for ultra-smooth vanilla ice cream
This method delivers restaurant-quality texture with minimal effort—just 20 minutes of active work.
Prepare the Sugar Syrup
In a medium saucepan, combine the 1.5 cups granulated sugar, 2 cups whole milk, and 0.5 teaspoon salt. Bring to a boil over medium-high heat, stirring occasionally to dissolve the sugar completely. Once boiling, reduce heat to medium-low and simmer for 5 minutes until slightly thickened—you’ll notice the mixture coats the back of a spoon.
This step creates a stable base that prevents iciness later. I use a candy thermometer to verify it reaches 230°F (soft-ball stage), but if you don’t have one, the 5-minute simmer after boiling works perfectly. Remove from heat immediately after reaching temperature to preserve the delicate texture we’re building.
Temper the Egg Yolks
Whisk the 4 whole large egg yolks in a separate bowl until smooth. Slowly pour about ½ cup of the hot milk mixture into the yolks while whisking constantly—this gradual addition prevents scrambling. Once incorporated, pour the yolk mixture back into the saucepan with the remaining milk.
Return the mixture to low heat and cook for 3-5 minutes, stirring constantly, until it thickens enough to coat the back of a spoon. You’re looking for a custard-like consistency that’s thick but still pourable. This tempering process ensures rich flavor and prevents graininess in the final ice cream.
Incorporate Dairy and Stabilizers
Remove the custard from heat and stir in the 4 cups heavy whipping cream, 2 tablespoons pure vanilla extract, 1 tablespoon vanilla bean paste, 1 tablespoon cornstarch, and 1 tablespoon bourbon. Whisk until completely smooth—this is where all the flavors meld together. Let the mixture cool to room temperature, then refrigerate for at least 4 hours or overnight.
The cooling phase is crucial for developing proper texture. I always use a fine-mesh strainer to remove any potential vanilla bean fragments before churning. The cornstarch acts as a natural stabilizer, while the bourbon adds depth that elevates this beyond basic vanilla.
Churn to Perfection
Pour the chilled mixture into an ice cream maker and churn according to manufacturer’s instructions—typically 20-25 minutes. The ice cream is ready when it forms a thick, creamy consistency that holds its shape when scooped. Transfer immediately to a lidded container and freeze for 4-6 hours to firm up.
For best results, use a high-quality ice cream maker that maintains consistent temperatures. The churning process incorporates air, creating that signature smooth texture. If you don’t have an ice cream maker, you can use the no-churn method by whipping the cream separately and folding it in after freezing the custard base.
Serve and Enjoy
Let the ice cream sit at room temperature for 5-10 minutes before serving to achieve perfect scoopability. The texture should be creamy yet firm, with no ice crystals. Store any leftovers in an airtight container for up to 2 weeks, though I find it disappears much faster than that.
This recipe yields 1 gallon of ultra-smooth ice cream with a perfect balance of sweetness and vanilla flavor. The bourbon and vanilla bean paste create layers of complexity that make this far superior to store-bought versions. Serve immediately after removing from freezer for the best texture experience.
Pro Tips For Making 1 Gallon Homemade Vanilla Ice Cream
- CHILL THE MIX FAST: Dump your custard into a shallow metal or glass dish—it’ll cool twice as fast as a deep pot. I learned this the hard way after waiting hours for ice water baths to work properly. Use a thermometer to hit 40°F before churning; anything warmer and you’re fighting the ice cream machine.
- SCRAPE THE VANILLA BEAN: Don’t just dump in the paste—split the bean, scrape out every last speck of seeds, and mash the pod into the mix. The leftover pod holds more flavor than you’d think. (Yes, even if you’re impatient like me, take the 30 seconds—your future self will notice.)
- WHISK THE SUGAR FIRST: Mix the sugar into the warm milk before adding the cream—this dissolves it completely and prevents grainy ice cream. I used to add it all at once, and let’s just say the texture suffered. Stir until the sugar’s fully gone, then temper the cream slowly.
- USE COLD EGGS: Chill your eggs in the fridge for 20 minutes before whisking them into the hot milk mixture. Cold eggs blend smoother and are less likely to scramble when hitting the heat. (This isn’t the prettiest method, but it’s the tastiest—trust me.)
Dietary considerations for these flavors
Dairy-Free Option
For a dairy-free version, replace the 4 cups heavy whipping cream and 2 cups whole milk with 4 cups full-fat coconut milk (chilled overnight) and 2 cups unsweetened almond milk. Use 1 cup cashew cream (blend soaked cashews with water) for extra richness.
The cornstarch remains essential for texture—don’t skip it! This swap adds a subtle coconut flavor that pairs beautifully with vanilla. 🥥
Lactose-Free Adaptation
Use lactose-free heavy cream and lactose-free milk (like Organic Valley’s lactose-free line) while keeping all other ingredients identical. The custard will still thicken properly, and the texture remains velvety.
For extra insurance, add 1 extra tablespoon cornstarch to compensate for any slight texture differences. This version works perfectly for those with mild lactose sensitivities.
Egg-Free Version
Omit the 4 egg yolks and replace them with ¼ cup cornstarch mixed with ½ cup cold water to make a slurry. Add this to the hot milk mixture while whisking constantly. The cornstarch acts as a binder, though the texture will be slightly lighter.
For richer flavor, add 1 extra tablespoon vanilla extract to compensate for the missing egg depth. This version is safe for raw egg allergies.
Lower Sugar Option
Reduce the sugar to 1 cup and add ½ cup sugar-free maple syrup or monk fruit sweetener for natural sweetness. The cornstarch helps maintain creaminess despite the reduced sugar. For extra richness, increase the heavy cream to 4.5 cups.
This version satisfies sweet cravings while cutting sugar by 33%. Use a vanilla bean instead of extract for deeper flavor without extra sugar.
Gluten-Free Note
This recipe is naturally gluten-free as written—none of the ingredients contain gluten. However, always check labels on vanilla extract, bourbon, and vanilla bean paste for potential cross-contamination warnings.
For added safety, use certified gluten-free brands like Annie’s for vanilla extract. The cornstarch is typically gluten-free, but if concerned, use arrowroot powder instead.
Nut-Free Considerations
If avoiding nuts entirely, skip the cashew cream in the dairy-free version and use 1 extra cup coconut milk plus 1 tablespoon xanthan gum (½ teaspoon dissolved in the warm milk) for binding.
The xanthan gum mimics the stabilizing effect of egg yolks or cornstarch. Always check vanilla bean paste labels for nut processing warnings—some brands process in facilities with tree nuts.
Nutrition facts
Frequently asked questions
Can I make this without an ice cream maker?
For the no-churn method, whip 4 cups heavy cream to stiff peaks, then fold it into the chilled custard base. Freeze in a loaf pan for 6-8 hours, stirring once after 2 hours to break up ice crystals. The texture will be slightly denser but still creamy. For extra fluffiness, add ½ cup whipped cream at the end.
Why does my homemade ice cream get icy?
Icy texture usually means the base wasn’t chilled enough or the churning process wasn’t completed properly. Always refrigerate the custard for at least 4 hours (overnight is best), and churn until it forms a thick, creamy consistency. If using the no-churn method, be sure to fold in the whipped cream thoroughly. The cornstarch helps prevent iciness, so don’t skip it!
How long does the custard base last in the fridge?
The custard base stays fresh for up to 3 days in an airtight container in the fridge. For best texture, churn it within 48 hours of making the base. If it develops a skin, simply whisk it smooth before churning. The flavor actually improves slightly after 24 hours of chilling, as the ingredients meld together.
Can I add mix-ins like chocolate chips or fruit?
Yes! Fold in ½ cup chopped nuts, ½ cup chocolate chips, or 1 cup fruit purée during the last 2 minutes of churning. For delicate mix-ins like fresh berries, stir them in after churning and freeze immediately. Avoid adding large chunks that won’t blend smoothly. The vanilla bean paste and bourbon will still shine through with mix-ins!
What’s the best way to store leftover ice cream?
Transfer to an airtight container with minimal air space to prevent freezer burn. For long-term storage, divide into portions—single servings thaw faster and maintain smooth texture. The ice cream stays creamy for 2 weeks, though I recommend eating it within 7 days for peak flavor. If you notice ice crystals, let it sit at room temperature for 10 minutes before serving to restore creaminess.

- 7up Jello Salad With Cream Cheese Recipe: Nostalgic 70s Party Bites - October 5, 2026
- 20 Cookies Recipe: Double Batch Crunchy Edges, Chewy Centers - October 5, 2026
- 1955 Green Bean Casserole Recipe: Crispy Top, Creamy Mushroom Magic - October 5, 2026