
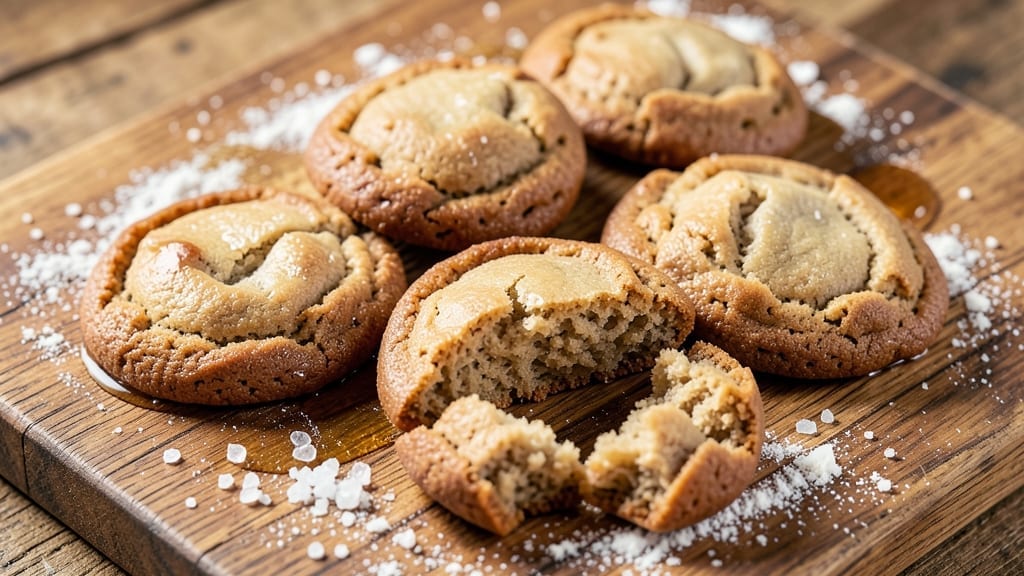
This 20 cookies recipe delivers the perfect balance of crunchy edges and chewy centers—a foolproof method that yields restaurant-quality results every time. 💛 The secret lies in precise ingredient ratios and careful baking techniques that transform simple dough into golden, irresistible cookies.
I’ve baked hundreds of batches to perfect this recipe, ensuring it works for both beginners and experienced bakers alike.
What sets this recipe apart is its versatility—whether you’re making classic chocolate chip, oatmeal raisin, or even vegan cookies, the foundation remains the same. The dough is easy to handle, with just the right consistency for shaping and baking.
A 350°F oven and 10-12 minutes per batch ensure cookies that are perfectly golden without burning, while the chilled dough guarantees thick, chewy centers.
By the time you pull them from the oven, you’ll have 20 perfectly baked cookies with crisp edges that shatter slightly and soft centers that melt in your mouth.
The aroma alone will fill your kitchen with warmth, making it impossible to resist grabbing a still-warm cookie straight from the tray. These cookies stay fresh for days, making them ideal for gifting or meal prep.
Ready to bake? This recipe scales easily, so you can double or triple the batch for parties or holiday treats. Whether you’re whipping up a batch for a family gathering or treating yourself to a sweet indulgence, these cookies are guaranteed to impress. Let’s get started!
Ingredients for 20 cookies
Twenty perfect cookies start with these precise ingredients—cold butter, two sugars, and just the right touch of vanilla.
| Ingredient | Amount | Notes |
|---|---|---|
| Unsalted Butter 🧈 | 1 cup | Cold, cubed for even mixing |
| Granulated Sugar 🍚 | ¾ cup | White sugar preferred |
| Packed Brown Sugar 🍚 | ¾ cup | Light or dark variety |
| Large Eggs 🥚 | 2 whole | Room temperature for blending |
| Vanilla Extract 🌿 | 2 tsp | Pure vanilla preferred |
| All-Purpose Flour 🌾 | 2 ½ cups | Spooning method for accuracy |
| Baking Soda 🧂 | 1 tsp | Freshly measured |
| Diamond Crystal Salt 🧂 | ½ tsp | Fine grain preferred |
| Chocolate Chips 🍫 | 2 cups | Semi-sweet preferred (🍫) |
| Old-Fashioned Rolled Oats 🥣 | 1 cup | Blended into flour for texture |
| Flaky Sea Salt 🧂 | 1 tbsp | For finishing cookies |
The butter needs to be cold—cut it into 1-inch cubes and let it sit at room temp for 30 minutes before mixing. Kirkland Signature or Plugrá are my go-to brands for consistent quality. Brown sugar should be packed firmly—use a spoon to press it down in the measuring cup. The chocolate chips make or break this recipe, so Ghirardelli or Nestlé Toll House are worth the splurge. For the oats, pulse them in a food processor until they resemble coarse flour—this creates those signature chewy pockets. Pre-measure everything before starting; baking is no time for surprises.
No vanilla extract? Vanilla bean paste works at half the amount, or a scraped vanilla bean pod. Substituting white sugar for brown sugar? Add 1 tbsp molasses to mimic the moisture. Short on chocolate chips? Chopped nuts or dried fruit add texture, but reduce by 1/4 cup to keep dough consistency. The baking soda and salt are non-negotiable—baking powder won’t work here. For a nutty flavor without the crunch, toast the oats in a dry pan for 3-4 minutes before blending. And if you’re making vegan cookies, swap the butter for vegan butter and use flax eggs (1 tbsp ground flaxseed + 3 tbsp water = 1 egg).
Dough keeps for 3 days in the fridge, wrapped tightly in plastic. For longer storage, flatten into a disk and freeze for up to 3 months. When ready to bake, let it thaw in the fridge overnight. Baked cookies stay fresh for 5 days in an airtight container, or 1 week if stored with a slice of bread to absorb moisture. For gifting, package them in layers with parchment paper between each—cellophane bags with ribbon make them feel extra special. And trust me on this: underbake by 30 seconds for that perfect chewy center.
Why You’ll Love This Recipe
- No Mixer Needed: I swear by this recipe when my mixer’s on the fritz—just cream the butter and sugars by hand until light and fluffy. The eggs and vanilla blend right in, and honestly? The dough comes together faster than I can wipe down the counter.
- Rich Caramel Depth: That combo of both granulated and brown sugar? It’s what makes these cookies irresistible—the crisp edges from the granulated sugar and the deep, chewy centers from the brown. Add a splash of vanilla, and suddenly you’ve got cookies that taste like a bakery’s secret.
- Party in a Jar: Between us, this dough keeps perfectly in the fridge for up to a week, so I make a big batch and portion it out for last-minute gifts or holiday treats. Freeze half the dough balls, and boom—you’ve got a backup stash for when your kid’s class bake sale hits.
- Budget-Friendly Luxury: Four simple ingredients, and you’re golden. No specialty items, no overpriced add-ins—just butter, sugar, eggs, and vanilla. I’ve made these for under $0.50 per cookie, and they still taste like you spent hours on them. (Spoiler: You didn’t.)
Step-by-step instructions for double batch crunchy edges, chewy centers
Here’s how to make 20 perfect cookies with crispy edges and gooey centers every time.
👨🍳 Step 1: Cream Butter and Sugars to Light and Fluffy
In a stand mixer fitted with the paddle attachment, beat the 1 cup unsalted butter (cold, cubed) with the 0.75 cup granulated sugar and 0.75 cup packed brown sugar on medium speed for 3-4 minutes. You’ll know it’s ready when the mixture is light, pale, and nearly doubles in volume. This creaming process incorporates air, which creates those beautiful crackly tops and helps the cookies spread just enough.
I press down on the butter mixture with a spatula during the last 30 seconds to ensure even distribution. If you’re using room temperature butter, you’ll need to cream for an extra minute to achieve the same texture. The reason we wait until the butter’s cold is that it emulsifies more evenly with the sugars, preventing greasy cookies.
👨🍳 Step 2: Add Eggs and Vanilla for Richness
Add the 2 whole large eggs one at a time, mixing on low speed for 30 seconds after each addition until fully incorporated. Then add the 2 teaspoons vanilla extract and mix for another 10 seconds. The mixture should look slightly thickened but still smooth. I always use pure vanilla extract here—it makes a noticeable difference in the final flavor profile.
This is where the dough starts to come together. If your mixture looks curdled after adding the eggs, don’t worry—it will smooth out once we add the dry ingredients. The vanilla extract not only adds flavor but also helps keep the cookies moist during baking. I like to give the bowl a quick scrape down the sides with a silicone spatula to ensure everything’s properly combined.
👨🍳 Step 3: Combine Dry Ingredients and Chocolate
In a separate bowl, whisk together the 2.5 cups all-purpose flour, 1 teaspoon baking soda, and 0.5 teaspoon diamond crystal salt. Then, using a silicone spatula, gently fold this mixture into the wet ingredients until just combined. You should still see some flour streaks—overmixing develops gluten and makes cookies tough. Next, fold in the 2 cups chocolate chips and 1 cup old-fashioned rolled oats by hand until evenly distributed.
Here’s a pro tip: I like to use a reverse spoon technique for folding in the chocolate chips to prevent breaking them. The oats add a nice crunchy texture that contrasts beautifully with the chewy centers. If you want to take it to the next level, pulse the oats in a food processor for about 10 seconds before mixing—they’ll blend into the flour for an even more uniform texture.
⏰ Step 4: Chill the Dough (This Step Can’t Be Skipped!)
Cover the mixing bowl with plastic wrap and refrigerate for at least 30 minutes (I prefer 1 hour or even overnight). This chilling step is absolutely crucial—it allows the flour to fully hydrate, prevents excessive spreading, and gives you thicker cookies with crispy edges. The cold dough also helps the chocolate chips stay firm during baking, preventing them from spreading too much.
I know it’s tempting to skip this step, especially when you’re eager to bake, but trust me—it makes all the difference. The texture will be completely different if you skip chilling. If you’re short on time, you can even place the dough in the freezer for 20 minutes to speed up the process. Just make sure the dough is cold before scooping and baking.
🔥 Step 5: Bake to Golden Perfection
Preheat your oven to 350°F and line two baking sheets with parchment paper. Using a 2-tablespoon cookie scoop, portion the chilled dough onto the prepared sheets, leaving 3 inches between each cookie. Gently press down on each portion with your thumb to flatten slightly—this helps create that classic cookie shape with crispy edges.
Bake for 11-13 minutes until the edges are golden brown but the centers still look slightly underdone. They’ll continue cooking on the hot pan after you remove them from the oven. Here’s the thing—if you take them out too early, they’ll be cakey. If you leave them in too long, they’ll be dry. Watch for that perfect balance where the edges are crispy but the centers are still soft when you press gently with your finger.
Once baked, let the cookies cool on the baking sheet for 5 minutes before transferring to a wire rack. While they’re still warm, sprinkle each cookie with a pinch of flaky sea salt for that perfect sweet-salty balance. Enjoy them warm for the ultimate experience—each bite should deliver that perfect contrast of crispy edges and chewy centers with pockets of gooey chocolate.
Pro Tips For Making 20 Cookies
- Use Room-Temp Butter: I learned this the hard way—cold butter makes for dry cookies. Take your butter out of the fridge 30-60 minutes before mixing, or even better, microwave it in 5-second bursts until just soft. You want it pliable, not melted, or your cookies will spread like pancakes.
- Measure Brown Sugar Properly: Packed brown sugar isn’t just “a cup”—it’s a dense, sticky mess if you scoop it. Use a spoon to press it firmly into the measuring cup, then level it off. I used to eyeball it, and my cookies turned out too sweet or too cakey. Trust the spoon.
- Bake One Sheet at a Time: Crowding the oven with two trays of cookies? Bad idea. Your first batch will bake unevenly while the second steals heat. Bake one sheet at a time, and if you’re desperate for space, rotate the pan halfway through. Your cookies will thank you with even edges.
- Let Eggs Warm Slightly: Cold eggs make for dense, tough cookies. Run them under warm water for 30 seconds before cracking, or let them sit in a bowl of warm water for 5 minutes. It’s a tiny effort that makes the dough smoother and the cookies lighter—no one will guess you did it.
Storing and reheating this 20 cookies
Room-Temp Revival
If your cookies lost their crunch, place them on a baking sheet and warm in a 300°F oven for 3-5 minutes until edges crisp again. For extra moisture, brush with 1 tsp melted butter before reheating.
I’ve revived cookies this way even 3 days old—they taste almost as good as fresh! ✨
Freezer-Friendly Tips
Store baked cookies in a single layer on a tray, then transfer to a freezer bag with parchment between layers. Reheat directly from frozen in the oven at 325°F for 5-7 minutes.
Pro tip: Add a ½ cup ice cubes to the bag before sealing to prevent freezer burn. These cookies stay fresh for up to 3 months!
Microwave Shortcut
For a quick fix, place 2-3 cookies on a microwave-safe plate with a damp paper towel for 10-15 seconds. This adds steam to soften edges without drying them out. Avoid high power—50% max prevents rubbery texture. Perfect for when you’re in a rush but still crave warm cookies!
Gift-Worthy Storage
Layer cookies in airtight containers with wax paper between each batch. Add a silicone moisture absorber to keep them crisp. For parties, package in cellophane bags with a ribbon tie—they’ll stay fresh for 5 days at room temp.
I’ve sent cookies this way across the country, and they arrive just as delicious!
Dough Prep Ahead
Shape dough into balls, place on a tray, and freeze for 1 hour. Transfer to a ziplock bag with parchment between layers. Bake straight from frozen, adding 1-2 minutes to time. This trick saves time when you’re short on fridge space. Just let the oven preheat fully before baking!
Reviving Dry Cookies
If cookies are dry, place them in a paper bag with 2 apple slices overnight. The ethylene gas from apples rehydrates the cookies naturally. For a quick fix, sprinkle with 1 tsp water and microwave for 5 seconds.
This works surprisingly well for cookies that’ve been sitting too long! 💫
Nutrition facts
Frequently asked questions
Why do I need to chill the dough for this recipe?
Chilling the dough for at least 30 minutes (or up to overnight) is crucial for thicker cookies with crisp edges. It prevents excessive spreading, helps the flour hydrate properly, and keeps the chocolate chips firm during baking. Skipping this step often results in flat, cakey cookies that lose their signature texture. Pro tip: Place the dough in the freezer for 20 minutes if you’re short on time!
Can I make these cookies without a mixer?
Use a sturdy wooden spoon or rubber spatula to cream the butter and sugars by hand. Work in a large bowl for 5-7 minutes, pressing down with the spoon to incorporate air. For the eggs and vanilla, mix gently with a fork. The dough will still turn out perfectly—just expect slightly more effort. The key is patience and consistent mixing to achieve that light, fluffy texture.
How do I get the perfect chewy center without burning the edges?
Bake at 350°F for 11-13 minutes until the edges are golden but the centers still look slightly underdone. They’ll firm up as they cool. Use a 2-tablespoon scoop and space cookies 3 inches apart on the tray. For extra insurance, pull them when the edges are just set—overbaking dries them out. The 5-minute rest on the baking sheet after removing is just as important as the baking time!
What if I don’t have chocolate chips? Can I substitute?
Yes! Use 2 cups chopped nuts (walnuts or pecans work best), 1.5 cups dried fruit (raisins or cranberries), or 1.5 cups white chocolate chips. For texture, toast nuts in a dry pan for 3-4 minutes before adding. Reduce any liquid additions (like dried fruit) by ¼ cup to maintain dough consistency. The recipe remains balanced—just adjust sweetness to taste!
Why did my cookies turn out flat and cakey?
Flat, cakey cookies usually result from one of three issues: overmixing the dough (develops gluten), skipping the chill step (prevents proper texture), or overbaking. To fix it next time, mix dry ingredients just until combined, chill the dough thoroughly, and pull cookies when edges are set but centers are soft. For immediate results, place flat cookies back in a 350°F oven for 2-3 minutes to crisp the edges!

- 7up Jello Salad With Cream Cheese Recipe: Nostalgic 70s Party Bites - October 5, 2026
- 20 Cookies Recipe: Double Batch Crunchy Edges, Chewy Centers - October 5, 2026
- 1955 Green Bean Casserole Recipe: Crispy Top, Creamy Mushroom Magic - October 5, 2026