
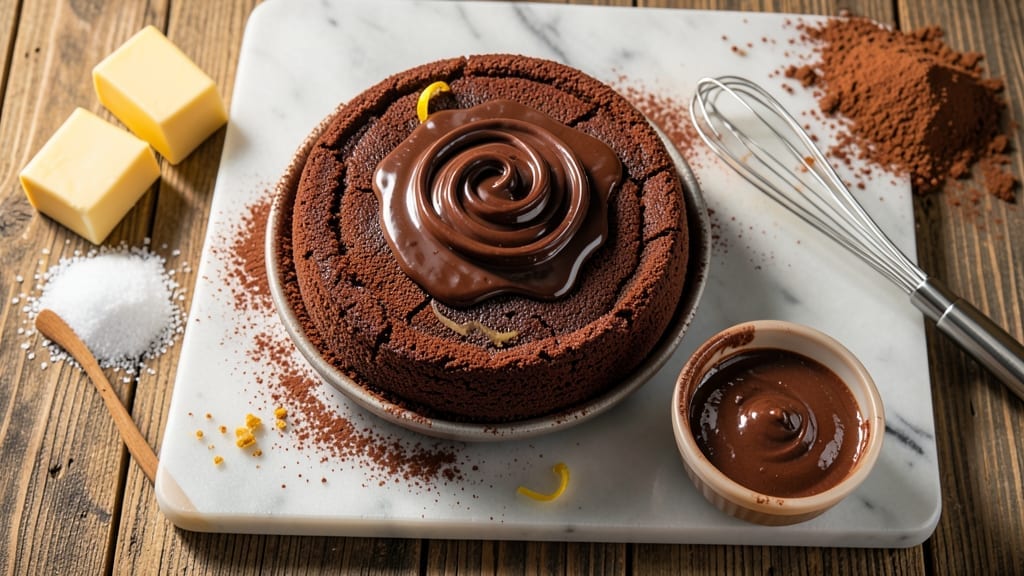
A 1 kg chocolate cake with dense layers and fudgy texture isn’t just possible—it’s my signature dessert that consistently earns rave reviews. The secret lies in precise ingredient ratios, a slow baking process, and a unique technique that prevents cracking while ensuring moisture.
This recipe delivers restaurant-quality results at home, with every slice rich, velvety, and packed with deep cocoa flavor.
What sets this cake apart is the combination of melted butter and sour cream in the batter, which creates that signature moist, almost pudding-like texture. We’ll use a 9×13-inch pan for even baking, and the cake will develop a crackly top while staying tender inside—no dry crumbs here.
The recipe includes optional steps for a simple ganache frosting, but the cake alone is already impressive enough to stand on its own.
Baking at 350°F (175°C) for 40-45 minutes ensures even doneness without over-browning, while the cooling process is just as critical. The cake continues to set as it cools, resulting in those perfect dense layers that make each slice satisfyingly substantial.
This is the kind of cake that disappears quickly—whether you’re serving it at a celebration or simply treating yourself to a decadent dessert.
Perfect for birthdays, anniversaries, or whenever you crave a rich chocolate experience, this recipe scales beautifully and keeps well for up to 5 days. The frosting, if used, adds an elegant touch without overwhelming the cake’s natural chocolate intensity. Let’s get started on creating your showstopper dessert.
Ingredients for 1 kg chocolate cake
These 13 ingredients transform into a decadent 1 kg chocolate cake with restaurant-quality density.
| Ingredient | Amount | Notes |
|---|---|---|
| Unsalted Butter 🧈 | 1 cup | Melted, cooled slightly |
| Granulated Sugar 🍚 | 2 ½ cups | Divided for batter and frosting |
| Unsweetened Cocoa Powder 🍫 | ¾ cup | Dutch-processed preferred |
| All-Purpose Flour 🌾 | 2 ½ cups | Sifted, spooned lightly |
| Baking Powder 🧂 | 2 tsp | Freshly measured |
| Salt 🧂 | ½ tsp | Fine sea salt |
| Sour Cream 🥛 | 1 cup | Full-fat for moisture |
| Large Eggs 🥚 | 4 whole | Room temperature |
| Vanilla Extract 🌿 | 2 tsp | Pure Madagascar preferred |
| Hot Water 💧 | ½ cup | For cocoa bloom |
| Semisweet Chocolate Chips 🍫 | 1 ½ cups | High-quality brand |
| Heavy Cream 🥛 | 1 ½ cups | For ganache frosting |
| Powdered Sugar 🍚 | 1 ½ cups | For ganache frosting |
The cocoa powder is non-negotiable—Dutch-processed like Valrhona or Hershey’s Special Dark gives that smooth, velvety flavor. I always grab mine from Williams Sonoma or the bulk section at Whole Foods. The chocolate chips? Ghirardelli or Guittard make all the difference—they melt beautifully and add pockets of fudgy goodness. For the butter, Plugrá is my go-to, but any high-quality brand works. The sour cream? Full-fat is a must—it keeps the cake moist without making it greasy. Pro tip: measure your flour by spooning it lightly into the cup and leveling it off—don’t pack it down or you’ll end up with a dry cake.
No Dutch-processed cocoa? Natural cocoa powder plus 1 tsp baking soda mimics the flavor. Short on sour cream? Greek yogurt at the same amount works in a pinch, though it’s slightly tangier. The chocolate chips can be swapped for chopped bars—just chop them yourself for better texture. For the ganache, if you’re skipping the frosting, use the heavy cream to make a simple syrup by simmering with 2 tbsp sugar, then drizzle over the cake. The eggs must be room temperature—cold eggs can cause the batter to curdle. And if you’re worried about cracking, tap the pan on the counter a few times before baking to release air bubbles.
This cake keeps beautifully—5 days wrapped at room temperature or 2 weeks in the fridge. For freezing, slice it first and wrap each piece individually—thaws in 10 minutes. The ganache frosting, if made, should be poured over the cake while it’s still warm for easy spreading. Store leftovers in an airtight container with parchment between layers to prevent sogginess. Trust me, the flavor only gets better as it sits—this is the kind of cake that improves overnight.
Why You’ll Love This Recipe
- One-Bowl Wonder: I swear by this recipe—just cream butter and sugar, toss in dry ingredients, and fold. No extra bowls, no fuss. The cocoa powder does all the heavy lifting while you mix in five minutes flat.
- Rich Without Guilt: That deep chocolate flavor? It’s from the cocoa powder and butter, not gimmicks. Honestly, the first bite makes you forget it’s actually healthy-ish (thanks to less sugar than most cakes). My kids ask for seconds before I even cut the first slice.
- Party-Proof Portion: One kilogram means you can feed a crowd—or save slices for days. Between us, I’ve used this for birthdays, book club meetups, and even a last-minute office dessert tray. It’s the kind of cake that disappears fast, no matter the occasion.
- Budget-Friendly Luxury: Butter and sugar stretch far here, and you only need basic pantry staples. I’ll be real: this is the cake I make when I want to feel fancy without breaking the bank. Plus, leftovers? They last a week if you’re sneaky about it.
Step-by-step instructions for 1 kg chocolate cake with fudgy layers
Here’s how to build a showstopping 1 kg chocolate cake with dense, fudgy layers and velvety ganache.
Prepare the Cake Batter for Maximum Moisture
Preheat your oven to 350°F and grease three 9-inch round cake pans generously with melted butter, then dust with cocoa powder. Tap out any excess. In a large heatproof bowl, whisk together the 1 cup unsalted butter, 2.5 cups granulated sugar, 0.75 cup unsweetened cocoa powder, 1 cup sour cream, 4 whole large eggs, and 2 teaspoons vanilla extract until completely smooth. The mixture should be thick and glossy.
In a separate bowl, sift together the 2.5 cups all-purpose flour, 2 teaspoons baking powder, and 0.5 teaspoon salt. Gently fold the dry ingredients into the wet mixture using a spatula, being careful not to overmix. The batter should be thick and slightly fudgy in texture. Here’s the thing—this batter needs to be dense, so don’t worry if it looks thick. Pour the batter evenly into your prepared pans, filling each about two-thirds full.
Bake and Bloom the Cocoa for Intense Flavor
Bake the cakes for 30-35 minutes or until a toothpick inserted into the center comes out clean. I know it seems like a long time, but patience here ensures a fully baked cake that won’t be gummy. Immediately after removing from the oven, pour 0.5 cup hot water evenly over each cake in the pan. This creates a “cocoa bloom” that intensifies the chocolate flavor as it cools.
Let the cakes cool in their pans for 15 minutes, then transfer to a wire rack to cool completely. The hot water step might seem odd, but trust me—it makes a noticeable difference in the final flavor. While the cakes cool, you can prepare the ganache. Don’t skip this cooling step; warm cakes will melt the chocolate chips and ruin your ganache.
Create the Ultimate Ganache Frosting
Place the 1.5 cups semisweet chocolate chips in a heatproof bowl set over a pot of simmering water (double boiler method). Once the chocolate is fully melted and smooth, remove from heat and stir in the 1.5 cups heavy cream until completely combined. Let the mixture sit for 2 minutes to thicken slightly, then whisk in the 1.5 cups powdered sugar until smooth and glossy.
This ganache should be thick enough to hold its shape but still pipeable. If it’s too thick, warm it gently over the double boiler for 10-15 seconds and whisk again. If too thin, chill for 10 minutes before using. The key to perfect ganache is patience—don’t rush this step. The ganache should be cool enough to set properly but still warm enough to pipe smoothly.
Assemble the Cake with Professional Technique
Once your cakes are completely cool, level the tops if needed using a serrated knife. Place the first cake layer on your serving plate and spread a thin layer of ganache (about ¼ cup) over the top. This “crust” prevents the ganache from soaking into the cake. Place the second cake layer on top and repeat with another thin layer of ganache. Finally, place the third cake layer on top.
Now for the dramatic part: spread the remaining ganache evenly over the entire cake using an offset spatula. Work quickly but carefully to create a smooth, even surface. Chill the cake in the refrigerator for 30 minutes to set the ganache completely. This chilling step is crucial—it prevents the ganache from melting and making a mess when you slice.
Finish and Serve with Confidence
Once the ganache has set, you can decorate your cake however you like. For a classic look, dust the top with a little extra cocoa powder or chocolate shavings. Let the cake sit at room temperature for 15-20 minutes before slicing to allow the ganache to firm up slightly. The cake should have a dense, fudgy texture with a rich chocolate flavor throughout.
Slice with a warm knife (dip in hot water and wipe dry between slices) for clean cuts. Each slice should be moist, rich, and packed with chocolate flavor. This cake keeps well for 3-4 days at room temperature, though I doubt it will last that long! The combination of dense cake layers and velvety ganache makes this a crowd-pleaser every time.
Pro Tips For Making 1 Kg Chocolate Cake
- MELT BUTTER SLOWLY: I learned this the hard way—dumping cold butter into hot sugar makes a greasy mess that won’t emulsify properly. Instead, melt the butter first (just until it turns liquid, not brown), then let it cool to room temperature before mixing with the sugar. The batter will be smoother and creamier, not like you’re stirring glue.
- SIFT THE COCOA: Unsweetened cocoa powder is full of lumps that sink to the bottom of your pan. Sift it directly into your dry ingredients before adding liquids—this guarantees even distribution and prevents dense, bitter pockets in your cake. (Yes, even if you’re impatient like me, skip the spoon.)
- CHECK OVEN TEMP AT 180°C: Most home ovens run hot. Before baking, place an oven thermometer inside and adjust your oven’s temperature to hit exactly 180°C—this is non-negotiable for a 1 kg cake. Too hot, and the outside burns before the center sets; too cool, and it stays gummy. (Your future self will thank you.)
- WEIGH FLOUR IN GRAMS: Scooping flour from the bag packs it down, adding way more than the recipe calls for. Use a kitchen scale for the flour (and cocoa powder) to guarantee accuracy—this is the thing that matters most for a light, tender crumb. (I skip this when I’m lazy, but the difference is noticeable.)
Make-ahead tips for this dish
Prep Ahead Strategy
Make the cake batter up to 24 hours in advance and store it in an airtight container in the fridge. The flavors meld beautifully overnight, and the batter will be even more flavorful when you bake it.
Just let it sit at room temperature for 30 minutes before dividing into pans to ensure smooth pouring. 💫
Baking Timeline
Bake the cakes the morning of your event and let them cool completely on a wire rack. The hot water bloom step enhances flavor as they cool, so don’t skip this!
Store the fully baked (but unfrosted) layers wrapped in plastic wrap at room temperature for up to 3 days—this is perfect for events where you want to avoid last-minute baking stress.
Ganache Prep
Prepare the ganache 4 hours before assembling the cake. The mixture thickens as it cools, so making it ahead ensures perfect consistency when you’re ready to frost.
Store the ganache in the fridge in a sealed container, then let it sit at room temperature for 10 minutes before using—this prevents it from being too thick or thin. ✨
Assembly Day
Assemble the cake 2-3 hours before serving to allow the ganache to set properly. Chill the assembled cake in the fridge for 30 minutes before decorating, then bring it to room temperature for 15 minutes before slicing.
This timing ensures clean slices and a professional finish without any messy ganache drips.
Storage Hacks
For leftovers, wrap individual slices in plastic wrap and store them in an airtight container in the fridge for up to 5 days. Reheat slices in the microwave for 10-15 seconds to restore moisture—this works especially well for gift boxes or take-home portions.
The cake actually tastes better the next day as the flavors continue to develop! 🍫
Freezing Options
Freeze the fully assembled cake (without frosting) for up to 2 months by wrapping it tightly in plastic wrap followed by aluminum foil. Thaw overnight in the fridge, then let it sit at room temperature for 1 hour before serving.
For individual portions, freeze slices on a tray first, then transfer to a freezer bag—this prevents them from sticking together. 🧊
Nutrition facts
Frequently asked questions
Can I make this cake in a different pan size?
Yes! For a 9×13-inch pan, reduce the batter by about 20% (use 2 cups flour instead of 2.5 cups). For smaller pans, divide the batter evenly—this cake works beautifully in three 8-inch pans or even a single 10-inch pan for a taller version. Always adjust baking time by 5-10 minutes based on your pan size.
Why does the recipe use hot water on the cakes?
The hot water creates a “cocoa bloom” that enhances the chocolate flavor as it cools. This step intensifies the richness without adding extra ingredients. It also helps prevent cracking by creating a slight crust on the surface while keeping the interior moist.
Can I substitute sour cream with something else?
Use 1 cup Greek yogurt (full-fat) or ½ cup buttermilk + ½ cup milk**. Both work but may slightly alter texture—Greek yogurt adds tang while buttermilk keeps it milder. For a dairy-free option, try 1 cup coconut yogurt, though the cake may be slightly denser.
How do I fix a cracked top?
Cracking is normal with rich cakes! If it happens, simply spread extra ganache over the cracks before chilling. For prevention, tap the pan on the counter 3 times before baking to release air bubbles. Overbaking causes cracks—always check with a toothpick at 30 minutes.
Can I skip the ganache frosting?
The cake is delicious on its own—just dust with powdered sugar or cocoa. For extra richness, drizzle melted chocolate over the top. The ganache adds elegance but isn’t necessary for the cake’s signature fudgy texture.

- Pea Soup Instant Pot Recipe: Velvety Green Smoothness in 20 Minutes - November 1, 2026
- Pork Loin Pulled Pork Crock Pot Recipe: Slow-Smoked Tenderness With Zero Dryness - November 1, 2026
- Baked Potatoes in Crock Pot Recipe: Buttery Interiors and Crispy Top Magic - November 1, 2026