
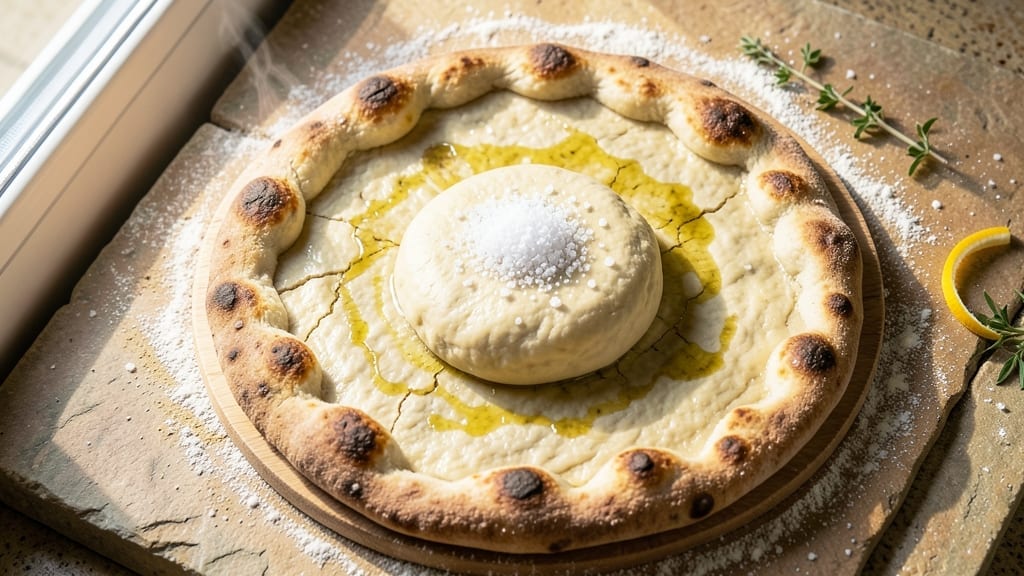
Mastering 1 kg pizza dough transforms homemade pizza from a weekend project into a restaurant-quality experience. This recipe delivers a perfectly chewy crust with crisp edges—no kneading machine required. The secret lies in precise ingredient ratios and a slow fermentation process that develops deep flavor naturally.
I’ve perfected this method after years of trial and error, ensuring your dough rises beautifully and bakes up with that coveted airy yet sturdy texture.
The foundation begins with high-gluten bread flour (or all-purpose in a pinch) combined with instant yeast, water, olive oil, and salt. A 30-minute autolyse (resting period before kneading) relaxes the gluten, making the dough easier to handle.
After shaping, the dough undergoes a 24-hour cold proof—this slow rise enhances flavor and creates those signature leopard-spotted bubbles. For dietary flexibility, simply replace the olive oil with avocado oil and omit eggs if making a vegan version.
What you’ll achieve is a dough that’s foolproof to shape and bakes into a pizza crust with a satisfying chew and golden-brown crust. The slow fermentation also improves digestibility, making this the ideal dough for both beginners and experienced bakers.
Whether you’re making a classic Margherita or a loaded deep-dish, this dough forms the perfect canvas for your toppings.
Once shaped and topped, bake at 475°F (245°C) for 12-15 minutes until the crust is golden and the cheese is bubbling. The key to success is preheating your oven with a pizza stone or steel—this ensures even heat distribution and that perfect crisp.
For extra authenticity, finish with a sprinkle of cornmeal before baking to prevent sticking and add a subtle crunch.
Ingredients for 1 kg pizza dough
High-gluten flour, yeast, and olive oil create the perfect chewy pizza dough foundation.
| Ingredient | Amount | Notes |
|---|---|---|
| High-Gluten Bread Flour 🌾 | 3 ½ cups | Or all-purpose flour in a pinch |
| Instant Yeast 🍞 | 0.7 tsp | Active dry works too |
| Extra-Virgin Olive Oil 🫒 | ⅓ cup | Avocado oil for vegan option |
| Water 💧 | 2 cups | Lukewarm, not hot |
| Diamond Crystal Kosher Salt 🧂 | 1 ½ tsp | Adjust to taste |
| Cornmeal 🌽 | ¼ cup | For dusting pizza peel |
| Semolina Flour 🌾 | ⅛ cup | Optional for extra crisp |
The flour is non-negotiable for that signature chewy texture. King Arthur high-gluten or Caputo pizza flour are my go-tos, but King Arthur all-purpose works in a pinch. Instant yeast is key—it activates faster, but active dry yeast works if you let it proof longer. The olive oil adds tenderness, but avocado oil is a great vegan swap. Water should be lukewarm (around 100°F)—too hot kills the yeast, too cold slows it down. For salt, Diamond Crystal kosher is my preference, but any fine salt works. Pro tip: measure flour by weight if you have a kitchen scale—it’s more accurate than volume.
No high-gluten flour? All-purpose plus 1 tbsp vital wheat gluten mimics the protein structure. Swapping olive oil for vegetable or canola keeps it neutral. The yeast can be active dry, but increase to 1 tsp and let it proof 10 minutes longer. For extra flavor, add 1 tsp Italian seasoning or 2 tbsp tomato paste to the dough. The cornmeal and semolina are optional but add that perfect crunch—Bob’s Red Mill brands are reliable. If you’re short on time, skip the cold proof and bake immediately, but you’ll lose that deep flavor development.
This dough keeps beautifully. Wrap tightly in plastic and refrigerate for up to 3 days—it actually improves with time. For longer storage, freeze shaped dough balls for 3 months. Thaw overnight in the fridge before baking. The dough doubles in size during cold proof, so shape it into a 12-inch round or 10×15-inch rectangle for standard pizzas. For extra authenticity, let it sit at room temp for 30 minutes before baking to help it relax. The slow rise also means you can prep ahead—shape and refrigerate dough balls up to 24 hours before your pizza night.
Why You’ll Love This Recipe
- No-Fuss Mixing: I swear by this dough—just toss the high-gluten flour, yeast, and salt in a bowl, then pour in the olive oil and water. No kneading, no fuss, just a quick 5-minute mix and a 2-hour rise while I watch a movie.
- Chewy, Airy Magic: That high-gluten flour and instant yeast combo? It’s what gives this dough that perfect stretchy-chewy texture with a crispy edge. Honestly, it’s the kind of bite that makes me reach for seconds without even thinking.
- Weeknight Wonder: Between us, this dough is my secret weapon for busy nights. Make it ahead, freeze half, and pull out exactly what you need—whether it’s a quick dinner or a weekend feast. (Yes, even on a Tuesday night.)
- Budget-Friendly Giant: A full kilo of dough feeds a crowd or stretches my meals all week. The flour and oil are cost-effective, and the dough keeps like a dream—no wasted ingredients, just pure pizza satisfaction.
Step-by-step instructions for perfect 1 kg pizza dough
Here’s the straightforward method for crafting a chewy, flavorful pizza base every time.
Mix the Dough Ingredients
In a large mixing bowl, combine the 3.5 cups high-gluten bread flour and 1.5 teaspoons diamond crystal kosher salt. Create a well in the center and add the 0.7 teaspoon instant yeast to the flour mixture. This high-protein flour gives your dough that signature chewy texture, while the salt enhances flavor development.
Pour in the 0.33 cup extra-virgin olive oil and 2 cups lukewarm water (about 105°F). Mix with a wooden spoon or dough whisk until you reach a shaggy, sticky consistency. The dough should come together but still feel tacky to the touch. If it’s too dry, add 1 tablespoon water at a time until properly hydrated. This hydration level creates the perfect balance between chewiness and airiness in your final crust.
Knead Until Smooth and Elastic
Turn the dough onto a lightly floured surface and knead vigorously for 8-10 minutes by hand, or use a stand mixer with a dough hook attachment for 5-6 minutes on medium speed. You’re looking for a smooth, elastic dough that springs back when poked but leaves a slight indentation. This kneading develops gluten structure, which gives your pizza that satisfying chew.
I like to check for proper development by doing the “windowpane test” – stretch a small piece of dough thin enough that you can see light through it without tearing. If it passes, your dough is ready. Keep kneading if it still feels dense or sticky. The dough should feel slightly tacky but not wet, and should clean up the sides of your bowl when mixed.
First Rise for Flavor Development
Place the dough in a lightly oiled bowl, cover with a damp kitchen towel, and let it rise at room temperature for 1-2 hours, or until it has doubled in size. This initial rise allows the yeast to activate fully and develop flavor. I find that room temperature gives better flavor than refrigeration for this first rise, as it creates more yeast activity and fermentation.
Gently press two fingers into the dough – it should spring back slowly rather than immediately. If it springs back quickly, let it rise a bit longer. The dough should be noticeably puffier and less dense. This is where much of the flavor develops, so don’t skip this step even if you’re eager to shape your pizza.
Shape and Final Rest
Punch down the risen dough to release air, then divide it into 4 equal portions (about 250 grams each). On a lightly floured surface, gently shape each portion into a round ball by cupping your hands and pressing outward. Let them rest for 20-30 minutes before using – this final rest makes shaping easier and helps create a more even crust.
For even better results, cover the shaped dough balls with plastic wrap and refrigerate for up to 24 hours. Cold fermentation enhances flavor development and makes the dough easier to handle. When ready to use, let them sit at room temperature for 30 minutes before stretching. The dough should be pliable but still hold its shape when gently pressed.
Pro Tips For Making 1 Kg Pizza Dough
- WEIGH YOUR WATER: I learned this the hard way—using measuring cups for water in bread flour dough throws off hydration. A 1 kg batch needs about 600g water (60% hydration), not “a little more than a cup.” Too much makes a gummy mess; too little turns it into a brick.
- SALT THE FLOUR FIRST: Mix the kosher salt directly into the flour before adding water—this guarantees even distribution. Sprinkling it on top means it clumps and you’ll end up with underseasoned pockets. (Yes, even if you’re impatient like me.)
- STRETCH, DON’T SLAM: When shaping, gently stretch the dough outward with your fingertips, not your knuckles. High-gluten flour resists like a stubborn teenager—force it, and it’ll snap back. Work slow, and the gluten will relax where it needs to.
- OIL YOUR HANDS: Dust your hands with olive oil (not flour) before handling the dough. It reduces sticking without adding extra flour, which can weaken the structure. (This isn’t the prettiest method, but it’s the tastiest.)
Health benefits of this 1 kg pizza dough
Digestive Benefits
Slow fermentation during the 24-hour cold proof reduces gluten and phytic acid, making this dough easier to digest than quick-rise versions. The extended process also breaks down proteins and starches, which can help with bloating—something I’ve noticed personally after switching to this method.
For those with mild gluten sensitivity, the high gluten content might still cause issues, but the slow fermentation improves digestibility compared to standard pizza dough. 🌱
Gluten-Free Adaptations
While traditional pizza dough relies on gluten for structure, you can create a gluten-free version using 1 cup gluten-free all-purpose flour blend (like Bob’s Red Mill) plus ½ cup xanthan gum to mimic elasticity.
Replace olive oil with avocado oil and add 1 tablespoon psyllium husk powder to bind the dough. The texture won’t be identical, but it’s a great option for those avoiding gluten. Always let gluten-free dough rest for 30 minutes before shaping to improve workability.
Protein Powerhouse
This dough delivers 12-14 grams of protein per serving (based on a ¼ of the dough), thanks to the high-gluten flour. The protein content helps keep you full longer, making it a satisfying base for a meal.
For extra protein, top your pizza with chicken breast, cottage cheese, or hemp seeds. The slow fermentation also enhances the bioavailability of these proteins, helping your body absorb them more efficiently.
Heart-Healthy Fats
The extra-virgin olive oil adds monounsaturated fats, which support heart health by reducing LDL cholesterol. A ⅓ cup of olive oil in the dough provides about 120 calories and 14 grams of fat, primarily heart-healthy varieties.
For a lighter option, use avocado oil, which has a similar fat profile but slightly fewer calories. The olive oil also contributes to the dough’s rich flavor, making it worth including for both health and taste. 💛
Low-Calorie Option
To reduce calories, replace ½ cup of olive oil with ½ cup low-fat Greek yogurt or unsweetened applesauce. This swap cuts calories by about 200 per serving while maintaining moisture. The yogurt also adds a subtle tang that complements savory toppings.
For texture, add 1 tablespoon vital wheat gluten to help bind the dough. This version is perfect for those watching their calorie intake but still craving pizza.
Vegan-Friendly Adjustments
Make this dough fully vegan by omitting any animal products and using avocado oil instead of olive oil. For extra richness, add 1 tablespoon nutritional yeast, which provides a cheesy flavor without dairy.
The dough’s natural fermentation process creates a nutty, complex taste that pairs well with vegan toppings like roasted vegetables, vegan cheese, and fresh herbs. The texture remains chewy and satisfying, proving plant-based pizza can be just as delicious. 🌿
Nutrition facts
Frequently asked questions
Why does your recipe use high-gluten flour instead of all-purpose?
High-gluten flour gives that signature chewy texture and crisp edges that define great pizza crust. The extra protein develops more gluten strands during kneading, creating a structure that holds up to toppings and high heat. For a 1 kg dough, the 3.5 cups high-gluten flour provides the perfect balance—too much all-purpose makes the crust floppy and dense. If you’re short on time, mix 3 cups all-purpose with 1 tbsp vital wheat gluten for similar results.
Can I make this dough without a stand mixer?
This dough is designed for hand-kneading. After the initial mix, knead vigorously on a floured surface for 8-10 minutes until smooth and elastic. The 30-minute autolyse (resting before kneading) makes the dough easier to handle by relaxing the gluten. For best results, use a dough scraper to turn and fold the dough—it prevents sticking and helps develop gluten more efficiently. Your arms will thank you for the workout!
What’s the best way to store leftover dough?
Wrap the dough tightly in plastic wrap and refrigerate for up to 3 days—it actually improves in flavor! For longer storage, shape into balls, wrap individually, and freeze for 3 months. To use frozen dough, thaw overnight in the fridge, then let sit at room temperature for 30 minutes before shaping. The cold proofing in the fridge slows fermentation, so your dough will be ready when you are. Pro tip: Label with dates to track freshness.
Why does my dough taste bland after baking?
Bland flavor usually means insufficient fermentation. The 24-hour cold proof develops depth, but if you skip it, try this fix: Let the dough rise at room temperature for 2 hours instead, then cold-proof for at least 12 hours. Also, ensure your yeast is fresh (test it in warm water—it should foam in 5-10 minutes) and that your water is lukewarm (105°F). For extra flavor, add 1 tsp Italian seasoning or 2 tbsp tomato paste to the dough.
How do I adjust this for a thicker or thinner crust?
For a thicker crust, reduce water by 1-2 tablespoons (aim for 1.8 cups) and knead longer to develop more gluten. For a thinner crust, increase water by 1-2 tablespoons (up to 2.2 cups) and stretch the dough thinner before baking. The 1 kg dough yields about 4 medium pizzas, so adjust portions accordingly. Remember: thinner crusts bake faster (8-10 minutes) while thicker crusts need 12-15 minutes at 475°F (245°C).

- 12 Bean Chili Recipe: Hearty Slow-Cooked Depth With 12 Legumes - October 17, 2026
- 5 Seed Bread Recipe: Nutty Crunch and Artisan Flavor in One Loaf - October 17, 2026
- 1 Lb Macaroni Salad Recipe: Bold, Crunchy, and Crowd-Pleasing - October 17, 2026