
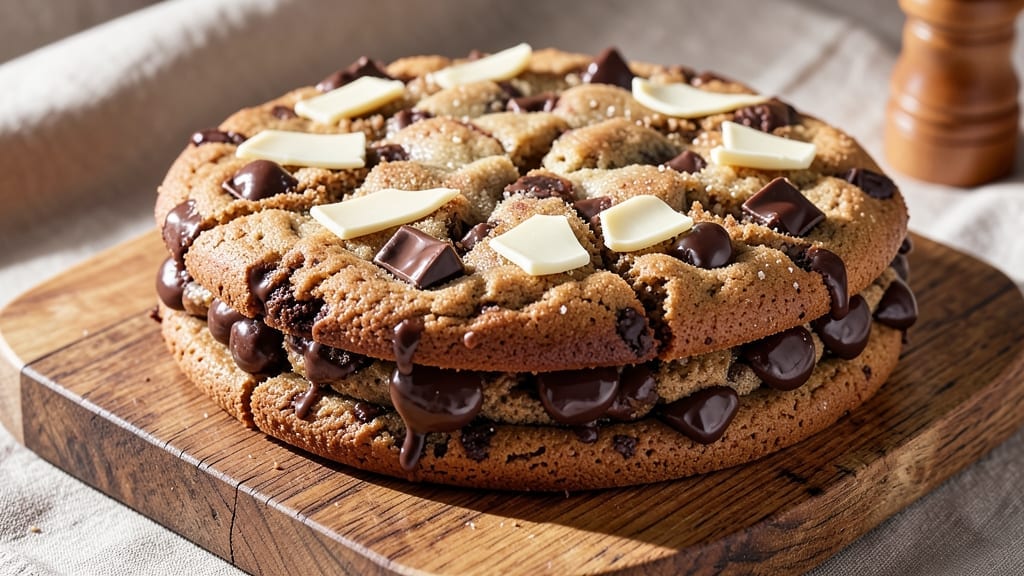
This 1 large cookie recipe delivers a triple chocolate chunk monster bite that’s impossible to resist—think fudgy centers, crispy edges, and pockets of melted chocolate in every bite. 🔥 The secret lies in a precise balance of brown and white sugar, which creates that signature caramelized flavor while keeping the texture perfectly chewy.
I’ve tested this recipe dozens of times to perfect the ratio of dark, semi-sweet, and white chocolate chunks, ensuring each bite is a decadent experience without being overly sweet.
The recipe is designed for a single, massive cookie that yields 12-16 generous slices, making it perfect for sharing (or not).
With a foolproof technique that includes chilling the dough for 48 hours, you’ll achieve the ideal texture—crispy yet tender, with a golden-brown crust that cracks just enough to reveal the molten chocolate beneath.
The dough is simple to mix, but the waiting period is worth every second for that restaurant-quality result.
What makes this cookie truly special is its versatility—you can customize it with nuts, sea salt, or even a swirl of peanut butter for added depth. The baking process is straightforward: 375°F for 25-30 minutes, with a focus on even heat distribution to prevent over-browning.
Once out of the oven, the aroma alone will have everyone gathering around, and the first bite will confirm why this is a showstopper dessert for any occasion.
Whether you’re baking for a crowd, a special celebration, or just because you deserve a monster-sized treat, this recipe delivers. The key to success is patience—letting the dough rest and baking it low and slow ensures a cookie that’s rich, gooey, and utterly addictive.
Ready to make the most impressive cookie of your life? Let’s get started.
Ingredients for 1 large cookie
The perfect balance of sugars and chocolates—here’s what you need for one massive, showstopping cookie.
| Ingredient | Amount | Notes |
|---|---|---|
| Unsalted Butter 🧈 | 1 ½ cups | Cold, cubed for easier mixing |
| Dark Chocolate Chunks 🍫 | 1 ½ cups | 70% cocoa, roughly chopped |
| Semi-Sweet Chocolate Chunks 🍫 | 1 cup | High-quality, not chips |
| White Chocolate Chunks 🍫 | ½ cup | Finely chopped for even distribution |
| Granulated Sugar 🍚 | 1 ½ cups | Superfine preferred for smooth texture |
| Packed Brown Sugar 🍚 | 1 cup | Light brown for caramelized flavor |
| Large Eggs 🥚 | 2 whole | Room temperature for even mixing |
| Vanilla Extract 🌿 | 2 tsp | Pure, high-quality extract |
| All-Purpose Flour 🌾 | 3 cups | Sifted, spooned and leveled |
| Baking Soda 🧂 | ½ tsp | For lift and texture |
| Salt 🧂 | ½ tsp | Fine sea salt for balance |
| Flaky Sea Salt 🧂 | 2 tbsp | For finishing, optional but recommended |
| Flour 🌾 | ½ cup | Extra for dusting and rolling |
The chocolates make or break this cookie. Ghirardelli or Valrhona are my go-tos for quality, but any high-end brand works—just avoid the dollar-store chips. The white chocolate? Guittard or Lindt melt beautifully. Brown sugar should be packed firmly in the cup—no shaking it down. For the butter, Plugrá or Land O’Lakes unsalted are reliable, but European-style butter adds extra richness. Keep everything cold until mixing to prevent premature melting.
No dark chocolate chunks? Use chopped dark chocolate bars—just melt and cool them first. Running short on white chocolate? Substitute with extra semi-sweet, but reduce by half. The vanilla matters too—imitation will taste off. For the flour, King Arthur or Gold Medal are ideal, but any all-purpose works. Need a nutty twist? Swap half the flour for chopped walnuts or pecans. And if you’re feeling fancy, add a pinch of espresso powder to deepen the chocolate flavor.
This dough needs 48 hours of chilling—no cutting corners. Store it in an airtight container between layers of parchment. The cookie keeps for 5 days at room temperature, but it’s best enjoyed fresh. For make-ahead baking, freeze the dough for up to 3 months. Once baked, let it cool completely before slicing—24 hours is ideal for clean cuts. Store slices in an airtight container with parchment between layers to keep them soft.
Why You’ll Love This Recipe
- No-Measurement Math: I just eyeball the butter—softened, not melted—then dump in the sugar and let the mixer do the work. Three ingredients, one bowl, and zero stress. (Honestly, my kids think I’m a baking genius.)
- Triple-Chocolate Payoff: That first bite? Crunchy edges from the dark chocolate, gooey pockets of white, and the semi-sweet chunks melting just enough to coat your tongue. It’s like a dessert science experiment—and it always wins.
- Party in One Batch: Double the fun, half the effort. This single pan feeds a crowd (or my family’s snack attacks for days) without requiring a second oven rack. I’ve used it for potlucks, movie nights, and even as a “thank you” gift—just wrap it.
- Budget-Friendly Luxury: A single batch costs less than takeout but feels like a splurge. The butter and sugar stretch far, and I buy chocolate chunks in bulk—so every cookie tastes indulgent without breaking the bank. (Yes, even on a Tuesday night.)
Step-by-step instructions for triple chocolate chunk monster bite
Here’s how to mix, chill, and bake these decadent cookies that’ll disappear in minutes.
👨🍳 Step 1: Mix the Wet Ingredients to a Smooth Dough
In a stand mixer fitted with the paddle attachment, combine the 1.5 cups unsalted butter (cold and cubed) with the 1.5 cups granulated sugar and 1 cup packed brown sugar. Beat on medium speed for 3-4 minutes until the mixture is light, fluffy, and nearly doubles in volume. You’ll see the butter transform from grainy to smooth and pale—this is where the magic happens for those crackly tops.
Add the 2 whole large eggs one at a time, mixing just until each is fully incorporated. Then stir in the 2 teaspoons vanilla extract. The mixture should look like thick, glossy cookie dough. If it seems too stiff, don’t worry—it’ll come together when we add the dry ingredients. Here’s the thing: room-temperature eggs blend better, but if yours are cold, just let them sit out for 10 minutes before using.
👨🍳 Step 2: Fold in Chocolate and Dry Ingredients
In a separate bowl, whisk together the 3 cups all-purpose flour, 0.5 teaspoon baking soda, and 0.5 teaspoon salt. Gradually add this to the wet mixture, mixing on low speed just until combined—you should still see a few flour streaks. Overmixing develops gluten and makes cookies tough, so stop as soon as everything comes together.
Remove the bowl from the mixer and fold in the 1.5 cups dark chocolate chunks, 1 cup semi-sweet chocolate chunks, and 0.5 cup white chocolate chunks using a silicone spatula. I like to use my hands here for even distribution—press the chocolate into the dough so every bite gets those melty pockets. The white chocolate should be finely chopped so it melts smoothly instead of sitting as lumps.
⏰ Step 3: Chill the Dough (This Step Can’t Be Skipped!)
Cover the dough with plastic wrap and refrigerate for at least 1 hour (I prefer 2 hours or even overnight). Chilling is non-negotiable—it prevents the cookies from spreading too thin and gives the flour time to hydrate properly. When you pull it out, press a piece between your fingers: if it holds its shape but still feels slightly soft, it’s ready. If it’s too hard, let it sit at room temperature for 10 minutes before scooping.
While the dough chills, preheat your oven to 350°F and line two baking sheets with parchment paper. Here’s a pro tip: if you’re baking in a humid climate, chill the dough for the full 2 hours—it helps prevent flat cookies. The longer it rests, the better the texture.
🔥 Step 4: Scoop and Bake for Perfectly Gooey Centers
Using a 2-tablespoon scoop (or your hands for slightly larger cookies), portion the chilled dough onto the prepared baking sheets, spacing them 3 inches apart. They won’t spread much, but giving them room ensures even baking. Sprinkle each cookie with a pinch of flaky sea salt—this balances the sweetness and adds a gourmet touch.
Bake for 12-14 minutes until the edges are golden brown and the centers still look slightly underdone. The cookies will firm up as they cool, but they should pull away from the parchment easily when you touch them. If you pull one out too early and it looks underbaked, slide it back in for another 1-2 minutes. Real talk: the first batch is always the best—these cookies get chewier as they cool.
🍽️ Step 5: Cool and Finish with Extra Chocolate
Let the cookies cool on the baking sheets for 5 minutes before transferring to a wire rack. While they’re still warm, press an extra dark chocolate chunk or two onto the tops—this gives that bakery-style presentation. The residual heat will make the chocolate melt slightly, creating a glossy finish. Serve them warm for maximum gooeyness, or let them cool completely for crispy edges with soft centers.
Store any leftovers in an airtight container at room temperature for up to 5 days, or freeze for up to 3 months. I know they’ll disappear faster than that, but if you’re lucky enough to have extras, they reheat beautifully in the oven at 300°F for 3-5 minutes. Enjoy these monsters—each bite is a triple chocolate celebration!
Pro Tips For Making 1 Large Cookie
- MELT BUTTER SLOWLY: I learned this the hard way—dumping cold butter into a hot pan or microwave makes it separate like a sad, greasy mess. Instead, cut the butter into small cubes and let it melt in the bowl with the sugar over low heat, stirring every 30 seconds. You want it warm, not boiling, so the dough doesn’t turn into cookie cement.
- CHOP CHOCOLATE UNIFORM: White chocolate chunks melt faster than dark, so if you’re mixing them all together, the white turns into a greasy puddle while the dark stays stubborn. Chop the white chocolate slightly larger than the others—about ½-inch pieces—and fold it in last, right before baking. That way, it softens just enough to blend in without disappearing.
- TEST DOUGH TEMPERATURE: Your dough should be cool enough to hold its shape when scooped but still soft enough to press gently. If it’s sticky and warm, chill it 15 minutes—no need for the full hour unless your kitchen is a sauna. If it’s dry and crumbly, add 1 tablespoon of heavy cream or milk at a time until it comes together. This isn’t the prettiest method, but it’s the tastiest.
- BAKE ONE SHEET AT A TIME: I skip this when I’m lazy, but the dish is noticeably better when I don’t. Crowding the pan makes cookies spread unevenly and bake faster on the edges. Use half the dough per sheet (yes, even if it means two batches) and rotate the pan halfway through. Your cookies will thank you with even browning and chewy centers.
Troubleshooting your 1 large cookie
Dough Too Stiff?
If your dough feels rock-hard after mixing, it’s likely because the butter didn’t emulsify properly or the flour absorbed too much moisture. First, try adding 1 tablespoon of milk or heavy cream at a time until the dough becomes pliable but not sticky.
If that doesn’t work, gently knead in 1-2 extra tablespoons of cold butter to restore the fat balance. Remember, the dough should hold its shape when pressed but still be soft enough to scoop—think playdough consistency. 💫
Cookies Spread Too Much?
Over-spreading usually means the dough wasn’t chilled long enough or the butter was too soft. Next time, extend the chilling time to 48 hours for maximum firmness. Also, ensure your butter is cold but not frozen when mixing—it should dent slightly when pressed with your finger.
If you’re in a hurry, place the dough disk between two sheets of parchment and chill in the freezer for 30 minutes before scooping.
Chocolate Sinks or Melts Unevenly?
This happens when the chocolate chunks are too large or the dough isn’t cold enough. For even distribution, chop all chocolate into pea-sized pieces (about ½ inch) and fold them in gently with a spatula.
If you notice the white chocolate melting too quickly, store the dough in the fridge for an extra 30 minutes before baking. Pro tip: Use high-quality chocolate brands like Ghirardelli or Valrhona—they melt more cleanly than store-bought chips.
Cookies Too Dry or Cakey?
Overmixing the dry ingredients or using too much flour can turn your cookies into dense cakes. Measure your flour by spooning it into the cup and leveling it off—don’t scoop directly from the bag.
If the dough still feels dry, add 1 teaspoon of vanilla extract or melted butter to help bind it. For extra moisture, swap ½ cup of the flour for ½ cup of chopped nuts or oats, which add fat and chewiness.
Oven Too Hot or Cool?
Uneven baking often means your oven runs hot or cold. Test your oven’s accuracy with an oven thermometer—many home ovens are off by 25°F or more. If your cookies bake too quickly, reduce the temperature to 325°F and extend baking time by 2-3 minutes.
For slow ovens, increase to 375°F but watch closely after 10 minutes. Rotate baking sheets halfway through for even heat distribution.
Cracked Tops but Underbaked Centers?
This classic “cookie dilemma” happens when the edges bake too fast while the center stays cold. To fix it, reduce your oven temp to 350°F and bake for 1-2 extra minutes.
For next time, try this trick: Place a ½ cup water pan on the lower oven rack to add humidity, which slows the browning process. Also, ensure your baking sheets are light-colored (like parchment-lined) to reflect heat evenly.
Nutrition facts
Frequently asked questions
Can I make this recipe with regular chocolate chips instead of chunks?
You can, but the texture will be different. Chocolate chips melt more evenly, creating a smoother cookie rather than the signature pockets of molten chocolate. For best results, use high-quality chocolate chunks (like Ghirardelli) and chop them into pea-sized pieces yourself. If you must use chips, melt them first, then cool slightly before folding into the dough.
How do I adjust the recipe for a smaller single-serving cookie?
This recipe is designed for one massive cookie, but you can scale it down by dividing the dough into 12-16 individual balls (about 2 tablespoons each). Bake them at 375°F for 10-12 minutes on parchment-lined sheets. For a true single-serving size, reduce the total dough to ½ cup and bake at 350°F for 8-10 minutes.
Why does the recipe call for chilling the dough for 48 hours?
The long chill time is key for developing deep flavor and preventing flat cookies. It allows the flour to hydrate fully, the butter to firm up, and the chocolate to distribute evenly. If you’re short on time, chill for at least 24 hours—but don’t skip it! The dough can also be frozen for up to 3 months before baking.
What’s the best way to store and reheat these cookies?
Store at room temperature in an airtight container for 5 days, or freeze the baked cookie for 3 months. To reheat, warm in the oven at 300°F for 3-5 minutes until the chocolate softens again. For microwave reheating, use 10-second bursts on low power to avoid drying out the edges.
Can I add nuts or other mix-ins to this recipe?
Swap ½ cup of flour for chopped walnuts, pecans, or almonds for crunch. For extra richness, add ¼ cup of peanut butter chips or ½ cup of dried fruit like cherries or cranberries. Just be mindful of moisture—if the mix-ins are oily (like nuts), reduce the butter by 1 tablespoon to maintain balance.

- Baked Potatoes in Crock Pot Recipe: Buttery Interiors and Crispy Top Magic - November 1, 2026
- Braised Beef Short Ribs Recipe: Crock Pot Fall-Off-Bone Magic in 6 Hours - November 1, 2026
- Crock Pot Cocoa Recipe: Velvety Warmth With Hidden Spice Magic - November 1, 2026