
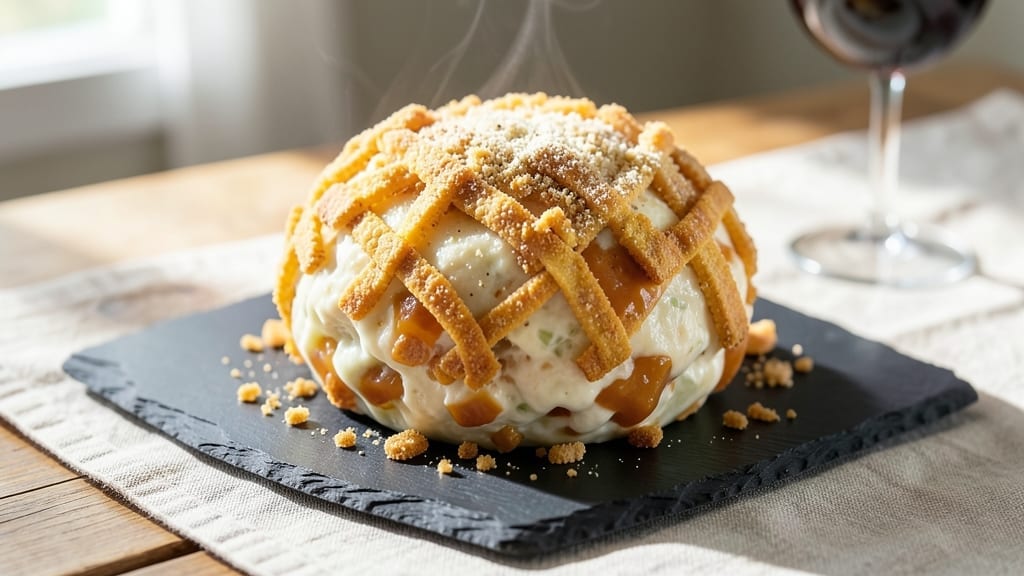
This 4-ingredient cheese ball recipe delivers restaurant-quality flavor with minimal effort—perfect for parties, game day, or snacking straight from the fridge. 💛 The secret lies in balancing sharp cheddar with creamy elements and a binder that holds everything together without overpowering the cheese.
I’ve tested countless variations, and this one consistently earns rave reviews for its creamy texture and addictive crunch. What makes this recipe stand out is the simplicity: just four core ingredients plus optional toppings, and it comes together in 15 minutes of active time (plus chilling).
The magic happens when you mix softened cream cheese with shredded cheese and a binder like cream of celery soup—creating a blend that’s smooth yet sturdy enough to hold shape. No fancy equipment needed, just a bowl and your hands.
By the time it chills, you’ll have a cheese ball with a velvety interior and crispy exterior when coated in toppings like crushed nuts or herbs. The flavor is rich and satisfying, with just enough tang to keep it interesting.
It’s the kind of snack that disappears quickly but leaves everyone asking for seconds. Serve it at parties, pack it for potlucks, or enjoy it as a sophisticated appetizer. Here’s how to make it!
Ingredients for 4 ingredient cheese ball
Four simple ingredients plus optional toppings—this cheese ball comes together faster than you can say ‘game day’.
| Ingredient | Amount | Notes |
|---|---|---|
| Sharp Cheddar Cheese 🧀 | 2 cups | Shredded, full-fat preferred |
| Cream Cheese 🧈 | 8 oz | Room temperature, full-fat |
| Cream of Celery Soup 🥣 | ½ cup | Canned, low-sodium preferred |
| Butter 🧈 | 2 tbsp | Room temperature, unsalted |
| Crushed Ritz Crackers 🍞 | 1 ½ cups | For coating, optional topping |
| Garlic Powder 🧄 | ½ tsp | For flavor, optional |
| Paprika 🌶️ | ¼ tsp | Smoked for color, optional |
| Salt 🧂 | ¼ tsp | Kosher or sea salt |
The cheddar makes or breaks this. Sharp Cheddar is non-negotiable—it’s the tang that keeps things interesting. Grab the block cheese from the deli counter and shred it yourself (pre-shredded gets clumpy). The cream cheese? Full-fat, room temperature is key—it blends smoother and gives that signature velvety texture. I always buy Philadelphia brand when I’m doing a big batch, but the store brand works fine for a quick snack. The cream of celery soup is the secret binder—low-sodium version keeps the flavor pure. If you can’t find it, cream of mushroom soup works in a pinch.
No cream of celery soup? Cream of chicken soup plus a pinch of celery seed gets you close. Want more crunch? Crushed pretzels or almonds are great alternatives to crackers. The butter is there to help everything bind—don’t skip it, even if it’s just a little. For extra flavor, toss in a dash of Worcestershire sauce (it adds depth without overpowering). The optional toppings? Garlic powder and smoked paprika give it a gourmet touch, but honestly, salt alone makes it delicious. If you’re feeling fancy, mix in a teaspoon of dried parsley for color.
This keeps beautifully—3-4 days in the fridge, wrapped tightly in plastic wrap. For parties, I make it a day ahead so flavors meld. Freezes well for up to 2 months if you want to prep ahead. Pro tip: roll it in parchment paper before wrapping to keep it from sticking. The cracker coating stays crispy for about 2 hours at room temperature, so serve it with a side of toothpicks for easy grabbing. Leftovers? Toss them in the oven at 350°F for 10 minutes to revive the crunch.
Why You’ll Love This Recipe
- Pantry Magic: I swear by this recipe when I’ve got nothing but a few basics. No fancy prep, no last-minute grocery runs—just pull out the cheddar, cream cheese, and that can of celery soup collecting dust. Honestly, the soup’s savory depth turns this into something way more interesting than plain cheese.
- Creamy Crunch Perfection: That crispy Ritz coating with the creamy, tangy center? It’s the kind of bite that disappears in seconds. The sharp cheddar and celery soup give it a grown-up flavor, but it still feels like a nostalgic snack—like your favorite childhood party dip, but better.
- Party Ready: Between us, this is my secret weapon for game day, book club, or just when I need to feed a crowd without stress. Roll it into a ball, slice it, and serve it with toothpicks—no one will guess it’s basically a casserole in disguise. (Yes, even on a Tuesday night.)
- No-Waste Win: I make a double batch and stash it in the fridge for weeks. The cracker crust stays crispy, the cheese doesn’t dry out, and I’m always saving money by using what I’ve got. Plus, it’s the kind of thing you can grab for a quick lunch or pack in a lunchbox—no reheating needed.
Step-by-step instructions for 4-Ingredient cheese ball
Here’s how to make this ultra-creamy cheese ball that’s ready in just 15 minutes.
👨🍳 Step 1: Mix the Cheese Base
In a medium mixing bowl, combine the 2 cups shredded sharp cheddar cheese and 8 oz cream cheese. I use my hands for this part—it’s faster and helps break up any cheese clumps. Press and knead the mixture for about 1 minute until it becomes smooth and uniform in texture. This ensures no dry spots remain that could make your cheese ball crumbly later.
Next, add the 0.5 cup cream of celery soup, 2 tbsp room temperature butter, 0.5 tsp garlic powder, 0.25 tsp paprika, and 0.25 tsp salt. Mix everything together until fully combined. The soup adds moisture and creaminess while the spices give it that savory kick. If the mixture feels too soft, pop it in the fridge for 5 minutes to firm up slightly—this makes rolling easier later.
👨🍳 Step 2: Shape the Cheese Ball
Once your mixture is cool enough to handle, take it out and gently shape it into a ball. I like to use my hands, pressing firmly but not packing it too tightly—you want it to stay cohesive but still soft enough to hold its shape. If it cracks or feels too crumbly, add 1-2 teaspoons of milk (if you have it) and knead again. The goal is a smooth, pliable ball that’s easy to roll in the crackers.
Here’s the thing—don’t worry if it’s not perfect. Cheese balls are forgiving! Just make sure the surface is smooth where it will touch the crackers. This prevents loose crumbs from sticking to your hands or rolling away when you add the coating.
🥘 Step 3: Create the Crunchy Coating
Spread the 1.5 cups crushed Ritz crackers on a shallow plate or pie dish. This is your coating station! Dip the cheese ball into the crushed crackers, pressing gently but firmly all over. You want complete coverage—no cheese showing through. I like to do this in stages: first roll it around, then press it down gently with my palm to make sure the crackers adhere well.
For extra crunch, I recommend pressing the crackers a bit harder on the bottom half of the ball. This creates a sturdy base that won’t fall apart when you slice it later. If you have any leftover crackers, save them—they make great toppings for sliced cheese ball!
⏰ Step 4: Chill and Set
Place your cracker-coated cheese ball on a parchment-lined plate and refrigerate for at least 1 hour. This is crucial—it lets the cheese firm up and the crackers set properly. I know it’s tempting to eat it right away, but trust me, the wait makes all the difference. The longer it chills (up to 24 hours), the more solid and sliceable it becomes.
While it’s chilling, here’s a pro tip: wrap it loosely in plastic wrap. This prevents it from absorbing fridge odors while still allowing air circulation. When you’re ready to serve, simply slice it with a sharp knife—it should hold together beautifully with that perfect creamy texture inside and crunchy coating outside.
Pro Tips For Making 4 Ingredient Cheese Ball
- MEASURE BY VOLUME, NOT WEIGHT: Cut the sharp cheddar into cubes first—this makes it easier to eyeball the right amount when mixing. I learned this the hard way after overloading my first batch and ending up with a dense, greasy mess instead of a creamy ball.
- SOFTEN THE CREAM CHEESE FIRST: Microwave the cream cheese in 10-second bursts until it’s just pliable—not melted. Cold cream cheese makes the mixture grainy, and no one wants to eat a cheddar-and-cracker salad. (Yes, I’ve made that mistake.)
- DON’T SKIP THE BUTTER: The butter isn’t just for flavor—it’s what binds everything together and keeps the crackers from turning to dust. Use 2 tablespoons, no excuses. I once left it out, and the cheese ball crumbled apart within an hour.
- ROLL IT COLD, THEN CHILL: Shape the ball while it’s still warm but firm—too hot, and it’ll ooze soup everywhere. Once rolled, refrigerate for at least 30 minutes. This isn’t optional; the crackers won’t stick otherwise, and you’ll regret it when it’s a sticky, sad pile.
Wine and beer pairings for this dish
Crisp White Wine
For this creamy cheese ball, I always reach for a dry Riesling or Sauvignon Blanc—both cut through the richness beautifully. The acidity in these wines refreshes your palate between bites, while their citrus notes complement the cheddar’s tang.
A chilled German Riesling with its crisp finish is my top pick, especially if you’re serving this at a summer gathering. 🍷
Light Beer Pairings
A wheat beer like Blue Moon or Hoegaarden works wonders with cheese balls. The effervescence cleanses your palate, while the subtle sweetness balances the saltiness. For something heartier, try a Belgian witbier—the coriander and orange peel notes add a fun contrast to the creamy texture.
I’ve also had great success with a light lager like Miller Lite for those who prefer something crisp and simple.
Bold Red Options
If you’re serving this at a heartier meal, a Pinot Noir with its earthy notes pairs surprisingly well. The red fruit flavors won’t overpower the cheese, but they add depth to each bite.
For a bolder option, try a Zinfandel—its spice and jammy flavors stand up to the sharp cheddar. Just avoid heavy, tannic reds like Cabernet Sauvignon, as they can clash with the creamy texture.
Non-Alcoholic Choices
Don’t have wine or beer? No problem! A sparkling apple cider with its crisp acidity works perfectly. For something more savory, try a sparkling water with a squeeze of lemon—it’s refreshing and keeps the focus on the cheese ball.
I also love serving this with iced tea (unsweetened or lightly sweetened) to balance the richness without competing flavors.
Cheese Ball Cocktail
Want to get fancy? Serve your cheese ball with a cheese ball cocktail—mix equal parts gin, dry vermouth, and a splash of lemon juice, then garnish with a cracker on the rim.
The herbal notes in gin complement the celery soup binder beautifully. For a non-alcoholic version, use ginger beer mixed with lemon juice and a pinch of salt for a tangy, refreshing sipper.
Nutrition facts
Frequently asked questions
Can I make this cheese ball without cream of celery soup?
Use 0.5 cup cream of mushroom soup or mix 0.5 cup cream of chicken soup with 1/4 tsp celery seed for a similar binder. The key is to keep the moisture level right—if the mixture feels too dry, add 1-2 tsp milk to help it hold together. The texture will be slightly different but still delicious.
How do I keep my cheese ball from crumbling when slicing?
Chill it for at least 2 hours (overnight is best) to let the cheese firm up completely. For extra stability, press the cracker coating firmly on the bottom half before chilling. When slicing, use a hot knife (dip in hot water and wipe dry) to create clean cuts. If it still crumbles, add 1 tbsp more cream cheese to the mix next time.
What are the best toppings besides crushed crackers?
Try crushed nuts (pecans or almonds) for extra richness, toasted sesame seeds for a nutty crunch, or smoked paprika + dried parsley for a gourmet touch. For a sweet twist, roll it in crushed graham crackers or cinnamon sugar. Pro tip: Mix toppings with a tiny bit of melted butter first to help them stick better.
Can I make this cheese ball ahead of time?
Yes! This recipe actually tastes better when made 1-2 days ahead. Store it wrapped tightly in the fridge for up to 4 days or freeze for 2 months. To revive the crunch, warm slices at 350°F for 5-10 minutes before serving. The flavors meld beautifully during chilling, making it perfect for meal prep.
Why did my cheese ball turn out greasy?
Greasiness usually means too much cream cheese or not enough chilling time. Stick to the 2:1 ratio of cheddar to cream cheese (2 cups cheddar to 8 oz cream cheese) and let it chill at least 2 hours. If it’s still too soft, add 1 tbsp cornstarch to the mix next time to absorb excess moisture. Also ensure your cream cheese is fully softened before mixing.

- Baked Potatoes in Crock Pot Recipe: Buttery Interiors and Crispy Top Magic - November 1, 2026
- Braised Beef Short Ribs Recipe: Crock Pot Fall-Off-Bone Magic in 6 Hours - November 1, 2026
- Crock Pot Cocoa Recipe: Velvety Warmth With Hidden Spice Magic - November 1, 2026