
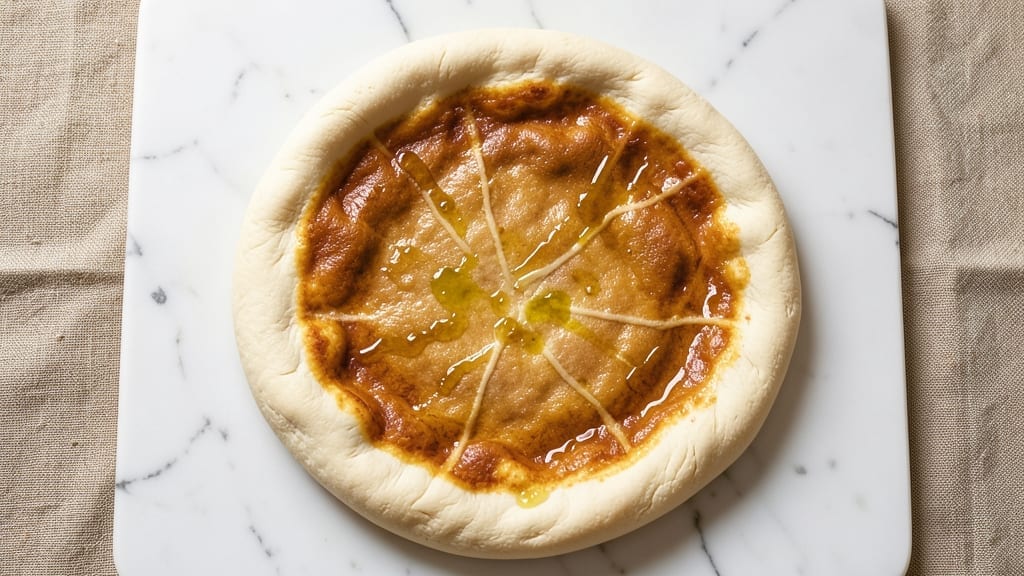
Making one large pizza dough from scratch doesn’t require hours of kneading or advanced skills—this foolproof no-knead recipe delivers a crispy, chewy crust in just 30 minutes of active time.
The secret lies in proper hydration and a slow rise, which develops deep flavor and an airy texture without the effort. I’ve perfected this method after years of testing, ensuring every batch turns out light yet sturdy enough to hold your favorite toppings without tearing.
This recipe balances simplicity with professional results by using just five core ingredients: high-protein flour for structure, instant yeast for convenience, salt for flavor, sugar to activate the yeast, and olive oil for tenderness.
The dough rests at room temperature while you prepare toppings, eliminating the need for a second rise in the fridge. Whether you’re aiming for a Neapolitan-style thin crust or a New York fold, this dough adapts effortlessly—just adjust your stretching technique.
By the time you roll it out, you’ll have a golden, blistered crust with a crispy exterior and a soft, airy interior—no matter your skill level. The slow fermentation enhances flavor while keeping the process beginner-friendly.
Pair it with a simple marinara and mozzarella for a classic, or go bold with spicy arrabbiata and fresh basil. This dough is your foundation for endless possibilities.
The beauty of this method is its versatility—use it for personal pizzas, feed a crowd, or even make dinner rolls. Once you master it, you’ll never buy store-bought dough again. Let’s get started with a crust that’s foolproof, flavorful, and ready in record time.
Ingredients for 1 large pizza dough
Five simple ingredients transform into a golden, blistered crust perfect for your favorite toppings.
| Ingredient | Amount | Notes |
|---|---|---|
| Bread Flour 🌾 | 3 ½ cups | High-protein for structure and chewiness |
| Instant Yeast 🍞 | ¼ tsp | Single-use packet or measured carefully |
| Fine Sea Salt 🧂 | 1 ½ tsp | Diamond Crystal preferred for accuracy |
| Granulated Sugar 🍚 | ¼ tsp | Activates yeast for proper rise |
| Extra-Virgin Olive Oil 🫒 | ½ cup | Fruity, not refined for flavor |
| Warm Water 💧 | 1 ¼ cups | 110°F for optimal yeast activation |
| Semolina Flour 🌾 | ½ cup | For dusting and crispy base |
The bread flour is non-negotiable here—its high gluten content gives you that perfect chewy texture. King Arthur or Caputo are my go-tos, but any bread flour will work. Instant yeast eliminates the need for proofing, so grab a single-use packet or measure carefully if using jarred yeast. The Diamond Crystal sea salt is my preferred choice because it’s finer and dissolves more evenly—no grainy surprises. Olive oil should be fruity and extra-virgin; California Olive Ranch is a reliable brand that won’t break the bank. Warm water is key: too hot and you’ll kill the yeast, too cold and it won’t activate properly. Aim for 110°F—just warm enough to feel cozy to the touch.
No bread flour? All-purpose flour plus 1 extra tbsp gets you close, but the texture won’t be quite as chewy. Short on instant yeast? Active dry yeast at half the amount works, but you’ll need to proof it first. Semolina can be swapped for regular flour in a pinch, though it won’t give that signature crispy crust. The sugar can be omitted if you’re avoiding it, but it helps activate the yeast faster. For the olive oil, avocado oil works too—just avoid refined or light varieties. And if you’re making this in a humid climate, you might need to reduce the water by 1 tbsp to prevent a sticky dough.
This dough is designed to rest at room temperature, so no fridge required. Cover it loosely with a towel or plastic wrap and let it sit for 1-2 hours—it’s ready when it’s puffy and jiggly. For best results, use within 24 hours, though you can refrigerate it for up to 3 days if needed. The semolina keeps indefinitely in your pantry, while the flour should be stored in an airtight container to prevent absorption. Once you’ve rolled it out, use immediately for that perfect crispy crust, or freeze any leftovers for up to 3 months—just thaw overnight in the fridge before reheating.
Why You’ll Love This Recipe
- Here’s what sold me: I can make this dough, let it rest, and pull it out for three days without it going stale. Freeze half for lazy Fridays, and you’ve got a budget-friendly, time-saving secret weapon. My wallet—and my taste buds—thank me every time.
- Five-Ingredient Magic: Honestly, I swear by this dough—just flour, yeast, salt, sugar, and olive oil. That’s it. No confusing ratios, no specialty ingredients lurking in my pantry. The bread flour gives it that perfect chew, while the olive oil keeps it tender without overpowering.
- Crispy-Creamy Promise: Between us, this dough delivers the holy grail of pizza texture—a blistered, golden crust with a pillowy center. The sugar feeds the yeast just enough to make it rise reliably, and the sea salt? That’s what turns “good” into “I’d drive across town for this” flavor.
- Weeknight to Party: I use this dough for everything—garlic knots on Tuesdays, a quick flatbread on Thursdays, or a showstopper pizza for when friends drop by. No last-minute scrambling. Just one batch, endless possibilities, and zero guilt when I make it twice in a week.
Step-by-step instructions for perfect no-knead pizza dough
Here’s how to make a restaurant-quality crust with minimal effort and maximum flavor.
Mix the Dough with Wet and Dry Ingredients
In a large bowl, combine the 3.5 cups bread flour, 1.5 tsp fine sea salt, 0.25 tsp granulated sugar, and 0.25 tsp instant yeast. Mix these dry ingredients together using a wooden spoon or your hands until fully incorporated—this ensures even distribution of the yeast and salt throughout the dough.
In a separate small bowl, whisk together the 0.5 cup extra-virgin olive oil and 1.25 cups warm water (test the water temperature—it should feel like a warm bath, around 110°F). Pour this liquid mixture into the center of your dry ingredients and stir with the spoon until a shaggy dough begins to form.
Once the dough comes together, switch to your hands and knead gently for 2-3 minutes until smooth. You’ll know it’s ready when it pulls away from the sides of the bowl and forms a cohesive ball. The dough should be slightly sticky but not wet—this is perfect for our no-knead method.
First Rise for Flavor Development
Lightly oil a large mixing bowl with a bit of olive oil, then transfer the dough to the bowl. Cover it tightly with plastic wrap or a damp kitchen towel. Place the bowl in a warm spot—ideally between 75°F and 80°F—for 1 hour. This warm environment encourages the yeast to activate and the dough to rise slowly.
During this first rise, the dough will nearly double in size. You’ll see small bubbles forming on the surface and the dough will feel lighter when pressed gently. If your kitchen isn’t warm enough, place the bowl near a turned-off oven with the light on, or on top of your refrigerator (not inside).
I like to set a timer for 30 minutes into the rise, then give the dough a gentle stretch and fold to help strengthen the gluten structure. Simply wet your hands, grab one side of the dough, stretch it upward, and fold it over itself. Repeat this two more times, rotating the bowl each time. This simple step creates a more elastic dough that’s less likely to tear when stretching later.
Shape and Second Rise for Perfect Texture
After the initial rise, punch down the dough gently to release any large air bubbles. On a lightly floured surface, shape it into a ball by pulling the edges toward the center. This step ensures even thickness when you eventually stretch it for your pizza. Dust the top with a thin layer of semolina flour—this prevents sticking and gives that beautiful crispy base we all love.
Place the shaped dough on a parchment-lined baking sheet or pizza peel dusted with semolina flour. Cover loosely with plastic wrap or a clean kitchen towel and let it rise again for 30-45 minutes. You’ll know it’s ready when it’s puffy and has expanded to about 1.5 times its original size. The edges should look slightly rounded and the surface should have small bubbles.
Here’s the thing—don’t over-rise the dough. If you let it rise too long, you’ll end up with a dense, chewy crust rather than that perfect airy texture. The second rise should be just until it looks puffy but still maintains some structure. This balance gives you that ideal combination of chew and lightness in every bite.
Preheat and Prepare for Baking
Preheat your oven to its highest setting—typically 500°F or higher if your oven goes that hot. Place a pizza stone or baking sheet on the middle rack while the oven heats up. If you’re using a pizza peel, position it near your work area so you can quickly transfer the dough.
While the oven heats, stretch the dough to your desired pizza size—typically 12 inches for a large pizza. I like to use my fingers to gently press and stretch from the center outward, rotating the dough as I go. If it resists, let it rest for 5 minutes and try again. The dough should be about ¼-inch thick at its thickest point.
Transfer the stretched dough to your preheated pizza stone or baking sheet. Brush the surface lightly with a bit more olive oil if desired, then add your favorite toppings. The dough is now ready for that perfect bake—just don’t forget to slide it into the oven quickly before it loses heat!
Pro Tips For Making 1 Large Pizza Dough
- Mix by Hand First: I learned this the hard way—skip the mixer until you’ve dissolved the yeast. Wet your fingers and rub the yeast, sugar, and a splash of warm water into the flour first. This guarantees even activation before adding the oil and salt, so you don’t end up with pockets of unfermented dough. (Yes, even if you’re impatient like me.)
- Weigh Your Flour: Bread flour varies wildly by brand. Measure by weight (500g for a large dough) instead of volume—cup measurements are unreliable. I was skeptical until I tried it: my crust went from dense to airy overnight. Keep a small scale handy; it’s the thing that matters most for consistency.
- Oil the Bowl Properly: Don’t just drizzle—coat the inside of your mixing bowl with olive oil before adding the dough. Use about 2 tablespoons, then toss the dough in it so every surface gets a thin layer. This prevents sticking during the first rise and makes stretching later a breeze. (Your future self will thank you.)
- Cold Proof Works: After the initial rise, move the dough to the fridge for 12–24 hours. Sounds weird, but it works: the slow fermentation deepens flavor and tightens the gluten, so your crust holds toppings without sagging. I skip this when I’m lazy, but the dough is noticeably better when I don’t.
Best sauces and condiments for these flavors
Classic Marinara
This is my go-to sauce for a reason—it’s simple, bright, and lets the dough shine. Use 2 cups San Marzano tomatoes crushed by hand, 2 tbsp extra-virgin olive oil, 3 garlic cloves minced, 1 tsp dried oregano, and a pinch of red pepper flakes.
Simmer for 20 minutes until thickened, then finish with salt and fresh basil. The acidity cuts through the richness of the dough beautifully. 🍅
Garlic-White Sauce
For a creamy, flavorful twist, blend 1 cup ricotta cheese, 2 tbsp heavy cream, 3 roasted garlic cloves, 1 tbsp grated Parmesan, and salt and pepper to taste.
Spread this on your dough before adding toppings—it’s perfect with prosciutto, arugula, and shaved Parmesan. The garlic adds depth without overpowering the crust. 🧀
Spicy Arrabbiata
If you love heat, this sauce is a game-changer. Cook 1 tbsp olive oil in a pan, add 4 minced garlic cloves, and 2 tbsp red pepper flakes, then pour in 2 cups crushed tomatoes.
Simmer for 15 minutes, then blend until smooth. Finish with fresh basil and a splash of balsamic vinegar for balance. The spice pairs perfectly with mozzarella and fresh basil. 🌶️
Pesto Swirl
For a quick and vibrant option, blend 2 cups fresh basil, ¼ cup pine nuts, ½ cup grated Parmesan, ½ cup olive oil, and 1 garlic clove until smooth.
Swirl it across the dough before adding toppings like grilled chicken or sun-dried tomatoes. The nutty, herby flavor adds a fresh contrast to the crispy crust. 🌿
Olive Oil & Herbs
Sometimes less is more. Drizzle 2 tbsp high-quality olive oil over the dough, then sprinkle with fresh rosemary, thyme, and flaky sea salt. Top with cherry tomatoes, mozzarella, and arugula for a bright, Mediterranean-inspired pizza. The simplicity lets the dough’s texture take center stage. 🫒
Nutrition facts
Frequently asked questions
Can I make this dough without a stand mixer?
This no-knead recipe is designed for hand mixing only. Just combine ingredients in a large bowl, stir with a wooden spoon until shaggy, then use your hands to knead gently for 2-3 minutes until smooth. The dough should be slightly sticky but not wet—this is perfect for the no-knead method.
Why does my dough keep sticking to my hands?
Sticky dough happens when the hydration level is too high or the flour isn’t absorbing enough moisture. Try adding 1-2 tablespoons more flour while kneading, or let the dough rest uncovered for 5 minutes to absorb excess moisture. Always wet your hands before handling sticky dough to prevent tearing.
How do I know when the dough is fully risen?
The dough is ready when it’s puffy, jiggly, and has nearly doubled in size. Press gently with a finger—if it springs back slowly (not too fast), it’s perfect. For the first rise, this takes about 1 hour, and for the second rise, 30-45 minutes. Over-rising makes the crust dense, so don’t let it sit too long!
Can I make this dough ahead of time?
Yes! Shape the dough into a ball, dust with semolina, and refrigerate for up to 3 days. Let it sit at room temperature for 1 hour before shaping and baking. For longer storage, freeze the shaped dough (wrapped tightly) for up to 3 months. Thaw overnight in the fridge before baking.
What’s the best way to stretch the dough without tearing?
Start by letting the dough rest for 5 minutes if it’s cold or stiff. Use your fingertips to gently press and stretch from the center outward, rotating the dough as you go. If it resists, let it rest another 5 minutes. For extra elasticity, do a few stretch-and-folds during the first rise—this strengthens the gluten and prevents tears.

- 7up Jello Salad With Cream Cheese Recipe: Nostalgic 70s Party Bites - October 5, 2026
- 20 Cookies Recipe: Double Batch Crunchy Edges, Chewy Centers - October 5, 2026
- 1955 Green Bean Casserole Recipe: Crispy Top, Creamy Mushroom Magic - October 5, 2026