
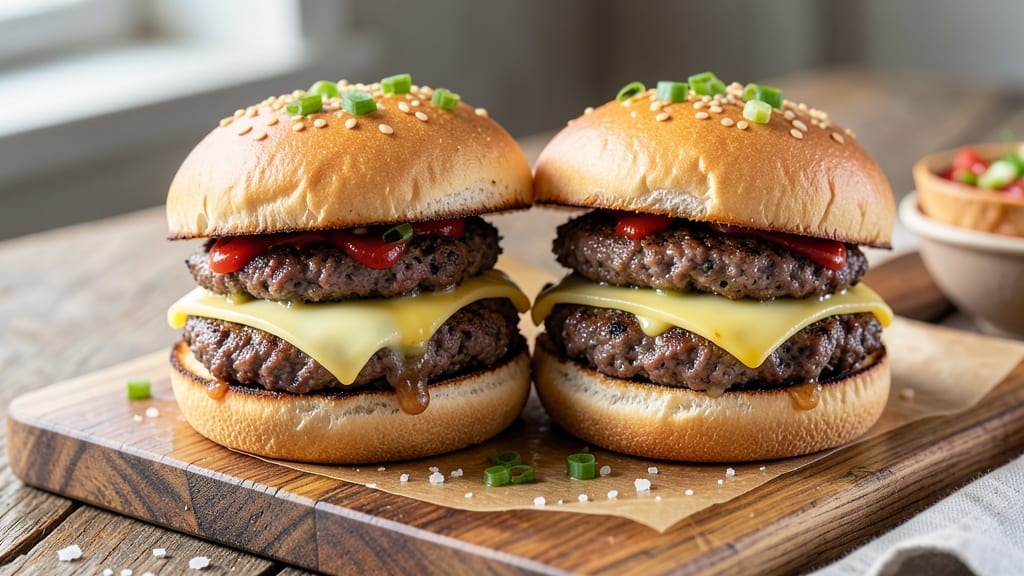
A 1 lb ground beef burger with a crispy smash-style crust and impossibly juicy core is the holy grail of backyard grilling—no more dry, crumbly patties here. The secret lies in proper seasoning, precise shaping, and mastering the cook time to lock in moisture while creating that perfect caramelized crust.
I’ve perfected this technique over countless summer cookouts, and it’s the one recipe my guests always ask for seconds of.
What sets this recipe apart is the smash-and-sear method, which transforms ordinary ground beef into a restaurant-quality burger every time.
You’ll need just five simple ingredients (plus your choice of toppings), and the entire process takes under 20 minutes from start to finish—ideal for busy weeknights or game day gatherings.
The key is keeping the patties thin enough to cook quickly without overworking the meat, ensuring that juicy center stays intact.
By the time you’re done, you’ll have burgers with crispy edges that shatter at the touch and a tender, flavorful interior that melts in your mouth. The seasoning blend—salt, pepper, and garlic powder—enhances the natural beef flavor without overpowering it, while the high-heat sear locks in all those juices.
This isn’t just a burger; it’s a foolproof technique that turns a simple meal into a showstopper.
Serve these burgers on toasted buns with your favorite toppings—cheese, lettuce, tomato, pickles, or a drizzle of special sauce—and watch them disappear faster than you can say “patty melt.”
Whether you’re grilling for a crowd or treating yourself to a solo meal, this recipe delivers restaurant-quality results with minimal effort. Let’s get cooking!
Ingredients for 1 lb ground beef burger
Five core ingredients plus optional toppings—this is your smash-burger game changer.
| Ingredient | Amount | Notes |
|---|---|---|
| Ground Beef (80/20 fat ratio) 🥩 | 1 lb | Freshly formed patties preferred |
| Kosher Salt 🧂 | 1 ½ tsp | Diamond Crystal preferred |
| Freshly Ground Black Pepper 🌶️ | 1 tsp | Cracked peppercorns preferred |
| Garlic Powder 🧄 | ½ tsp | Freshly toasted for depth |
| Vegetable Oil (for smashing) 🫒 | 2 tbsp | High smoke point preferred |
| Hamburger Buns 🍞 | 4 whole | Toasted for structure |
| Topping Bundle (optional) 🥗 | ½ cup | Cheese, lettuce, tomato, pickles |
| Mayonnaise (for special sauce) 🥫 | 2 tbsp | Duck sauce optional |
| Yellow Mustard (for special sauce) 🍯 | 1 tbsp | Dijon optional |
| Ketchup (for special sauce) 🍅 | 1 tbsp | Heinz preferred |
The beef is non-negotiable here. 80/20 fat ratio gives you that perfect balance of juiciness and crust. Costco sells pre-formed ground beef patties that save time, but I always form my own for that restaurant-quality texture. Look for bright red color and good marbling—if it’s grayish, toss it. The Diamond Crystal kosher salt is my go-to because it dissolves better than table salt, giving you that clean, bright flavor. Freshly cracked peppercorns make a world of difference over pre-ground—worth the extra 30 seconds with a pepper mill.
No garlic powder? Fresh minced garlic at double the amount works perfectly, but it burns faster so handle carefully. Running low on mayo? Greek yogurt at half the quantity gives you a tangy twist. The special sauce can be pre-made or assembled fresh—Trader Joe’s has great pre-mixed options if you’re short on time. For the buns, toast them until golden brown—they’ll hold up better to juicy burgers. No grill? A cast-iron skillet on high heat mimics the smash technique beautifully.
Keep the ground beef cold until ready to use—2 days max in the fridge. The special sauce keeps for 1 week in the fridge, though I always make fresh for the best flavor. Toasted buns stay crisp for 30 minutes if wrapped in a towel. For leftovers, store patties (without buns) in the fridge for 2 days—they reheat surprisingly well in a skillet. Freeze extras on a tray before bagging for 3 months—prevents them from sticking.
Why You’ll Love This Recipe
- Five-Ingredient Magic: I swear by this—just beef, salt, pepper, garlic powder, and oil. That’s it. No fancy binders, no overcomplicated steps. The 80/20 fat ratio keeps it juicy, and the smash? That’s where the real flavor unlocks.
- Crispy-Creamy Payoff: The oil makes them sizzle like a restaurant patty, but the inside stays tender. Honestly, the first time I tried this, I nearly dropped my spatula. That garlic powder? It’s the secret—subtle but there, making every bite sing.
- Weeknight or Game Day: Toss these on the grill for a summer BBQ or pan-fry them in a skillet for a quick dinner. Between us, they’re my go-to when I’m feeding a crowd but don’t want to spend hours in the kitchen. (Yes, even on a Tuesday night.)
- Leftovers? More Like Leftovers: Cook the whole pound at once—it’s cheaper per patty, and the extras freeze like a dream. Reheat them in a cast-iron, and they’re just as good as day one. My freezer’s always stocked, and my wallet thanks me.
Step-by-step instructions for 1 pound ground beef burgers
Here’s how to craft burgers with a perfect smash-style crust and impossibly juicy centers.
Form and Season the Patties
Divide the 1 lb ground beef (80/20 fat ratio) into four equal portions, each about 4 ounces. I like to use my hands for this—warm water makes it easier to handle the meat without it sticking. Gently shape each portion into a loose ball, being careful not to overwork the beef or compact it too tightly.
Place the seasoning—1.5 tsp kosher salt, 1 tsp freshly ground black pepper, and 0.5 tsp garlic powder—on a small plate. Working with one ball at a time, roll it in the seasoning until fully coated. The salt should adhere evenly, and you’ll see a slight sheen from the fat. Let the seasoned patties rest for 5 minutes while you prepare the grill or pan.
Smash the Patties for Maximum Crust
Heat a clean skillet over medium-high heat until it’s screaming hot. Add 2 tbsp vegetable oil and let it shimmer for 30 seconds. While the oil heats, place one seasoned beef ball between two sheets of plastic wrap. Using a heavy pan or a burger press, smash it into a ½-inch thick patty—this creates that coveted crispy crust while keeping the inside juicy.
Slide the smashed patty onto the hot skillet. You’ll hear a satisfying sizzle as the fat begins to render. Cook for 2-3 minutes until the edges are golden brown and crispy, but the center still feels cool to the touch. Flip carefully with a thin spatula—this is where the magic happens for that perfect sear.
Toast the Buns and Assemble
While the patties cook, lightly butter the cut sides of the 4 whole hamburger buns and toast them in a dry skillet over medium heat for 1 minute per side until golden. This adds structure and prevents sogginess. Keep them warm in a 200°F oven while you finish the burgers.
After flipping, cook the other side of each patty for 1-2 minutes for medium doneness (adjust time for your preferred level). The internal temperature should reach 145°F for medium—use an instant-read thermometer to check. Transfer the cooked patties to a clean plate and tent loosely with foil to keep them warm.
Mix the Special Sauce
In a small bowl, combine 2 tbsp mayonnaise, 1 tbsp yellow mustard, and 1 tbsp ketchup. Stir until smooth—the sauce should coat the back of a spoon with a glossy finish. This classic trio balances richness, tang, and sweetness perfectly. Taste and adjust seasoning if needed, though the amounts should be spot-on.
Spread a generous layer of the special sauce on the bottom half of each toasted bun. This step ensures every bite delivers that signature flavor combination. If using the optional 0.5 cup topping bundle, layer cheese, lettuce, tomato, and pickles on top of the sauce. Place the cooked patty on top and drizzle any accumulated juices from the patty over the burger.
Serve Immediately for Maximum Juiciness
Top each burger with the remaining bun halves and serve immediately. The smash technique locks in juices while creating that irresistible crust. Cut into a burger to check—juices should flow freely, and the center should remain tender. Serve with crispy fries or a fresh garden salad for a complete meal.
Real talk: don’t skip the resting step. Those 5 minutes after cooking let the juices redistribute, ensuring each bite is packed with flavor. And if you’re feeling fancy, add a sprinkle of freshly cracked pepper on top right before serving—it makes all the difference.
Pro Tips For Making 1 Lb Ground Beef Burger
- Smash Don’t Shape: I used to roll these into perfect balls, but that’s how you end up with dense, dry burgers. Instead, flatten the patties to about ¾-inch thick with a warm skillet and your palm—press hard, then make a shallow dimple in the center. The fat will render properly, and you’ll get that perfect crust without flipping constantly.
- Salt Before You Touch: Don’t wait until the pan. Mix the kosher salt, black pepper, and garlic powder right into the raw beef—about 1 teaspoon salt per pound—and let it sit for 10 minutes. That’s when the salt starts breaking down proteins, locking in moisture. (Yes, even if you’re impatient like me.)
- Watch the Heat: Start hot—cast iron screaming, nonstick at medium-high—but back it down to medium after the first 2 minutes. Too much heat too long = burnt crust, raw center. The patties should sizzle like crazy at first, then settle into a steady sear. Crowding the pan? Skip it. Give them space to breathe.
- Oil the Pan Wrong: Drizzle vegetable oil directly on the beef, not the pan. Tilt the skillet and let it pool, then swirl to coat—just enough to prevent sticking. I learned this the hard way after scrubbing a pan clean from over-oiling. A light film is all you need; the beef’s fat will do the rest.
Wine and beer pairings for this dish
Classic American Lager
A crisp, light-bodied American lager like Bud Light or Miller Lite is my go-to pairing for this burger. The clean, refreshing carbonation cuts through the richness of the beef while complementing the smash-style crust without overpowering it.
I like to chill mine for 30 minutes before serving to enhance that crisp bite. 🍺
Malty Amber Ales
For a slightly bolder option, try an amber ale such as Fat Tire or Blue Moon. The caramel and toasty malt notes in these beers mirror the toasted bun and caramelized crust of the burger.
The moderate hop bit also balances the fat in the beef beautifully. Serve at 45°F for the best flavor contrast.
Red Wine Surprise
Don’t overlook red wine—specifically a light Pinot Noir or Chianti. The acidity in these wines cuts through the grease while their fruitiness enhances the beef’s natural flavors.
I recommend a 2019 La Crema Pinot Noir from California, which has just enough tannin to stand up to the burger without being overpowering. Chill slightly for 15 minutes before serving.
Non-Alcoholic Options
For those skipping the alcohol, a sparkling ginger beer like Feather Ginger Beer or a cucumber-mint soda works wonderfully. The effervescence cleanses the palate between bites, while the herbal notes complement the garlic powder in the seasoning.
I like to serve it ice-cold with a lime wedge for an extra zing.
Regional Beer Twists
If you’re grilling in the South, try a Southern-style lager like Shiner Bock. Its toasty malt and slight sweetness pair perfectly with the smoky notes from a charcoal grill.
In the Northeast, a New England IPA (like Trillium Brewing Co.’s offerings) adds a hoppy contrast that works surprisingly well with the burger’s richness.
Wine Pairing Pro Tips
When pairing wine, always serve it 10-15 minutes before the burger to let it breathe. For reds, decant for 5 minutes if stored in the fridge. I also recommend using stemless glasses for casual settings—they’re easier to hold while enjoying your burger.
And if you’re feeling adventurous, try a rosé—its crisp acidity and berry notes make it a surprisingly great match for beef burgers. 🍷
Nutrition facts
Frequently asked questions
Why does this recipe use 80/20 ground beef instead of leaner cuts?
The 20% fat content in 80/20 ground beef is crucial for juicy burgers. The fat renders out during cooking, creating flavorful drippings that baste the patty and lock in moisture. Leaner cuts (like 90/10) often result in dry, crumbly burgers that lack that satisfying mouthfeel.
Can I make these burgers ahead of time?
You can prep the patties up to 2 days ahead, but cook them fresh for the best texture. Form and season the patties, then refrigerate them on a plate. Cook within 24 hours for optimal juiciness. For leftovers, store cooked patties (without buns) in the fridge for 2 days or freeze for 3 months.
How do I adjust the recipe for smaller or larger batches?
This recipe yields 4 burgers from 1 lb of beef. For 2 burgers, use ½ lb of meat. For 6 burgers, use 1.5 lbs. Keep patty thickness consistent (½-inch) and adjust cook times slightly—thinner patties cook faster. Scale the special sauce and toppings proportionally.
What’s the best way to cook these if I don’t have a grill?
A cast-iron skillet works perfectly! Heat it over medium-high heat until smoking hot, then use the smash technique with 2 tbsp oil. The skillet mimics grill searing while trapping heat for that crispy crust. For even cooking, avoid overcrowding—work in batches if needed. A grill pan also works well for indoor grilling.
Can I make these burgers into sliders?
Reduce each patty to 2 ounces (about ½-inch thick) for slider-sized burgers. Use mini buns (like Hawaiian rolls) and keep toppings light—think cheese, pickles, and a smear of special sauce. Cook time decreases to 1-2 minutes per side for perfect doneness. Serve on a platter with toothpicks for easy grabbing.

- Baked Potatoes in Crock Pot Recipe: Buttery Interiors and Crispy Top Magic - November 1, 2026
- Braised Beef Short Ribs Recipe: Crock Pot Fall-Off-Bone Magic in 6 Hours - November 1, 2026
- Crock Pot Cocoa Recipe: Velvety Warmth With Hidden Spice Magic - November 1, 2026