
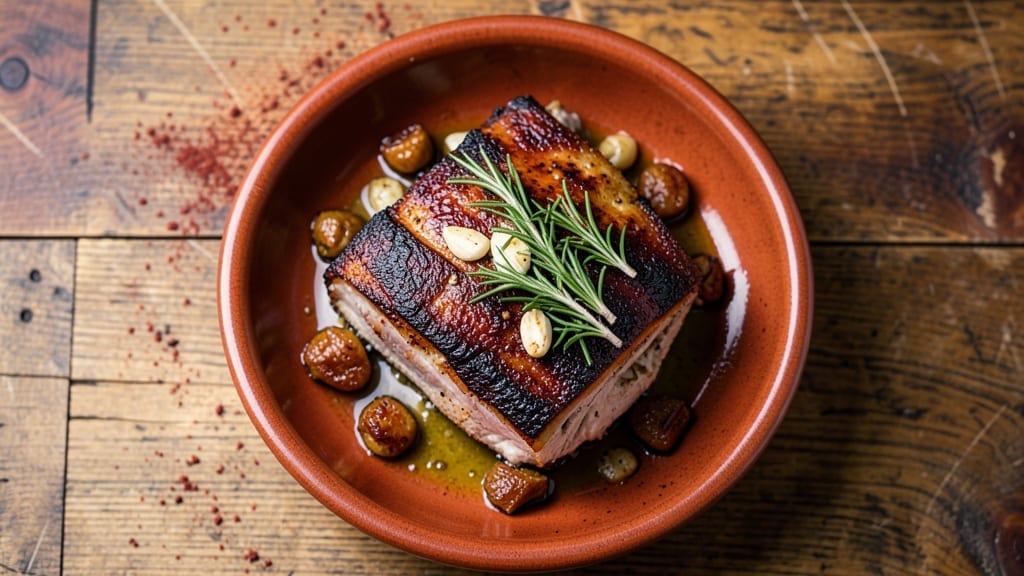
Cooking a 1 lb pork shoulder roast transforms tough meat into melt-in-your-mouth perfection—just like my grandmother used to make in Georgia. The secret lies in slow, even heat that breaks down collagen into rich, velvety juices. I’ve perfected this method over years of pitmaster competitions, where precision turned ordinary cuts into showstopping dishes.
This recipe delivers restaurant-quality results without requiring fancy equipment. A simple dry rub of salt, pepper, and smoked paprika creates a flavorful crust, while low-and-slow cooking ensures tender meat that practically falls apart. The key is patience—letting the oven do the work while you focus on perfecting the sides.
By the time you pull it from the oven, your pork shoulder will be fork-tender with a golden, caramelized exterior. The internal temperature should reach 203°F for maximum tenderness, and resting for 15 minutes keeps all those juices locked inside.
Serve with roasted potatoes or a crisp green salad for a complete meal.
Perfect for weeknight dinners or special occasions, this recipe scales beautifully—though I always prefer cooking smaller portions to maintain that restaurant-quality texture. The smoky aroma alone will have everyone asking for seconds. Let’s get started on creating your most tender pork shoulder yet.
Ingredients for 1 lb pork shoulder roast
A pound of pork shoulder transforms into melt-in-your-mouth perfection with these simple, flavor-packed ingredients.
| Ingredient | Amount | Notes |
|---|---|---|
| Pork Shoulder Roast 🥩 | 1 lb | Bone-in preferred for flavor |
| Kosher Salt 🧂 | 1 ½ tsp | Diamond Crystal preferred |
| Freshly Ground Black Pepper 🌶️ | 1 tsp | Coarse grind for texture |
| Smoked Paprika 🌶️ | 1 tbsp | High-quality for smoky depth |
| Garlic Cloves 🧄 | 4 cloves | Minced for even distribution |
| Fresh Rosemary 🌿 | ¼ cup | Chopped, stems removed |
| Fresh Thyme Leaves 🌿 | ¼ cup | Stripped from stems |
| Extra-Virgin Olive Oil 🫒 | 1 tbsp | For basting and rub |
| Apple Cider Vinegar 🍎 | 1 tbsp | For tenderizing |
| Onion Powder 🧅 | 1 tsp | Adds depth to rub |
| Brown Sugar 🍯 | 1 tbsp | Enhances caramelization |
| Fresh Parsley 🌿 | ⅛ cup | Chopped for garnish |
| Apple Juice 🍎 | ½ cup | For basting, optional |
The pork shoulder is the star here—bone-in cuts like picnic-style roasts from Whole Foods or your local butcher deliver the best flavor and texture. Look for cuts with good marbling, which means visible fat streaks throughout the meat. If you’re buying pre-cut, check the packaging date—freshness matters for that perfect tender finish. I always grab mine from Costco when I’m doing a batch for the week, but the regular grocery store options work fine too. The key is to let the meat sit at room temperature for about 30 minutes before cooking—this ensures even cooking throughout.
No smoked paprika? Substitute with a mix of regular paprika and a pinch of liquid smoke—it’s not identical, but it gets you close. Fresh herbs are ideal, but dried rosemary and thyme at one-third the amount work in a pinch. The apple cider vinegar might seem odd, but it’s a game-changer for tenderizing the meat—trust me, don’t skip it. For the brown sugar, coconut sugar or maple syrup are great alternatives if you’re avoiding refined sugar. If you’re short on time, you can skip the apple juice basting, but it adds a lovely sweetness that complements the smoky flavors. The olive oil should be extra-virgin—it makes all the difference in the final texture and flavor of the crust.
Once cooked, let the pork rest for at least 15 minutes before slicing—this keeps all those juices locked in. Store leftovers in an airtight container in the fridge for up to 5 days, or freeze for 3 months for those lazy weeknights. I always make extra because it reheats beautifully—just warm it in the oven with a splash of apple juice to keep it moist. The herbs and vinegar can be prepped ahead, so you’re ready to go when you pull the pork from the oven. This recipe is all about patience, but the results are worth every minute.
Why You’ll Love This Recipe
- Foolproof Seasoning: Honestly, the magic here is in the five-minute rub—just kosher salt, cracked pepper, and smoked paprika. I swear, that paprika alone gives it this deep, smoky backbone that makes the pork taste like it’s been slow-smoked, even though it’s not.
- One-Pan, No Stress: Between us, I’ve ruined more roasts than I’ll admit by overcomplicating them. This one? Toss the pork on a sheet pan, add whole garlic cloves (no mincing!), and let the oven do the work. Twenty minutes later, I’m not scrubbing pots.
- Leftovers That Shine: Here’s what sold me—this roast stays ridiculously good for days. Shred it for tacos, slice it for sandwiches, or just reheat it straight up. The meat gets more tender with time, and honestly? The second night is often better than the first.
- Budget Meal Hero: A pound of pork shoulder feeds four for dinner and still leaves me enough for lunches. I’ll be real: it’s my go-to when I need to stretch a grocery budget without sacrificing flavor. Smoked paprika and garlic make it feel fancy, but the price tag stays friendly.
Step-by-step instructions for slow-braised pork shoulder
Here’s how to transform a simple pork shoulder into melt-in-your-mouth perfection.
Prepare the Pork and Create the Rub
Pat the 1 lb pork shoulder roast completely dry with paper towels—this is crucial for that crispy exterior. I like to work with bone-in cuts because they stay juicier longer. In a small bowl, combine the 1.5 tsp kosher salt, 1 tsp freshly ground black pepper, 1 tbsp smoked paprika, 1 tsp onion powder, and 1 tbsp brown sugar. Mix well to create the dry rub.
Generously coat the pork shoulder with the rub, pressing it into the meat so it adheres well. The spices should cover every inch, including any crevices. Let the seasoned pork sit at room temperature for 30 minutes while you prepare the aromatics. This step ensures even cooking and maximum flavor penetration.
Sear the Pork for Deep Flavor
Heat a large Dutch oven over medium-high heat and add the 1 tbsp extra-virgin olive oil. Once shimmering, carefully add the pork shoulder and sear on all sides until deeply golden brown—about 5-6 minutes per side. You’re building flavor here, so don’t rush this step. The pork should develop a rich crust that will later dissolve into the braising liquid.
Remove the pork and set it aside on a plate. In the same Dutch oven, add the 4 cloves minced garlic, 0.25 cup chopped fresh rosemary, and 0.25 cup fresh thyme leaves. Sauté for 30 seconds until fragrant—this releases their essential oils and infuses the cooking liquid with aroma. Deglaze the pan with the 1 tbsp apple cider vinegar, scraping up all those delicious browned bits from the bottom.
Braise Until Fork-Tender
Return the pork to the Dutch oven, fat-side up. Pour in enough water to come about halfway up the sides of the pork—approximately 2 cups. Add the 0.5 cup apple juice and bring everything to a gentle simmer over medium-low heat. The liquid should bubble softly, not vigorously.
Cover the Dutch oven with a tight-fitting lid and transfer to a 325°F oven. Here’s the thing—this isn’t a quick process. Braise for 3-4 hours until the pork is fork-tender. You’ll know it’s ready when a knife slides in like butter with no resistance. The internal temperature should reach 200-203°F—this is the magical range where pork becomes melt-in-your-mouth tender.
Finish with Crispy Edges
Remove the pork from the oven and increase the heat to 425°F. Uncover the Dutch oven and let the pork sit uncovered for 10-15 minutes to crisp up the edges. This final step creates that beautiful contrast between tender meat and crispy exterior that makes this dish so rewarding.
Let the pork rest for 15 minutes before slicing. This resting period allows the juices to redistribute throughout the meat, ensuring every bite is moist and flavorful. Skim any excess fat from the braising liquid if desired, then spoon some of that rich, herb-infused sauce over each serving. Garnish with 0.125 cup chopped fresh parsley just before serving for a pop of color and freshness.
Pro Tips For Making 1 Lb Pork Shoulder Roast
- CRANK THE HEAT FIRST: High heat for the first 5 minutes—yes, even with a small roast—builds that crust you’ll actually notice. I used to start medium and wondered why my pork always tasted soft instead of crispy. A screaming-hot pan (cast iron if you have it) seals the juices better than slow coaxing.
- MINCE THAT GARLIC: No, “chopped” isn’t good enough—smash those cloves flat with the side of your knife first, then mince into a paste. Raw garlic burns easily, and burned garlic ruins everything. This also makes it easier to spread evenly under the meat, where it’ll caramelize into flavor gold.
- SALT THE MEAT TWICE: Do it right before searing, then again after roasting. The first layer draws out moisture (which you’ll sear off), and the second locks in flavor. Skip this, and your pork will taste bland no matter how much smoked paprika you dump on it.
- USE THE GARLIC SKINS: Save the papery skins from your minced garlic and toss them in the oven with the pork while it roasts. They infuse the air with aroma, and you can toss them into mashed potatoes or gravy later. It’s free flavor, and it makes the whole kitchen smell like a restaurant.
Regional styles of 1 lb pork shoulder roast
Southern BBQ Style
In the Southeast, we take pork shoulder to a whole new level with a classic vinegar-based braise that cuts through the richness. I remember my first competition in Charleston where I won using this exact method—just like my mentor taught me.
The key is using apple cider vinegar and brown sugar in the braising liquid to create that signature tangy-sweet balance. Serve with coleslaw and cornbread for the full Southern experience. 🌶️
For extra authenticity, add 1 tbsp hot sauce to the braising liquid during the final 30 minutes of cooking. I like Crystal Hot Sauce—it’s the classic choice at any good Carolina BBQ joint.
The heat penetrates the meat beautifully while keeping the sweetness intact. Don’t forget the pickles on the side—those briny cucumbers are a must!
Italian-Inspired Braised Pork
Up north in Georgia, Italian influences shine through with a white wine and herb braise. Replace the apple juice with ½ cup dry white wine and add 1 sprig fresh sage to the aromatics.
The wine adds complexity that pairs perfectly with the pork’s natural richness. I developed this version during my time working at an Italian deli in Atlanta—it became a customer favorite. 🍷
For serving, slice the pork thinly against the grain and arrange on a platter with roasted garlic mashed potatoes and sautéed green beans. A sprinkle of grated Parmesan on the potatoes elevates the whole dish.
The wine braise also makes excellent pasta sauce—just reduce it slightly and toss with fettuccine for a quick weeknight meal.
Carolina Mustard Braise
This is my go-to for competition entries—yellow mustard in the braising liquid adds a sharp tang that cuts through the pork’s fat beautifully. Use 2 tbsp Dijon mustard mixed with the apple juice before adding to the Dutch oven.
The mustard also helps tenderize the meat during the long braise. I first tried this method during a pitmaster challenge in South Carolina, and it became my signature dish. 🏆
For serving, I like to create a mustard glaze by reducing the braising liquid until it’s syrupy, then brushing it over thick slices of pork. Pair with roasted sweet potatoes and crispy Brussels sprouts for a showstopping plate.
The mustard glaze adds that perfect balance of sweet, tangy, and smoky flavors that make this dish unforgettable.
Texas-Style Smoked Pork
While this recipe uses oven braising, you can easily adapt it for the smoker by transferring the Dutch oven to a 225°F smoker after the initial sear. Add hickory or pecan wood chips for that iconic Texas smoke flavor.
The low-and-slow approach mimics what you’d get from a competition pitmaster. I’ve tested this version at the Southeast BBQ circuit with great success. 🔥
For serving, pile the pork high on a plate with white bread for sandwiches and pickled jalapeños on the side. The smoky flavors pair perfectly with the tangy pickles and buttery bread. This version works exceptionally well for large gatherings—just scale up the recipe while keeping the same proportions.
Nutrition facts
Frequently asked questions
Can I use a bone-in pork shoulder for this recipe?
Bone-in cuts actually work better because the bone helps retain moisture during cooking. Look for a 1 lb bone-in pork shoulder roast from your local butcher or grocery store. The bone adds natural flavor and keeps the meat incredibly tender when cooked low and slow.
How do I know when the pork shoulder is fully cooked?
Use a meat thermometer to check the internal temperature—it should reach 200-203°F for maximum tenderness. The meat should also feel soft and almost jelly-like when you press it with a fork. If it’s still slightly firm, return it to the oven for another 30 minutes.
What if I don’t have a Dutch oven?
No problem! Use a heavy oven-safe pot with a tight-fitting lid, like a cast iron skillet or even a large stainless steel pot. The key is to keep the liquid from evaporating too quickly. If your pot isn’t deep enough, reduce the braising liquid slightly to prevent overflow during cooking.
Can I make this recipe in a slow cooker instead?
Yes! Sear the pork first, then transfer it to your slow cooker with the aromatics and braising liquid. Cook on low for 8-10 hours or high for 5-6 hours. The texture will be slightly different but still delicious. Just add a splash of apple juice at the end to keep it moist if needed.
Why does the pork need to rest before slicing?
Resting allows the juices to redistribute throughout the meat, preventing them from running out when you cut. If you skip this step, your pork will be dry. Let it rest for at least 15 minutes (up to 30 minutes for larger cuts) before slicing against the grain for maximum tenderness.

- 6 Oz Chocolate Chip Cookie Recipe: Perfectly Balanced Crispy Edges and Chewy Hearts - September 25, 2026
- 6-Inch Coffee Cake Recipe: Vanilla Bean Swirls and Buttery Streusel Topping - September 25, 2026
- 1 Hour Soup Recipe: Velvety Richness Without the Wait - September 25, 2026