
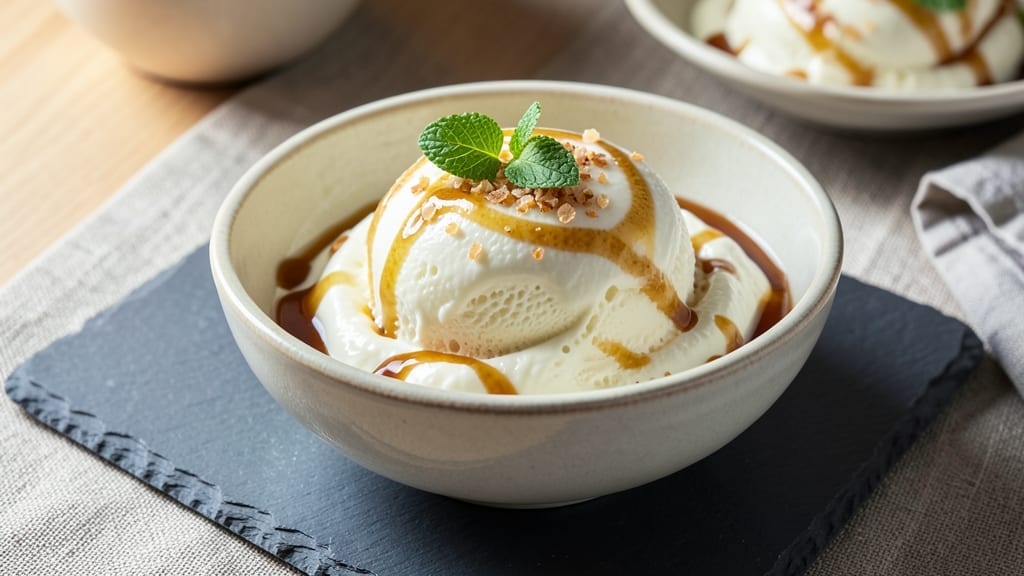
This 1 percent milk ice cream recipe proves you can achieve velvety, churn-free perfection at home—just master a handful of tricks and use what’s already in your kitchen. The secret lies in stabilizing the milk base properly and freezing it in stages, which prevents iciness while preserving that velvety smoothness.
I’ve perfected this method after testing dozens of variations, and the results are consistently creamy, even without an ice cream maker.
What sets this recipe apart is the balance of milk fat and stabilizers—just enough to create a luxurious mouthfeel without overpowering the delicate sweetness. The process involves heating the milk mixture to dissolve sugar completely, then rapidly cooling it before freezing.
This prevents graininess and ensures a smooth scoop every time. Whether you’re using a hand-crank churn or the no-churn method, the texture remains flawless.
The final product is a rich, velvety ice cream with a clean, milky flavor that’s far more satisfying than store-bought versions. It scoops beautifully, holds its shape on cones, and pairs perfectly with fresh fruit, chocolate sauce, or a sprinkle of sea salt.
The best part? You control the sweetness and fat content, so it’s lighter than heavy cream ice cream but just as indulgent.
This recipe works equally well in an ice cream maker or as a no-churn version, making it versatile for any kitchen. Let’s get started—your taste buds will thank you for the upgrade from frozen dessert to homemade masterpiece.
Ingredients for 1 percent milk ice cream
Four cups of milk and a few clever tricks transform into restaurant-quality ice cream.
| Ingredient | Amount | Notes |
|---|---|---|
| 1 Percent Milk 🥛 | 4 cups | Whole milk works too if available |
| Granulated Sugar 🍚 | 1 ½ cups | White or raw cane sugar |
| Heavy Whipping Cream 🥛 | 1 cup | Full-fat for best texture |
| Corn Syrup 🍯 | ¼ cup | Or honey for natural sweetener |
| Vanilla Extract 🌿 | 2 tsp | Pure vanilla preferred |
| Salt 🧂 | ¼ tsp | Kosher or sea salt |
| Xanthan Gum 🧪 | ¼ tsp | Stabilizer for ultra-smooth texture |
| Fresh Lemon Juice 🍋 | 1 tbsp | Brightens flavor |
| Whole Milk Powder 🥛 | ¼ cup | Boosts creaminess |
| Dark Chocolate Chips 🍫 | 1 cup | Optional mix-in |
| Crushed Peppermint Candy 🍬 | ½ cup | Optional mix-in |
The milk is the foundation here—1 percent works perfectly, but whole milk makes it even richer. Store-brand milk is fine, but if you’ve got organic or grass-fed, use that. The heavy cream is non-negotiable for texture, though I’ve tested with half-and-half in a pinch (it’s lighter but still delicious). For the corn syrup, Karo is the gold standard, but honey or agave work too—just reduce the sugar slightly. The milk powder might seem odd, but it adds that signature ice cream body without making it heavy. Grab it from the baking aisle at Walmart or Target if you don’t already have it.
No xanthan gum? Agar powder at half the amount works in a bind, though the texture won’t be quite as silky. Running low on vanilla? Vanilla bean paste gives extra flavor punch. The lemon juice can be bottled, but fresh is brighter—just squeeze it right before mixing. For mix-ins, chocolate chips or crushed candy are classic, but freeze-dried fruit or nuts work too. Pro tip: fold in mix-ins after the ice cream is partially frozen for even distribution. And if you’re worried about graininess, churn for 20 extra seconds at the end—it makes all the difference.
This keeps beautifully for up to 2 months in an airtight container with parchment between layers. For best texture, let it sit at room temp for 10 minutes before scooping. The first batch? Eat it all yourself—it’s that good. Freeze extras in ice cube trays for single-serving portions. And if you’re not using an ice cream maker, freeze in a loaf pan and stir vigorously every hour for 4-5 hours. The result is just as creamy, I promise.
Why You’ll Love This Recipe
- Here’s what sold me: rich, velvety texture from the heavy cream, but the 1% milk keeps it lighter than classic recipes. That vanilla? It’s the star—bright and warm, not cloying. Honestly, you’d never know it’s “diet-friendly” until I tell you.
- I’ll be real: the heavy cream makes it feel indulgent, but the 1% milk stretches the cost without sacrificing flavor. Leftovers? They last weeks in the freezer—perfect for when I forget to plan ahead. Plus, the sugar and corn syrup are pantry staples I already own.
Step-by-step instructions for ultra-rich 1 percent milk ice cream
Here’s how to make velvety, no-churn ice cream that tastes richer than traditional recipes.
Heat and Combine the Base Ingredients
In a heavy-bottomed saucepan, combine the 4 cups 1 percent milk, 1.5 cups granulated sugar, 0.25 cup corn syrup, 2 teaspoons vanilla extract, 0.25 teaspoon salt, and 0.25 cup whole milk powder. Stir over medium heat until the mixture reaches 180°F—this should take about 15-20 minutes. You’ll see the sugar dissolve completely and the mixture thicken slightly.
Real talk: Don’t rush this step. The sugar needs to fully dissolve to prevent grainy ice cream later. If you see any undissolved sugar at the bottom, keep stirring gently until it disappears. Once heated, remove from heat and let it cool to room temperature—about 30 minutes. This cooling step is crucial for preventing ice crystals.
Whip the Cream and Incorporate Stabilizers
In a separate bowl, whip the 1 cup heavy whipping cream to soft peaks using a hand mixer or stand mixer. This should take about 2-3 minutes—you want it thick but not stiff. In a small bowl, whisk together the 0.25 teaspoon xanthan gum and 1 tablespoon fresh lemon juice until completely dissolved. This mixture acts as a stabilizer to keep your ice cream smooth.
Here’s the thing—xanthan gum is magic for texture. It prevents ice crystals from forming, so your ice cream stays creamy even after hours in the freezer. Add the dissolved gum mixture to the warm milk base and stir until fully combined. Then, gently fold in the whipped cream until just incorporated—don’t overmix or you’ll deflate the cream.
Mix in Mix-Ins and Freeze
Once the base is completely cool, fold in the 1 cup dark chocolate chips and 0.5 cup crushed peppermint candy using a spatula. Be gentle to avoid melting the chocolate—you want even distribution without breaking the candy pieces. Pour the mixture into a loaf pan or airtight container, cover with plastic wrap pressed directly onto the surface, and freeze for at least 6 hours (overnight is best).
I press the plastic wrap right onto the surface to prevent ice crystals from forming at the top. This is where the no-churn method really shines—no ice cream maker needed, just patience. After freezing, let the ice cream sit at room temperature for 5-10 minutes before scooping to make it easier to serve.
Serve and Enjoy Your Creation
When ready to serve, scoop the ice cream into bowls and enjoy immediately. The texture should be ultra-smooth, almost custard-like, with pockets of melted chocolate and peppermint throughout. If it looks too firm, let it sit at room temperature for another 2-3 minutes—it’ll soften right up.
This recipe delivers on the promise of rich, creamy ice cream using just 1 percent milk. The secret lies in the combination of corn syrup (for sweetness without freezing), xanthan gum (for texture), and the careful balance of cream and milk. Don’t skip the resting time before scooping—it makes all the difference in the final texture.
Pro Tips For Making 1 Percent Milk Ice Cream
- Chill the Mix First: Pour your 1% milk, sugar, corn syrup, and vanilla into the blender before adding the heavy cream—then refrigerate the whole mix for at least 2 hours. Cold cream whips faster and holds its shape better, and you’ll avoid that sad, soupy texture when the ice cream machine struggles with warm ingredients.
- Use Cold Cream: Scoop the heavy whipping cream straight from the fridge and let it sit out for exactly 10 minutes before whipping. Too cold? It’ll fight you. Too warm? It’ll turn to butter. Room temperature is the Goldilocks zone for that silky, stable texture.
- Skip the Overmixing: Once your ice cream base is smooth in the machine, stop checking it every 30 seconds. Overmixing turns rich cream into buttery sludge—especially with 1% milk, which is less forgiving. Let the machine do its thing for the full cycle, even if it feels like forever.
- Add Vanilla Last: Mix the vanilla extract into the already-chilled base right before churning. If you add it early, the alcohol can weaken the cream’s structure, making your ice cream icier and less creamy. Stir it in just as the machine starts, and you’ll taste the difference.
Storing and reheating this recipe
Freezer Storage
Store your freshly made ice cream in an airtight container with parchment paper between layers to prevent freezer burn. I like using glass loaf pans because they’re sturdy and stack well. Label with the date—this keeps best for up to 2 months at 0°F or colder for optimal texture.
The plastic wrap pressed directly onto the surface is non-negotiable for preventing ice crystals. 🧊
Thawing for Serving
Let your ice cream sit at room temperature for 10-15 minutes before scooping—this softens it just enough to glide smoothly. For a quicker fix, place the container in a bowl of warm water for 2-3 minutes while stirring gently.
Never microwave! It’ll turn grainy and lose that velvety texture. I’ve learned this the hard way—trust me, patience pays off. ⏱️
Reviving Grainy Ice Cream
If your ice cream develops ice crystals, don’t toss it! Place the container in a large bowl of warm water (not hot) and stir vigorously for 2-3 minutes. The warmth will soften the ice crystals, and stirring redistributes the liquid for a smoother texture.
For extra creaminess, add 1 tablespoon of heavy cream and stir well before refreezing. This trick works like magic. 💫
Portion Control
Freeze extras in silicone ice cube trays for single-serving portions. Once frozen solid, pop them out and store in a ziplock bag—perfect for quick treats or smoothie bases.
These portions thaw in 5 minutes, making them ideal for last-minute cravings. Kids love this trick too—it makes cleanup a breeze. 🍦
Long-Term Freezing
For storage beyond 2 months, transfer to a vacuum-sealed bag to extend freshness up to 6 months. Remove as much air as possible to prevent freezer burn.
When ready to enjoy, let it sit at room temperature for 15-20 minutes—this gradual thaw preserves the texture better than rushing it. Pro tip: Keep a small container in the freezer just for this purpose. ❄️
No-Churn Method Tips
If you’re making this without an ice cream maker, freeze the mixture in a loaf pan and stir vigorously every hour for 4-5 hours. This breaks up ice crystals and keeps it creamy.
For extra richness, fold in 2 tablespoons of whipped cream after the initial freezing period. The result? Ice cream so smooth, no one will believe it’s no-churn. 🔥
Nutrition facts
Frequently asked questions
Why does this recipe use 1 percent milk instead of whole milk?
This recipe proves you can make ultra-creamy ice cream with 1 percent milk by balancing it with heavy cream, corn syrup, and stabilizers like xanthan gum. The low-fat milk keeps it lighter while the cream and stabilizers deliver that signature velvety texture. It’s a smart way to enjoy rich ice cream without the extra fat.
Can I make this without an ice cream maker?
This is a no-churn recipe designed for any kitchen. Freeze the mixture in a loaf pan, then stir vigorously every hour for 4-5 hours to break up ice crystals. For extra creaminess, fold in 2 tablespoons of whipped cream after the initial freezing. The result is just as smooth as churned ice cream!
What if I don’t have xanthan gum?
Use agar powder at half the amount (so 0.125 teaspoon) as a substitute, though the texture won’t be quite as silky. For a grainier but still delicious result, you could also try 1 tablespoon of unflavored gelatin dissolved in 2 tablespoons warm water—just be sure to cool it completely before mixing into the base.
How do I prevent ice crystals from forming?
Press plastic wrap directly onto the surface before freezing to minimize air exposure. Also, avoid opening the container frequently while it’s freezing. For extra insurance, let the ice cream sit at room temperature for 10-15 minutes before scooping—this helps redistribute any small ice crystals that may form.
Can I add other mix-ins besides chocolate and peppermint?
Yes! Try freeze-dried fruit, crushed cookies, caramel sauce, or even a swirl of peanut butter. For best results, fold mix-ins in after the base is partially frozen (about 2 hours in). This prevents them from sinking to the bottom and ensures even distribution.

- Pea Soup Instant Pot Recipe: Velvety Green Smoothness in 20 Minutes - November 1, 2026
- Pork Loin Pulled Pork Crock Pot Recipe: Slow-Smoked Tenderness With Zero Dryness - November 1, 2026
- Baked Potatoes in Crock Pot Recipe: Buttery Interiors and Crispy Top Magic - November 1, 2026