
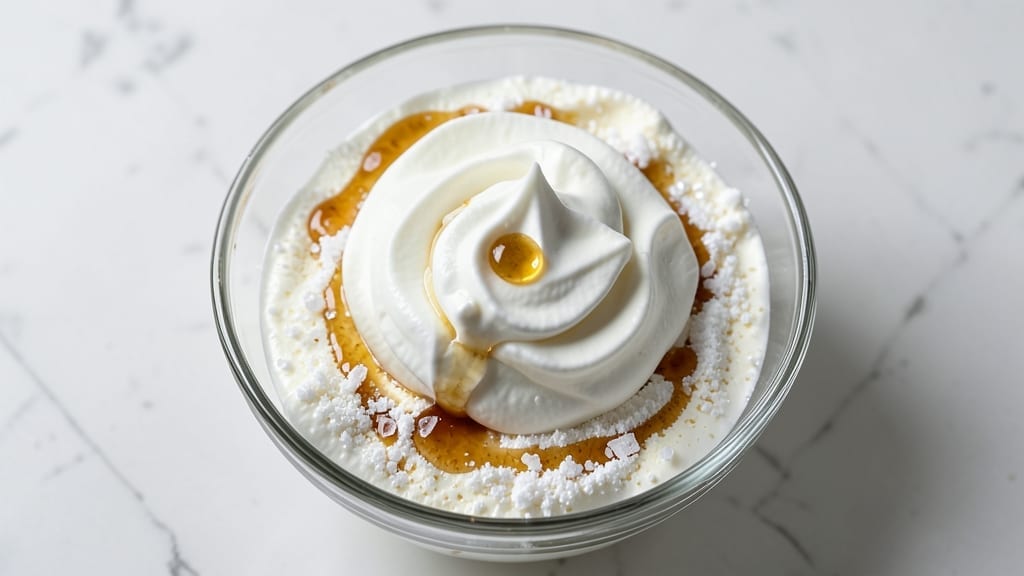
Creating 1 pint of whipped cream that’s light, airy, and stable enough to pipe in elegant swirls is simpler than you think—and this recipe delivers restaurant-quality results in just 5 minutes.
The secret lies in chilling every component properly and using a stabilizer (like corn syrup or powdered sugar) to prevent deflation. I’ve perfected this method after countless experiments with store-bought versions that collapsed into soupy messes within hours.
This recipe yields 16 ounces of finished whipped cream using just 4 ingredients: heavy whipping cream, a stabilizer (powdered sugar or corn syrup), vanilla extract, and a pinch of salt.
The key to success is starting with cold cream (chilled for 2+ hours) and using a hand mixer or stand mixer on high speed—never low. Over-whipping is the enemy of stability, so stop when soft peaks form.
For extra flavor, fold in chocolate chips, citrus zest, or a splash of liqueur after whipping.
What you’ll end up with is cloud-like whipped cream that holds its shape for hours, perfect for topping desserts, filling pastries, or garnishing hot beverages. The stabilizer ensures it doesn’t weep or deflate, while the vanilla and salt balance sweetness for a sophisticated finish.
This method works for both classic vanilla and flavored variations, and the recipe scales easily for larger batches.
Store any unused whipped cream in an airtight container in the refrigerator for up to 3 days, though it’s best used fresh. For a vegan alternative, substitute heavy cream with full-fat coconut cream (chilled overnight) and add a touch of maple syrup as a stabilizer.
Let’s get started on creating whipped cream that’s impossible to resist.
Ingredients for 1 pint whipped cream
Four ingredients transform into restaurant-quality whipped cream in minutes—no shortcuts needed.
| Ingredient | Amount | Notes |
|---|---|---|
| Heavy Whipping Cream 🥛 | 16 oz | Ultra-pasteurized for stability |
| Powdered Sugar 🍚 | 2 tbsp | Fine, confectioners sugar preferred |
| Pure Vanilla Extract 🌿 | ½ tsp | Bottled vanilla preferred |
| Fine Sea Salt 🧂 | ⅛ tsp | Diamond Crystal preferred |
The heavy whipping cream is the foundation—ultra-pasteurized brands like Land O’Lakes or Horizon work best for stability. Chill the cream in the fridge for at least 2 hours before whipping, and keep the bowl and beaters cold too. The stabilizer (powdered sugar) prevents weeping, so confectioners sugar is ideal—it dissolves smoothly. For vanilla, bottled extract delivers deeper flavor than imitation. The salt balances sweetness and enhances texture, so don’t skip it. Buy cream in 16-ounce cartons for perfect pint-sized batches.
No powdered sugar? Light corn syrup (1 tbsp) works as a stabilizer, though texture may be slightly softer. Short on vanilla? Almond extract (¼ tsp) or citrus zest adds complexity. For a vegan version, replace cream with full-fat coconut cream (chilled overnight)** and add 1 tsp maple syrup. The salt can be omitted if using unsweetened cream, but the stabilizer is non-negotiable—it’s what keeps your whipped cream from turning into soup. If you over-whip, the cream will stiffen; stop at soft peaks for perfect piping consistency.
Whipped cream deflates faster at room temperature, so store it in an airtight container in the fridge for up to 3 days. For best results, use within 24 hours. To reheat, gently warm the container in a bowl of warm water for 10 seconds before whipping again. Freezing isn’t recommended—it alters the texture. For flavor variations, fold in chocolate chips, crushed cookies, or a splash of liqueur after whipping. The stabilizer ensures these additions won’t cause weeping, even after hours.
Why You’ll Love This Recipe
- Here’s what sold me: the salt transforms the flavor. It cuts through the sweetness so the vanilla shines—rich, warm, and just a little bit sophisticated without trying too hard.
- Three-Ingredient Magic: I swear by this combo—just cream, sugar, vanilla, and a pinch of salt. That’s it. No fussing with stabilizers or overcomplicating things when you just need perfect fluff in minutes.
- Sweet-Salty Balance: Here’s what sold me: the salt transforms the flavor. It cuts through the sweetness so the vanilla shines—rich, warm, and just a little bit sophisticated without trying too hard.
- Party in a Bowl: This is my go-to for last-minute desserts, coffee toppings, or even a fancy-ish garnish for cocktails. One pint stretches across multiple uses, so I’m never scrambling when someone says, “We’re having guests!”
Step-by-step instructions for whipped cream
Here’s the method for perfect, stable whipped cream every time—no lumps, no weeping, just light airy clouds.
Chill Everything Thoroughly
Place the 16 oz heavy whipping cream in the refrigerator for at least 2 hours before whipping. Cold cream whips to stiffer peaks and holds its shape better. Also chill your mixing bowl and beaters for 30 minutes—this prevents the cream from warming too quickly during whipping, which can cause it to break.
I like to place the bowl in the freezer for the last 10 minutes to ensure it’s ice cold. The cream should be uniformly cold throughout, not just on the surface. If you’re short on time, you can even use a metal bowl and place it in the freezer for 15 minutes while the cream chills in the fridge.
Whip to Soft Peaks
Pour the cold 16 oz heavy whipping cream into the chilled bowl. Add the 2 tbsp powdered sugar and 0.5 tsp pure vanilla extract, then begin whipping on medium speed with a hand mixer or stand mixer fitted with the whisk attachment. After 1 minute, stop and scrape down the sides of the bowl with a rubber spatula—this ensures even whipping and prevents the cream from becoming too thick in some areas.
Continue whipping until the cream forms soft peaks. You’ll know it’s ready when you lift the beaters and the cream holds its shape momentarily before slowly melting back into the bowl. This usually takes about 2-3 minutes total. The cream should look glossy and thick but still pourable. Don’t overwhip at this stage—you’re aiming for softness, not stiffness.
Add Salt and Whip to Stiff Peaks
Reduce the mixer speed to low and add the 0.125 tsp fine sea salt. This might seem like a tiny amount, but it enhances the flavor and helps stabilize the whipped cream. Increase the speed back to medium and continue whipping until the cream forms stiff peaks. Stiff peaks should stand upright when you lift the beaters, though the tip may bend slightly.
This final stage typically takes another 1-2 minutes, depending on your mixer. Watch closely—the moment the cream reaches stiff peaks is critical. If you overwhip beyond this point, the cream will become grainy and eventually turn into butter. The texture should be smooth, thick, and hold its shape without collapsing.
Serve Immediately or Store Properly
Transfer the whipped cream to a serving bowl or piping bag fitted with a large star tip. Use it immediately for desserts like pies, cakes, or fruit toppings. If you need to store it, cover the surface with a thin layer of powdered sugar to prevent a skin from forming. Keep it refrigerated and use within 24 hours for the best texture and flavor.
The salt in the whipped cream helps maintain its structure, but even with it, the cream will gradually deflate over time. For the lightest, airiest results, always whip fresh and serve immediately. If you notice the cream starting to weep or separate, gently fold it back together with a spatula before using.
Pro Tips For Making 1 Pint Whipped Cream
- Chill the Bowl First: I learned this the hard way—warm metal bowls are the enemy of stiff peaks. Pop your mixing bowl in the freezer for 10 minutes before starting. The cream will whip faster and hold its shape longer, especially if you’re working in a warm kitchen.
- Use Room-Temp Cream: Cold cream from the fridge is stubborn, but don’t pull it out hours early—just let it sit for 30-60 minutes until it feels like cool milk. This balances stiffness and airiness, so you don’t end up with butter or soupy mess.
- Salt Before Whipping: Skip the “add salt at the end” habit—sprinkle a pinch of fine sea salt (about ¼ teaspoon) with the vanilla and powdered sugar at the start. It dissolves better and balances sweetness evenly, not just on the surface.
- Stop When It’s Soft: Overwhipping turns whipped cream into butter—watch for the moment it holds stiff peaks but still looks silky, not dry or grainy. If you’re unsure, stop 30 seconds before you think you should. It’ll hold better than overworked cream.
Dietary considerations for this recipe
Lactose-Free Options
If you need a lactose-free version, substitute the heavy whipping cream with lactose-free heavy cream (brands like Organic Valley or Simply Lactose-Free work well). The stabilizer and chilling process remain the same, ensuring the same light texture. Just ensure the cream is ultra-pasteurized for best results. 🥛
Dairy-Free Alternatives
For a vegan whipped cream, use full-fat coconut cream (chilled overnight) instead of dairy cream. Add 1 tablespoon maple syrup as a stabilizer and ½ teaspoon vanilla extract. Whip until soft peaks form—it’ll be slightly denser but still delicious. Brands like Goya or So Delicious work best. ✨
Sugar-Free Adaptation
Skip the powdered sugar and use 1 tablespoon light corn syrup or ½ teaspoon xanthan gum (dissolved in 1 tsp water) as a stabilizer. The texture will be slightly softer but still stable. For flavor, add ½ teaspoon stevia extract or a splash of almond milk to balance richness.
Gluten-Free Note
This recipe is naturally gluten-free—all ingredients (heavy cream, powdered sugar, vanilla, salt) are gluten-free by default. Just double-check your vanilla extract and salt brands for cross-contamination warnings if you’re highly sensitive. Most store-bought extracts and salts are safe. 🌾
Allergen-Friendly Tips
For nut-free whipped cream, avoid almond extract and opt for vanilla or citrus zest instead. If you’re avoiding dairy, coconut cream is your best bet—just ensure it’s labeled nut-free (some brands process in facilities with nuts). Always check labels for hidden allergens like soy lecithin in stabilizers.
Nutrition facts
Frequently asked questions
Why does my whipped cream turn into butter?
Over-whipping is the #1 culprit! When you whip beyond stiff peaks, the fat molecules break down completely, turning your cream into butter. Stop whipping as soon as you see stiff peaks (when the tip of the beater stands straight up). For 1 pint, this should take 3-4 minutes total—set a timer if needed.
Can I make whipped cream without powdered sugar?
Yes, but it won’t hold as well. Use 1 tbsp light corn syrup instead—it acts as a stabilizer. For flavor variations, try ½ tsp almond extract or 1 tsp honey (dissolved first). The texture will be slightly softer, but still perfect for immediate use.
How do I fix whipped cream that’s already deflated?
Don’t panic! Gently fold in 1 tsp cold heavy cream and re-whip on low speed for 30 seconds. If it’s weeping (liquid separating), mix in ½ tsp powdered sugar to absorb moisture. For best results, always use within 24 hours—fresh whipped cream holds its shape longest.
What’s the best way to pipe perfect rosettes?
Fill a piping bag with a large star tip (like Wilton #104) and hold it 1-2 inches above your surface. Apply light pressure while moving the bag in a circular motion—this creates elegant swirls. For 1 pint, you’ll get about 4-6 cups of decorated surface area. Keep the cream cold while piping to maintain stiffness.
Can I make whipped cream ahead of time?
Partially yes! Whip it 1 day ahead and store in an airtight container with parchment paper pressed on the surface. Re-whip for 1-2 minutes before using—it won’t be as light but will still work. For flavored versions (like chocolate or citrus), add mix-ins right before serving to prevent separation.

- 77 Texas BBQ Taco Sauce Recipe: Smoky Chipotle Heat With Caramelized Depth - October 19, 2026
- 1930’s Chocolate Cake Recipe: Vintage Richness With Vanilla Bean Swirls - October 19, 2026
- 6 Ingredient Bread Recipe: No-Knead Wonder With Pantry Staples - October 19, 2026