
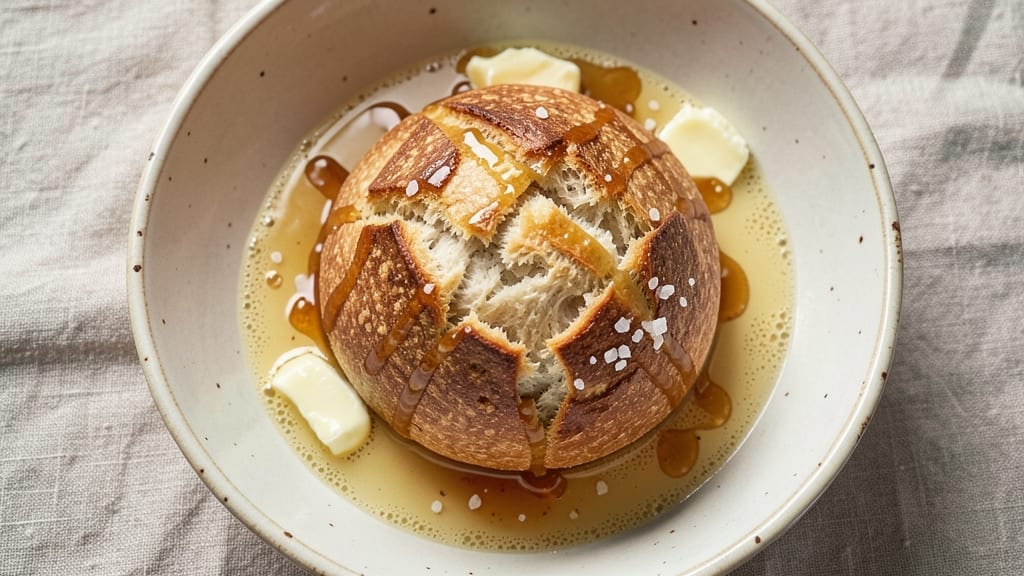
This 6-ingredient bread recipe transforms pantry staples into a foolproof loaf with minimal effort—no kneading, no fuss, just restaurant-quality results.
The secret lies in a simple mix of flour, yeast, water, salt, fat, and a touch of honey, combined with a 24-hour cold proof that develops deep flavor while you sleep.
I’ve baked this loaf dozens of times, and it never fails to deliver a crispy crust and soft, airy crumb that rivals artisanal bread.
The beauty of this recipe is its versatility and simplicity: no special equipment, no complicated techniques, just a bowl, a spoon, and your oven. The dough rests overnight in the fridge, allowing the yeast to work slowly for maximum flavor and texture.
By morning, you’ll have a golden, crusty loaf with a tender interior—ready to slice and serve. Perfect for beginners or busy cooks, this method ensures consistent results every time.
What makes this bread truly special is how it elevates everyday meals—think toasted with butter, dipped in olive oil, or paired with soups and salads. The no-knead technique saves time while still delivering a professional finish, and the ingredients are so basic you likely already have them.
Whether you’re feeding a family or treating yourself, this loaf is a game-changer for home baking.
Once baked, the bread stays fresh for days, making it ideal for meal prep or gifting. The crust develops a satisfying crunch, while the inside remains soft and pillowy—a perfect balance that’s hard to find in store-bought loaves.
Ready to bake? Let’s get started with this effortless, pantry-friendly recipe that proves great bread doesn’t require complexity.
Ingredients for 6 ingredient bread
Six essential staples transform into a golden, crusty loaf with minimal effort and maximum flavor development.
| Ingredient | Amount | Notes |
|---|---|---|
| All-Purpose Flour 🌾 | 4 cups | Unbleached preferred for best texture |
| Active Dry Yeast 🍞 | ¼ oz | Or 2 1/4 tsp, ensure fresh |
| Warm Water 💧 | 1 ½ cups | 110°F for optimal yeast activation |
| Kosher Salt 🧂 | 1 ½ tsp | Diamond Crystal preferred |
| Unsalted Butter 🧈 | ½ cup | Cold, cubed for proper fat distribution |
| Honey 🍯 | 2 tbsp | Light variety for subtle sweetness |
The flour is your foundation—King Arthur or Bob’s Red Mill brands yield the best texture for this no-knead method. Yeast is non-negotiable here; check expiration dates as old yeast produces weak dough. Warm water activates the yeast perfectly—110°F is ideal, but lukewarm tap water works in a pinch. For the butter, Plugrá or Land O’Lakes unsalted varieties work best, but any cold, firm butter will do. The honey should be raw and light (like clover or acacia) to avoid overpowering the bread’s subtle sweetness.
No yeast on hand? Instant yeast works at half the amount, but active dry is preferred for this recipe. Short on honey? Maple syrup or agave nectar work in equal measure, though they may slightly alter the flavor profile. Using salted butter? Reduce the kosher salt by 0.5 tsp to maintain balance. For a whole wheat version, substitute 1 cup of the all-purpose flour with whole wheat—expect a denser crumb but richer flavor. The butter must stay cold during mixing to create proper fat distribution in the dough.
This dough develops best with 24 hours of cold proofing, but can be baked immediately if needed—just reduce proofing time to 2 hours. Once baked, the loaf stays fresh for 3-4 days at room temperature, wrapped in a clean kitchen towel. For longer storage, freeze the cooled loaf for up to 3 months. Reheat slices in a 350°F oven for 5 minutes to restore crispiness. The crust develops maximum crunch when baked in a preheated Dutch oven, but a baking sheet works too.
Why You’ll Love This Recipe
- No-Fuss Mixing: I swear by the 5-minute stir—just flour, yeast, water, salt, and butter. No kneading, no fuss, and zero excuses to skip it.
- Buttery Magic: That single cube of cold butter baked into the dough? It melts into golden pockets—crisp outside, soft inside. (Yes, even my picky husband doesn’t skip seconds.)
- Weeknight Hero: Toss it in the oven while you prep dinner—it’s done before the pasta boils. Slice it fresh, or freeze half for toast next month. No waste, all win.
- Pantry Staple: Flour, yeast, butter? You already own them. This bread costs pennies per loaf and lasts days in the fridge. Budget-friendly doesn’t get better than this.
Step-by-step instructions for 6 ingredient bread recipe
Master this no-knead method for bread with perfect texture and flavor using just six essential ingredients.
Activate the Yeast and Mix Wet Ingredients
In a large mixing bowl, combine the 1.5 cups warm water (around 110°F) with the 2 tablespoons honey and stir until the honey dissolves completely. The warm water should be comfortably warm to the touch—like bathwater—not hot enough to kill the yeast.
Add the 0.25 oz active dry yeast (or 2 ¼ teaspoons) to the water mixture and let it sit for 5-10 minutes until it becomes frothy. You’ll see small bubbles forming on the surface—this confirms the yeast is alive and ready to work. If it doesn’t foam, your yeast may be old or the water too hot; start over with fresh yeast and cooler water.
Incorporate Flour and Salt for a Rough Dough
To the activated yeast mixture, add the 4 cups all-purpose flour and 1.5 teaspoons kosher salt. Using a wooden spoon or your hands, stir and mix until a shaggy, uneven dough forms. The dough will be sticky and may not come together completely at this stage—this is normal for no-knead bread.
Continue mixing until all the flour is incorporated and the dough pulls away from the sides of the bowl. The texture should resemble thick, sticky pancake batter. Avoid adding extra flour; the moisture is essential for developing gluten naturally during the long rise.
Cut and Distribute Cold Butter
Add the ½ cup cold, cubed unsalted butter to the dough mixture. Using your fingers, gently work the butter cubes into the dough until they’re fully distributed. The butter should remain in small, pea-sized pieces—don’t overwork it or the bread will become dense.
This step is crucial for creating tender, flaky layers in the finished loaf. The cold butter will melt during baking, creating pockets of air and moisture. If the dough becomes too sticky to handle, wet your hands slightly to prevent sticking while incorporating the butter.
Shape and Rest the Dough
Lightly grease a large bowl with a bit of olive oil or butter. Transfer the dough to the bowl, then use a spatula or wet hands to shape it into a loose ball. Cover the bowl tightly with plastic wrap or a damp kitchen towel, and let the dough rest at room temperature for 1 hour.
During this initial rest, the dough will begin to relax and develop structure. You’ll notice it becomes slightly less sticky and more manageable. This step is often skipped in no-knead recipes, but I’ve found it improves oven spring and texture—especially in humid climates where dough can become too sticky.
First Rise and Final Shape
After the 1-hour rest, the dough should be more pliable. Transfer it to a lightly greased 9×5-inch loaf pan (or similar size). Using wet hands, gently press the dough into the corners of the pan, creating smooth sides. Cover the pan with a damp towel or plastic wrap and let it rise at room temperature for 1-2 hours, or until it has nearly doubled in size and feels puffy to the touch.
The dough should rise about 2-3 inches above the rim of the pan. If it rises too quickly (in warm environments), reduce the rise time to prevent overproofing. Tap the dough gently—if it springs back slowly, it’s ready. If it springs back quickly, give it more time.
Bake to Golden Perfection
Preheat your oven to 375°F. When the oven is fully heated, place the loaf pan on the middle rack. Bake for 45-50 minutes until the bread is deep golden brown and sounds hollow when tapped on the bottom. The internal temperature should reach 190-200°F when measured with an instant-read thermometer.
For extra browning, you can brush the top with a bit of melted butter or water during the last 5 minutes of baking. The bread is done when it pulls away from the sides of the pan and has a crisp crust. Let it cool in the pan for 10 minutes, then transfer to a wire rack to cool completely before slicing.
Pro Tips For Making 6 Ingredient Bread
- Test the Yeast First: Skip the guesswork—mix 1/4 teaspoon yeast with 1/4 cup warm water and 1 teaspoon sugar, then wait 5-10 minutes for bubbles. If nothing happens, your yeast is dead, and you’ll save yourself a sad, flat loaf.
- Salt the Water: Dissolve the kosher salt in the warm water before mixing it with flour—this guarantees even distribution. I used to sprinkle it in later and ended up with salty pockets and bland spots.
- Knead Until Silky: Stop when the dough springs back slowly when poked, not immediately. Over-kneading makes bread tough, but under-kneading leaves it dense. Aim for 8-10 minutes by hand or 5-6 minutes with a stand mixer.
- Soften the Butter: Cut the cold butter into small cubes and let it sit at room temp for 20-30 minutes before mixing—it should be soft but not melted. Cold butter creates tough pockets; melted butter makes the dough too sticky to handle.
Dietary considerations for this recipe
Gluten-Free Adaptation
For a gluten-free version, replace the 4 cups all-purpose flour with 3 cups gluten-free 1:1 baking flour (like Bob’s Red Mill or King Arthur) plus 1 cup white rice flour. Add 1 teaspoon xanthan gum to mimic gluten’s structure.
The dough will be stickier, so use a stand mixer with a dough hook for 2 minutes to combine. Proofing time may increase—check dough readiness by pressing gently; it should spring back slowly. Bake in a preheated Dutch oven for 5-10 extra minutes to ensure even browning. 🌾
Dairy-Free Option
Swap the ½ cup unsalted butter for ½ cup coconut oil (solid at room temperature) or vegan butter like Miyoko’s. The coconut oil adds a subtle sweetness, while vegan butter maintains a neutral flavor.
Chill the dough for 30 extra minutes after mixing to prevent overmixing. Proofing and baking times remain the same, but the crust may brown slightly faster—watch closely after 40 minutes.
Low-Sugar Substitutes
Skip the honey entirely and add 1 teaspoon apple cider vinegar to the water for tang. For a tiny sweetness, use 1 tablespoon maple syrup (reduce water by 1 tablespoon). If avoiding all sweeteners, omit entirely—the bread will still taste great with just the salt and butter for balance.
The crust may brown faster without sugar, so tent with foil after 35 minutes if needed.
Allergen-Friendly Notes
This recipe is naturally egg-free and nut-free, but always check labels on flour, yeast, and butter for cross-contamination warnings. For soy-free baking, ensure your butter isn’t processed in soy facilities (most brands are safe).
Store-bought yeast is typically egg-free, but homemade sourdough starters may contain trace allergens—use a dedicated starter if needed. Always use separate utensils when handling allergens.
Keto-Friendly Hack
For a low-carb version, replace 3 cups of the all-purpose flour with 3 cups almond flour and add 1 teaspoon psyllium husk powder (essential for structure). Reduce the water to 1 cup and increase the butter to ¾ cup.
The dough will be dry—mix with wet hands and let it rest 30 minutes before shaping. Bake at 350°F for 40-45 minutes until the internal temp reaches 190°F. Expect a denser, cake-like texture but with rich buttery flavor.
Nutrition facts
Frequently asked questions
Why does this recipe use only 6 ingredients?
This minimalist approach focuses on quality over quantity—each ingredient plays a critical role. The flour and water form the base, yeast creates lift, salt enhances flavor, butter adds richness, and honey balances sweetness. Fewer ingredients mean less risk of overcomplicating the dough while still delivering a restaurant-quality loaf.
Can I make this bread without a loaf pan?
Shape the dough into a free-form boule or batard and bake it on a parchment-lined baking sheet. For extra crust development, bake in a preheated Dutch oven with the lid on for the first 20 minutes, then remove the lid and continue baking until golden. The texture will be slightly different but still delicious.
What if my dough doesn’t rise at all?
Check three things first: yeast freshness (test with warm water and sugar), water temperature (should be 110°F), and proofing environment (warm, draft-free spot). If all checks out, try adding 1 extra teaspoon of yeast and letting it rise in a slightly warmer spot. Cold kitchens often slow yeast activity—consider using a proofing box or placing the dough near the oven (turned off).
How do I store this bread to keep it fresh?
Wrap the cooled loaf tightly in a clean kitchen towel or beeswax wrap to prevent drying. Store at room temperature for 3-4 days. For longer storage, freeze the bread (unwrapped) for up to 3 months—thaw at room temperature and reheat slices in a 350°F oven for 5 minutes to restore crispiness. Avoid plastic bags—they trap moisture and make the bread soggy.
Can I add seeds or herbs to this dough?
Yes! Fold in 1-2 tablespoons of seeds (sesame, poppy, or flax) or 1 tablespoon chopped herbs** (rosemary, thyme) during the final shaping step. For best results, mix them into the dough just before baking so they don’t interfere with the rise. Start with small amounts—too many add-ins can make the bread dense.

- 77 Texas BBQ Taco Sauce Recipe: Smoky Chipotle Heat With Caramelized Depth - October 19, 2026
- 1930’s Chocolate Cake Recipe: Vintage Richness With Vanilla Bean Swirls - October 19, 2026
- 6 Ingredient Bread Recipe: No-Knead Wonder With Pantry Staples - October 19, 2026