
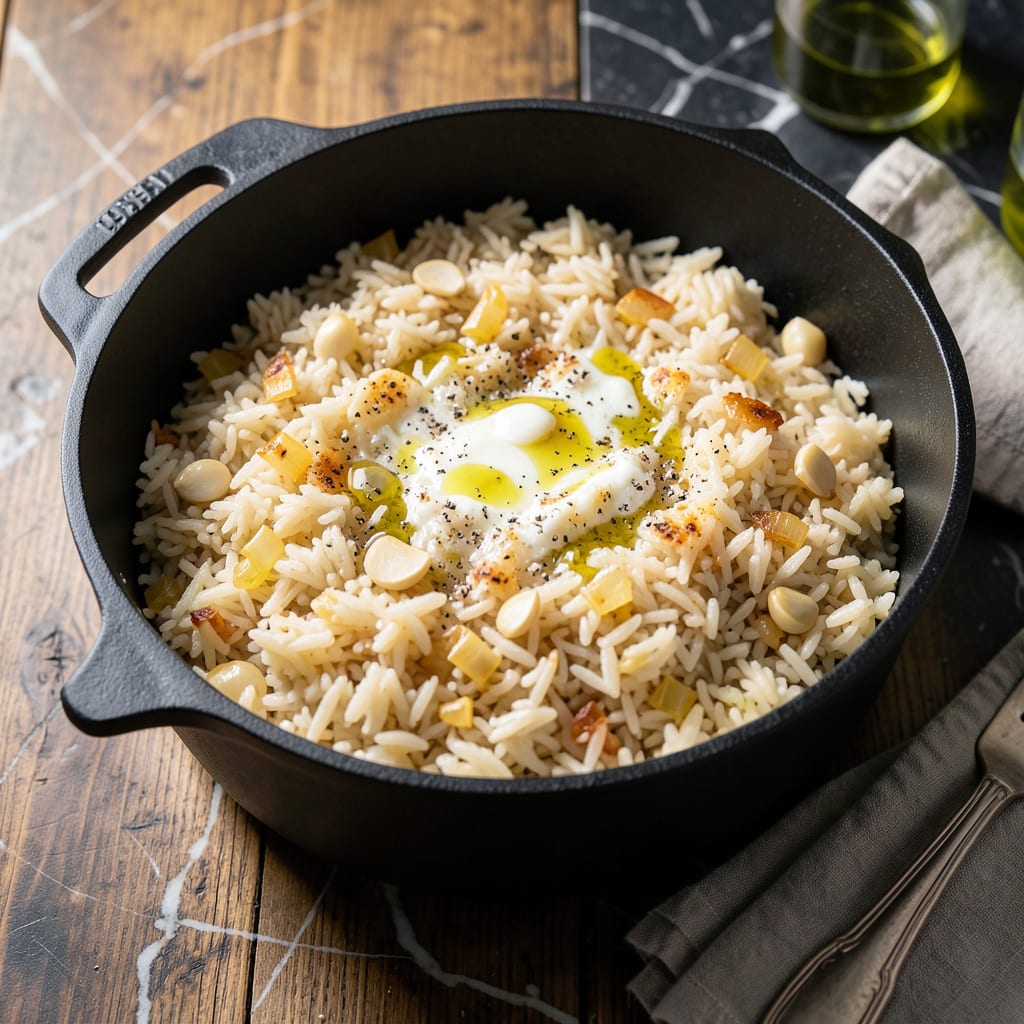
This one-pot method delivers perfectly fluffy rice with zero fuss. No special equipment, no constant stirring—just a simple technique that works every time.
With minimal effort and maximum reliability, you’ll achieve restaurant-quality results. The hands-off approach means you can focus on the rest of your meal while the rice cooks to perfection.
Ingredients for 1 Pot Rice
Simple ingredients, zero fuss, perfectly fluffy rice every single time.
| Ingredient | Amount | Notes |
|---|---|---|
| Long-Grain White Rice 🍚 | 2 cups | Rinsed until water runs clear |
| Water 💧 | 4 cups | Or substitute with broth |
| Unsalted Butter 🧈 | 2 tbsp | Or substitute olive oil |
| Kosher Salt 🧂 | 1 tsp | Diamond Crystal preferred |
| Garlic Cloves 🧄 | 3 cloves | Minced for aromatic base |
| Yellow Onion 🧅 | ½ whole | Finely diced for even cooking |
| Bay Leaf 🌿 | 1 whole | Dried, for subtle depth |
| Fresh Thyme Sprigs 🌿 | 2 whole | Optional but recommended |
| Black Pepper 🌶️ | ½ tsp | Freshly ground for best flavor |
| Lemon Zest 🍋 | 1 tsp | For bright finishing touch |
| Fresh Parsley 🌿 | 2 tbsp | Chopped, for garnish |
The rice choice matters here. Jasmine or basmati give you that separate, fluffy grain—avoid short-grain types like arborio (they turn sticky). Most grocery stores stock these in the bulk section or near the international foods. I grab mine from Whole Foods when I want organic, but any well-stocked supermarket works. Look for unbroken grains—if the bag is full of dust, pick another one.
No butter? Olive oil or coconut oil work just as well. Out of fresh garlic? Garlic powder at one-third the amount (so 1 tsp instead of 1 tbsp). The broth swap is an easy upgrade—chicken or vegetable both add depth. If you’re skipping the aromatics, add a pinch of onion powder. And yes, you can use a rice cooker, but the one-pot method here gives you better control (and fewer dishes).
Leftovers keep 4-5 days in the fridge, reheat with a splash of water. Freezes well for 3 months—portion into bags for easy grabs. The herbs can be swapped for whatever you’ve got growing (cilantro, dill, or even a sprig of rosemary all work).
Why You’ll Love This Recipe
- One Pot Wonder: I love that I just dump everything in, cover it, and walk away—no stirring, no fuss.
- Garlic Butter Magic: The butter and garlic turn plain rice into something rich and aromatic. Honestly, it’s my favorite part.
- Weeknight Hero: Between us, this is my go-to when I need a side dish in 20 minutes flat.
- Budget Stretch: A pound of rice, a few pantry staples, and I’ve got a filling meal for pennies per serving.
Step-by-Step Instructions for 1 Pot Rice
This hands-off method delivers perfectly fluffy grains with almost no effort on your part.
Step 1: Sauté Aromatics for Maximum Flavor
Melt the 2 tbsp Unsalted Butter in a heavy pot or Dutch oven over medium heat. As it melts, add the finely diced 0.5 whole Yellow Onion and sauté for 3-4 minutes until it turns translucent and just begins to soften.
Add the minced 3 cloves Garlic Cloves, the 1 whole Bay Leaf, and the 2 whole Fresh Thyme Sprigs. Cook for another 1 minute, stirring constantly, until the garlic releases its fragrant aroma. This builds a deep, savory foundation for your rice.
Step 2: Toast the Rice for Nutty Depth
Stir in the 2 cups Long-Grain White Rice and cook for 1-2 minutes, toasting it lightly in the butter and aromatics. You’ll notice the grains become slightly opaque and emit a subtle, nutty fragrance—this is the starches beginning to break down.
Season with the 1 tsp Kosher Salt and the 0.5 tsp Black Pepper, ensuring the rice is evenly coated. Toasting is critical here—it prevents a starchy, gummy texture and enhances the grain’s natural flavor.
Step 3: Add Liquid and Simmer to Perfection
Pour in the 4 cups Water and stir once to combine. Bring the mixture to a full boil over high heat. Once boiling, reduce the heat to low, cover the pot with a tight-fitting lid, and let it simmer undisturbed.
Cook for 15-18 minutes. Resist the urge to lift the lid—steam is essential for even cooking. You’ll know it’s done when the liquid has been fully absorbed and the rice is tender with a slight bite.
Step 4: Rest and Finish with Bright Notes
Remove the pot from the heat and let it sit, covered, for 10 minutes. This resting period allows the steam to redistribute, ensuring every grain is fluffy and separate. The rice will continue to cook gently during this time.
After resting, discard the bay leaf and thyme sprigs. Fluff the rice with a fork, then stir in the 1 tsp Lemon Zest for a bright, citrusy finish. Garnish with the 2 tbsp Fresh Parsley before serving.
Pro Tips For Making 1 Pot Rice
- Toast the rice: Cook the rice in the butter for 2-3 minutes before adding water—it adds a nutty depth that plain steamed rice lacks.
- Crush the garlic: Smash the garlic cloves with the side of your knife before adding them so they infuse more flavor without burning.
- Use hot water: I learned this the hard way—boiling water added to the pot right away prevents the rice from turning gummy or uneven.
- Rest covered: After cooking, let it sit off heat with the lid on for 10 minutes; it finishes the steam and makes the grains separate perfectly.
Serving Suggestions for 1 pot rice
Garnish Like a Pro
Fresh herbs make all the difference. I always finish with 2 tbsp Fresh Parsley for a pop of color and clean flavor. The 1 tsp Lemon Zest adds that bright note that cuts through the richness of the butter. 💛
Protein Pairings
This rice is a blank canvas for proteins. Try it with grilled chicken or baked salmon for a complete meal. For vegetarians, sautéed tofu or chickpeas add substance and pair beautifully with the aromatic base.
Vegetable Sides
Steamed broccoli or roasted asparagus complement the fluffy texture perfectly. I love the contrast of tender rice with crisp-tender veggies. A simple green salad with a light vinaigrette keeps the meal balanced.
Sauce It Up
Drizzle with garlic aioli or a lemon-tahini sauce for extra flavor. If you’re serving it as a side, a spoonful of gravy or curry sauce ties everything together beautifully.
Family-Style Serving
Transfer the rice to a large bowl and let everyone serve themselves. The aromatics infuse every grain, so it tastes delicious even at room temperature. I often make a double batch for potlucks—it’s always a hit.
Leftovers Reinvented
Use leftovers for fried rice the next day—just sauté with veggies and a beaten egg. The pre-cooked grains crisp up nicely in the pan. It’s my favorite way to give this dish a second life.
Nutrition Facts
Frequently Asked Questions
Can I use brown rice instead?
Yes, but adjust the liquid to 4.5 cups and simmer for 40-45 minutes. Brown rice needs more water and time to soften its outer bran layer.
Why do I need to toast the rice first?
Toasting enhances the nutty flavor and prevents gummy texture by sealing the grains. Skip this step and you risk a starchy, mushy result.
What if my rice is still crunchy after cooking?
Add 1/4 cup hot water, cover, and steam for 5 more minutes. If it’s burnt, you likely had the heat too high.
Can I make this in a rice cooker?
Sauté aromatics in the pot first, then add rice and liquid as usual. Use the standard white rice setting.

- 4C Bread Crumbs Meatballs Recipe: Crispy Crust and Juicy Centers - September 25, 2026
- 6 Oz Chocolate Chip Cookie Recipe: Perfectly Balanced Crispy Edges and Chewy Hearts - September 25, 2026
- 6-Inch Coffee Cake Recipe: Vanilla Bean Swirls and Buttery Streusel Topping - September 25, 2026