
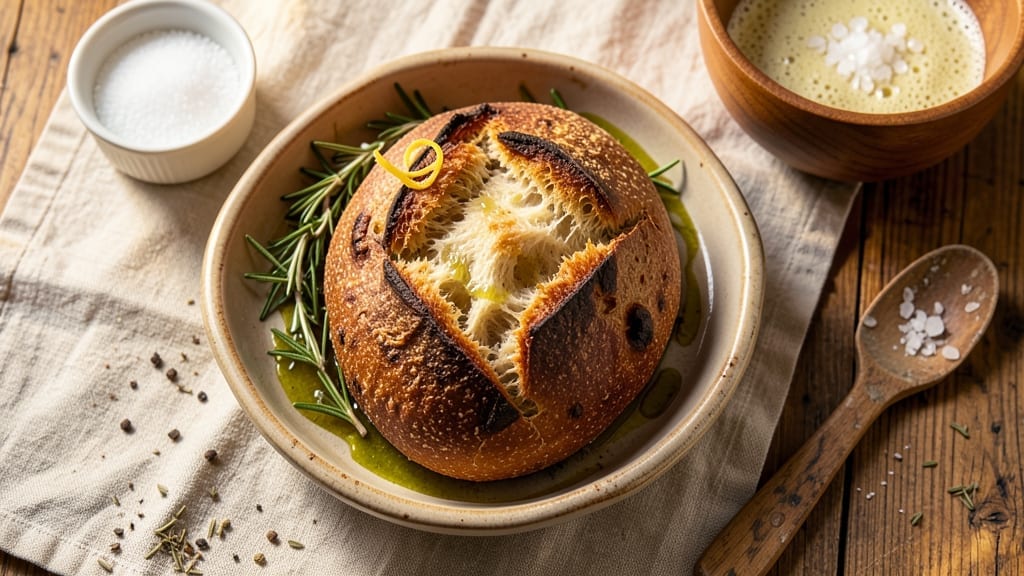
A 1-pound loaf of bread with a crisp Dutch oven crust and airy interior is the ultimate homemade achievement—crusty outside, tender inside, with a golden sheen that makes every slice feel special.
The secret lies in precise technique: proofing the dough just right, shaping it carefully, and baking it in a Dutch oven to trap steam and create that signature crust.
I’ve perfected this method over years of trial and error, and it delivers a loaf so good you’ll never buy store-bought again.
This recipe uses simple ingredients—flour, yeast, water, and salt—but the magic happens in the method. The dough develops through a slow, cold fermentation overnight, which builds flavor and strength. Shaping the loaf properly ensures an even rise, while the Dutch oven creates that coveted oven-spring and crackly crust.
It’s a process worth the time for a result that tastes like a bakery fresh from the oven.
By the end, you’ll have a perfectly risen loaf with a crisp exterior and a soft, even crumb—ideal for sandwiches, toast, or serving alongside soups. The aroma alone will have everyone gathering around the table.
Whether you’re a beginner or an experienced baker, this recipe ensures consistent, foolproof results every time.
Ready to bake? Let’s get started with the ingredients and step-by-step instructions that will transform your kitchen into a bakery. The effort is minimal, but the reward—a 1-pound loaf of bread that’s restaurant-quality—is worth every minute.
Ingredients for 1 pound loaf of bread
Four cups flour, a pinch of yeast, and patience—these are the pillars of a perfect Dutch oven loaf.
| Ingredient | Amount | Notes |
|---|---|---|
| All-Purpose Flour 🌾 | 4 cups | High-protein preferred for structure |
| Active Dry Yeast 🍞 | ¼ tsp | Freshly opened for best activity |
| Granulated Sugar 🍬 | ½ tsp | Feeds yeast for initial activation |
| Salt 🧂 | 1 ½ tsp | Kosher or sea salt preferred |
| Warm Water 💧 | 1 ½ cups | 105-110°F (40-43°C) for yeast |
| Olive Oil 🫒 | 1 tbsp | Extra-virgin for richness |
| Cornmeal 🌽 | ½ cup | For dusting Dutch oven |
| Ice Cubes ❄️ | 1 cup | For dough chilling |
The flour is non-negotiable. King Arthur or Gold Medal are my go-tos—they handle the slow fermentation without falling apart. Yeast needs to be fresh, so grab a new packet (not that year-old jar). Warm water temperature matters more than you’d think—too hot kills yeast, too cool makes it sluggish. 105-110°F is the sweet spot. For the Dutch oven, Lodge or Staub brands create the best crust, but any heavy pot with a lid works. If you don’t have cornmeal, all-purpose flour works in a pinch, though it won’t be quite as crisp.
No yeast? Sourdough starter at 1/4 cup replaces it entirely, but you’ll need to adjust fermentation time. Olive oil can be swapped for melted butter or vegetable oil, but olive adds subtle richness. The ice cubes are crucial for dough chilling—no freezer? Place dough in fridge for 1 hour. Salt is important, but if you’re using a salted butter substitute, reduce by 1/4 tsp. For a lighter crumb, some bakers add 1/2 tsp baking soda, but traditionalists skip it for authentic flavor.
Dough keeps 3 days in the fridge wrapped tightly, or 3 months frozen in a sealed bag. The Dutch oven stays hot for hours, so use it first if baking multiple items. For reheating, wrap the cooled loaf in foil and warm at 300°F for 10 minutes. The crust gets crispier as it cools, so slice when fully room temperature. Store in a bread box or paper bag to maintain freshness longer than plastic.
Why You’ll Love This Recipe
- No-Knead, No-Fuss Loaf: I mix it, let it rise, and forget about it—literally. That yeast and sugar combo wakes up magic with just 10 minutes of hands-on time, and the dough does the rest while I sip coffee.
- Sweet-Savory Balance: That pinch of sugar isn’t just for flavor—it feeds the yeast and gives the crust a subtle caramel note. Honestly, the first slice out of the pan tastes like a bakery’s secret, but with zero pretension.
- Sandwich Hero: Between us, this loaf is my go-to for grilled cheese, turkey wraps, or even toasted with butter and jam. It’s the quiet MVP that never lets me down—especially when I’m starving at 2 PM.
- Pantry Staple: One loaf lasts my family five days, and the leftovers? Perfect for croutons or breadcrumbs. I buy yeast in bulk, and flour’s already cheap—this is the kind of recipe that saves me money without feeling like a chore.
Step-by-step instructions for Dutch oven bread
Master this method and you’ll achieve a crusty exterior with a tender crumb every single time.
Activate the Yeast for Maximum Rise
In a small bowl, combine the 1.5 cups warm water, 0.5 tsp granulated sugar, and 0.25 tsp active dry yeast. Stir gently and let sit for 5-10 minutes until frothy. You’ll see small bubbles form on the surface—this confirms your yeast is alive and ready to work.
Here’s the thing—if the mixture doesn’t bubble within 10 minutes, your yeast may be inactive. In that case, start fresh with a new packet. Temperature matters too: the water should feel warm to your wrist (around 105-110°F). If it’s too hot, you’ll kill the yeast; if too cold, it won’t activate properly.
Mix the Dough and Develop Gluten
In a large mixing bowl, combine the 4 cups all-purpose flour and 1.5 tsp salt. Create a well in the center and pour in the yeast mixture along with the 1 tbsp olive oil. Using a wooden spoon or dough whisk, stir until a shaggy dough forms.
Switch to your hands and knead the dough on a lightly floured surface for 8-10 minutes until smooth and elastic. You’ll know it’s ready when it springs back slowly when poked. This gluten development creates the bread’s structure. Don’t rush this step—proper kneading prevents a dense loaf. If the dough feels sticky, add flour 1 tablespoon at a time until it’s workable.
First Rise and Chill the Dough
Lightly oil a large bowl, place the dough inside, and cover with a damp towel. Let it rise in a warm place for 1-2 hours until doubled in size. The dough should feel light and airy when pressed gently—it should spring back immediately.
After rising, transfer the dough to a clean surface and divide it into two equal pieces. Shape each into a round boule. Here’s where the ice comes in: place both boules on a plate, cover with plastic wrap, and freeze for 30 minutes. Then, add the 1 cup ice cubes around them and freeze for another 20 minutes. This chilling step firms up the dough for better oven spring.
Prepare and Bake in the Dutch Oven
Preheat your oven to 475°F with the Dutch oven inside for 30 minutes. While it heats, dust the inside of the Dutch oven with 0.5 cup cornmeal, tapping out any excess. Carefully transfer one chilled boule to the Dutch oven, seam-side up.
Bake uncovered for 20 minutes, then carefully flip the loaf and bake for another 15-20 minutes until deep golden brown. The bread should sound hollow when tapped on the bottom. Remove from the Dutch oven and cool on a wire rack for at least 1 hour before slicing. This resting time allows the crumb to set properly and prevents a gummy texture.
Repeat for Second Loaf (Optional)
Follow the same process with the second boule, placing it in the Dutch oven immediately after removing the first. The residual heat will maintain the 475°F temperature. Both loaves should achieve that perfect crust—crispy on the outside, tender on the inside.
Real talk: your first attempt might not be perfect, and that’s okay. The key is paying attention to the dough’s behavior and adjusting times slightly based on your oven. With each batch, you’ll refine your technique and get closer to that bakery-quality loaf you’re after.
Pro Tips For Making 1 Pound Loaf Of Bread
- Test Yeast First: I learned this the hard way—skip testing your yeast, and you might end up with a dense brick instead of a fluffy loaf. Sprinkle that packet of active dry yeast into a small bowl with ¼ cup warm water and ½ teaspoon sugar, then wait 5–10 minutes for frothy bubbles. If nothing happens, your yeast is dead, and it’s time to start over.
- Mix Water Last: Adding the water first turns your dough into a sticky mess that’s a nightmare to handle. Instead, whisk the dry ingredients—flour, yeast, sugar, and salt—first, then pour in the warm water gradually while mixing. This keeps the dough manageable and prevents overworking it before it’s ready.
- Knead Just Enough: Over-kneading tightens gluten and makes your bread tough. Stop when the dough springs back slowly after pressing it (about 5–7 minutes by hand). If it’s still sticky or gummy, let it rest for 10 minutes before kneading again—this trick saves time and effort.
- Shape Tightly, Rest Longer: A loosely shaped loaf collapses during baking. Press the edges inward firmly to create surface tension, then let it rise in a greased bowl for 1–1½ hours (until nearly doubled). The extra rest time ensures even oven expansion and a better crumb—no more sad, flat loaves.
Flavor customization for these flavors
Herb-Infused Variations
Add 1 tbsp fresh rosemary or thyme directly to the dough for a fragrant, Mediterranean-inspired loaf. Finely chop the herbs and mix them into the flour before adding wet ingredients.
For a stronger flavor, use 2 tbsp dried herbs instead. I find rosemary pairs beautifully with this dough, giving it a piney aroma that complements the crust perfectly. 🌿
Seeded or Grain Boosts
Swap 1 cup of the all-purpose flour for whole grains like wheat berries, rye, or spelt for added texture and nutrition. For seeds, add 2 tbsp sunflower or sesame seeds to the dough before shaping.
Toast the seeds in a dry pan for 2-3 minutes first to enhance their flavor. The seeds will create delightful crunch contrasts in every bite.
Sweet Twists
Add 2 tbsp honey or maple syrup to the dough for a subtle sweetness that caramelizes beautifully during baking. I recommend using local wildflower honey for the best flavor.
For a more pronounced sweetness, sprinkle 1 tbsp cinnamon into the flour before mixing. This works wonderfully for breakfast loaves or dessert sandwiches.
Savory Add-Ins
Mix in ½ cup finely chopped caramelized onions or ¼ cup grated Parmesan cheese for a savory depth. The onions should be cooked until golden and sweet, adding a rich umami flavor.
For cheese lovers, add the Parmesan during the final kneading stage. Both additions elevate the bread’s complexity while maintaining that perfect texture.
Crust Enhancements
Create a garlic-infused crust by brushing the baked loaf with melted butter mixed with 1 minced garlic clove and a pinch of salt. For extra crunch, sprinkle coarse sea salt or smoked paprika on the dough before baking.
The salt enhances the crust’s development, while the paprika adds a subtle smokiness that pairs well with soups and stews.
Gluten-Free Adaptations
Replace 1 cup of all-purpose flour with a 1:1 gluten-free baking flour blend (like Bob’s Red Mill) for a lighter texture. Add ½ tsp xanthan gum to improve elasticity. Keep in mind that gluten-free dough behaves differently—it may require 10-15 extra minutes of kneading and a slightly longer proofing time.
The result will still be delicious, just with a denser crumb.
Nutrition facts
Frequently asked questions
Why does my Dutch oven bread turn out dense instead of light?
Dense bread usually means underdeveloped gluten or improper proofing. Make sure you knead for a full 8-10 minutes until the dough springs back slowly when poked. Also, check your yeast—it should create bubbles within 5-10 minutes when mixed with warm water. If your kitchen is cold, proof the dough in a warm spot (like near the oven with the light on) for better rise.
Can I make this recipe without a Dutch oven?
Use a heavy baking sheet or cast iron skillet instead. For extra steam, place a tray of boiling water in the oven below the baking sheet. The crust won’t be as crackly, but you’ll still get a good rise. Another trick is to spray the dough with water before baking for a similar effect to the Dutch oven’s steam trap.
How do I know when the dough is fully proofed?
Fully proofed dough should double in size and feel light when pressed gently. Press two fingers into the dough—if it springs back immediately and leaves a clear indentation, it’s ready. For visual confirmation, mark the bowl with a pen before proofing. The dough should reach the mark after 1-2 hours in a warm environment.
What’s the best way to store homemade bread?
Store your loaf in a paper bag or bread box at room temperature for 2-3 days to maintain freshness. For longer storage, wrap tightly in foil and freeze for up to 3 months. To reheat, warm at 300°F for 10 minutes wrapped in foil—this revives the crust without drying it out. Avoid plastic bags as they trap moisture and make the bread soggy.
Can I make this recipe with whole wheat flour?
Yes, but expect a denser texture. Replace 1 cup of all-purpose flour with whole wheat flour, and add 1-2 extra tablespoons of water since whole wheat absorbs more moisture. For better rise, let the dough proof for 30-60 minutes longer than usual. The flavor will be richer, but the crumb will be heavier—great for sandwiches where structure matters more than lightness.

- 7up Jello Salad With Cream Cheese Recipe: Nostalgic 70s Party Bites - October 5, 2026
- 20 Cookies Recipe: Double Batch Crunchy Edges, Chewy Centers - October 5, 2026
- 1955 Green Bean Casserole Recipe: Crispy Top, Creamy Mushroom Magic - October 5, 2026