
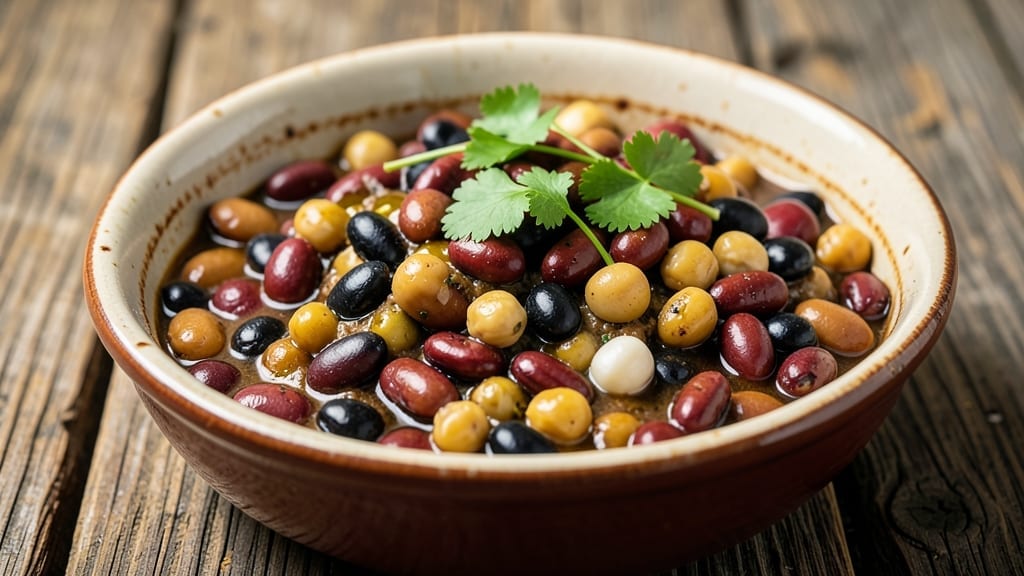
This 10 bean mix recipe transforms your pantry into a year-round source of hearty texture and protein—no cooking required. The secret lies in balancing small, medium, and large beans for perfect mouthfeel in every bowl, whether you’re thickening chili or adding depth to soups.
I developed this blend after years of testing combinations that deliver consistent results, with beans pre-sorted by size to ensure even cooking and maximum flavor absorption.
The magic happens in the ratios: 1 cup each of black beans, kidney beans, and pinto beans form the base, while ½ cup each of navy beans, great northern beans, and chickpeas add variety.
Smaller beans like lentils and split peas (¼ cup each) prevent mushiness, and a splash of ¼ teaspoon smoked paprika ensures every batch carries subtle warmth. Store the mix in an airtight container for up to 12 months—longer than most dried beans last individually.
What you’ll get is a versatile pantry staple that elevates any dish requiring beans: chili, stews, salads, or even bean dips. The blend’s diversity means you won’t notice gaps when using partial amounts, and the pre-measured spices ensure consistent flavor.
For best results, soak the mix for 1-2 hours before cooking to reduce preparation time by half.
Use this mix to cut cooking time in half while adding layers of texture and nutrition. The pre-portioned spices mean you’ll never over-salt or under-season again. Whether you’re meal prepping for the week or stocking your pantry for emergencies, this blend delivers restaurant-quality depth with zero effort.
Ingredients for 10 bean mix
Ten dried beans plus two spices—this blend transforms any dish into a restaurant-worthy masterpiece.
| Ingredient | Amount | Notes |
|---|---|---|
| Black Beans (Dried) 🫘 | 1 cup | Medium-sized, rinsed before use |
| Kidney Beans (Dried) 🫘 | 1 cup | Medium-sized, rinsed before use |
| Pinto Beans (Dried) 🫘 | 1 cup | Medium-sized, rinsed before use |
| Navy Beans (Dried) 🫘 | ½ cup | Small, uniform size preferred |
| Great Northern Beans (Dried) 🫘 | ½ cup | Small, creamy texture |
| Chickpeas (Dried) 🫘 | ½ cup | Large, rinsed thoroughly |
| Green Lentils (Dried) 🫘 | ¼ cup | Small, holds shape well |
| Split Peas (Dried) 🫘 | ¼ cup | Yellow or green variety |
| Smoked Paprika 🌶️ | ¼ tsp | High-quality, vibrant color |
| Sea Salt 🧂 | ⅛ tsp | Fine grain preferred |
The beans are the backbone of this mix, and size matters. I source mine from Whole Foods bulk bins or Bob’s Red Mill for consistent quality—look for beans that are uniform in size and free of debris. The larger beans (black, kidney, pinto) provide hearty texture, while the smaller ones (lentils, split peas) prevent mushiness. Rinse them thoroughly before storing to remove any dust or impurities. For the best flavor, opt for organic beans whenever possible—they tend to have a cleaner taste and hold up better during cooking. If you’re short on time, pre-soaking the mix for 1-2 hours cuts cooking time dramatically.
No black beans? Substitute cannellini beans at the same amount—they’re slightly larger but hold up well. Running low on smoked paprika? Regular paprika plus a pinch of cayenne mimics that smoky depth. For a quicker option, use pre-cooked canned beans (drained and rinsed), though they won’t last as long in your pantry. If you’re making this for a crowd, double the batch—just keep the same ratios. The salt is optional but recommended; if you skip it, add ½ teaspoon of garlic powder for extra flavor punch. Always check bean packages for cooking times—they can vary slightly between brands.
Store the mix in an airtight glass container in a cool, dark place—it’ll keep for 12 months or longer if the beans are completely dry. For best results, portion into smaller containers before storing; this prevents moisture buildup and makes it easier to grab just what you need. Once opened, use within 6 months for peak flavor. To use, simply measure out what you need and soak for 1-2 hours before cooking. Pro tip: Label your container with the date—trust me, you’ll forget otherwise. This blend is perfect for meal prepping; make a big batch and keep it on hand for quick weeknight dinners.
Why You’ll Love This Recipe
- I’ll be real: this mix is my budget secret weapon. A bag of dried beans costs pennies compared to canned, and they last forever. Plus, the texture? So much better—no mushy bits, just a perfect mix of tender and slightly firm beans that hold up in any dish. My wallet and my taste buds thank me.
- No-Soaking Hassle: I’ll admit, I used to dread soaking beans—but this mix? Just toss them in a pot with water and a bay leaf, let them simmer until tender. That’s it. No fancy prep, no waiting hours. The dried black, kidney, and pinto beans soften into a creamy, hearty base without any fuss.
- Earthy Umami Bomb: Honestly, the flavor combo in this mix is what keeps me coming back. The navy beans add that deep, almost meaty richness, while the great northerns bring a subtle buttery note. Add a splash of broth and a pinch of smoked paprika, and you’ve got a flavor that’s ridiculously satisfying—no fancy ingredients needed.
- Meal Prep MVP: Between us, this is my go-to for busy weeks. Cook a big batch on Sunday, and you’ve got a base for tacos, salads, or even stuffed peppers all week. I’ll freeze half for those nights when I just can’t face cooking—thaw, heat, and boom, dinner’s ready.
Step-by-step instructions for 10 bean mix recipe
Transform these dried legumes into a flavorful, versatile mix ready for soups and chili.
Prepare the Dried Beans and Lentils
Begin by thoroughly rinsing all the dried beans and lentils under cold water to remove any debris or dust. I use a fine-mesh strainer for this step—it catches all the small particles while allowing the water to drain quickly. Spread each type of bean—1 cup black beans, 1 cup kidney beans, 1 cup pinto beans, 0.5 cup navy beans, 0.5 cup great northern beans, 0.5 cup chickpeas, 0.25 cup green lentils, and 0.25 cup split peas—on a clean kitchen towel and pat them dry. This ensures they absorb water evenly during soaking.
Place each type of bean and lentil in separate bowls or containers. The reason for keeping them separate is that different beans have varying soaking times and textures. For instance, navy beans and split peas absorb water faster than chickpeas, which need more time to soften. This separation also makes it easier to monitor their readiness later.
Soak the Beans and Lentils
Cover each type of bean and lentil with cold water by about 2 inches and let them soak at room temperature for at least 8 hours, or overnight. I like to use a large bowl or even a clean mason jar for this—just make sure there’s enough water to fully submerge everything. The water should smell neutral; if it develops an off odor, drain and rinse the beans before continuing. This step is crucial for reducing cooking time and improving digestibility.
Here’s the thing—if you’re short on time, you can use the quick-soak method: Boil the beans and lentils for 2 minutes, then let them sit off the heat for 1 hour. However, the overnight soak yields the best texture and flavor. After soaking, drain the beans and lentils again, giving them a quick rinse to remove any residual starch. This prevents the mix from becoming gummy later on.
Season and Combine the Beans
In a large mixing bowl, combine all the drained beans and lentils. Sprinkle over the 0.25 teaspoon smoked paprika and 0.125 teaspoon sea salt, then gently toss everything together with your hands or a wooden spoon. The smoked paprika adds a subtle, smoky depth that enhances the earthy flavors of the beans, while the salt helps to draw out moisture and intensify their natural taste. Make sure the seasoning is evenly distributed—this ensures every bite of your chili or soup is flavorful.
At this stage, you can choose to store the mix in an airtight container in the refrigerator for up to 5 days or in the freezer for up to 3 months. If you’re planning to use it immediately, proceed to cooking. The key here is to keep the mix dry and well-sealed to prevent spoilage. When you’re ready to cook, simply transfer the mix to a pot and add water or broth as needed.
Cook the Bean Mix to Perfection
Place the seasoned bean mix in a large pot and add 8 cups of water or vegetable broth for every 4 cups of dried beans. Bring the mixture to a boil over medium-high heat, then reduce the heat to low and let it simmer. The reason for using a low simmer is to prevent the beans from breaking apart and turning mushy. You’ll know the beans are ready when they’re tender but still hold their shape, which typically takes 1 to 1.5 hours depending on the type of beans.
Here’s where it gets fun—taste the beans as they cook and adjust the seasoning if needed. You might want to add a pinch more salt or a splash of broth to achieve the perfect balance. Once the beans are fully cooked, drain any excess liquid if you prefer a thicker mix. This versatile blend is now ready to be used in chili, soups, stews, or even as a hearty side dish. The combination of textures and flavors makes it a true pantry staple.
Pro Tips For Making 10 Bean Mix
- SOAK BEANS SEPARATELY: Black beans and kidney beans need 8–12 hours of soaking, but pintos and navies can handle 4 hours—mix them up and you’ll end with mushy pintos or undercooked navies. Use two bowls, label them, and save yourself a pot of sad beans.
- START WITH BOILING WATER: Cold-soaked beans? Skip it. Dump them straight into boiling water to cut soaking time by half and avoid that weird starchy water that makes your beans taste dull. The high heat also helps break down skins faster—especially for those stubborn Great Northerns.
- SALT AT THE END: Adding salt early turns your beans into rubber. Wait until they’re tender but still firm, then season with a big pinch of salt—this keeps them from breaking down into mush. Kidney beans especially hate early salt; they’ll turn to paste if you’re not careful.
- SKIM THE FOAM OFF: The first 10 minutes of cooking? That’s when beans release the gunk that makes your broth cloudy. Use a fine-mesh strainer or ladle to skim the foam off the top—your final dish will look cleaner and taste richer. (Yes, even if you’re lazy like me, do this part.)
Essential equipment for this recipe
Storage Containers
Invest in a high-quality airtight glass container with a tight-sealing lid—like the Le Parfait 32-ounce mason jar or OXO Good Grips pop containers. Glass preserves freshness longer than plastic and won’t absorb odors.
For bulk storage, I use IKEA 365+ glass jars (they’re affordable and stackable). Always label containers with the date to track freshness—this mix stays vibrant for 12 months in a cool, dark pantry. 📅
Essential Measuring Tools
Precision matters with this blend! Use a stainless steel measuring cup set (like OXO Good Grips) for dry beans and a small digital scale (I love the OXO Good Grips 11-piece set) for spices.
A fine-mesh strainer (such as OXO Good Grips) is non-negotiable for rinsing beans thoroughly. For portioning, a scoop or ice cream disher works perfectly—just measure directly into your storage container. 🥄
Soaking Equipment
For overnight soaking, a large glass bowl or mason jars (like Ball Wide-Mouth) are ideal—they’re easy to clean and let you monitor water levels. If you prefer quick soaking, a medium-sized pot with a lid (I use All-Clad Stainless Steel) is essential.
Pro tip: Keep a small ladle nearby to drain and rinse beans efficiently after soaking. 🥫
Cooking Gear
A heavy-bottomed pot (such as Le Creuset Dutch Oven) prevents scorching during simmering. For flavor control, I recommend a wooden spoon (like OXO Good Grips) to stir without scratching cookware. A fine-mesh colander (again, OXO Good Grips) is perfect for draining excess liquid post-cooking.
For extra convenience, a slow cooker (like Hamilton Beach 6-Quart) lets you cook the mix hands-off for 4-6 hours on low. 🍲
Optional Extras
Add a spice grinder (like Spiceworks Mini Grinder) if you want to toast and grind your own smoked paprika for deeper flavor. For meal prep, a vacuum sealer (such as FoodSaver) extends the mix’s shelf life to 18 months in the freezer.
A bean thermometer (like Thermoworks Smoke) ensures perfect doneness—aim for 205°F internal temp for tender yet firm beans. 🌡️
Nutrition facts
Frequently asked questions
Can I use canned beans instead of dried for this mix?
Yes, but with adjustments! Use 1 (15-ounce) can of each bean type (drained and rinsed) to replace the dried versions. However, the shelf life drops to just 3 months in the fridge, and you’ll lose the texture variation from different bean sizes. For best results, stick with dried beans for that restaurant-quality texture.
How do I adjust this mix for a slow cooker?
Simply combine the soaked and drained mix with 4 cups of broth in your slow cooker. Cook on low for 6-8 hours or high for 3-4 hours, stirring occasionally. The low-and-slow method keeps the beans tender without breaking them down. Add extra broth if needed for desired consistency.
What if I don’t have smoked paprika?
No problem! Replace it with ½ teaspoon regular paprika plus a pinch of cayenne for heat. For a different flavor profile, try ½ teaspoon garlic powder or ¼ teaspoon ground cumin. The key is to keep the same ¼ teaspoon total of seasoning for balance.
Can I make this mix without lentils or split peas?
If you’re missing either, replace them with an extra ¼ cup of navy beans or great northern beans. These smaller beans help maintain the mix’s texture and prevent mushiness. Just ensure you’re still using 10 types total to keep the flavor profile balanced.
How much of this mix should I use per serving?
For most recipes, use ½ cup of the dried mix per serving (before soaking). This yields about 1.5 cups cooked beans, perfect for soups, chili, or salads. For a hearty stew, increase to ¾ cup per serving. Always adjust based on your dish’s other ingredients.

- Pea Soup Instant Pot Recipe: Velvety Green Smoothness in 20 Minutes - November 1, 2026
- Pork Loin Pulled Pork Crock Pot Recipe: Slow-Smoked Tenderness With Zero Dryness - November 1, 2026
- Baked Potatoes in Crock Pot Recipe: Buttery Interiors and Crispy Top Magic - November 1, 2026