
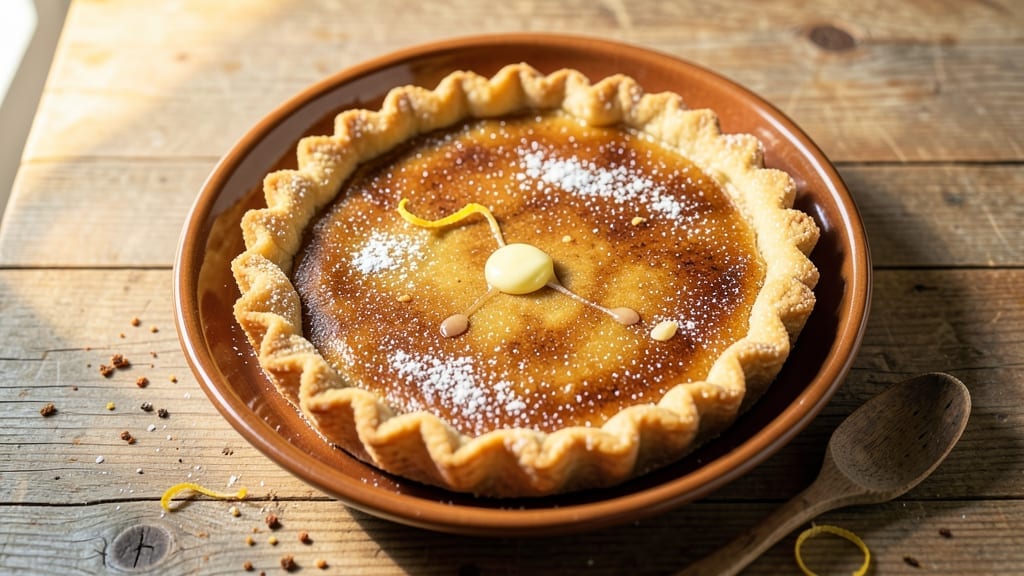
A 10-inch butter pie crust that shatters with the first bite is the foundation of every legendary dessert—think of it as the difference between a good pie and a showstopper.
The secret lies in cold butter cut into flour like tiny snowflakes, then folded and chilled to create those signature flaky layers. I’ve perfected this technique after years of trial and error, and once you try it, you’ll never go back to store-bought crusts.
The process is simpler than it sounds: start with cold butter and ice-cold water to prevent melting, then work quickly to avoid warming the dough. The key is cutting the butter into the flour until it resembles coarse cornmeal—this ensures maximum surface area for those melt-in-your-mouth layers.
Chill the dough between folds to maintain its structure, and handle it as little as possible to avoid gluten development.
What you’ll end up with is a golden, crisp crust that’s tender yet sturdy enough to hold even the heaviest fillings. The texture is so delicate it practically dissolves on your tongue, while the edges remain beautifully flaky.
This crust works perfectly for classic apple pie, rich pumpkin pie, or even savory galettes—it’s the kind of foundation that elevates any dessert to restaurant-quality.
Once you’ve mastered the crust, you can experiment with fillings, but the real magic is in the technique. Let’s get started on creating layers that will impress even the most discerning pie lovers.
Ingredients for 10 inch butter pie crust
Cold butter, ice water, and patience—these are the ingredients that create restaurant-quality pie crust.
| Ingredient | Amount | Notes |
|---|---|---|
| All-Purpose Flour 🌾 | 2 ½ cups | Sifted for light texture |
| Unsalted Butter 🧈 | 1 cup | Cold, cubed into 1/2-inch pieces |
| Ice Water 💧 | ½ cup | Chilled to prevent butter melting |
| Diamond Crystal Kosher Salt 🧂 | ½ tsp | Fine grain preferred |
| Granulated Sugar 🍚 | 1 tbsp | For subtle sweetness |
| Vanilla Extract 🌸 | ½ tsp | Pure vanilla for aroma |
| Ice Cubes ❄️ | 1 cup | For extra coldness |
The butter is non-negotiable here. European-style unsalted butter has the highest fat content (82-86%), which is key for flakiness. Plugrá or Land O’Lakes European Style are my go-tos, but any good-quality brand works. Keep it frozen until you’re ready to cut it into the flour—this ensures it stays cold and creates those perfect layers. The flour should be ice-cold too, so chill your mixing bowl in the freezer for 10 minutes before starting. I always use King Arthur or Gold Medal flour because they have a higher protein content, which helps with structure while still staying tender.
No ice water? Cold vodka or gin works in a pinch—it’s strong enough to keep the butter cold without adding flavor. Running out of vanilla? Almond extract at half the amount gives a similar aromatic boost. The sugar is optional, but it adds a subtle sweetness that balances savory fillings beautifully. If you’re worried about the crust being too rich, reduce the butter to ¾ cup—it’ll still be flaky, just slightly less decadent. For a gluten-free version, swap the flour for a 1:1 gluten-free blend, but add an extra 1 tbsp of cold water to compensate for the lack of gluten structure.
This dough is delicate. Wrap it tightly in plastic wrap and refrigerate for at least 2 hours—overnight is even better. For the best results, let it rest 30 minutes at room temperature before rolling. If you need to freeze it, wrap the dough in plastic and freeze for up to 3 months. Thaw in the fridge overnight before using. The crust keeps well in the fridge for 3 days, but it’s best used fresh for that perfect shatter.
Why You’ll Love This Recipe
- Foolproof First Try: I’ve made this crust more times than I can count, and honestly? It never fails. Cold butter cut into flour with ice water—no food processor, no fuss—just a fork and patience. That first blind-baked round comes out golden and sturdy every single time, even when my hands are sticky and the kitchen’s a mess.
- Butter Love: The moment that cold butter melts into the flour, you know this crust is going to be something special. Rich, flaky layers that don’t scream “homemade” but taste like you slaved over them. (Between us, it’s the kosher salt and sugar that make the difference—don’t skip the pinch of each.)
- Pie Party Ready: This crust is my go-to for holidays, potlucks, or when I’m craving dessert but don’t want to bake from scratch. Use it for sweet pies, savory tartlets, or even a buttery quiche—just scale the size up or down. My daughter’s friends still ask for seconds, and they’re not even dessert people.
- Budget Buster: Four ingredients, one crust. That’s it. No weird specialty flours or pricey shortcuts—just the basics you already have. And because it keeps well in the fridge, I make two at a time. Less waste, more pie for less money. (Yes, even on a Tuesday night.)
Step-by-step instructions for a 10-Inch butter pie crust
Here’s how to create a restaurant-quality crust with layers so delicate they’ll shatter at the first touch.
Combine Dry Ingredients for Perfect Texture
In a large mixing bowl, whisk together the 2.5 cups all-purpose flour, 0.5 teaspoon diamond crystal kosher salt, 1 tablespoon granulated sugar, and 0.5 teaspoon vanilla extract. The sugar and vanilla might seem unusual, but they add subtle sweetness and aroma that enhances the butter flavor. I like to use a whisk for this step to break up any flour clumps and ensure even distribution of the dry ingredients.
Here’s the thing—sifting the flour isn’t strictly necessary, but I find it creates a lighter, more tender crust. If you don’t have a sifter, just whisk vigorously for about 30 seconds to aerate the flour. The goal is to create as much surface area as possible so the butter can coat every particle when we mix it in later.
Cut in the Cold Butter for Maximum Flakiness
Add the 1 cup unsalted butter, cut into ½-inch cubes, to the flour mixture. Using a pastry cutter or your fingers, work the butter into the flour until you reach a crumbly texture with pea-sized butter pieces remaining. This is where the magic happens—those butter pieces will melt during baking and create the flaky layers.
I always use my fingers for this step because it gives me better control. Work quickly but gently, pressing the butter pieces into the flour without actually melting them. You want to see small butter pieces still visible when you’re done. If the mixture starts to look like wet sand, it means the butter is getting too warm—return it to the refrigerator for 5 minutes to firm up before continuing.
Add Ice Water Gradually for Structure
In a separate small bowl, combine the 0.5 cup ice water and 1 cup ice cubes. The ice is crucial—it keeps the water cold and prevents the butter from melting prematurely. Add the ice water mixture 1 tablespoon at a time to the flour-butter mixture, mixing gently with a fork or your fingers after each addition.
You’ll know you’ve added enough when the dough just comes together when pressed. It should hold when you squeeze a small amount, but not be sticky. If it’s too dry, add more ice water ½ teaspoon at a time. If it’s too wet, sprinkle in a little more flour. This dough should be cool to the touch—if it feels warm, it’s too soft and will develop gluten instead of flaky layers.
Form and Chill the Dough for Perfect Handling
Turn the dough onto a lightly floured surface and gently shape it into a disk about 1 inch thick. Wrap it tightly in plastic wrap and refrigerate for at least 2 hours, or up to 48 hours. This long chill time is essential—it allows the gluten to relax and the butter to firm up completely, which prevents shrinking and ensures those perfect flaky layers when baked.
I know it’s tempting to skip the chilling, but don’t. The dough will be much easier to roll out after chilling, and you’ll get that professional, shatter-prone texture that separates this crust from the ordinary. If you’re in a hurry, you can chill it in the freezer for 30 minutes, but the refrigerator method gives the best results.
Roll and Transfer with Confidence
Remove the dough from the refrigerator and let it sit at room temperature for 5-10 minutes before rolling. This brief warm-up makes it more pliable. On a lightly floured surface, roll the dough from the center outward, rotating it occasionally, until it reaches a 10-inch diameter and is about ⅛-inch thick. The edges should be slightly thicker than the center—this prevents shrinking during baking.
Carefully transfer the rolled dough to your pie dish, gently easing it in without stretching it. Trim any uneven edges with a sharp knife, leaving about ½-inch overhang. The overhang helps prevent shrinking during baking. If you notice any cracks or tears, simply press them together gently—they’ll heal during the blind baking process.
Pro Tips For Making 10 Inch Butter Pie Crust
- Chill the Butter First: Take your unsalted butter straight from the fridge—cold butter prevents the dough from turning greasy. I learned this the hard way after a crust that looked more like a sad, oily blob than anything edible. Cut it into ½-inch cubes for even distribution.
- Cut in Butter Until It’s Pea-Sized: When mixing the flour and butter, stop when the mixture resembles coarse crumbs with pea-sized butter pieces—no bigger, no smaller. Larger chunks melt unevenly, and you’ll end up with a tough crust. Use a pastry cutter or your fingers (yes, really) for control.
- Skip the Overmixing: Once the dough comes together, handle it just enough to form a loose ball—overworking it develops gluten, and your crust will turn out dense. My grandmother used to say, “Less is more,” and she was right: a few gentle folds are all you need.
- Use Ice Water Sparingly: Add ice water one tablespoon at a time—too much makes the dough sticky and hard to roll. If it’s too wet, sprinkle a little more flour (but not too much, or your crust will lose flavor). The dough should hold together when pressed but not stick to your hands.
Common mistakes when making great 10 inch butter pie crust
Overworking the Dough
One of the biggest mistakes is handling the dough too much, which develops gluten and creates a tough crust instead of flaky layers. Every time you knead or press the dough, you’re building gluten strands that will make your crust chewy rather than tender.
I’ve learned the hard way—once I accidentally kneaded the dough for a full minute, and the result was a sad, dense pie bottom that could have been used as a hockey puck. 🏒
To avoid this, work quickly and gently. Use your fingers to press the butter into the flour, and only mix until the dough just comes together. If it feels sticky, add a tiny bit more flour, but don’t overmix.
Remember, your goal is to create a crumbly texture with visible butter pieces—not a smooth, elastic dough.
Skipping the Chill Time
Another common mistake is rushing the chilling process. Many home bakers think they can skip the 2-hour refrigeration or use the dough immediately after mixing. Big mistake! The chill time is what allows the butter to firm up and the gluten to relax, giving you that perfect shatter when baked.
I once made a pie crust without chilling it properly, and it shrunk dramatically in the oven, leaving a messy, uneven bottom.
If you’re short on time, at least chill the dough for 30 minutes in the freezer, but the refrigerator method is always better. The dough should be cold to the touch when you roll it out—if it’s warm, return it to the fridge for another 15 minutes.
Patience here pays off with a golden, crisp crust.
Using Warm Butter
Warm butter is the enemy of flaky pie crust. If your butter starts to soften or melt while you’re working with it, you’ll lose those crucial layers that create the flaky texture.
I’ve seen people pull butter straight from the fridge and start cutting it into flour without letting it sit at room temperature first—this is a recipe for disaster. The butter needs to be cold enough to stay firm but not rock-hard, so it cuts into the flour cleanly.
To test if your butter is at the right temperature, press a piece between your fingers. It should hold its shape but still be pliable enough to cut easily. If it leaves a greasy smear, it’s too warm.
If it’s too hard to cut, return it to the freezer for 5 minutes. Always keep your mixing bowl and utensils cold by chilling them in the freezer before starting.
Uneven Rolling
Rolling the dough unevenly is another mistake that leads to a less-than-perfect crust. If you roll too hard in one spot or roll from the outside in, the dough can thin out unevenly, causing some areas to cook faster than others.
This often results in a crust that’s too thick in some places and too thin (or even burnt) in others. I’ve seen people roll their dough in a circular motion without rotating it, which creates a thicker center and thinner edges.
To avoid this, roll the dough from the center outward, rotating it occasionally to maintain an even thickness. Aim for about ⅛-inch thickness throughout.
If you notice the dough sticking to the rolling pin or surface, sprinkle a little more flour, but don’t over-flour it or the crust will become tough. A lightly floured surface is all you need.
Ignoring the Overhang
Many bakers forget to leave an overhang when transferring the dough to the pie dish, which can cause the crust to shrink and pull away from the edges during baking.
I’ve seen this happen more times than I can count—especially with beginners who trim the dough too close to the edge. That ½-inch overhang is there for a reason: it helps the crust expand evenly and prevents it from shrinking away from the filling.
When you transfer the dough to your pie dish, gently ease it in without stretching it. If you notice any cracks or tears, simply press them together—they’ll heal during the blind baking process.
And remember, the edges should be slightly thicker than the center. This not only helps with expansion but also creates that beautiful, flaky edge that everyone loves.
Not Blind Baking Properly
Finally, skipping or doing a poor job of blind baking is a common mistake that leads to a soggy crust. Many people assume the crust will bake through with the filling, but that’s not the case—especially with wet fillings like fruit or custard.
I’ve made this mistake with apple pie, and the result was a crust that was still doughy in the middle while the edges were overcooked and burnt.
To avoid this, always blind bake your crust for 15-20 minutes at 375°F before adding your filling. Use pie weights or dried beans to keep the crust from puffing up, and make sure to prick the bottom with a fork to prevent air pockets.
This step ensures your crust is fully baked and crisp before the filling goes in, so you get that perfect shatter with every bite. 🥧
Nutrition facts
Frequently asked questions
Why does this recipe use ice water instead of regular water?
The ice water keeps the butter cold and prevents it from melting too quickly, which is crucial for creating those signature flaky layers. Cold butter creates steam during baking that lifts the layers, while warm butter would just dissolve and make the crust tough. Think of it like building tiny pockets of air that puff up beautifully when baked!
Can I make this crust ahead of time?
This crust actually tastes better when made a day ahead. Wrap it tightly in plastic wrap and refrigerate for up to 48 hours before using. For longer storage, freeze the wrapped dough for up to 3 months. Just thaw it in the fridge overnight before rolling.
What’s the best way to roll out the dough evenly?
Roll from the center outward, rotating the dough occasionally to maintain even thickness. Aim for about ⅛-inch thickness throughout. Keep your rolling surface and pin lightly floured but not over-floured, or the crust will become tough. A marble rolling surface works best for even pressure.
Why does my crust sometimes shrink during baking?
This usually happens when the dough isn’t chilled enough before rolling or if it warms up during handling. Always keep your dough cold and work quickly. The ½-inch overhang when transferring to the pie dish helps prevent shrinking. If it does shrink slightly, just trim the edges after baking.
Can I substitute butter with shortening?
While you can use shortening, you’ll lose that rich buttery flavor and slightly less flakiness. For the best results, stick with butter. If you’re concerned about richness, reduce the butter to ¾ cup and add ¼ cup shortening for a lighter texture, but the flavor won’t be as authentic.

- Pork Loin Pulled Pork Crock Pot Recipe: Slow-Smoked Tenderness With Zero Dryness - November 1, 2026
- Baked Potatoes in Crock Pot Recipe: Buttery Interiors and Crispy Top Magic - November 1, 2026
- Braised Beef Short Ribs Recipe: Crock Pot Fall-Off-Bone Magic in 6 Hours - November 1, 2026