
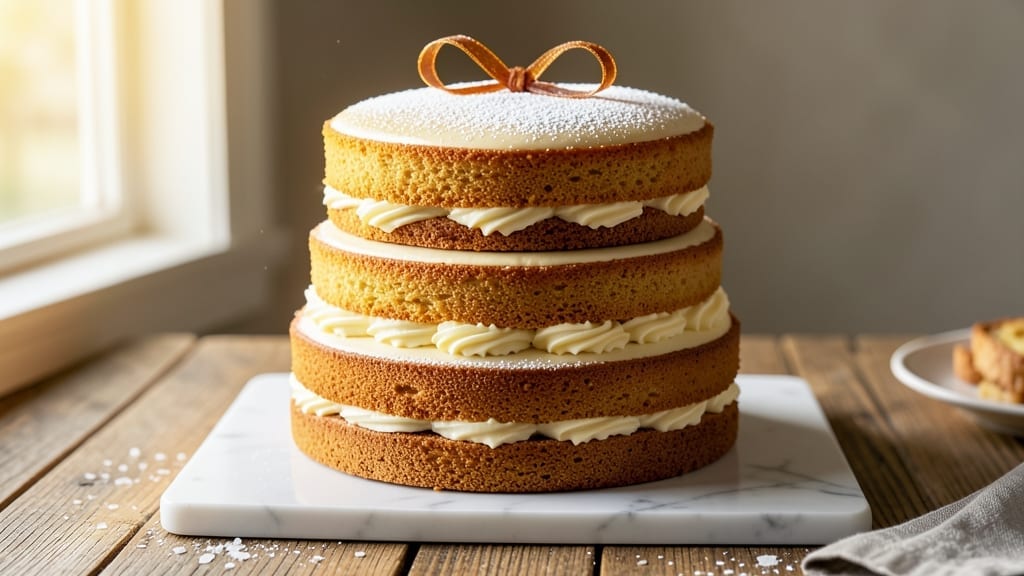
This 10-inch layer cake recipe delivers the perfect balance of rich chocolate and delicate vanilla layers, each moist and tender with a crisp crust—ideal for celebrations or special occasions.
The secret lies in precise measurements and gentle folding, ensuring each layer stays light and airy while the frosting creates a flawless finish. Whether you’re a beginner or seasoned baker, this method guarantees a showstopping cake that tastes as good as it looks.
The foundation of this cake is a foolproof vanilla sponge cake batter that bakes evenly in 10-inch pans, while the chocolate layer adds depth with a touch of cocoa powder and espresso for richness.
Baking times are carefully timed to 30-35 minutes at 350°F, ensuring no dry edges or undercooked centers. The layers are filled with a luscious vanilla buttercream, creating a harmonious blend of flavors in every bite.
What sets this recipe apart is the frosting technique—spread evenly between layers and smoothed over the top for a clean, professional look. The final touch? A dusting of powdered sugar or fresh berries for a touch of elegance.
This cake isn’t just visually stunning; it’s designed to impress with its perfect texture and balanced sweetness.
Ready to elevate your baking game? This recipe scales easily for larger gatherings, and you can customize the flavors—think raspberry jam filling or a salted caramel drizzle. Let’s get started on creating a cake that’s as delicious as it is beautiful.
Ingredients for 10 inch layer cake
Twelve ingredients for two perfect 10-inch layers—vanilla and chocolate harmony baked to perfection.
| Ingredient | Amount | Notes |
|---|---|---|
| All-Purpose Flour 🌾 | 3 cups | Sifted for lightness |
| Granulated Sugar 🍚 | 2 ¼ cups | Divided for layers |
| Unsalted Butter 🧈 | 1 ½ cups | Room temperature, full-fat |
| Large Eggs 🥚 | 6 whole | Room temperature preferred |
| Vanilla Extract 🌸 | 2 tsp | Pure extract, not imitation |
| Baking Powder 🧪 | 1 ½ tsp | Double-acting preferred |
| Salt 🧂 | ½ tsp | Fine sea salt |
| Milk 🥛 | 1 cup | Whole milk preferred |
| Unsweetened Cocoa Powder 🍫 | ½ cup | Natural or Dutch-process |
| Instant Espresso Powder ☕ | 1 tsp | For chocolate depth |
| Vanilla Buttercream Frosting 🍰 | 3 cups | Homemade recipe included |
| Powdered Sugar 🍚 | 1 cup | For dusting |
| Fresh Berries 🍓 | 1 cup | Optional garnish |
The flour and sugar are your cake’s backbone. King Arthur or Gold Medal flour bakes up lighter, but any all-purpose will work. For the sugar, Domino or C&H brands stay consistent, but avoid super-fine—it packs too tightly. Room-temperature butter is non-negotiable (the good stuff, not the pre-whipped tub kind). Land O’Lakes or Plugrah unsalted butter works best. Eggs should be at room temperature too—cold eggs cause dense layers. The vanilla extract matters here: Nielsen-Massey or McCormick pure extract adds real flavor, not artificial imitation. Pre-sift your dry ingredients to avoid lumps, and measure carefully—this cake relies on precision for that professional finish.
No vanilla extract? Vanilla bean paste at half the amount works beautifully, though it’s pricier. Running short on butter? Coconut oil or vegetable shortening can substitute, but texture will differ slightly. For the cocoa powder, Hershey’s Special Dark or Dutch-process brands add richness. The espresso powder is key for chocolate depth—Starbucks or Folgers instant works perfectly. Milk can be swapped for heavy cream or buttermilk for extra tenderness. The buttercream frosting needs to be made separately (recipe linked below), but you can use store-bought if you’re in a pinch—Betty Crocker or Wilton are reliable. Fresh berries for garnish? Strawberries or raspberries add color, but any fruit works.
Store your cake layers in an airtight container at room temperature for up to 2 days. For longer storage, freeze layers (unfrosted) for 1 month3 days in the fridge, so assemble the cake just before serving. To prevent soggy layers, place parchment paper between cake and frosting if storing ahead. The powdered sugar dusting should be done fresh—it adds that final elegant touch. This cake scales perfectly for larger gatherings, so double the recipe if needed, just be sure to use three 10-inch pans.
Why You’ll Love This Recipe
- No Mixer Needed: I swear by this recipe because it only requires a bowl and a whisk—no stand mixer, no electric beaters, just elbow grease for two minutes. The butter and sugar creamed by hand give that perfect ribbon stage without the fuss, and honestly? The cake turns out fluffier than anything I’ve made with a machine.
- Vanilla Butter Bliss: That rich, buttery vanilla flavor? It’s the kind of taste that makes people pause mid-slice. The eggs add structure while keeping it tender, and the vanilla extract—don’t skimp here—infuses every layer with warmth. It’s not just sweet; it’s comforting sweet, the kind that feels like a hug in dessert form.
- Party or Picnic: This cake is my go-to for birthdays, potlucks, or even a lazy Sunday picnic. The 10-inch size feeds a crowd but isn’t overwhelming for leftovers, and the layers let you get creative—add lemon glaze, chocolate ganache, or just dust it with powdered sugar. (Between us, I’ve served it at weddings and book club meetings. It’s that reliable.)
- Budget-Friendly Magic: All-purpose flour, butter, sugar, eggs—these are pantry staples that won’t break the bank. A single batch costs me less than $10 and yields enough for seconds (or thirds). Plus, the leftovers? They keep for days in the fridge, so I’m never scrambling to bake last-minute. Win.
Step-by-step instructions for stacking vanilla and chocolate layers
Master the art of layering with precision for a flawless 10-inch cake.
Prepare the Cake Pans and Batter
Preheat your oven to 350°F and grease three 10-inch round cake pans thoroughly with butter, then line the bottoms with parchment paper. I use a pastry brush for even coverage—this prevents sticking and ensures clean release. Place the pans on a baking sheet to catch any potential drips during baking.
In a large mixing bowl, combine the 3 cups all-purpose flour, 1.5 tsp baking powder, and 0.5 tsp salt. Sift this mixture directly into the bowl to aerate the flour and prevent lumps. Make a well in the center and add the 1.5 cups room temperature butter, 2.25 cups granulated sugar, and 6 whole eggs. Mix on medium speed until the batter is smooth and fully combined, about 2-3 minutes.
Divide the Batter for Vanilla and Chocolate Layers
Divide the batter evenly into three portions. For the chocolate layers, add 0.5 cup unsweetened cocoa powder and 1 tsp instant espresso powder to one portion, mixing until completely smooth. This creates two vanilla layers and one chocolate layer, giving the cake its signature contrast.
Next, add 2 tsp vanilla extract and 1 cup milk to each portion, mixing until fully incorporated. The batter should be thick but pourable—if it’s too thick, add an extra tablespoon of milk. Pour the vanilla batter into two of the prepared pans, filling each about two-thirds full. Tap the pans gently on the counter to release any air bubbles.
Bake the Layers to Perfect Doneness
Bake the vanilla layers first for 25-30 minutes or until a toothpick inserted into the center comes out clean. Rotate the pans halfway through baking for even browning. Remove the pans from the oven and let them cool in the pans for 10 minutes, then transfer the cakes to a wire rack to cool completely.
While the vanilla layers cool, pour the chocolate batter into the third pan and bake for 25-30 minutes as well, using the same toothpick test for doneness. The chocolate layer will look slightly darker but should still be moist and fudgy in the center. Let it cool completely before assembling the cake to prevent soggy layers.
Level and Frost the Cake Layers
Once all layers are completely cool, use a serrated knife to trim the tops of the cakes to create even surfaces. Place a layer on a cake stand or plate and spread 1 cup vanilla buttercream frosting evenly over the top. Repeat with the second vanilla layer, adding another 1 cup frosting before placing the chocolate layer on top. Spread the remaining 1 cup frosting over the chocolate layer.
Chill the assembled cake in the refrigerator for 30 minutes to allow the frosting to set slightly before decorating. This step is crucial—it prevents the frosting from sliding off when you add the final touches. Dust the top and sides with 1 cup powdered sugar using a fine-mesh sieve for an elegant finish.
Garnish and Serve
Arrange the 1 cup fresh berries on top of the cake in a circular pattern or scatter them randomly for a natural look. The berries add a pop of color and freshness that complements the rich flavors of the cake. Let the cake sit at room temperature for 10 minutes before slicing to allow the frosting to firm up slightly.
Slice into 12 even portions using a sharp, hot knife for clean cuts. The contrast of vanilla and chocolate layers will be stunning, and the berries will add a refreshing contrast to every bite. Serve immediately for the best texture and flavor combination.
Pro Tips For Making 10 Inch Layer Cake
- Melt Butter Slowly: I learned this the hard way—dumping cold butter into hot sugar makes a greasy mess that won’t dissolve properly. Use a double boiler or microwave in 20-second bursts, stirring between each, until the butter melts completely and the mixture turns smooth and glossy. That’s the only way to get even distribution in your batter.
- Sift Dry Ingredients Twice: Flour clumps are the enemy of tender layers. Sift the flour and sugar together before adding wet ingredients, then sift again after mixing—yes, it’s extra work, but it guarantees no lumps in your batter. (Your future self will notice the difference in texture.)
- Test Doneness with a Toothpick: The cake will look done before it actually is. Insert a toothpick into the center of the middle layer—if it comes out clean (with a few moist crumbs), it’s ready. Pull it out too soon, and your layers will collapse under filling.
- Use Room-Temp Eggs: Cold eggs create air pockets that deflate during baking, leading to dense layers. Take eggs out of the fridge 30 minutes before using—just enough time to warm them to room temperature. (No, don’t microwave them. Just… don’t.)
Storing and reheating your 10 inch layer cake
Room-Temp Storage
Store your fully assembled cake at room temperature in an airtight container for up to 2 days. I like using clear plastic cake carriers with locking lids—they keep the cake protected while showing off your hard work.
Place a sheet of parchment paper between layers if you’re storing it ahead of frosting to prevent sogginess. Keep it away from direct sunlight or heat sources, which can cause the frosting to melt.
If you’ve already sliced the cake, store individual portions in single-serving containers with tight seals. This prevents the layers from drying out and keeps the frosting from becoming grainy. For extra freshness, place a damp paper towel in the container to maintain moisture. 💛
Fridge Preservation
For longer storage, refrigerate the unfrosted layers (wrapped tightly in plastic wrap) for up to 3 days. The frosting should be made fresh and added just before serving.
If you must refrigerate the fully frosted cake, cover it completely with plastic wrap and store for no more than 24 hours—the cold can make the frosting too firm and affect texture.
When ready to serve, let the cake sit at room temperature for 30-45 minutes to bring the frosting back to its perfect spreadable consistency.
I find this especially helpful for cakes made ahead for parties—just pop it in the fridge overnight and let it warm up before the big reveal. ✨
Freezer-Friendly Layers
Freeze unfrosted cake layers individually in ziplock freezer bags for up to 1 month. Squeeze out all the air before sealing to prevent freezer burn. Thaw completely in the refrigerator overnight before frosting—never microwave or the layers will become gummy.
For the frosting, store it separately in an airtight container in the freezer for up to 2 weeks. Thaw at room temperature before using.
Pro tip: Label your freezer bags with the date and “unfrosted cake layers” to avoid confusion. When you’re ready to assemble, let everything come to room temperature before frosting—this ensures smooth application and a professional finish. The texture difference between fresh and thawed layers is minimal if done correctly. ❄️
Reheating Tips
If your cake has been refrigerated or frozen, never reheat it in the microwave—it’ll turn rubbery. Instead, place the cake on a wire rack in a 200°F oven for 5-10 minutes to gently warm the frosting without drying out the layers.
This low-and-slow method keeps the texture tender while bringing the frosting back to its creamy state.
For individual slices, wrap them loosely in parchment paper and warm in the oven for 3-5 minutes. The paper prevents the frosting from sticking to the pan while allowing it to soften evenly.
This works especially well for cakes with berry garnishes—just add fresh fruit after reheating to keep it vibrant. 🔥
Nutrition facts
Frequently asked questions
Can I use this recipe with 8-inch pans instead of 10-inch?
Yes, but you’ll need to adjust the batter and baking time. For 8-inch pans, reduce each layer’s batter by about 1/3 (about 1 cup per pan) and bake for 20-25 minutes at 350°F. The cake will be taller, so consider reducing the frosting slightly to maintain proportion.
Why did my cake layers crack on top?
Cracking usually happens from overmixing the batter or opening the oven too soon. Mix just until combined (about 2-3 minutes) and avoid opening the oven door during the first 20 minutes of baking. Let the layers cool completely before frosting to prevent further cracking.
How do I make this cake gluten-free?
Replace the all-purpose flour with a 1:1 gluten-free baking flour blend (like Bob’s Red Mill or King Arthur) plus 1 tsp xanthan gum. Reduce the milk by 1 tablespoon since gluten-free batters are often wetter. Bake for 5-10 minutes longer as they may need extra time to set. The texture will be slightly denser but still delicious.
Can I substitute buttercream with cream cheese frosting?
Use 16 oz cream cheese, 1 cup butter, 4 cups powdered sugar, and 1 tsp vanilla for a tangy twist. Whip until smooth and spread just like buttercream. Chill the cake longer (1 hour) since cream cheese frosting sets firmer. The flavor pairs beautifully with the vanilla layers.
What’s the best way to level uneven cake layers?
Use a serrated knife and a leveling guide (like a ruler or cake leveler). Place the guide on top of the cake and gently press down while moving the knife in a back-and-forth motion. Work in small sections to avoid crumbling. For extra precision, use a hot knife (dip in hot water) to make cleaner cuts.

- Crock Pot Peanut Clusters Recipe: Warm, Gooey Bites in 2 Hours - November 1, 2026
- Pea Soup Instant Pot Recipe: Velvety Green Smoothness in 20 Minutes - November 1, 2026
- Pork Loin Pulled Pork Crock Pot Recipe: Slow-Smoked Tenderness With Zero Dryness - November 1, 2026