
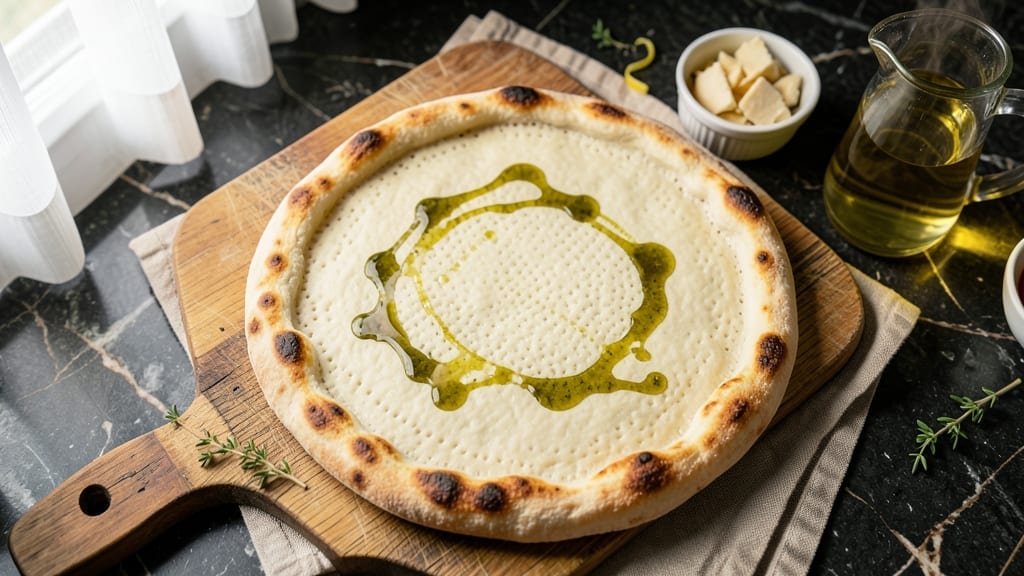
A 10-inch pizza dough recipe that delivers a perfectly chewy crust in just 2 hours—no kneading required. This no-knead method transforms simple ingredients into a restaurant-quality base that’s foolproof for beginners and pros alike.
The secret lies in a long, slow rise that develops deep flavor and an ideal texture without the effort.
What sets this dough apart is its foolproof simplicity—just five ingredients and minimal handling. The dough rests overnight in the refrigerator, allowing gluten to relax naturally, which eliminates the need for kneading while creating that signature chewy texture.
This method also ensures your dough stays fresh longer, so you can prep ahead for spontaneous pizza nights.
By the time you roll it out, you’ll have a dough that’s springy yet pliable, with a golden-brown crust that’s crispy on the outside and tender inside. The flavor is rich and slightly tangy from the yeast fermentation, making every bite more satisfying.
Whether you’re making classic Margherita or loaded deep-dish, this dough is your foundation for perfect pizza every time.
Use this dough for personal-sized pizzas, calzones, or even garlic knots—its versatility makes it a kitchen essential. Once you try this method, you’ll never go back to store-bought crusts again. Let’s get started on making your perfect 10-inch pizza dough.
Ingredients for 10 inch pizza dough
Five simple ingredients transform into a restaurant-worthy 10-inch pizza crust with minimal effort.
| Ingredient | Amount | Notes |
|---|---|---|
| All-Purpose Flour 🌾 | 3 cups | Plus 2 tbsp for dusting |
| Active Dry Yeast 🍞 | ¼ tsp | Or 1 packet (2.25 tsp) |
| Granulated Sugar 🍚 | ½ tsp | Enhances yeast activation |
| Salt 🧂 | 1 tsp | Diamond Crystal preferred |
| Extra-Virgin Olive Oil 🫒 | ½ cup | High-quality for flavor |
| Warm Water 💧 | 1 cup | 110°F for ideal yeast activation |
| Cornmeal 🌽 | ¼ cup | For dusting work surface |
| Semolina Flour 🌾 | ¼ cup | For dusting pizza peel |
The flour is the foundation—King Arthur or Caputo Tipo 00 if you want to splurge, but all-purpose works perfectly fine. Yeast matters here: check the expiration date—old yeast won’t activate properly. I always buy mine from Whole Foods or Trader Joe’s where it’s kept refrigerated. The olive oil should be fruity and peppery—California-grown brands like Corto or Colavita are my go-tos. Warm water is critical: too hot kills the yeast, too cold slows activation. Aim for 110°F—drop a thermometer in to check.
No yeast on hand? Instant yeast works 1:1, but active dry is traditional. Short on olive oil? Avocado oil or melted coconut oil work in a pinch (just don’t use butter). The sugar can be swapped for honey or maple syrup if you prefer, though it won’t activate yeast as reliably. For the flour, bread flour gives a slightly chewier crust if you’re willing to experiment. And if you’re making this ahead, the dough actually improves after 3-4 days in the fridge—flavor develops like a slow-fermented sourdough.
This dough is designed to rest 12-16 hours in the fridge—perfect for meal prep. Store it in an airtight container with a damp towel to prevent drying. When ready to use, let it sit at room temperature for 1-2 hours before rolling. The dough keeps for 5 days refrigerated or 3 months frozen. For freezing, shape the dough, wrap tightly in plastic, then place in a freezer bag. Thaw overnight in the fridge before using—no need to defrost at room temperature.
Why You’ll Love This Recipe
- No-Knead Magic: I swear by this dough—just mix, let it rise, and boom. No standing at the counter with a rolling pin, no overworking the gluten. The yeast and olive oil do all the heavy lifting while I sip my coffee.
- Chewy Gold Perfection: That crispy edge with the pillowy center? It’s all in the olive oil and sugar combo. The dough develops this just-right texture that makes every bite satisfying—no sad, dry slices here.
- Weeknight to Party Fix: Same dough, endless toppings. Use it for a quick Friday night slice or stretch it into a family-sized feast. Honestly, I’ve even made breakfast pizzas with it—yes, even on a Tuesday night.
- Budget Stretch: Five ingredients, zero waste. That flour and yeast go a long way, and the olive oil adds richness without breaking the bank. Leftovers? Freeze the dough balls—next week’s pizza is already sorted.
Step-by-step instructions for 10-Inch pizza dough
Here’s how to make a perfect no-knead crust that’s chewy, airy, and ready in just two hours.
Activate the Yeast and Mix the Dough
In a large mixing bowl, combine the 1 cup warm water (about 110°F), 0.5 tsp granulated sugar, and 0.25 tsp active dry yeast. Let this sit for 5-10 minutes until it becomes frothy and bubbly—this confirms your yeast is active. If it doesn’t bubble, your yeast may be dead, and you’ll need to start over.
Once the yeast is active, add the 3 cups all-purpose flour and 1 tsp salt to the bowl. Stir just until combined, then drizzle in the 0.5 cup extra-virgin olive oil. Mix with a wooden spoon until a shaggy dough forms. Avoid overmixing—you’re not developing gluten here, just combining ingredients.
Let the Dough Rest and Develop Flavor
Cover the bowl with plastic wrap or a damp kitchen towel and let the dough rest at room temperature for 1 hour. This initial rest allows the flour to fully hydrate and the gluten to begin relaxing, which makes the dough easier to handle later. The dough should look slightly puffy but still compact—this is perfect for our no-knead method.
After 1 hour, the dough will have expanded and become more pliable. Give it a gentle stretch to see if it springs back slowly (this indicates proper gluten development). If it feels too stiff, let it rest another 15-20 minutes. The goal is a dough that’s soft but not sticky—just the right consistency for shaping.
Shape the Dough and Prepare for Rising
Lightly dust a clean work surface with 2 tbsp of the all-purpose flour (from the extra 2 tbsp mentioned in the ingredients). Turn the dough out onto the surface and gently shape it into a rough ball. Don’t worry about perfection—this isn’t a kneaded dough, so it won’t be smooth. Press the dough down slightly to release any air bubbles, then cover it loosely with plastic wrap.
Let the dough rise at room temperature for another 1 hour. You’ll know it’s ready when it’s nearly doubled in size and has a few small bubbles on the surface. The dough should feel light and airy when pressed gently—this indicates proper fermentation. If your kitchen is cold, place the dough in a slightly warm spot (like near the oven with the light on) to help it rise evenly.
Final Shape and Rest Before Baking
Turn the risen dough onto a surface lightly dusted with 0.25 cup cornmeal (this prevents sticking and adds texture). Gently press the dough into a 10-inch circle, using your fingers to smooth the edges. Don’t stretch it too thin—aim for about ¼-inch thickness in the center, tapering to ⅛-inch at the edges. This ensures a crispy crust without a soggy middle.
Cover the shaped dough with plastic wrap and let it rest for 20-30 minutes before baking. This final rest relaxes the gluten one last time, making it easier to transfer to your pizza peel without tearing. Preheat your oven to its highest setting (500°F or higher) with a pizza stone or baking sheet inside. The extreme heat is key to that perfect chewy crust.
Prepare for Baking (Final Touches)
Just before baking, dust a pizza peel or baking sheet generously with 0.25 cup semolina flour. This creates a crispy, golden base for your pizza. Carefully transfer the dough to the peel, then add your favorite toppings—keep it simple for the first try to avoid a soggy crust. Slide the pizza onto the preheated stone or sheet and bake for 10-12 minutes, rotating halfway if needed, until the crust is deep golden brown and the cheese is bubbly.
Here’s the thing—this dough is forgiving, but timing matters. The crust should be crispy on the outside but still soft and chewy inside. If it browns too quickly, cover it loosely with foil for the last 2-3 minutes of baking. Let the pizza cool for 2-3 minutes before slicing—this ensures clean cuts and prevents toppings from sliding off.
Pro Tips For Making 10 Inch Pizza Dough
- Weigh Your Flour: I learned this the hard way—scooping flour by volume leads to inconsistent dough. A 10-inch pizza needs about 350 grams of all-purpose flour (not packed, not tapped). Use a kitchen scale, even if it feels fussy—your dough’s texture will be far more reliable.
- Dissolve Yeast Properly: Cold water kills yeast fast, and warm water can overactivate it. Mix the active dry yeast with ½ cup warm water (110°F/43°C) and 1 tsp sugar, then let it sit for 5–7 minutes until frothy. If it doesn’t bubble, start over—dead yeast means a flat, sad pizza.
- Knead Just Enough: Over-kneading makes dough tough, but under-kneading leaves it gummy. For this recipe, 5–7 minutes by hand (or 3–4 minutes with a stand mixer on medium) should give you a smooth, slightly tacky ball. Test by poking it—if it springs back slowly, it’s ready.
- Use Olive Oil Wisely: Don’t skimp on the extra-virgin olive oil—this isn’t just for flavor, it’s for stretch. Brush 1–2 tablespoons on the dough after shaping, focusing on the edges and center. It’ll prevent cracking and give you that crispy, golden crust you’re after. (Yes, even if you’re impatient like me.)
Flavor customization for this dish
Spicy Heat Kick
Add 1 tsp red pepper flakes or ½ tsp cayenne powder to the dough mixture for a subtle kick that develops as it ferments. For extra heat, sprinkle ½ tsp crushed chili flakes on the shaped dough before adding toppings.
I love using Penzeys brand for consistent heat levels—start with their medium-hot blend if you’re new to spicy pizza. 🌶️
Garlic-Infused Flavor
Increase the olive oil to ⅔ cup and infuse it with 4 minced garlic cloves by heating the oil gently for 5 minutes before mixing with other ingredients. This creates a rich, aromatic base that pairs perfectly with tomato sauce.
For a stronger garlic flavor, let the dough rest an extra 30 minutes before shaping. I often add a pinch of dried oregano to complement the garlic notes.
Herb-Enhanced Dough
Fold 1 tbsp finely chopped fresh rosemary or 2 tbsp dried basil into the dough during the final mixing stage. The herbs infuse the crust with subtle herbal notes that shine through when baked.
I recommend using dried Italian seasoning from McCormick for a consistent blend of basil, oregano, and thyme. This works especially well with white pizzas or those topped with light ingredients like prosciutto and arugula.
Sweet and Tangy Twist
Replace half the granulated sugar with ½ tsp honey or ¼ tsp maple syrup for a subtle sweetness that enhances fermentation. The result is a slightly sweeter crust with a tangy depth.
I often pair this with caramelized onions or fig jam as toppings for a sweet-savory balance. This variation is perfect for breakfast pizzas or dessert-style creations with ricotta and berries.
Cheesy Crust Base
Add ¼ cup grated Parmesan cheese to the dough mixture for a cheesy, flavorful crust that holds up to any toppings. The cheese adds richness and prevents the dough from becoming too dry. I prefer Parmigiano-Reggiano for its intense umami flavor, but Pecorino Romano works well too.
This variation is ideal for hearty toppings like pepperoni or sausage, as the cheese-infused crust adds an extra layer of flavor.
Whole Wheat Boost
Replace 1 cup of all-purpose flour with 1 cup whole wheat flour for a nuttier, heartier crust. The whole wheat adds fiber and a slightly denser texture while keeping the dough manageable.
I recommend using King Arthur whole wheat flour for its balanced protein content. This variation works especially well with robust toppings like mushrooms, caramelized onions, and goat cheese.
Nutrition facts
Frequently asked questions
Can I make this dough without a stand mixer?
This recipe is designed for minimal effort—no mixer needed. Just use a large bowl and a wooden spoon to mix the ingredients until a shaggy dough forms. The no-knead method relies on resting time rather than mechanical mixing, so you’ll save time and energy. The dough’s texture comes from proper fermentation, not vigorous kneading.
What if my dough doesn’t rise properly?
Check your yeast first—it must be fresh and active (it should bubble within 5-10 minutes in warm water). If your kitchen is cold (below 70°F), place the dough near a warm spot (like an oven light) to help it rise. Avoid overmixing, which can kill yeast. If it still doesn’t rise, try adding ¼ tsp more sugar to the dough for extra activation.
How do I adjust the recipe for a thicker crust?
For a thicker crust, reduce the olive oil to ¼ cup and add ½ cup extra flour (total 3.5 cups). Shape the dough slightly thicker (⅜-inch center) and bake on a preheated pizza stone for 12-15 minutes until golden. This works especially well for deep-dish styles. For a crispier edge, brush with melted butter before baking.
Can I use this dough for other baked goods?
Yes! This dough works perfectly for calzones, garlic knots, or focaccia. For focaccia, shape it into a rectangle, dimple with your fingers, and bake with olive oil and herbs. For knots, roll the dough into ropes, twist the ends, and bake until golden. The no-knead method makes it versatile for any Italian-style baked creation.
Why does my crust turn out too dry?
Dry crust usually means the dough was overmixed or didn’t rest long enough. Ensure you’re using 1 cup warm water (110°F) and let the dough rest 12-16 hours in the fridge. If it’s still dry, add 1 tbsp olive oil to the dough before shaping. Avoid overworking it—this no-knead method relies on gentle handling.
