
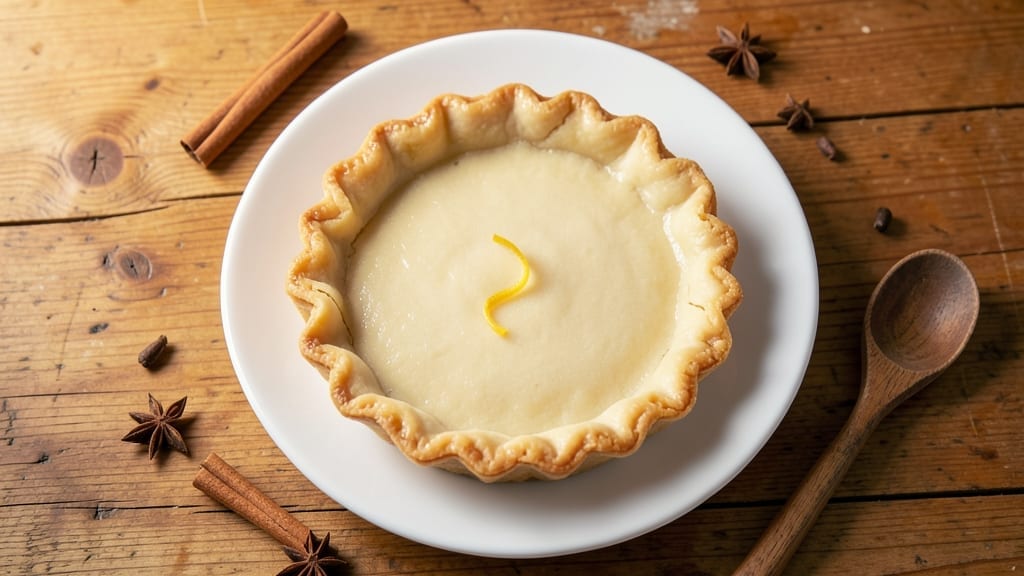
A 10-inch single pie crust delivers the perfect foundation for any dessert—flaky, sturdy, and effortlessly elegant. The secret lies in the cold butter technique, where chilled fat creates delicate layers that transform into crisp, golden perfection when baked.
I’ve refined this method over years, eliminating the guesswork of rolling and fitting it into a pie dish without tears or uneven edges.
This recipe uses just five simple ingredients—all-purpose flour, unsalted butter, ice water, salt, and a touch of vinegar—to create a crust that’s foolproof for beginners but impressive enough for seasoned bakers.
The key steps—mixing just until combined, resting the dough, and rolling it to 1/8-inch thickness—ensure a consistent, even crust every time. Whether you’re making a classic apple pie or a savory tart, this crust handles fillings with confidence.
By the time you slide it into the oven, you’ll have a golden, shatteringly crisp crust that holds its shape and delivers that signature flakiness in every bite.
The beauty of this method is its adaptability: blind-bake it for quiches, use it as a tart shell, or fill it with your favorite pie filling. No more struggling with sticky dough or uneven edges—just a reliable, restaurant-quality crust that’s ready in under an hour.
For best results, keep the dough cold throughout the process and avoid overworking it. If you’re nervous about rolling, use a pie dish as your guide—press the dough gently into the bottom and up the sides to create a seamless fit.
This crust is your ticket to bakery-worthy desserts without the fuss. Let’s get started!
Ingredients for 10 inch single pie crust
Five ingredients, one perfect 10-inch crust—flaky, sturdy, and foolproof for any pie.
| Ingredient | Amount | Notes |
|---|---|---|
| All-Purpose Flour 🌾 | 2 ½ cups | Sifted for even texture |
| Unsalted Butter 🧈 | 1 cup | Cold, cubed, unsalted |
| Ice Water 💧 | ½ cup | Freshly chilled, not tap |
| Diamond Crystal Kosher Salt 🧂 | ½ tsp | Fine grain preferred |
| White Vinegar 🍶 | 1 tbsp | Pure, 5% acidity |
The butter is non-negotiable here—cold cubes from the fridge create those signature flaky layers. Grab European-style butter if you want extra richness, but standard unsalted works perfectly. Look for Plugrá or Land O’Lakes unsalted at most grocery stores—they’re reliable and affordable. If your butter starts to soften during mixing, pop the bowl back in the freezer for 10 minutes. The flour? King Arthur or Gold Medal are my go-tos—they’re consistent and give the best texture. Sift it first to avoid lumps, which can ruin the delicate crumb structure.
No ice water? Cold water from the fridge works too, but ice keeps the dough colder longer, which is key for that crisp texture. Running short on vinegar? Lemon juice at double the amount adds brightness without changing the crust’s structure. The salt matters—Diamond Crystal is less salty than Morton, so adjust if you’re sensitive to saltiness. For a gluten-free version, swap the flour for King Arthur gluten-free blend, but expect a slightly denser crust. And if you’re worried about rolling, press the dough directly into your pie dish—no rolling pin required!
Wrap the dough tightly in plastic and refrigerate for up to 2 days—it actually improves as it rests. For longer storage, freeze the dough between parchment paper for 3 months. Let it thaw in the fridge overnight before using. The butter cubes will soften slightly, but that’s perfect for rolling. If your kitchen gets warm, keep the dough in the freezer until you’re ready to roll. This crust reheats beautifully too—just bake at 375°F for 10-15 minutes to crisp it up again.
Why You’ll Love This Recipe
- No-Fuss Magic: This crust comes together in five minutes—just pulse flour, butter, and ice water until it clumps, then chill. No rolling pin acrobatics, no stress. Honestly, I’ve made it while scrolling through my phone.
- Butter’s Golden Touch: That cold, cube-of-butter method? It delivers a flaky, melt-in-your-mouth texture with zero effort. The vinegar kick keeps it tender, so you get that crisp edge without the dry, sad middle.
- Your Pie’s Secret Weapon: Use it for quiches, pot pies, or even a savory tart—no need to double the recipe. I’ve filled it with leftover chicken, spinach, and cheese on a Tuesday, and it still felt like a special occasion.
- Budget-Friendly Staples: Flour, butter, salt—these are pantry basics you already own. No fancy shortcuts, just reliable, foolproof crust that costs pennies per serving. (Yes, even on a grocery-store budget.)
Step-by-step instructions for perfectly flaky 10-Inch pie crust
Here’s the foolproof method I use to create a perfectly flaky crust without the stress of rolling.
Create the Butter-Flour Mixture
In a large bowl, combine the 2.5 cups all-purpose flour and 0.5 teaspoon diamond crystal kosher salt. Whisk gently to distribute the salt evenly. Add the 1 cup cold, cubed unsalted butter to the flour mixture. Using your fingers or a pastry cutter, work the butter into the flour until you achieve a texture resembling coarse crumbs with pea-sized butter pieces.
This is where the magic happens—I press down firmly on the butter pieces to ensure they stay cold and maintain their shape. Cold butter is essential for those signature flaky layers. If you notice any butter melting, place the bowl in the refrigerator for 5 minutes to reset the temperature before proceeding.
Incorporate the Vinegar and Water
In a separate small bowl, whisk together the 0.5 cup ice water and 1 tablespoon white vinegar. The vinegar acts as a natural tenderizer, helping to develop gluten just enough to hold the crust together without making it tough. Pour this mixture slowly over the butter-flour mixture while gently stirring with a fork.
At this stage, the dough will look shaggy and come together in clumps. Use your hands to bring it all together, pressing lightly to combine without overworking the dough. If the dough feels too dry, add 1 teaspoon ice water at a time until it just holds together when pressed. The goal is a soft, slightly tacky dough that’s easy to handle but not sticky.
Form the Disc and Chill
Turn the dough out onto a lightly floured surface and gently shape it into a rough 10-inch round disc. Wrap the disc tightly in plastic wrap and refrigerate for at least 1 hour, or up to 24 hours. This chilling step is non-negotiable—it allows the gluten to relax and the butter to firm up, preventing the crust from shrinking or tearing when you bake it.
I like to place the wrapped dough on a baking sheet before refrigerating. This prevents it from sticking to the counter and makes transferring it to your pie dish much easier later. The dough should feel firm but still slightly pliable when you’re ready to use it. If it feels too soft after chilling, give it 15-20 minutes more in the fridge.
Assemble and Bake the Crust
Remove the chilled dough from the refrigerator and let it sit at room temperature for 5-10 minutes to become slightly more pliable. On a lightly floured surface, gently roll the dough into a 10-inch circle—no need to press hard. Transfer the rolled crust to your pie dish, carefully shaping it to fit the bottom and sides without stretching.
For a classic double-crust pie, repeat the rolling process with any remaining dough. If you’re making a single crust, crimp the edges with your fingers or a fork for a decorative finish. Place the pie dish on a baking sheet lined with parchment paper to catch any potential drips. Prick the bottom of the crust with a fork in several places to prevent air bubbles from forming during baking.
Pre-Bake for Structure
Preheat your oven to 375°F. Place a second baking sheet on the rack below your pie dish—this creates a convection effect that helps the crust bake evenly. Add 2-3 tablespoons of pie weights or dried beans to the bottom crust if you’re making a double-crust pie. For a single crust, simply bake it empty.
Bake for 15-20 minutes until the edges begin to turn light golden brown and the crust looks set. Remove the weights (if using) and bake for an additional 5-10 minutes until the bottom is lightly golden. The crust should be firm to the touch but not dark brown. This pre-baking step ensures your crust holds its shape during the main baking process, preventing a soggy bottom.
Pro Tips For Making 10 Inch Single Pie Crust
- Cut Butter in Small Batches: I learned this the hard way—trying to cut cold butter into flour at once just makes a mess. Work in 2-3 tablespoon chunks at a time, pulsing your food processor or rubbing it between your fingers until it’s pea-sized. This keeps the dough from overheating and ensures even distribution.
- Use Ice Water, Not Cold: After burning three batches of crust, I finally figured out that “cold water” isn’t the same as ice water. Grab a handful of ice cubes, toss them in your measuring cup, and fill the rest with cold water. The shock of the ice keeps the dough from getting gummy, especially in humid kitchens.
- Skip the Vinegar Unless Needed: My grandmother swore by this, and she was right—but only if your flour is fresh. If your all-purpose flour is older than 3 months, a teaspoon of white vinegar helps cut gluten development. Otherwise, it’s just one more thing to measure and mix. Test your dough’s stickiness first—if it’s not clinging to your hands, skip it.
- Press, Don’t Roll, the Crust: Does it look weird? Yes. Does it work? Every single time. After shaping your dough into a disk, press it gently into your pie dish with your fingertips, then chill it. Rolling later can tear the edges, and this method guarantees a sturdy base. I was skeptical until I tried it—now it’s my go-to.
Troubleshooting perfect results
Dough Too Sticky
If your dough feels too sticky after mixing, resist the urge to add more flour—this will make it tough. Instead, chill the dough for an extra 15-20 minutes to firm it up.
I’ve found that wrapping it tightly in plastic and placing it in the freezer for 10 minutes works wonders. Once chilled, the dough should roll out smoothly without sticking to your surface. If it’s still too soft, lightly dust your rolling pin and surface with flour, but use sparingly. 💡
Uneven Rolling
Uneven thickness leads to uneven baking. To avoid this, roll your dough from the center outward, applying even pressure. I like to use a 10-inch plate as a guide to ensure perfect sizing.
If the edges get too thin, gently press them up with your fingers to maintain thickness. For stubborn spots, chill the dough for 5 minutes before re-rolling. 🔄
Shrinking During Baking
Shrinking happens when the dough isn’t chilled enough or overworked. Always keep your dough cold—press it into the pie dish directly from the fridge if needed. Avoid stretching the dough to fit; instead, gently press it into place.
If it shrinks slightly during baking, don’t panic—it’s normal. For extra insurance, blind-bake the crust for 10 minutes before adding filling. ✨
Butter Melting Too Soon
If your butter softens before rolling, pop the dough back in the fridge for 10-15 minutes. For extra insurance, place the dough between two sheets of parchment paper before chilling—this keeps it cold and prevents sticking.
If you’re in a hurry, use cold shortening (like Crisco) instead of butter for a more stable dough, though it won’t be as flaky. 🧊
Cracked or Torn Edges
Tears usually mean the dough was too warm or overworked. To fix this, gently press the torn edges together and smooth them out. For a seamless finish, use a fork to crimp the edges after transferring the dough to the pie dish.
If cracks appear during baking, cover them with extra filling or a lattice top—no one will notice! 🍰
Nutrition facts
Frequently asked questions
Can I use this crust for savory dishes like quiche or pot pie?
This 10-inch single pie crust works perfectly for savory dishes. For quiche, blind-bake the crust for 10-12 minutes at 375°F before adding your custard filling. The same crust holds up beautifully for pot pie—just brush it with egg wash before baking to create a golden, crisp finish. The vinegar in the recipe actually enhances savory flavors!
What if I don’t have a rolling pin?
No rolling pin? No problem! Use a 10-inch plate as your guide—press the dough gently between two sheets of parchment paper with your hands. For extra leverage, place another plate on top and press down firmly. The key is even pressure—rotate the dough 90 degrees after each press to maintain a perfect circle.
How do I prevent a soggy bottom when adding filling?
Prevent soggy bottoms by pre-baking your crust for 15 minutes at 375°F before adding filling. For fruit pies, sprinkle 1 tablespoon cornstarch over the bottom crust before baking to create a moisture barrier. If using a watery filling (like berries), brush the pre-baked crust with a thin layer of egg white before adding the filling.
Can I make this crust ahead of time?
Yes! This crust keeps beautifully for up to 2 days in the fridge wrapped tightly in plastic. For longer storage, freeze the shaped disc (before rolling) between parchment paper for 3 months. Thaw overnight in the fridge—never at room temperature. The dough actually improves with resting time!
Why does my crust turn out tough instead of flaky?
Tough crusts usually mean overworking the dough or using warm butter. Keep everything cold—press butter pieces firmly into flour and avoid handling the dough more than necessary. Use your fingers or a pastry cutter, not a food processor. Also, don’t skip the 1-hour chill before rolling. If your kitchen is warm, chill the dough between parchment paper.

- Pea Soup Instant Pot Recipe: Velvety Green Smoothness in 20 Minutes - November 1, 2026
- Pork Loin Pulled Pork Crock Pot Recipe: Slow-Smoked Tenderness With Zero Dryness - November 1, 2026
- Baked Potatoes in Crock Pot Recipe: Buttery Interiors and Crispy Top Magic - November 1, 2026