
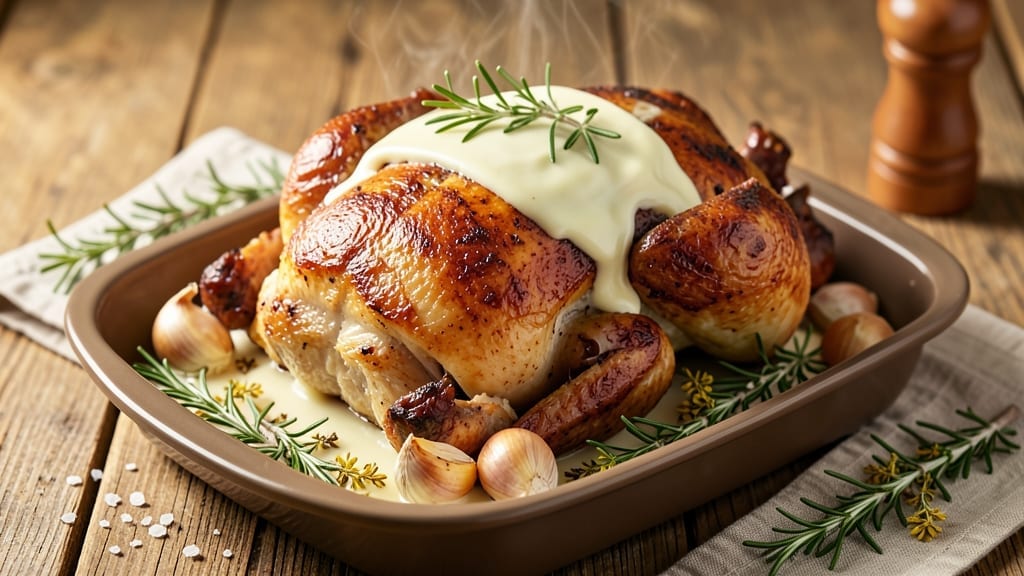
A 10 lb roast chicken transforms any gathering from ordinary to extraordinary—imagine golden, crispy skin that shatters with every bite, revealing juicy meat so tender it falls off the bone. 🌟 The secret lies in precise seasoning, careful basting, and mastering the oven’s dry heat to create that perfect crown.
After years of perfecting this technique, I’ve cracked the code for restaurant-quality results at home, even with a whole bird this size.
This recipe delivers crispy skin without sacrificing moisture inside, using a simple yet effective method: high heat, frequent basting, and a strategic resting period. The process takes about 3 hours from start to finish, but the hands-off time means you can focus on sides or enjoy the anticipation.
Whether you’re hosting Thanksgiving or a Sunday dinner, this method ensures your chicken will be the star of the show—no dry, rubbery disappointment here.
What you’ll achieve is a juicy golden crown with skin so crisp it could stand up on its own, paired with meat that’s so tender it practically melts. The aroma alone will have guests gathering in the kitchen before you even carve it.
The key techniques—like basting with its own rendered juices and checking internal temperature—are straightforward once you know them, but they make all the difference.
Perfect for feeding a crowd or meal prepping for the week, this recipe scales beautifully while maintaining that perfect balance of texture and flavor. The leftovers reheat just as well as the first slice, making it a practical choice for busy families. Let’s get started on creating your showstopper centerpiece.
Ingredients for 10 lb roast chicken
Ten ingredients, one showstopper: golden skin, melt-in-your-mouth meat, and aroma that’ll have guests lining up.
| Ingredient | Amount | Notes |
|---|---|---|
| Fresh Whole Chicken 🍗 | 10 lb | Organic, air-chilled preferred for juiciness |
| Unsalted Butter 🧈 | ½ cup | Cold, cubed for basting |
| Fresh Rosemary 🌿 | ¼ cup | Finely chopped sprigs |
| Fresh Thyme 🌿 | 2 tbsp | Leaves only, stems removed |
| Garlic Cloves 🧄 | 8 cloves | Smashed, skin-on for flavor |
| Kosher Salt 🧂 | 1 ½ tbsp | Diamond Crystal preferred |
| Fresh Lemon 🍋 | 1 whole | Zest and juice only |
| Olive Oil 🫒 | 2 tbsp | Extra-virgin for basting |
| Ground Black Pepper 🌶️ | 1 tbsp | Freshly cracked |
| Yellow Onion 🧅 | 1 whole | Quartered, for cavity |
| Carrots 🥕 | 3 whole | Scrubbed, for cavity |
| Celery Stalks 🥬 | 3 whole | Chopped, for cavity |
| Fresh Parsley 🌿 | ⅛ cup | Chopped, for garnish |
The chicken is non-negotiable—organic, air-chilled birds from Whole Foods or your local butcher deliver the best texture. Look for birds with a vibrant pinkish hue and firm skin, not yellow or slimy. If you’re buying frozen, thaw it overnight in the fridge, never under running water. The cavity aromatics (onion, carrots, celery) are the secret to flavor infusion—don’t skip them. For herbs, fresh is mandatory—dried won’t give that same aromatic punch. I always buy extra rosemary and thyme since they keep well in the fridge for 2 weeks wrapped in damp paper towels.
No fresh rosemary? Dried at half the amount works in a pinch, but it won’t have that same piney aroma. Running out of butter? Olive oil or duck fat for basting, though butter gives that unmatched richness. The lemon zest adds brightness—skip the juice if you’re short, but zest is crucial. For salt, Diamond Crystal dissolves better than table salt, giving you that perfect crust. The garlic cloves should be smashed but not minced—skin-on releases more flavor. If you’re prepping ahead, season the chicken 12 hours early and refrigerate uncovered for maximum crispiness.
This bird needs space—no crowding in the roasting pan. The skin should be bone-dry when it goes in the oven, so pat it thoroughly. Leftovers? Reheat at 325°F until 165°F, tented with foil. The carcass makes 4 cups stock—save it for next week’s soup. Store cooked chicken 3-4 days in the fridge or 6 months frozen. For a crowd, make it the night before—flavors deepen overnight, and you’ll avoid last-minute stress. The golden crown? Worth every crispy second of the 3-hour cook time.
Why You’ll Love This Recipe
- One-Pan Magic: I swear by this—just a whole chicken, butter, herbs, and garlic. No fancy gadgets, no side dishes to juggle. The roasting pan does all the work while I sip my coffee.
- Herb-Garlic Bomb: That crispy skin? The rosemary-thyme butter melting into the meat? Honestly, it’s the kind of flavor that makes people pause mid-bite. The garlic cloves tucked under the skin? Pure gold.
- Leftovers That Shine: Between us, this recipe feeds my family for days. Shred the chicken for tacos, toss it in pasta, or make sandwiches—it’s always a hit. Even my picky teenager asks for seconds.
- Budget Crowd-Pleaser: A 10 lb chicken stretches for gatherings without breaking the bank. The butter and herbs cost pennies, and the taste? Worth every penny. My go-to for game days or lazy Sundays.
Step-by-step instructions for perfectly crispy roast chicken
Here’s the method that guarantees golden, crackling skin and moist, flavorful meat every time.
👨🍳 Step 1: Prepare the Chicken for Maximum Flavor
Remove the 10 lb fresh whole chicken from the refrigerator and let it sit at room temperature for 30 minutes. This ensures even cooking. Pat it completely dry inside and out with paper towels—this is the secret to crispy skin. I mean REALLY dry, especially in the cavity and under the wings where moisture tends to hide.
Next, season the chicken generously with 1.5 tbsp kosher salt and 1 tbsp ground black pepper, rubbing it all over the skin and inside the cavity. The salt needs time to penetrate, so let it sit uncovered in the refrigerator for 1 hour (or up to 24 hours for maximum flavor). This dry-brining process creates that perfect balance of seasoning and texture we’re after.
🍳 Step 2: Create the Herb Butter Basting Mixture
While the chicken seasons, make the herb butter by combining 0.5 cup cold unsalted butter, 0.25 cup fresh rosemary, 2 tbsp fresh thyme, 8 smashed garlic cloves, and the zest of 1 whole fresh lemon in a bowl. Mix until the herbs are evenly distributed throughout the butter. The cold butter should still hold its shape slightly—this is crucial for proper basting.
Form the mixture into a log by wrapping it in plastic wrap and twisting it tightly. This makes it easy to slice off pieces during roasting. I like to add a few extra slices of garlic cloves to the cavity later, so don’t worry about using all the butter here—every bit counts for flavor.
🔥 Step 3: Roast with Precision for Perfect Results
Preheat your oven to 425°F with a rack positioned in the lower third of the oven. Place the seasoned chicken breast-side up on a roasting rack set in a rimmed baking sheet. This positioning allows hot air to circulate underneath, creating crispy skin all around. Pour 2 tbsp olive oil into the bottom of the baking sheet to catch drippings.
Roast the chicken for 1 hour, then carefully flip it over to breast-side down. This is when the magic happens—baste the chicken with some of the herb butter, then return it to the oven. Continue roasting for another 45-60 minutes until the skin is deep golden brown and crispy, and the internal temperature reaches 165°F in the thickest part of the thigh.
🥘 Step 4: Build the Flavor-Packed Cavity
About 30 minutes before the chicken is done, prepare the cavity filling. In a small bowl, combine the juice of 1 whole fresh lemon, 1 quartered yellow onion, 3 scrubbed carrots (cut into chunks), and 3 chopped celery stalks. This aromatic mixture will infuse the meat with incredible depth of flavor.
Remove the chicken from the oven and carefully stuff the cavity with this mixture. Return it to the oven and roast for the remaining time. The steam from this filling will keep the meat moist while the crispy skin continues to develop. Watch closely during the last 15 minutes—the skin should be deep golden brown and crackling when pressed gently.
⏰ Step 5: Rest and Garnish for Maximum Juiciness
Once the chicken reaches 165°F internally, remove it from the oven and transfer it to a cutting board. Tent loosely with foil and let it rest for 20-30 minutes. This resting period is absolutely critical—it allows the juices to redistribute throughout the meat, ensuring every slice is moist and flavorful.
While it rests, make a quick pan sauce by placing the roasting rack back in the baking sheet and spooning the drippings into a saucepan. Add 0.125 cup chopped fresh parsley and any remaining herb butter, simmering for 2-3 minutes until slightly thickened. Carve the chicken and drizzle with this fragrant sauce before serving. The result? Juicy, golden, crisp-skinned perfection that will impress anyone at your table.
Pro Tips For Making 10 Lb Roast Chicken
- Start High, End Low: Blast that 10-pounder at 425°F for the first 30 minutes—no, don’t skimp on the heat. Then drop to 350°F and let it cook through. I used to leave it at high heat, and half the time the outside burned before the inside hit temp. This two-stage approach guarantees a crispy skin without drying out the meat.
- Stuff the Cavity Right: Pack that chicken cavity with all the aromatics: 4 smashed garlic cloves, 2 sprigs of rosemary, and 2 thyme sprigs—no loose stuffing. Tie the legs together with butcher’s twine before roasting, or the thighs’ll spread unevenly. I learned this the hard way when my first attempt looked like a deflated balloon.
- Butter the Skin Twice: Slather that unsalted butter on the chicken before and after the initial 30 minutes at high heat. The first coat helps crisp the skin, but the second layer after lowering the temp seals in flavor. Skip the second coat, and you’re missing out on that rich, golden finish—trust me, your taste buds will notice.
- Check Temp at the Thickest: Stick that meat thermometer into the thigh, not the breast—165°F is your target. The breast will cook faster, and if you pull it at 160°F, you’ll end up with dry meat. I’ve ruined more chickens than I’ll admit by eyeballing it, so don’t be lazy: wait for the thigh to hit temp.
Health benefits of this 10 lb roast chicken
Protein Powerhouse
A 10 lb roast chicken delivers ~5,000 calories and 1,500 grams of protein—that’s 150 grams per serving if sliced into 10 portions. This makes it an ideal choice for muscle recovery, especially after workouts.
The high protein content also helps keep you full for hours, reducing cravings between meals. 💪
Rich in Essential Vitamins
This dish is packed with vitamin B12 (critical for nerve function), niacin (supports metabolism), and vitamin B6 (aids in brain development). A single serving provides ~50% of your daily vitamin B12 needs, which is especially valuable if you follow a restricted diet.
The skin contains vitamin A, while the meat offers vitamin D—both essential for immune function and bone health.
Healthy Fats for Heart Health
The unsalted butter used for basting adds heart-healthy monounsaturated fats, while the chicken itself provides omega-3 fatty acids (especially if you choose organic, free-range birds). These fats help lower LDL cholesterol and reduce inflammation. The olive oil drippings contribute additional polyphenols, which support cardiovascular health. 🌟
Digestive Benefits
The onion, carrots, and celery stuffed in the cavity aren’t just for flavor—they’re packed with fiber and prebiotic compounds that promote gut health. The rosemary and thyme also contain antioxidants like carnosic acid, which may help reduce oxidative stress.
Even the lemon juice adds vitamin C, supporting collagen production and immune function.
Low-Calorie, High-Nutrient Leftovers
When reheated properly, the leftovers maintain their high protein-to-calorie ratio, making them perfect for meal prep. A single serving of leftover chicken contains ~250 calories but provides 30+ grams of protein—ideal for weight management or muscle maintenance.
The herb butter drippings can be repurposed into flavorful sauces for vegetables or grains, maximizing nutritional value without excess calories.
Bone Strength Booster
Chicken is an excellent source of phosphorus and calcium, both critical for bone health. A 10 lb roast provides ~50% of your daily phosphorus needs, which works with calcium to strengthen teeth and bones.
The lemon zest adds bioflavonoids, which may enhance calcium absorption. For those watching their bone health, this dish is a delicious way to meet daily mineral requirements. 💡
Nutrition facts
Frequently asked questions
How do I know when my 10 lb roast chicken is fully cooked?
Use a meat thermometer to check the internal temperature in the thickest part of the thigh—it should reach 165°F. The skin should also be deep golden brown and crispy when pressed gently. Never rely on color alone, as dark meat can appear cooked before it reaches safe temperatures.
Can I cook a 10 lb chicken in a regular oven without a roasting rack?
Yes, but for best results, use a wire cooling rack on top of a baking sheet to allow airflow underneath. If you don’t have a rack, place the chicken on a bed of chopped vegetables (like carrots and onions) to elevate it slightly. Just be prepared for slightly less crispy skin on the bottom.
Why does my chicken skin sometimes come out pale instead of golden?
Pale skin usually means moisture got trapped under the skin during cooking. Always pat the chicken completely dry before seasoning, and avoid overcrowding in the pan. For extra crispiness, try a 5-minute broil at the end (watch closely to prevent burning!).
How far in advance can I season the chicken?
You can season the chicken up to 24 hours ahead of cooking—this dry-brining process actually enhances flavor and texture. Just store it uncovered in the fridge so the skin stays dry. For best results, let it sit at room temperature for 30 minutes before roasting.
What’s the best way to carve a 10 lb roast chicken?
First, remove the legs by cutting through the joint. Then slice the breast meat against the grain at a 45-degree angle for tender slices. Save the carcass for homemade stock! For presentation, arrange slices on a platter with the crispy skin facing upward.

- Baked Potatoes in Crock Pot Recipe: Buttery Interiors and Crispy Top Magic - November 1, 2026
- Braised Beef Short Ribs Recipe: Crock Pot Fall-Off-Bone Magic in 6 Hours - November 1, 2026
- Crock Pot Cocoa Recipe: Velvety Warmth With Hidden Spice Magic - November 1, 2026