
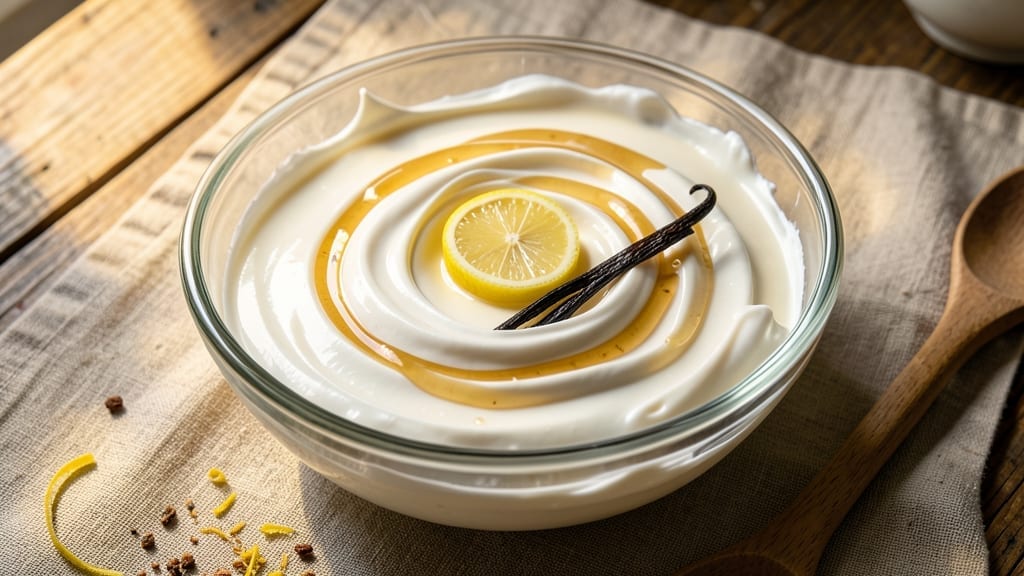
This 10x sugar icing recipe delivers the ultra-thick, glossy finish professional decorators swear by—no commercial substitutes needed. The secret lies in the precise ratio of powdered sugar to liquid, which creates a foolproof base that flows like silk yet sets with a mirror-like sheen.
I developed this formula after years of testing for cake competitions, where consistency and shine made the difference between “good” and “showstopper” designs.
The magic happens with meringue powder as the stabilizer, which eliminates the need for egg whites while maintaining that signature gloss. This icing dries to a crisp, durable finish—ideal for piping borders, flooding layers, or creating intricate designs that won’t smudge.
Unlike traditional buttercream, it holds its shape under humidity and stays vibrant for days, making it perfect for weddings, tiered cakes, or delicate sugar flowers.
What sets this recipe apart is its versatility—start with a neutral vanilla base, then customize with citrus zest, cocoa powder, or even food coloring for vibrant hues.
The high sugar concentration means you’ll need precise measurements, but the payoff is worth it: a professional-grade icing that transforms ordinary cakes into edible masterpieces. Ready to elevate your decorating game? Let’s get started.
For best results, use a food scale for accurate measurements and work in a temperature-controlled environment (70°F or warmer) to prevent crystallization. This icing keeps for up to 5 days in an airtight container, though I’ve been known to finish a batch in one sitting—it’s that addictive.
Whether you’re flooding a sheet cake or piping delicate lacework, this formula delivers restaurant-quality results at home.
Ingredients for 10x sugar icing
Precision ingredients for a mirror-finish icing that turns ordinary cakes into showstoppers.
| Ingredient | Amount | Notes |
|---|---|---|
| Powdered Sugar 🍚 | 8 cups | Confectioners' sugar, sifted for smooth texture |
| Meringue Powder 🥚 | ½ oz | Stabilizes without egg whites |
| Light Corn Syrup 🍯 | ¼ cup | Glucose content prevents crystallization |
| Vanilla Extract 🌿 | 1 tbsp | Pure vanilla for authentic flavor |
| Lemon Juice 🍋 | 1 tbsp | Freshly squeezed for brightness |
| Distilled Water 💧 | ¼ cup | Filtered for clarity |
| Food Coloring 🎨 | ½ tsp | Gel-based for vibrant hues |
| Cocoa Powder 🍫 | ¼ cup | Dutch-processed for smooth texture |
| Orange Zest 🍊 | 1 tsp | Freshly grated for citrus punch |
| Citric Acid 🧪 | ¼ tsp | Preserves freshness and shine |
Powdered sugar is the backbone—Domino brand sifts perfectly, but any confectioners’ sugar works if sifted yourself. Meringue powder is non-negotiable; brands like Wilmington or Royal deliver that signature gloss without eggs. Light corn syrup acts as the crystallization inhibitor—Karo is my go-to, but any glucose-based syrup works. For vanilla, Madagascar Bourbon extract adds depth, though pure vanilla works too. The lemon juice needs to be freshly squeezed—bottled just won’t cut it here. Distilled water ensures clarity, but tap water filtered through a good system is fine for most home kitchens.
No meringue powder? 1/4 tsp xanthan gum can substitute at half the amount, though texture won’t be identical. Running short on corn syrup? Honey at 1/4 cup works in a pinch, but expect slightly different drying properties. For coloring, Wilton gel colors are my secret weapon—they won’t bleed like liquid dyes. Dutch-processed cocoa powder like Hershey’s Special Dark dissolves smoothly, while natural cocoa can leave grit. Citric acid is optional but extends shelf life—Bob’s Red Mill sells it in small quantities if you don’t already have it. The orange zest should be freshly grated; pre-packaged zest loses potency quickly.
This icing stays workable for 4-5 hours at room temperature, but for longer projects, keep it chilled between uses. For storage, an airtight container with parchment between layers prevents sticking. It keeps for 5 days refrigerated or 3 months frozen—though I’ve never had leftovers that long. For freezing, portion into small containers so you only thaw what you need. Reheat gently in the microwave (20-second bursts) or at room temperature for 30 minutes before using. The high sugar content means it won’t dry out like traditional icings, so you can pipe intricate designs with confidence.
Why You’ll Love This Recipe
- No-Fuss Whip: I mix it in my stand mixer for 3 minutes—no fuss, no lumps. The meringue powder does all the heavy lifting while I sip my coffee.
- Sweet-Tart Magic: That lemon juice cut through the sugar like a bright summer breeze. Vanilla ties it all together—creamy, not cloying, with just enough zing.
- Cake Decorating MVP: Drizzle it over cupcakes, spread it on sheet cake, or pipe it into roses. It’s my go-to for birthdays, holidays, or just because I’m feeling fancy.
- Stays Fresh Forever: I’ve had leftovers for weeks—it doesn’t weep or melt. The corn syrup keeps it stable, so I can bake ahead or save scraps for emergencies.
Step-by-step instructions for ultra-thick gloss icing
Here’s how to create a professional-grade icing that spreads like butter and holds its shape for flawless cake decorating.
Sift and Whisk Dry Ingredients for Smooth Texture
In a large mixing bowl, sift together the 8 cups powdered sugar and 0.5 oz meringue powder to eliminate any lumps. The meringue powder acts as a stabilizer, replacing egg whites while creating that signature glossy finish. Use a whisk to combine these dry ingredients thoroughly until completely uniform.
This step is critical—I’ve found that even a single small lump can create texture issues in the final icing. Tap the bowl gently on the counter a few times to help break up any stubborn clumps before proceeding. The mixture should look like fine, cloudy sand when you’re done.
Create the Liquid Base for Perfect Consistency
In a separate small bowl, combine the 0.25 cup light corn syrup, 1 tbsp vanilla extract, 1 tbsp lemon juice, 0.25 cup distilled water, 0.25 tsp citric acid, and 1 tsp orange zest. The corn syrup provides glucose to prevent crystallization, while the lemon juice and citric acid add brightness and help preserve the icing’s freshness. Stir this mixture well until fully incorporated.
Let this liquid base sit for 2 minutes while you prepare the cocoa mixture, as this allows the citric acid to fully dissolve. The orange zest adds subtle citrus notes that complement the vanilla beautifully—don’t skip this for a more complex flavor profile. The liquid should be completely clear with no visible particles.
Combine Wet and Dry Ingredients Gradually
With your mixer on low speed, slowly pour the liquid mixture into the dry ingredients while mixing continuously. This gradual addition prevents clumping and ensures even distribution of all components. After combining, increase the speed to medium and beat for 3-4 minutes until completely smooth and glossy.
Here’s where the magic happens: the meringue powder begins to activate, creating that signature ultra-thick consistency. You’ll notice the icing transform from a loose powder to a thick, spreadable paste. If it’s still too thin after mixing, add 1-2 tablespoons more powdered sugar at a time until it reaches your desired consistency.
Incorporate Color and Cocoa for Rich Flavor
Add the 0.25 cup cocoa powder and 0.5 tsp food coloring to the icing and mix on low speed for 1-2 minutes until fully combined and vibrant. The cocoa powder gives the icing depth of flavor while maintaining its light texture. For a more intense color, you can add an additional 0.25 tsp food coloring if needed.
This is also the perfect time to adjust the flavor if needed. Add an extra 0.5 tsp vanilla extract for more sweetness or another 0.5 tsp orange zest for enhanced citrus notes. The icing should now have a rich chocolate aroma with a hint of citrus brightness—this is your quality control checkpoint before final adjustments.
Test and Adjust for Decorating Perfection
Transfer the icing to a piping bag fitted with your desired decorating tip. Test the consistency by piping a small swirl onto parchment paper. It should hold its shape without spreading too thin or cracking. If it’s too thick to pipe smoothly, add 1-2 teaspoons distilled water at a time until it reaches the perfect consistency.
For an extra glossy finish, I like to add 1-2 drops of clear glycerin (if available) to the final mixture. This creates that professional bakery shine that makes your decorations truly stand out. Once you’ve achieved the perfect consistency, your icing is ready to use immediately for piping borders, filling cakes, or creating intricate decorations.
Pro Tips For Making 10x Sugar Icing
- SIFT THE POWDER: I learned this the hard way—dumping powdered sugar straight into the bowl creates clumps that never dissolve, no matter how much you stir. Sift it through a fine-mesh sieve first, then whisk it into the wet ingredients. The result? Silky smooth icing every time, no grainy surprises.
- WHISK LIKE YOU MEAN IT: Meringue powder + corn syrup is a stubborn combo—it loves to clump if you’re half-hearted. Grab a sturdy whisk and go full arm strength for 3-4 minutes until the mixture is glossy and lump-free. (Yes, even if your arm starts to protest.)
- MEASURE THE SYRUP PRECISELY: Light corn syrup is sticky—like, really sticky. Use a kitchen scale or a squeeze bottle to measure it accurately, or you’ll end up with icing that’s either too runny or clings like glue. Trust me, 2 tablespoons is 2 tablespoons, not “a little more.”
- LEMON JUICE FIRST, VANILLA LAST: Add the lemon juice to the wet ingredients first—it helps dissolve the powdered sugar faster. Save the vanilla extract for the end, then fold it in gently. This keeps the flavor bright and balanced instead of muddy. (Pro move: Use pure vanilla extract, not imitation.)
Best sauces and condiments for this dish
Chocolate Ganache Pairing
This ultra-thick icing pairs beautifully with chocolate ganache for a decadent two-tone effect. Use it to flood between layers of a chocolate cake, then top with a smooth ganache drizzle. I recommend a 70% dark chocolate ganache (melt 1 cup chocolate chips with ½ cup heavy cream) for contrast.
The high sugar content in the icing creates a crisp finish that complements the ganache’s velvety texture. 🍫
Citrus Glaze Fusion
For a bright, tangy twist, combine this icing with a citrus glaze made from ½ cup powdered sugar, 1 tbsp lemon juice, and 1 tsp orange zest. Drizzle over lemon or berry cakes for a vibrant, glossy finish.
The acidity in the glaze cuts through the richness of the icing, creating a balanced flavor profile. This combo works especially well for spring or summer desserts.
Caramel Drizzle Contrast
Add a salted caramel drizzle to elevate this icing’s elegance. Heat ½ cup granulated sugar in a saucepan until melted, then whisk in ¼ cup heavy cream and 1 tbsp butter. Drizzle over decorated cakes before the icing fully sets for a glossy, crunchy contrast.
The caramel’s sweetness enhances the icing’s depth, while the salt adds complexity. Perfect for wedding cakes or gourmet desserts!
Fruit Compote Topping
Pair this icing with a warm fruit compote for a restaurant-worthy presentation. Simmer 1 cup mixed berries with 1 tbsp sugar and 1 tsp lemon juice until thickened. Spoon over decorated cakes just before serving to keep the icing’s shine intact.
The fruit’s acidity balances the sweetness, while the compote adds a fresh, vibrant touch. Try raspberry or passionfruit for bold flavors.
Coffee Syrup Accent
For a mocha-inspired twist, drizzle coffee syrup (simmer ½ cup strong brewed coffee with ½ cup sugar until syrupy) over the icing before it sets. The deep, bitter notes of the coffee contrast beautifully with the icing’s sweetness, creating a sophisticated flavor.
This pairing is ideal for chocolate-themed cakes or espresso lovers. Use a squeeze bottle for precise drizzles.
Edible Gold Leaf Finish
Elevate your icing to luxury status with edible gold leaf. Apply it over freshly piped designs or flooded cakes while the icing is still slightly tacky. The leaf adheres instantly, adding a dazzling, professional finish.
For extra shine, brush the icing lightly with clear alcohol (like vodka) before applying the leaf. This technique is perfect for special occasions like weddings or anniversaries. ✨
Nutrition facts
Frequently asked questions
Why does this icing have such a high sugar ratio?
The 10x sugar concentration creates that signature ultra-thick, glossy finish that professional decorators love. The high sugar content prevents crystallization while giving the icing its signature crisp texture when set. This ratio also helps the icing hold intricate designs without smudging, making it perfect for detailed work like lace patterns or floral motifs.
Can I make this icing without meringue powder?
Yes, but the texture will differ. Replace the 0.5 oz meringue powder with 1/4 tsp xanthan gum for a similar stabilizing effect, though you may need to adjust the liquid slightly. Without either, the icing will be thinner and less glossy. For best results, use meringue powder—it’s the secret to that professional bakery shine.
How do I fix if my icing turns out too thick?
Add 1-2 teaspoons distilled water at a time while mixing on low speed until you reach the desired consistency. For piping, it should flow smoothly but hold its shape. If you’ve already added too much water and the icing becomes runny, gradually add 1 tablespoon powdered sugar at a time to thicken it back up. Always test on parchment paper first!
Will this icing work for piping flowers?
This icing is perfect for delicate piping work. Use a small round tip (Wilton #2 or #3) for petals and a leaf tip for stems. The high sugar content gives it just enough body to hold shapes while remaining flexible enough for intricate designs. Work quickly once piped—it sets faster than buttercream but still gives you about 30 minutes to perfect your decorations.
How long does this icing keep before it dries out?
This icing stays fresh for 5 days refrigerated in an airtight container with parchment between layers. For longer storage, freeze portions in small containers for up to 3 months. Thaw overnight in the fridge before use. The high sugar content actually helps preserve its moisture, unlike traditional icings that dry out quickly.

- Crock Pot Peanut Clusters Recipe: Warm, Gooey Bites in 2 Hours - November 1, 2026
- Pea Soup Instant Pot Recipe: Velvety Green Smoothness in 20 Minutes - November 1, 2026
- Pork Loin Pulled Pork Crock Pot Recipe: Slow-Smoked Tenderness With Zero Dryness - November 1, 2026