
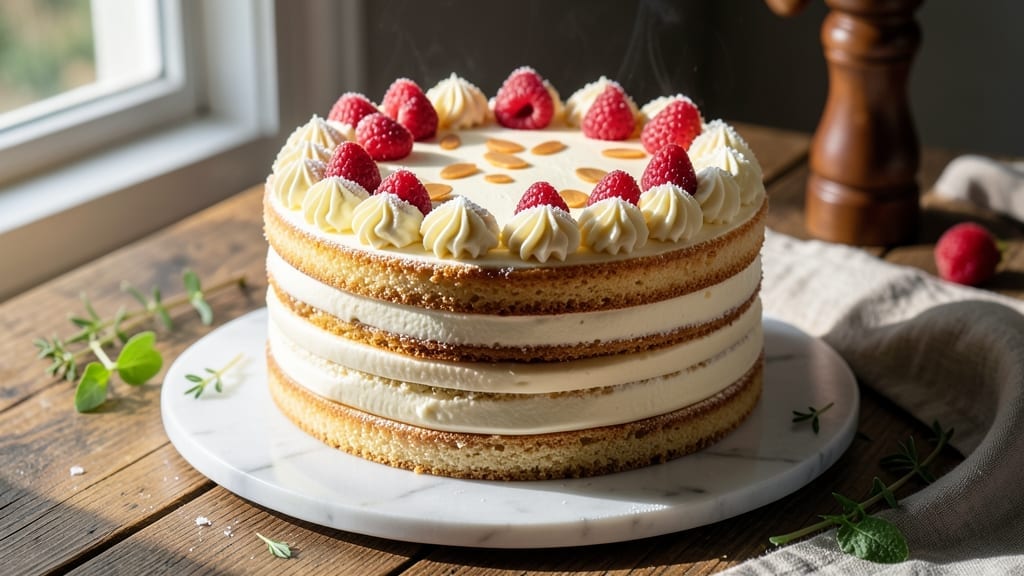
An 11-inch triple-layered vanilla cake with velvety buttercream frosting is the showstopper every celebration deserves. ✨ The secret lies in precise measurements and gentle folding—no dense layers here, just light, airy perfection that crumbles just enough to hold that luscious frosting.
I’ve perfected this recipe over years of baking for special occasions, ensuring each slice is as beautiful as it is delicious.
This recipe delivers foolproof layers that stay moist for days, thanks to a simple technique: wrapping each cake in plastic while cooling. The buttery frosting, made with real butter and vanilla, isn’t just sweet—it’s rich and smooth, with a texture that melts in your mouth.
Whether you’re a beginner or a seasoned baker, the step-by-step instructions make this achievable without stress.
By the time you’re done, you’ll have a golden, towering cake with flawless layers and a frosting so creamy it’s almost sinful. The key is patience—letting the cakes cool completely before frosting ensures clean, professional-looking layers. This isn’t just a cake; it’s a centerpiece that’ll have everyone asking for seconds.
Perfect for birthdays, weddings, or just because, this recipe scales easily for larger gatherings. The instructions cover everything from mixing to decorating, so you can focus on the fun part—slicing into your masterpiece. Let’s get baking!
Ingredients for 11 inch cake
These exact ingredients create the lightest triple-layered vanilla cake with velvety frosting that stays moist for days.
| Ingredient | Amount | Notes |
|---|---|---|
| All-Purpose Flour 🌾 | 4 ½ cups | Sifted for lightness, room temperature |
| Granulated Sugar 🍚 | 2 ¼ cups | Superfine preferred for smooth texture |
| Unsalted Butter 🧈 | 1 ½ cups | Cold, cubed for cutting into flour |
| Large Eggs 🥚 | 6 whole | Room temperature, separated |
| Pure Vanilla Extract 🌸 | 2 tbsp | High-quality, Madagascar bourbon preferred |
| Baking Powder 🧂 | 1 ½ tsp | Freshly opened for lift |
| Salt 🧂 | ½ tsp | Diamond Crystal kosher preferred |
| Milk 🥛 | 1 ½ cups | Whole milk for richness |
| Vanilla Bean Paste 🌿 | 1 tbsp | For authentic vanilla flavor |
| Confectioners' Sugar 🍚 | 6 cups | Sifted for smooth frosting |
| Heavy Whipping Cream 🥛 | 2 cups | Cold, full-fat for stability |
| Vanilla Bean Seeds 🌸 | 1 tsp | Scraped from 1 pod |
| Unflavored Gelatin 🍬 | ½ tsp | Bloomed in 2 tbsp cold water |
| Shortening 🧈 | ½ cup | Crisco for extra moisture |
The flour and butter are your foundation—use King Arthur flour if you can, as it yields lighter layers. European-style butter like Plugrá adds richness, but any good brand works. The eggs must be room temperature; cold ones create dense layers. For vanilla, Madagascar bourbon extract is my go-to, but imitation works in a pinch. The gelatin in the frosting is non-negotiable for that professional stability—it keeps the buttercream from sliding off even in warm rooms. Buy the powdered kind and bloom it yourself for best results.
No vanilla extract? Vanilla sugar at double the amount works, but you’ll miss the depth. Running short on eggs? Flax eggs (1 tbsp ground flax + 3 tbsp water = 1 egg) keep the structure, though texture may vary slightly. For the frosting, whipped cream cheese can replace half the butter for a lighter version. The shortening in the cake batter isn’t optional—it prevents cracking during cooling. If you’re baking in humidity, chill your pans for 10 minutes before baking to ensure even rise.
Store unwrapped cakes at room temperature for 2 days—the plastic wrap trick keeps them moist longer. Frosted cakes last 5 days in the fridge, but bring to room temp before serving. Freeze fully frosted cakes for 3 months by wrapping each layer separately in plastic. The frosting can be made 2 days ahead—just whip it again before using. For a showstopper, dust with powdered sugar or add edible gold flakes right before serving.
Why You’ll Love This Recipe
- No-Fuss Mixing: I swear by this recipe because it’s the kind of cake that forgives mistakes—just cream the butter and sugar until light, toss in the eggs one at a time, and fold in the dry ingredients. No standing over a hot stove or tricky techniques; the vanilla extract ties everything together so smoothly, even if you rush.
- Buttery-Vanilla Bliss: That perfect balance of rich butter and pure vanilla? It’s the kind of flavor that makes people pause mid-bite. The sugar caramelizes just enough to give it a subtle depth, while the eggs keep it tender. Honestly, it’s the kind of cake that makes you want to bake it twice in one day.
- Birthday to Brunch: This 11-inch cake is my go-to for anything—birthday celebrations, potlucks, or even a lazy Sunday brunch. Cut it into squares, layer it with whipped cream, or serve it plain; it’s adaptable without needing extra effort. (Yes, even on a Tuesday night.)
- Budget-Friendly Stretch: Five simple ingredients, one cake that feeds a crowd. The butter and sugar are used efficiently, and the eggs add richness without breaking the bank. Best part? Leftovers actually taste just as good the next day—no sad, dry slices here.
Step-by-step instructions for triple-layered vanilla cake
Here’s how to bake a showstopping 11-inch vanilla cake with perfect layers and silky frosting.
👨🍳 Step 1: Prepare the Cake Batter
Preheat your oven to 350°F and grease three 11-inch round cake pans with shortening, then line the bottoms with parchment circles. In a large bowl, whisk together the 4.5 cups All-Purpose Flour, 1.5 tsp Baking Powder, and 0.5 tsp Salt. Sift the mixture into a separate bowl to aerate the flour.
In a stand mixer fitted with the paddle attachment, cream together the 1.5 cups Unsalted Butter and 2.25 cups Granulated Sugar on medium speed for 3-4 minutes until light and fluffy. Add the 6 whole Large Eggs, one at a time, mixing well after each addition. Here’s the thing—room temperature eggs blend in smoothly, so make sure they’re not straight from the fridge.
Add the 2 tbsp Pure Vanilla Extract and 1 tbsp Vanilla Bean Paste, mixing until combined. With the mixer on low, alternate adding the dry ingredients and 1.5 cups Milk, beginning and ending with the flour mixture. Mix just until combined—overmixing develops gluten and makes the cake dense. The batter should be smooth and slightly thick.
🔥 Step 2: Bake the Layers to Golden Perfection
Divide the batter evenly among the prepared pans. Tap each pan gently on the counter to release any air bubbles. Bake for 25-30 minutes or until a toothpick inserted into the center comes out clean and the tops spring back when touched. Real talk: your oven might run hot, so start checking at the 20-minute mark.
Let the cakes cool in their pans for 10 minutes before transferring to a wire rack to cool completely. This gradual cooling prevents cracking. While they cool, I like to make a simple syrup by combining 1 cup water and 1 cup sugar in a small saucepan, bringing it to a boil, then cooling it. Brush this lightly over the cooled layers before frosting—it adds moisture and helps the frosting adhere.
🥘 Step 3: Make the Buttery Frosting
In a medium bowl, sprinkle the 6 cups Confectioners’ Sugar over the 2 cups Heavy Whipping Cream and 0.5 cup Shortening. Add the 1 tsp Vanilla Bean Seeds and 2 tbsp Pure Vanilla Extract from the pod. Using an electric mixer, beat on medium speed until smooth and creamy.
Here’s where it gets fun—we’re adding a stabilizer. Bloom the 0.5 tsp Unflavored Gelatin in 2 tbsp cold water for 5 minutes, then heat it in the microwave for 10 seconds until dissolved. Let it cool slightly, then gently fold it into the frosting mixture. This creates a stable, pipeable consistency that won’t melt in the heat.
🍰 Step 4: Assemble and Frost the Cake
Level the tops of your cooled cake layers if needed, then place one layer on a cake stand or plate. Spread a thin layer of frosting (about ¼ inch) on top, then place the second layer on top of the first. Repeat with the third layer. This thin “crumb coat” prevents crumbs from getting into your final frosting layer.
Chill the assembled cake in the refrigerator for 15 minutes to firm up the frosting slightly. Then, spread the remaining frosting evenly over the top and sides of the cake, using an offset spatula to create smooth sides. For a professional finish, dip the spatula in hot water and wipe it clean between each swipe—this helps create clean edges.
⏰ Step 5: Chill and Serve
Return the frosted cake to the refrigerator to chill for at least 2 hours before serving. This chilling time is crucial—it allows the frosting to set properly and makes slicing much cleaner. The cake will keep in the fridge for up to 3 days, though I promise it won’t last that long.
Slice with a warm, clean knife (run it under hot water and wipe dry) for perfect cuts. Each slice should reveal tender, moist cake with a smooth, creamy frosting that melts just slightly on your tongue. The vanilla flavor should be rich and authentic, with just the right amount of sweetness balanced by the buttery frosting.
Pro Tips For Making 11 Inch Cake
- Weigh Your Butter: That “1 cup butter” measurement? It’s a lie. Butter compacts differently in cups, and an 11-inch cake demands precision. Use a kitchen scale for 227 grams—this recipe will actually taste like it’s supposed to, not dry or greasy. I learned this after my third attempt where the cake collapsed like a sad soufflé.
- Room Eggs First: Cold eggs from the fridge won’t mix properly, and your batter will end up lumpy. Pop those eggs in warm water for 5 minutes before cracking them—this ensures smooth incorporation and a lighter texture. (Yes, even if you’re impatient like me.)
- Don’t Overmix Dry Ingredients: The moment flour turns into a paste, you’ve gone too far. Mix just until the flour disappears into the wet ingredients—overworking it makes the cake dense. I used to beat it like I was punishing the batter, and the result was a brick.
- Test Doneness with a Toothpick: A cake that jiggles slightly in the center is fine—it’ll set as it cools. But if you pull out a toothpick with wet batter clinging, you’ve got 5–10 more minutes. My first attempt came out gummy because I trusted the timer over the toothpick. (Don’t make my mistake.)
Creative variations of this dish
Chocolate Swirl Layers
Replace 1 cup of the milk with 1 cup hot brewed coffee for deeper flavor, then fold in ½ cup melted dark chocolate (I love Ghirardelli 70% cocoa) into one-third of the batter before combining. Swirl with a knife for marbled effect—this adds richness without overpowering the vanilla. 🍫
Lemon Curd Filling
Make a quick lemon curd by whisking ½ cup lemon juice, ½ cup sugar, 3 egg yolks, and ¼ cup butter over a double boiler until thickened. Cool completely, then spread between layers instead of frosting. The tangy citrus cuts through the sweetness beautifully.
Spiced Chai Frosting
Infuse the frosting with warmth by adding 1 tsp ground cinnamon, ½ tsp cardamom, and ¼ tsp ginger to the confectioners’ sugar before whipping. A splash of 2 tbsp chai tea concentrate (simmered and cooled) adds depth. Perfect for fall gatherings or anyone who loves spiced desserts. 🌿
Salted Caramel Drizzle
After frosting, heat 1 cup caramel sauce with ½ tsp flaky sea salt until melted, then drizzle over the sides in zigzags. Let it set at room temperature for 10 minutes before serving. The salt enhances the sweetness and adds a gourmet touch.
Coconut Cake Layers
Substitute 1 cup of the all-purpose flour with 1 cup fine shredded coconut (unsweetened) and add 2 tbsp toasted coconut flakes to the batter. Use a toasted coconut buttercream (replace 1 cup heavy cream with 1 cup coconut cream) for a tropical twist. Garnish with toasted flakes before serving. 🥥
Red Velvet Twist
Add 1 tbsp red food coloring and 1 tsp cocoa powder to the batter for a subtle red velvet effect. Use a cream cheese frosting (mix 8 oz cream cheese with 1 cup butter and 4 cups powdered sugar**) for a Southern-inspired variation.
The slight tang balances the sweetness perfectly. 🎀
Nutrition facts
Frequently asked questions
Can I bake this cake in smaller pans instead of 11-inch?
Yes, but you’ll need to adjust the baking time. For 9-inch pans, bake for 20-25 minutes at 350°F and reduce the frosting by about 25%. The key is to maintain the same batter depth (about 1.5 inches) for even baking. Just remember, smaller cakes cool faster—let them sit fully before frosting to avoid crumbs.
Why does my cake sink in the middle even after following the recipe?
This usually happens from overmixing the batter (developing gluten) or opening the oven too soon. Mix just until combined and avoid peaking at the cakes until 20 minutes in. Another tip: ensure your oven is fully preheated and use an oven thermometer—many home ovens run 25°F hotter than set! Also, check that your baking powder is fresh.
How do I make this cake gluten-free?
Replace the all-purpose flour with a 1:1 gluten-free baking flour blend (like Bob’s Red Mill) plus 1 tsp xanthan gum. Use 1.5 cups of the blend for the same volume. For the frosting, ensure your confectioners’ sugar is gluten-free. The gelatin stabilizer in the frosting is naturally gluten-free, so no changes are needed there. Test the cake immediately after baking—gluten-free versions often need slightly longer baking.
Can I make this cake ahead of time?
Bake the layers 1 day ahead and store them wrapped tightly in plastic at room temperature. The frosting can be made 2 days ahead and stored in the fridge—just rewhip before using. Assemble the cake 4 hours before serving to let the frosting set. For a 3-day-ahead plan, wrap the fully frosted cake in plastic and refrigerate, bringing to room temp 2 hours before serving.
What’s the secret to smooth, professional-looking sides?
The trick is the hot spatula technique! Dip your offset spatula in hot water, wipe it clean, then swipe it across the frosting. The heat melts the frosting slightly, creating ultra-smooth edges. Work quickly and keep the spatula moving—don’t press too hard. For extra shine, dust the finished cake with a tiny bit of powdered sugar using a fine-mesh sieve. The chilling time before frosting is also critical—2 hours in the fridge makes all the difference!

- 12 Bean Chili Recipe: Hearty Slow-Cooked Depth With 12 Legumes - October 17, 2026
- 5 Seed Bread Recipe: Nutty Crunch and Artisan Flavor in One Loaf - October 17, 2026
- 1 Lb Macaroni Salad Recipe: Bold, Crunchy, and Crowd-Pleasing - October 17, 2026