
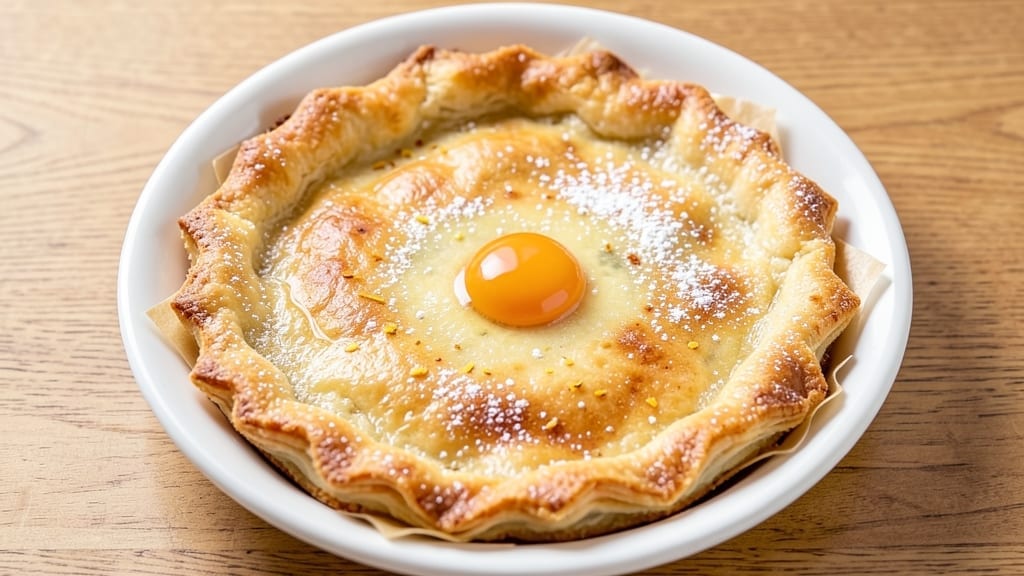
This flaky 11-inch pie crust recipe starts with layers so delicate they crumble at the slightest press—your desserts will never be the same. This recipe delivers the perfect balance of crispness and tenderness, using a simple technique that even beginner bakers can master.
The secret lies in cold butter and minimal handling—no overworking the dough, just patience and precision.
What sets this crust apart is its foolproof method for achieving that signature lattice pattern, whether you’re making a classic apple pie or a modern twist like salted caramel. Each step is designed to prevent common pitfalls like cracking or shrinking, so you’ll get a golden, sturdy crust every time.
The dough rests just long enough to relax the gluten without losing its structure.
By the time you slide that perfectly baked crust into the oven, you’ll be rewarded with edges that crisp to a delicate golden brown while the center stays tender.
The filling—whether it’s spiced pumpkin, tart apples, or even a savory option—will sit in a crust that holds its shape and delivers that satisfying crunch with every bite.
This recipe isn’t just about the crust; it’s about the confidence that comes with knowing you’ve mastered a technique that elevates any pie. Ready to bake? Let’s get started with the ingredients and step-by-step instructions that guarantee success.
Ingredients for 11 inch pie crust
Nine simple ingredients create a crust so delicate it shatters with every bite—no shortcuts, just perfect layers.
| Ingredient | Amount | Notes |
|---|---|---|
| All-Purpose Flour 🌾 | 2 ½ cups | Sifted for light texture |
| Unsalted Butter 🧈 | 1 cup | Cold, cubed into 1/2-inch pieces |
| Ice Water 💧 | ½ cup | Chilled, for binding |
| Diamond Crystal Kosher Salt 🧂 | ½ tsp | Fine grain preferred |
| Granulated Sugar 🍚 | 1 tbsp | For tenderizing flour |
| Large Egg Yolk 🥚 | 1 whole | For binding and richness |
| Vanilla Extract 🌸 | ½ tsp | Optional, for subtle flavor |
| Cornstarch 🌾 | 1 tbsp | For extra flakiness |
| Butter Flakes (for lattice) 🧈 | ¼ cup | Melted, for brushing |
| Coarse Sugar (for sprinkling) 🍚 | 2 tbsp | For golden crust edges |
The butter is non-negotiable—European-style unsalted with at least 80% fat delivers the richest flakes. Plugrá or Kerrygold are my go-tos, but any high-quality brand works if it’s cold. Keep those cubes frozen until use—they’ll melt slower and create better layers. The flour? King Arthur or Gold Medal are reliable, but sift it first—this prevents tough spots. If your kitchen’s humid, chill the flour in the fridge for 10 minutes before mixing. The cornstarch might seem optional, but it’s what gives this crust that signature shatter factor.
No egg yolk? 1 tbsp milk or water plus 1 tbsp flour works as a binder, though the crust won’t be quite as tender. Short on vanilla? Almond extract at half the amount adds depth without overpowering. The lattice pattern requires precision—pre-cut strips from the grocery store save time, but if you’re ambitious, fold the dough in half before cutting. For a savory crust, skip the sugar entirely and boost the salt to 1 tsp. And if your butter melts too fast? Freeze the dough balls for 15 minutes before rolling.
This dough keeps for 3 days wrapped in plastic in the fridge, but it’s best used within 24 hours for maximum flakiness. For longer storage, freeze the dough balls for up to 3 months—thaw overnight in the fridge before rolling. Brush the baked crust with melted butter flakes while still warm for that restaurant-quality sheen. Leftovers? Crumble over ice cream or use as a crispy topping for casseroles. The lattice pattern stays sturdy for 2 days if stored in an airtight container.
Why You’ll Love This Recipe
- No-Fuss Assembly: I swear by this crust because it’s all about the process—just pulse the butter and flour, add ice water, and fold. No rolling pins, no stress, and no last-minute reshaping. The secret’s in the cold butter and kosher salt; it keeps everything together like magic.
- Buttery Crunch Perfection: That first bite? Pure satisfaction. The sugar in the butter (yes, it’s there) caramelizes just enough to give the edges a golden, almost toasty crunch, while the center stays tender. Honestly, it’s the kind of crust that makes you pause mid-slice to savor it.
- Weeknight or Holiday: Between us, this crust works for everything—apple pie, pot pie, even a quiche for breakfast. I’ve used it for Thanksgiving leftovers, summer potlucks, and lazy Sunday brunches. It’s the one recipe that never lets me down, no matter the occasion.
- Costs Pennies, Lasts Forever: A single batch feeds two pies, and the ingredients? Basic. Cold butter, flour, and ice water are already in my pantry. Plus, leftovers freeze like a dream—just thaw and bake. It’s my budget-friendly secret for looking like a baking pro without breaking the bank.
Step-by-step instructions for perfect 11-Inch pie crust
Mastering flaky layers requires precision—follow these exact steps for a crust that shatters with every bite.
Combine Dry Ingredients for Optimal Texture
In a large bowl, whisk together the 2.5 cups all-purpose flour, 1 tablespoon granulated sugar, ½ teaspoon Diamond Crystal kosher salt, and 1 tablespoon cornstarch. The sugar tenderizes the flour while preventing gluten development, and the salt enhances flavor. Sift the flour mixture directly into the bowl to aerate it—this creates tiny air pockets that become the flaky layers in your crust.
I like to use a whisk here rather than a spoon to ensure even distribution of the sugar and salt. These dry ingredients should be completely homogeneous before adding any fats. If you notice any flour clumps, press them through a fine-mesh sieve to maintain consistency throughout the dough.
Cut in Cold Butter for Maximum Flakiness
Add the 1 cup cold unsalted butter (cut into ½-inch cubes) to the flour mixture. Using a pastry cutter or two forks, work the butter into the flour until you achieve pea-sized crumbs with some larger butter pieces remaining. This technique is called “cutting in,” and it’s critical for creating flaky layers.
Handle the mixture gently—overworking develops gluten and destroys that delicate texture. The butter should remain cold throughout this process. If you notice the butter starting to melt, place the bowl in the freezer for 5 minutes to reset the temperature. You’re aiming for a texture where the butter coats the flour evenly but still has visible chunks.
Add Wet Ingredients and Form the Dough
In a separate small bowl, whisk together the ½ cup ice water, 1 whole large egg yolk, ½ teaspoon vanilla extract, and any accumulated flour from the mixing bowl. The ice water is essential—it’s cold enough to keep the butter firm while providing just enough moisture to bind the dough.
Gradually pour the wet mixture over the dry ingredients while stirring with a fork. Stop mixing as soon as the dough comes together—it should form a shaggy mass that’s still slightly crumbly. Avoid overmixing, which develops gluten and makes the crust tough. If the dough feels too dry, add 1 teaspoon more ice water; if too sticky, sprinkle in 1 tablespoon more flour. The dough should hold together when pressed but not be wet.
Chill the Dough for Perfect Handling
Divide the dough into two equal discs, flatten each slightly, and wrap them tightly in plastic wrap. Place them on a flat surface and press down gently to remove any air pockets. Refrigerate for at least 2 hours or up to 48 hours. This chilling period is non-negotiable—it allows the gluten to relax and the butter to solidify, which prevents the crust from shrinking during baking.
I recommend chilling overnight if possible. The longer the dough rests, the more flavor develops as the butter slowly melts and redistributes. When you’re ready to roll, the dough should be cold but pliable. If it feels too firm, let it sit at room temperature for 10-15 minutes before handling. Never skip this step—rushing leads to soggy, dense crusts.
Roll and Transfer for an 11-Inch Crust
On a lightly floured surface, roll one disc of dough into a 12-inch circle (about ⅛-inch thick). The dough will naturally want to spring back—rotate it frequently and press down gently as you roll. Transfer the rolled crust to a 11-inch pie dish, carefully easing it into the pan without stretching. Trim any excess dough hanging over the edge, leaving about ½-inch overhang. Fold the overhang under itself to create a neat edge.
Repeat with the second disc for your top crust if making a double-crust pie. For lattice work, roll the second disc into a 12-inch rectangle, cut into strips, and arrange over the filling. Brush the bottom crust with melted butter flakes and sprinkle with 2 tablespoons coarse sugar before adding filling. The sugar creates a beautiful golden crust edge while the butter flakes add richness that carries through the baking process.
Pro Tips For Making 11 Inch Pie Crust
- CHILL THE BUTTER FIRST: Take your unsalted butter out of the fridge 15 minutes before mixing—it should soften just enough to press into the flour but not melt. I learned this the hard way when my crust turned out greasy and flaky in the wrong way (i.e., not crisp). Cold butter = better layers.
- WEIGH THE FLOUR: Skip the scooping. Use a kitchen scale for the all-purpose flour—11-inch crusts need precision. Spooning flour into cups packs it differently, and you’ll end up with a tough crust. A little extra effort here means a lighter, more tender result.
- STOP WHEN IT’S SHAGGY: Mix the butter and flour until the dough looks like wet sand, not sticky or crumbly. Overworking it develops gluten, and your crust will turn out chewy instead of flaky. Stop as soon as the mixture holds together when pressed—yes, it’ll look messy, and that’s fine.
- PRESS THE CRUST FAST: Once the dough is in the pan, press it out quickly and evenly—no lingering in one spot. I used to take my time, and the crust would shrink back. Work in concentric circles, starting from the center, to keep it smooth and prevent gaps. A rolling pin helps, but your hands work too if you’re in a hurry.
Serving suggestions for leftovers
Classic Pairings
An 11-inch pie crust shines with traditional fillings like apple or peach—the crisp edges contrast perfectly with tender fruit. For a crowd-pleaser, try a classic apple pie with Granny Smith and Honeycrisp apples, tossed in 2 tbsp lemon juice and 3 tbsp brown sugar.
Bake the bottom crust, fill, then top with a lattice or second crust brushed with egg wash. 🍏
Savory Twists
Swap sweet for savory with a spinach and feta quiche—sauté 2 cups fresh spinach with 1 cup crumbled feta and 4 eggs whipped with ½ cup heavy cream. Pour into the crust and bake at 375°F for 30 minutes.
The flaky layers hold up beautifully to rich, creamy fillings. For extra flair, sprinkle with toasted pine nuts before serving.
Seasonal Variations
Fall calls for pumpkin pie—mix 1.5 cups pumpkin puree, 1 cup sweetened condensed milk, 2 eggs, and 1 tsp cinnamon. Pour into the crust and bake at 425°F for 15 minutes, then reduce to 350°F for 40 minutes.
The crust’s structure prevents cracking, even with custard fillings. For winter, try a pecan pie with 2 cups chopped pecans and 1 cup corn syrup—the lattice keeps the filling contained while adding visual appeal.
Garnish Game-Changers
Elevate any pie with simple garnishes. For sweet pies, brush the baked crust with melted butter flakes and sprinkle with coarse sugar for a caramelized edge. Add flaky sea salt (like Maldon) to contrast sweetness.
For savory pies, top with fresh herbs like thyme or rosemary—just before serving to keep them vibrant. A drizzle of honey or balsamic glaze adds unexpected depth to both sweet and savory creations.
Make-Ahead Magic
Assemble pies 24 hours ahead—store unbaked in the fridge to let flavors meld. Bake straight from the fridge (add 5-10 minutes to cook time). For freezer-friendly pies, bake the crust, fill, then freeze unbaked for up to 3 months.
Thaw overnight before baking. This works perfectly for key lime pie or chocolate cream pie**, where the crust’s structure keeps fillings intact during freezing. Label with bake instructions to avoid guesswork later. ❄️
Nutrition facts
Frequently asked questions
Why does this recipe call for ice water instead of regular water?
The ice water keeps the butter cold while providing just enough moisture to bind the dough. Cold butter creates flaky layers, and ice water prevents the butter from melting too quickly during mixing. If you only have room-temperature water, chill your mixing bowl first to compensate.
Can I make this crust without a food processor or pastry cutter?
Use two forks or even your fingers to cut the butter into the flour until you get pea-sized crumbs. Work quickly to keep everything cold—this prevents the butter from melting and losing its flakiness. The key is minimal handling to avoid developing gluten.
What if my dough cracks when rolling?
Cracking usually happens when the dough is too warm or too dry. Chill your rolling pin and work surface, and keep the dough wrapped in plastic between rolls. If cracks appear, gently press them closed with your fingers or use a bit of water to smooth them. For extra insurance, roll the dough slightly thicker than needed and trim after baking.
How do I prevent the crust from shrinking in the oven?
Shrinking happens when the dough isn’t chilled enough or the butter melts too quickly. Always chill the dough for at least 2 hours before rolling, and keep the butter as cold as possible. When transferring to the pie dish, avoid stretching—ease the dough in gently. Pre-bake the crust (blind bake) for 15 minutes at 375°F before adding filling to set its shape.
Can I use this crust for a savory pie like quiche?
Yes! For savory applications, reduce the sugar to ½ tablespoon and increase the salt to 1 teaspoon. The extra salt balances rich fillings like cheese or eggs. The same flaky technique works perfectly for quiches, pot pies, or even savory tarts. Just brush the baked crust with melted butter for extra richness.

- 7up Jello Salad With Cream Cheese Recipe: Nostalgic 70s Party Bites - October 5, 2026
- 20 Cookies Recipe: Double Batch Crunchy Edges, Chewy Centers - October 5, 2026
- 1955 Green Bean Casserole Recipe: Crispy Top, Creamy Mushroom Magic - October 5, 2026