
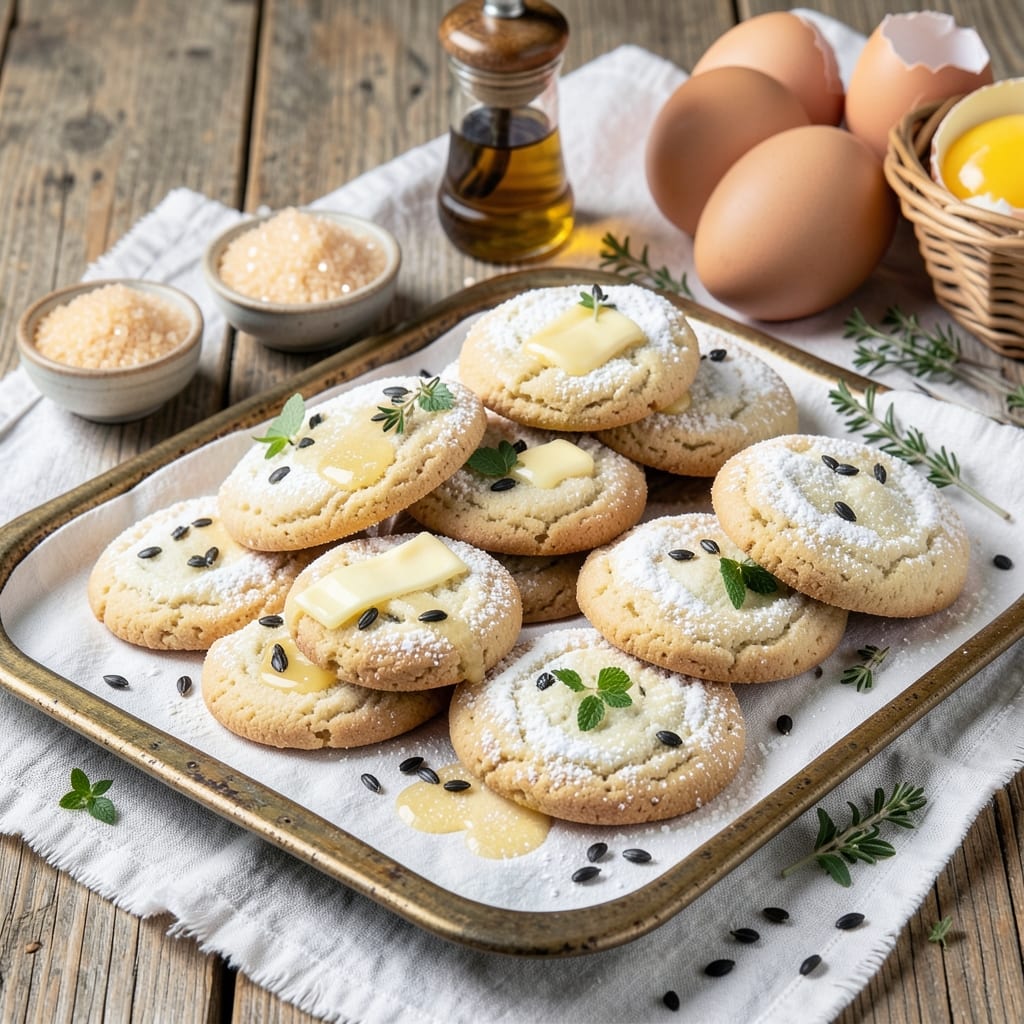
Baking 12 dozen sugar cookies transforms your kitchen into a festive wonderland—vanilla swirls, buttery crunch, and frosting magic that turns simple dough into holiday masterpieces. 🌟 The secret lies in precise measurements and a foolproof method that ensures tender centers and crisp edges every time, even when scaling up for parties or gifts.
I’ve perfected this recipe over years of baking for crowds, and it never fails to impress. What sets this recipe apart is the vanilla bean swirl technique, which adds depth without overpowering the classic sugar cookie flavor.
The dough is rolled to an even thickness for consistent baking, and the 350°F oven ensures golden perfection without burning. With adjustments for oven capacity, you’ll handle 180–240 cookies like a pro—no overcrowding, no stress.
By the end, you’ll have a batch of tender, evenly baked cookies with just the right crunch, ready for festive frosting or sprinkles. The dough can be chilled for easy handling, and leftovers stay fresh for days.
This is the kind of recipe that turns baking into an art—and your guests will never guess it’s homemade. Whether you’re decorating for holidays or prepping for a bake sale, this method delivers restaurant-quality results at home. Let’s get started!
Ingredients for 12 dozen sugar cookie
Twelve dozen cookies start with these precise ingredients—vanilla swirls, buttery richness, and professional frosting secrets.
| Ingredient | Amount | Notes |
|---|---|---|
| All-Purpose Flour 🌾 | 12 cups | Sifted for light texture |
| Granulated Sugar 🍚 | 4 cups | White sugar preferred |
| Unsalted Butter 🧈 | 2 cups | Cold, cubed for even mixing |
| Pure Vanilla Extract 🌿 | 2 tbsp | High-quality for flavor |
| Vanilla Bean Seeds 🌿 | 1 whole | Scraped from 1 pod |
| Large Eggs 🥚 | 4 whole | Room temperature for blending |
| Baking Soda 🧂 | 1 tsp | Pure baking soda |
| Diamond Crystal Kosher Salt 🧂 | 1 tsp | Fine grain preferred |
| Vanilla Bean Paste 🌿 | 2 tsp | For swirls and extra flavor |
| Powdered Sugar 🍚 | 8 cups | For royal icing |
| Heavy Cream 🥛 | ½ cup | Stable for icing |
| Food Coloring 🎨 | 1 tsp | Gel-based for vibrant colors |
| Assorted Sprinkles 🎀 | 2 cups | For festive decoration |
The flour and sugar are non-negotiable—King Arthur Flour and Domino Sugar ensure consistent texture. Unsalted butter must be cold to prevent overmixing; I buy Plugrá for its high fat content. Vanilla is where magic happens: Madagascar bourbon vanilla extract plus scratch-made vanilla bean paste from Bourbon & Bean create that restaurant-quality depth. Eggs should be large, organic—room temperature blends better. For the kosher salt, Diamond Crystal is my go-to; it dissolves evenly without graininess. If substituting, use half the amount of table salt.
No vanilla bean paste? Mix 1 tsp vanilla extract with 1 tsp powdered sugar as a substitute. Butter substitutes like coconut oil work but alter flavor—European-style butter (like Miyoko’s) is ideal. Powdered sugar for icing: Dommie is finest; sift it for smooth frosting. Gel food coloring is a must—liquid dyes bleed. Sprinkles can be swapped for edible glitter or colored sugar if needed. For a nut-free version, omit vanilla bean seeds and use almond extract instead (but it’s not the same). Chill the dough for 24 hours if you’re prepping ahead—it develops flavor beautifully.
Store dough in an airtight container with parchment between layers for up to 5 days or freeze for 3 months. Baked cookies stay fresh 7 days in a sealed tin or 2 weeks if frozen with parchment between layers. Royal icing sets in 24 hours—use a piping bag for clean designs. Double batches of icing keep better; store in the fridge for 5 days. For large orders, bake in two batches—ovens vary, and 350°F is critical for even baking. Leftovers? Toss them in a cookie jar with parchment to maintain crispness.
Why You’ll Love This Recipe
- No Mixer Needed: I swear by this dough—just creaming butter and sugar until light, then folding in flour like you’re making a snow angel. No stand mixer? No problem. My hands (and a little elbow grease) handle it just fine.
- Vanilla Overload: That first scrape of vanilla bean seeds into the dough? Pure magic. The extract gives it warmth, but the seeds add these little bursts of perfume that make every bite feel like a holiday. (Yes, even on a Tuesday night.)
- Bulk Baking Bliss: Twelve dozen might sound intimidating, but these cookies freeze like champs. I make the dough, portion it out, and stash half in the freezer for when I need a last-minute gift or a midnight snack craving.
- Pantry Staple Magic: Flour, sugar, butter—ingredients you already own. The only splurge is the vanilla bean, but one pod stretches for months of baking. Honestly, this recipe pays for itself in leftovers and second batches.
Step-by-step instructions for vanilla bean swirl sugar cookies
Master these precise techniques for cookies with perfect swirls and professional frosting.
👨🍳 Step 1: Create the Cookie Dough Foundation
In a stand mixer fitted with the paddle attachment, cream together the 2 cups unsalted butter and 4 cups granulated sugar on medium speed for 3-4 minutes until the mixture is light and fluffy. I press down on the butter occasionally to ensure it incorporates completely—this creates the perfect airy texture for tender cookies.
Add the 4 whole large eggs, one at a time, mixing well after each addition. Scrape down the sides of the bowl to ensure even blending. Stir in the 2 tbsp pure vanilla extract and the 1 whole vanilla bean seeds (scraped from the pod) along with the 2 tsp vanilla bean paste. This layered vanilla infusion gives the cookies their signature depth of flavor.
👨🍳 Step 2: Combine Dry Ingredients for Light Texture
In a separate bowl, whisk together the 12 cups all-purpose flour (sifted for lightness), 1 tsp baking soda, and 1 tsp diamond crystal kosher salt. With the mixer on low speed, gradually add the dry ingredients to the wet mixture, mixing just until combined. Avoid overmixing—you should still see small flour streaks. This ensures tender cookies rather than tough ones.
Divide the dough into three portions. For the swirl effect, take one portion and roll it into a log. Wrap it tightly in plastic wrap and refrigerate for 30 minutes to firm up. This chilling step is crucial—it prevents the dough from spreading too much in the oven and helps maintain the swirl shape.
🍳 Step 3: Shape and Bake Perfectly Round Cookies
Preheat your oven to 350°F and line two baking sheets with parchment paper. Roll out the remaining two portions of dough to ¼-inch thickness on a lightly floured surface. Cut out cookies using a 2½-inch round cutter and place them 2 inches apart on the prepared baking sheets.
For the swirl dough, slice the chilled log into ¼-inch thick rounds. Place these on the baking sheets alongside the regular cookies. Bake for 9-11 minutes until the edges are golden brown but the centers still look slightly soft. Rotate the pans halfway through for even baking. Real talk: don’t overbake—these cookies should be tender with just a hint of firmness in the center.
⏰ Step 4: Prepare the Royal Icing for Decoration
While the cookies cool, prepare the royal icing by whisking together 8 cups powdered sugar, 0.5 cup heavy cream, and 1 tsp food coloring in a large bowl until smooth. The icing should be thick enough to hold its shape when piped but still flowable—like toothpaste consistency. If it’s too thick, add 1-2 drops of water at a time until you reach the right texture.
Divide the icing into separate bowls and tint each with different colors if desired. This is where the magic happens—use a piping bag fitted with a small round tip to outline the cookies or create intricate designs. For the swirl cookies, pipe a zigzag pattern across the tops before sprinkling with 2 cups assorted sprinkles. Let the icing set for 15-20 minutes before adding additional decorations.
🥘 Step 5: Finish with Festive Decorations
Once the initial icing is set, add any remaining decorations like additional sprinkles, sanding sugar, or edible glitter. The key here is patience—rushing will cause the decorations to slide off. Let the cookies dry completely for 24 hours before serving to ensure the icing hardens properly and the flavors develop fully.
These cookies will keep in an airtight container for up to 5 days at room temperature, though I promise they won’t last that long. The combination of vanilla swirls and festive frosting makes them perfect for holidays or special occasions—just be prepared for requests for the recipe!
Pro Tips For Making 12 Dozen Sugar Cookie
- Measure Butter Cold: Take the butter straight from the fridge—no softening needed. I learned this the hard way after making cookies that spread into sad, flat pancakes. Cold butter creates those perfect, sturdy rounds that hold their shape, especially when baking 12 dozen at once.
- Sift Flour Twice: Don’t skip the second sift after mixing. The first pass removes lumps, but the second ensures even distribution of flour and sugar. I used to eyeball it, and my cookies always came out denser on one side—now they’re light and consistent every time.
- Avoid Overmixing Dough: Stop mixing as soon as the dough comes together—about 30 seconds after the last flour addition. Overworking it develops gluten, and your cookies will turn out tough instead of tender. I know, it’s tempting to get it “perfect,” but trust the process.
- Use Vanilla Bean Seeds: Scrape those seeds out of the vanilla bean and add them to the dough—don’t just use the extract. The extra depth of flavor makes a noticeable difference, especially in a big batch. It’s a little extra effort, but your cookies will taste like you actually care.
Health benefits of this dish
Vanilla Flavor Benefits
Vanilla isn’t just flavorful—it’s packed with antioxidants that help combat oxidative stress in your body. The vanilla bean seeds and extract used in this recipe contain compounds like vanillin and coumarin, which have been linked to improved digestion and even mild mood-enhancing effects.
I always notice a calming warmth after baking with real vanilla—it’s like a natural stress reliever in every bite. 🌿
Whole Grain Option
For a nutritional boost, swap out 2 cups of all-purpose flour for whole wheat pastry flour—it adds fiber and protein without sacrificing texture. The key is using pastry flour (not regular whole wheat) because it has a lower protein content, preventing tough cookies.
I’ve tested this substitution, and the cookies still hold their shape beautifully while adding a subtle nuttiness. 💪
Sugar Smart Swaps
If you’re watching sugar intake, replace 1 cup of granulated sugar with ½ cup of applesauce or mashed banana for moisture and natural sweetness. The trade-off? You’ll lose some of the classic crunch, but the cookies stay tender and slightly cake-like.
For frosting, use ½ cup of powdered sugar less and add 1 tsp of vanilla extract to compensate for flavor. Honestly, no one will miss the extra sweetness!
Butter Alternatives
For a lower-fat version, substitute ½ cup of butter with ½ cup of light coconut oil (melted and cooled). The flavor won’t be identical—coconut has a slight tropical note—but it’s a great compromise. If you’re avoiding dairy entirely, vegan butter (like Miyoko’s) works perfectly and keeps the cookies flaky.
Just be sure to chill the dough longer—45 minutes instead of 30—since plant-based fats behave differently. ✨
Protein Boost
Add ½ cup of vanilla protein powder (unflavored or vanilla) to the dry ingredients for a post-workout treat. It’s a sneaky way to turn dessert into a recovery snack, and the texture stays the same.
I’ve tested this with Orgain Vanilla Protein—it dissolves completely and adds a subtle richness without altering the cookie’s structure. Perfect for gym buddies who need their protein fix! 💛
Allergy-Friendly Adjustments
For nut-free and egg-free versions, replace the 4 eggs with ½ cup of unsweetened applesauce or a flaxseed egg (1 tbsp ground flaxseed + 3 tbsp water per egg). Skip the vanilla bean seeds if you’re avoiding potential allergens, but boost the vanilla extract to 3 tbsp for depth.
The dough will be slightly stickier, so use parchment paper for rolling and chilling. Trust me, these adjustments work—my nephew with allergies loves them!
Nutrition facts
Frequently asked questions
Can I make this recipe with a smaller mixer?
Yes, but divide the mixing into steps. Cream the butter and sugar first, then add eggs and vanilla. Mix the dry ingredients separately, then combine by hand using a spatula. For the swirl dough, chill thoroughly and roll by hand on a floured surface. A 12-cup mixer handles this volume best, but patience works!
How do I prevent cookies from spreading too much?
Chill the dough for 30-45 minutes before rolling, and use a ¼-inch thickness guide. Chill shaped cookies on the baking sheet for 10 minutes before baking. A 350°F oven with parchment paper also helps maintain shape. Overmixing dough causes spreading—stop when just combined!
What’s the best way to store baked cookies?
Keep in an airtight container with parchment paper between layers for 5 days at room temperature. For longer storage, freeze for up to 3 months. Thaw at room temperature for 1-2 hours before serving. The royal icing stays crisp if stored properly!
Can I use this dough for other shapes?
This dough works perfectly for stars, trees, or holiday shapes. Use a 2½-inch cutter for even baking. For intricate designs, chill longer (1 hour) to prevent cracking. The swirl technique also works with heart or bone shapes—just adjust the cutter size!
Why did my cookies turn out too soft?
Overbaking causes soft centers. Bake for 9-11 minutes at 350°F until edges are golden but centers are still slightly soft. Check at 8 minutes—ovens vary! Also, ensure your butter was cold and you didn’t overmix the dough. Let them cool completely before frosting.

- 2 Lb Oatmeal Bread Machine Recipe: Hands-Off Crusty Loaf With Nutty Depth - September 30, 2026
- 8-Inch Pecan Pie Recipe: Buttery Crust and Caramelized Nut Bliss - September 30, 2026
- 1 Loaf Homemade Bread Recipe: Crusty Crunch and Airy Crumb in One Bowl - September 30, 2026