
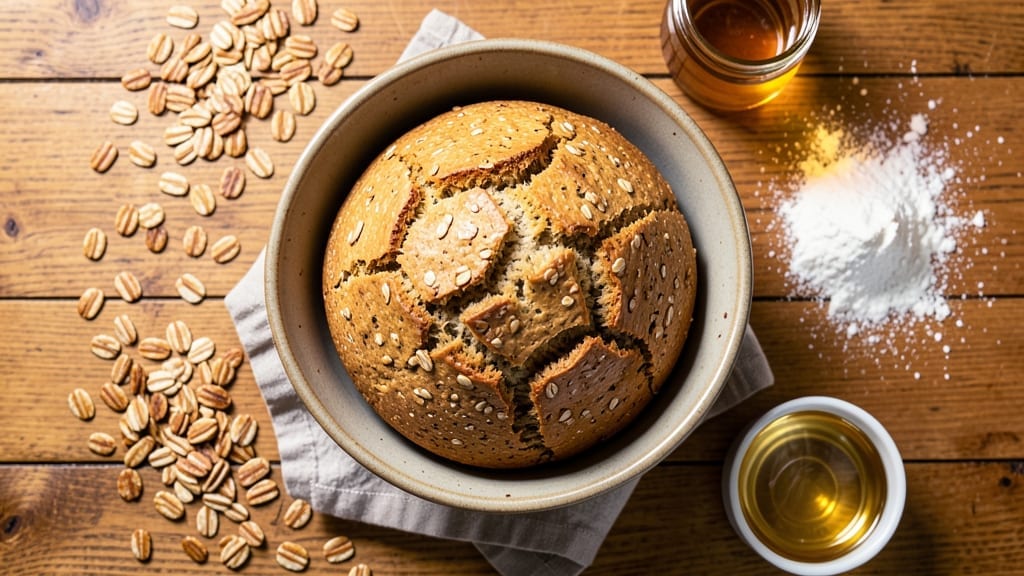
A 2 lb oatmeal bread machine recipe transforms your kitchen into a bakery with minimal effort—just load the ingredients, set the machine, and walk away. The result? A crusty loaf with a nutty depth from rolled oats, perfect for toast, sandwiches, or serving warm with butter.
This recipe uses simple pantry staples and your bread machine’s basic cycle, making it ideal for beginners and busy bakers alike.
The secret to a perfectly textured loaf lies in the right hydration balance and kneading time. Rolled oats add heartiness and fiber, while a touch of honey or sugar enhances browning and flavor.
The bread machine handles the heavy lifting—no manual kneading required—so you can focus on other tasks while it works its magic. For a foolproof crust, ensure the loaf is fully baked before removing it from the pan.
What you’ll end up with is a golden-brown loaf with a crisp exterior and tender crumb, infused with the warm, nutty aroma of oats. The versatility of this bread makes it a staple for any kitchen—use it for breakfast toast, hearty sandwiches, or as a side with soups and stews.
The recipe scales easily, so you can adjust the size to fit your bread machine’s capacity.
For added flavor, consider mixing in seeds like flax or sunflower, or swap out half the oats for whole wheat flour. If your bread turns out too dense, increase the kneading time slightly or reduce the oat quantity by ¼ cup.
With this recipe, you’ll master the art of hands-off baking in no time.
Ingredients for 2 lb oatmeal bread machine
Simple pantry staples plus a few key ingredients for your bread machine magic.
| Ingredient | Amount | Notes |
|---|---|---|
| All-Purpose Flour 🌾 | 3 cups | Unbleached preferred for nutty flavor |
| Rolled Oats 🥣 | 1 cup | Old-fashioned, not quick oats |
| Honey 🍯 | ¼ cup | Or light brown sugar |
| Warm Water 💧 | 1 ¼ cups | 110°F for optimal activation |
| Active Dry Yeast 🍞 | 0.03 oz | 1 packet or 2¼ tsp |
| Salt 🧂 | 1 tsp | Diamond Crystal preferred |
| Unsalted Butter 🧈 | ½ cup | Melted, full-fat recommended |
| Whole Milk 🥛 | ¼ cup | Room temperature preferred |
| Egg 🥚 | 1 whole | Large, room temperature |
| Sunflower Seeds 🌻 | ¼ cup | Optional for extra crunch |
| Cornmeal 🌽 | 1 tbsp | For bread pan coating |
The oats are non-negotiable here—they bring that signature nutty depth. Bob’s Red Mill rolled oats are my go-to, but any old-fashioned variety works. If you’re feeling fancy, toast them lightly in a dry pan for 3-4 minutes before adding to the machine—it deepens the flavor. The yeast is the workhorse, so make sure it’s fresh (test it with warm water + pinch of sugar). For the honey, any liquid sweetener works, but maple syrup adds a subtle earthiness. The butter? Full-fat makes all the difference—it keeps the crumb tender even after baking. If you’re short on time, melted butter works just as well.
No honey? Light brown sugar or agave does the trick. Out of milk? Water works in a pinch, but you’ll lose that slight richness. The egg adds structure, but if you’re making this vegan, replace it with 1 tbsp ground flaxseed + 3 tbsp water (let sit 5 mins). For the seeds, sunflower or flax are my favorites, but pumpkin seeds or sesame seeds add different textures. Pro tip: if your bread machine pan is nonstick, skip the cornmeal—just grease it lightly with butter. And if your dough feels too sticky, reduce the milk by 2 tbsp.
Store the loaf in a paper bag at room temperature for up to 3 days to keep it fresh. For longer storage, slice and freeze portions—toast straight from frozen for crispy results. The oats in this bread make it perfect for toasting or French toast. If you make a double batch, freeze half right away—it’s a lifesaver for lazy mornings. And if you’re worried about density, reduce the oats by ¼ cup if your kitchen is humid, or increase kneading time by 5 minutes.
Why You’ll Love This Recipe
- Bread Machine Magic: I swear, this recipe is the reason I keep my bread machine out. Toss in the flour, oats, and honey—no kneading, no fuss—just press start. The yeast does all the work while I sip my coffee.
- Honey-Oat Crunch: That rolled oats give it a satisfying texture, but the honey? It’s the star. Warm, caramelized sweetness in every bite, and it pairs perfectly with butter or jam. Honestly, I’ve been known to eat it straight from the pan.
- Weeknight & Picnic Hero: Slice it for toast in the morning, pack it for lunches, or bring it to a potluck—this bread does it all. The 2 lb batch feeds my family for days, and the oats keep it hearty enough for sandwiches or toast.
- Budget-Friendly Staple: Flour, oats, and honey are pantry basics, and this recipe stretches them into something special. I’ve made it for under $3 a loaf, and it lasts longer than store-bought. Between us, I’ve never thrown out a slice.
Step-by-step instructions for 2 lb oatmeal bread machine recipe
Let’s bake a hearty, nutty loaf with minimal effort—your bread machine does all the hard work.
Prepare the Ingredients for Perfect Mixing
In a small bowl, whisk together the 1.25 cups warm water (around 110°F) with the 0.03 oz active dry yeast until it forms a frothy foam. This activates the yeast—you’ll see bubbles forming within 5-10 minutes. If it doesn’t bubble, your yeast may be dead, and you’ll need to start over.
In a separate large bowl, combine the 3 cups all-purpose flour, 1 cup rolled oats, 1 tsp salt, and 0.25 cup honey. Gently mix with a wooden spoon until just blended. The oats should be evenly distributed but still visible—this ensures that nutty texture we’re after. I like to press the oats lightly between my fingers to break up any large clumps before adding them to the flour.
Mix Wet Ingredients and Combine
Melt the 0.5 cup unsalted butter in a microwave-safe bowl for 30 seconds (or until just melted). Let it cool slightly, then whisk in the 0.25 cup whole milk and 1 whole egg until smooth. This warm mixture helps activate the yeast even more when combined with the flour.
Add the yeast mixture and melted butter mixture to the dry ingredients. Stir with a wooden spoon until everything comes together into a shaggy dough. It’ll be sticky, but that’s exactly what we want for a tender, moist loaf. If the dough feels too wet, add 1 tablespoon more flour—just enough to make it manageable without drying it out.
Load the Bread Machine and Set the Cycle
Lightly grease your bread machine pan with a bit of oil or brush it with melted butter. Sprinkle a thin layer of 1 tbsp cornmeal on the bottom to prevent sticking. This step is crucial—without it, your beautiful loaf might stick to the pan and tear when removed.
Transfer the dough to the bread machine pan and press it down gently with oiled fingers. The dough should fill about 2/3 of the pan—don’t overfill, or it’ll overflow during kneading. Sprinkle the 0.25 cup sunflower seeds on top for extra crunch and nutrition. Close the lid and select the “Basic White Bread” setting on your machine. The cycle should take about 3 to 3½ hours, depending on your specific model.
Remove and Cool for Maximum Flavor
When the bread machine beeps to signal completion, carefully remove the loaf from the pan. I like to use a thin spatula or offset spatula to help lift it out gently. Let it cool on a wire rack for at least 30 minutes—this allows the crumb to set and makes slicing much easier. If you can’t wait, slice it warm, but be prepared for softer bread.
Here’s the thing—this bread tastes even better the next day as the flavors deepen. The oats develop a more pronounced nutty taste, and the crust becomes slightly crispier. Store any leftovers wrapped in a bread bag at room temperature for up to 3 days, or freeze slices for up to 3 months. For serving, I recommend a light brush of melted butter or a thin layer of honey—it brings out all those warm, comforting flavors.
Pro Tips For Making 2 Lb Oatmeal Bread Machine
- TOAST THE OATS: Dump the rolled oats in a dry skillet over medium heat for 3-4 minutes until they smell nutty and toasted—this deepens the flavor way more than skipping it. I used to skip this step until I realized my bread tasted like cardboard instead of oatmeal.
- MEASURE HONEY BY WEIGHT: Honey’s thickness makes volume measurements unreliable—use a scale for ½ cup (about 120g) instead of eyeballing it. I learned this the hard way when my bread turned out either too sweet or cloying.
- DON’T OVERMIX THE DOUGH: After the bread machine’s first knead cycle, resist the urge to punch it down or mix again—overworking the gluten with oats makes the bread dense. Let the machine handle it; trust the process.
- ADD YEAST TO WARM WATER FIRST: Mix the yeast with the warm water before adding honey—this gives it a head start to activate while the other ingredients combine. I used to toss it in dry, and my bread would always take forever to rise.
Common mistakes when making this recipe
Overmixing the Dough
One of the biggest mistakes is overmixing the dough once it’s in the bread machine. While the machine handles most of the kneading, too much agitation can develop gluten excessively, leading to a dense, chewy loaf instead of that light, airy texture we want.
The dough should be just combined—shaggy and sticky—when you load it into the pan. If it feels too stiff or elastic, you’ve likely overmixed. Trust the machine to do the work; you’re just setting it up for success. 💫
Skipping the Yeast Test
Never assume your yeast is fresh! If you skip testing it by mixing 1 packet of yeast with 2 tbsp warm water and 1 tsp sugar and it doesn’t foam within 5-10 minutes, your bread won’t rise properly.
Dead yeast is a silent killer of flavor and texture. I’ve ruined more loaves than I’d like to admit by forgetting this step—always test first! The yeast should create a bubbly, frothy mixture before you proceed.
Ignoring the Pan Prep
Failing to grease the pan or use cornmeal is a fast track to a sticky, torn loaf. The cornmeal creates a barrier that prevents the dough from sticking to the pan, while greasing ensures easy release.
I’ve seen loaves tear right down the middle because they were stuck to the pan. Lightly grease with oil or butter, then sprinkle 1 tbsp cornmeal on the bottom—this simple step saves so much frustration. Don’t skip it!
Overfilling the Pan
Stuffing the pan too full is a recipe for disaster—literally. The dough needs room to rise and expand during kneading. If you overfill it, the dough will spill over the sides, creating a messy cleanup and potentially uneven baking.
Fill the pan only about 2/3 full—this gives the dough enough space to develop properly. Trust me, your bread machine will thank you with a perfectly shaped loaf. 🍞
Not Letting the Bread Cool
I know the smell of fresh bread is irresistible, but slicing it too soon is a cardinal sin. The loaf needs at least 30 minutes to cool on a wire rack. Cutting it too early causes the crumb to turn gummy and the slices to fall apart.
Patience here pays off—waiting ensures clean slices and a better texture. If you’re in a rush, at least let it cool for 15 minutes before slicing.
Using Quick Oats
Quick oats are a common mistake—they break down too much during baking, resulting in a dense, gummy loaf. Stick with old-fashioned rolled oats for that perfect nutty texture and chewy bite.
If you’re in a pinch, you can pulse rolled oats in a food processor for a few seconds to speed up the process slightly, but don’t overdo it. The oats should still hold their shape and add that hearty, satisfying texture we all love. 🥣
Nutrition facts
Frequently asked questions
Can I use steel-cut oats instead of rolled oats?
No, steel-cut oats are too dense and won’t break down properly during baking. Stick with rolled oats—they soften just enough to add texture without making the bread gummy. If you’re short on time, lightly toast the rolled oats in a dry pan for 3-4 minutes before adding to deepen their nutty flavor.
Why did my bread turn out dense instead of crusty?
Density usually comes from over-kneading, dead yeast, or too much oatmeal. First, test your yeast to confirm it’s active. If the dough feels stiff or elastic when loaded, you’ve overmixed—just combine ingredients until shaggy. For a crustier loaf, reduce oats by ¼ cup or increase kneading time by 5 minutes in your machine’s settings.
How do I adjust this recipe for a smaller bread machine?
Reduce all ingredients by 25-30% while maintaining the same ratios. For example, use 2 cups flour, ¾ cup rolled oats, and 1 tbsp honey. Keep the water and yeast proportional to the flour amount. Most machines handle 1 lb loaves well—just ensure the pan isn’t overfilled. The texture will be similar but slightly more delicate.
Can I add dried fruit like raisins or cranberries?
Add ½ cup dried fruit (soaked in warm water for 10 minutes first) to the dough along with the sunflower seeds. The extra moisture from the fruit may require 1 tbsp less water overall. For best results, use smaller pieces and distribute them evenly—large chunks can make the bread uneven.
How long does this bread stay fresh without a bread box?
Wrap the cooled loaf in a paper bag (not plastic) and store at room temperature for up to 3 days. The paper bag mimics a bread box by allowing airflow while preventing drying. For longer storage, slice and freeze portions—reheat slices in a 350°F oven for 5-7 minutes or toast straight from frozen.

- 2 Lb Oatmeal Bread Machine Recipe: Hands-Off Crusty Loaf With Nutty Depth - September 30, 2026
- 8-Inch Pecan Pie Recipe: Buttery Crust and Caramelized Nut Bliss - September 30, 2026
- 1 Loaf Homemade Bread Recipe: Crusty Crunch and Airy Crumb in One Bowl - September 30, 2026