
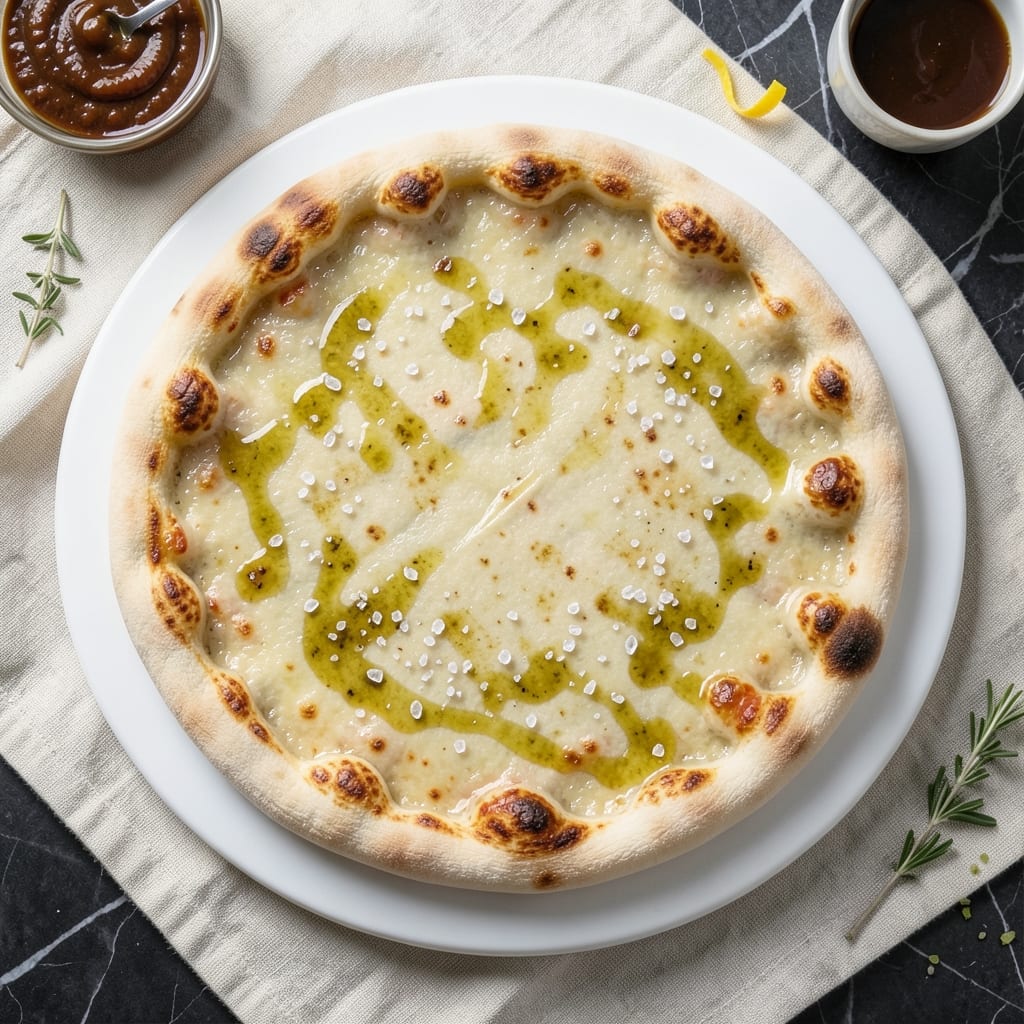
Mastering a 12-inch thin crust pizza dough with that signature light, airy base and perfect chew starts with precise technique—not shortcuts. This recipe delivers a crispy, tender crust that holds toppings without sogginess, using a 30-minute prep and 2-hour proofing for restaurant-quality results at home.
The secret lies in proper hydration, gentle handling, and a thin but sturdy shape that cooks evenly every time.
What sets this dough apart is the balance of flour, water, and a touch of olive oil—just enough to create a golden, crackly crust without losing that satisfying chew.
Unlike heavy New York-style dough, this version focuses on thinness and crispness while maintaining structure, making it ideal for classic Margherita or loaded meat lovers. The dough rests twice: once to develop gluten, again to relax before stretching, ensuring it springs back without tearing.
By the time you slide it into the oven, you’ll have a perfectly even, thin crust with just enough give to support toppings without breaking. The high heat of your oven creates that coveted crispness at the edges while keeping the center tender.
This isn’t just dough—it’s the foundation for a pizza that tastes like it came from a pizzeria, not a shortcut.
Pair it with your favorite sauce, fresh mozzarella, and toppings of choice, then bake at 475°F for 10-12 minutes. The result? A crispy, chewy crust that’s light enough to eat by itself but sturdy enough to hold anything you dream up. Here’s how to make it.
Ingredients for 12 inch thin crust pizza dough
Nine simple ingredients transform into a crispy, chewy pizza crust with perfect balance.
| Ingredient | Amount | Notes |
|---|---|---|
| All-Purpose Flour 🌾 | 3 cups | King Arthur or Gold Medal preferred |
| Extra-Virgin Olive Oil 🫒 | 2 tbsp | Light, fruity variety for best flavor |
| Granulated Sugar 🍚 | 1 tbsp | White or raw cane sugar works |
| Active Dry Yeast 🍞 | 1 ¼ tsp | Ensure yeast is fresh for best rise |
| Warm Water 💧 | 1 ¼ cups | 110°F, not boiling |
| Diamond Crystal Kosher Salt 🧂 | 1 tsp | Fine grain preferred |
| Cornmeal 🌽 | ½ cup | For dusting work surface |
| Semolina Flour 🌾 | ¼ cup | Optional for extra texture |
| Ice Cubes ❄️ | 1 cup | For chilling dough |
The flour is everything here—King Arthur or Gold Medal gives the best gluten structure, but any all-purpose will work in a pinch. Grab a 5-pound bag from Costco if you bake often, or just get the 5-pound bag at regular grocery stores. The yeast? Check the expiration date—old yeast won’t rise properly. For the water, 110°F is key—too hot kills the yeast, too cold slows it down. If you don’t have a thermometer, let tap water sit out for 10 minutes after boiling. The olive oil adds tenderness without greasiness—avoid strong-flavored varieties like Kalamata.
No yeast? Make your own with flour and sugar (mix 1 tbsp flour + 1 tsp sugar + 1/2 cup warm water, let sit 10 minutes, then add to dough). Running out of cornmeal? Semolina or rice flour works too—just know the texture will be slightly different. The sugar can be swapped for honey (same amount), but it might darken the crust a bit. For a no-sugar optionDiamond Crystal measures differently than Morton—use 3/4 tsp Morton if that’s what you’ve got.
This dough keeps 3 days in the fridge, wrapped tightly in plastic. For longer storage, freeze shaped dough balls for up to 3 months—thaw overnight in the fridge before using. The cornmeal/semolina dusting prevents sticking, so don’t skip it. If you’re prepping ahead, make the dough, let it rise, then freeze—just add 10 minutes to proofing time after thawing. For best results, let dough sit at room temp for 10 minutes before stretching—cold dough tears easily
Why You’ll Love This Recipe
- Here’s what I love: the edge gets that perfect golden crunch while the center stays pillowy. The olive oil in the dough keeps it tender, but the thin crust means every bite is crisp enough to hold up to even the sauciest toppings. (Yes, even on a Tuesday night.)
- No-Fuss Mixing: I swear by the 5-minute stir—just flour, olive oil, sugar, and yeast in a bowl. No stand mixer, no fancy tools, just my hands and a little elbow grease. That sugar? It’s not just for sweetness—it helps the yeast wake up faster, so your dough’s ready to roll in under an hour.
- Crispy Yet Chewy: Here’s what I love: the edge gets that perfect golden crunch while the center stays pillowy. The olive oil in the dough keeps it tender, but the thin crust means every bite is crisp enough to hold up to even the sauciest toppings. (Yes, even on a Tuesday night.)
- Weeknight Flex: This dough is my secret weapon for lazy nights—make it ahead, store it in the fridge, and stretch it out when you’re starving. Need a quick lunch? Toss it with pesto and cherry tomatoes. Hosting? Double the batch and turn it into a crowd-pleasing pizza bar.
Step-by-step instructions for 12-Inch thin crust pizza dough
Here’s how to craft a light, airy dough with just the right chew—every time.
Activate the Yeast with Warm Water and Sugar
In a small bowl, combine the 1.25 cups warm water (about 110°F) with the 1 tbsp granulated sugar and 1.25 tsp active dry yeast. Stir gently with a fork or whisk, then let it sit for 5-10 minutes until it becomes frothy and bubbly. This tells you the yeast is alive and ready to work.
I always check the water temperature first—too hot and you’ll kill the yeast; too cold and it won’t activate. If it doesn’t bubble after 10 minutes, your yeast might be old. Let me know if this happens and we’ll troubleshoot.
Mix the Dough with Olive Oil and Salt
In a large bowl, whisk together the 3 cups all-purpose flour and 1 tsp diamond crystal kosher salt. Make a well in the center and pour in the yeast mixture along with the 2 tbsp extra-virgin olive oil. Using a wooden spoon or your hands, mix until a shaggy dough forms.
This dough needs just enough hydration to be workable but not sticky. If it’s too dry, add 1 teaspoon warm water at a time until it comes together. The goal is a soft, slightly tacky dough that’s easy to handle but won’t stick to your fingers.
Knead the Dough Until Smooth and Elastic
Turn the dough onto a lightly floured surface and knead for 8-10 minutes until smooth and elastic. I like to use the “windowpane test” to check readiness—stretch a small piece of dough thin enough to see light through it. If it tears, keep kneading for another minute.
Don’t worry if your arms get tired—this is where the gluten develops, giving your pizza that perfect chew. If the dough starts sticking, wet your hands slightly instead of adding more flour. Too much flour makes for a dense crust.
First Rise with Ice Cubes for Extra Lightness
Lightly oil a large bowl, place the dough inside, and cover with a damp towel. Let it rise in a warm place for 1-2 hours, or until doubled in size. Here’s my secret trick: after 30 minutes, sprinkle the 1 cup ice cubes on top of the dough. The cold shock creates tiny air pockets that make the final crust extra light.
This chilling step also helps prevent overproofing. If your kitchen is warm, place the bowl over a slightly warm oven with the light on (about 70°F) for more consistent rising. Poke the dough gently—if it springs back slowly, it’s ready.
Shape and Chill for Perfect Thin Crust
Punch down the dough and divide it into two equal pieces. On a surface dusted with ½ cup cornmeal and ¼ cup semolina flour, roll each piece into a 12-inch circle, about ⅛-inch thick. For even thickness, use a rolling pin and press down gently but firmly.
Transfer the shaped dough to parchment paper and refrigerate for 30 minutes before adding toppings. This final chill prevents the dough from shrinking when it hits the hot pizza stone. The cornmeal and semolina give that beautiful golden crust you see in pizzerias.
Pro Tips For Making 12 Inch Thin Crust Pizza Dough
- MEASURE WATER BY WEIGHT: The recipe calls for warm water, but eyeballing it leads to dough that’s either gummy or dry. Use a kitchen scale—70% of the flour’s weight in water (so 280g water for 400g flour). This keeps the thin crust consistent every time.
- SALT THE FLOUR FIRST: I used to add salt with the yeast, and my dough always tasted uneven. Instead, mix the salt directly into the flour before adding anything else—it dissolves better and distributes evenly. No more salty pockets or bland patches.
- STRETCH, DON’T PULL: When shaping the dough, resist the urge to yank it into a circle. Gently press and stretch from the center outward, using your knuckles for leverage. This prevents tearing and keeps the thin crust uniform—no patchy thick spots.
- USE COLD OLIVE OIL: The olive oil in this recipe isn’t just flavor—it’s what makes the crust crisp. Chill it in the fridge for 15 minutes before mixing. Cold oil emulsifies better with the flour, so it coats the dough evenly and doesn’t turn the crust greasy.
Dietary considerations for this dish
Gluten-Free Adaptations
For a gluten-free version, replace the 3 cups all-purpose flour with 2 cups gluten-free 1:1 baking flour (like Bob’s Red Mill) plus 1 cup white rice flour. Add 1 tbsp xanthan gum to mimic gluten’s structure.
Let the dough rest 10 minutes after mixing to hydrate fully—gluten-free dough needs extra time. Proofing may take 30-45 minutes longer since gluten-free flours rise differently. 💡
Dairy-Free Options
This dough is naturally dairy-free, but watch for cross-contamination if using shared flours. For extra crispiness, brush the rolled dough with 1 tbsp olive oil instead of butter before baking.
If your toppings include cheese, use dairy-free mozzarella like Miyoko’s or Violife. The crust itself stays perfectly dairy-free while accommodating other dietary needs. ✨
Lower-Carb Variations
Swap 1 cup all-purpose flour for 1 cup almond flour to reduce carbs, but expect a denser texture. Add 1 extra egg white to help bind the dough. For a crispier crust, press the almond flour mixture into a ⅛-inch-thick layer on a parchment-lined tray before baking.
This version works best with minimal sauce—focus on cheese and veggie toppings. 🌟
Vegan-Friendly Adjustments
Replace the 1.25 tsp active dry yeast with 1.25 tsp nutritional yeast for a vegan option. Use 2 tbsp olive oil (already vegan) and ensure your flour is certified vegan. For extra rise, add ½ tsp apple cider vinegar to the water.
The crust will be just as crispy and chewy, perfect for plant-based pizzas with vegan cheese and toppings. 🌱
Allergen-Free Tips
Check all ingredients for hidden allergens: use certified gluten-free yeast if needed, and opt for sunflower oil instead of olive oil if nut allergies are a concern. For egg-free binding, add 1 tbsp ground flaxseed mixed with 3 tbsp water to replace the egg’s structural role.
Always label your dough clearly if sharing with others. 💪
Nut-Free Substitutions
If avoiding nuts, skip almond flour in lower-carb versions and stick to 100% gluten-free flour blend with xanthan gum. For added crispiness, sprinkle ¼ cup crushed cornflakes on the dough before baking—they toast beautifully and add crunch without nuts.
This keeps the crust sturdy and delicious for all dietary needs. 🔥
Nutrition facts
Frequently asked questions
Can I make this dough without a rolling pin for a thinner crust?
For an even thinner crust, use the “stretch-and-press” method: place the dough ball on parchment, cover with plastic wrap, and press your fingers firmly from the center outward while rotating the dough. Repeat until you reach ⅛-inch thickness. This creates a crispier, more restaurant-style crust than rolling.
Why did my dough tear when I tried to stretch it?
Cold dough tears easily—always let it sit at room temperature for 10 minutes before shaping. If it still tears, your gluten development might be weak. Knead 2 more minutes or let it rest 15 minutes longer before stretching. For extra strength, add 1 tbsp vital wheat gluten to the flour next time.
How do I prevent a soggy crust with wet toppings?
Pre-bake the crust for 3-4 minutes at 475°F before adding toppings, or use a thin layer of sauce (no more than 2 tbsp) and let it sit for 5 minutes before adding cheese. For extra protection, sprinkle ¼ cup grated Parmesan on the crust before final baking—it creates a barrier against moisture.
Can I make this dough in a stand mixer?
Yes! Use the dough hook attachment on low speed for 5-6 minutes until the dough pulls away from the bowl. Avoid overmixing—just until smooth and elastic. The mixer saves time but requires slightly less kneading than by hand. Let it rise as directed for best results.
What’s the best way to reheat leftover pizza with this crust?
For crispy results, reheat in a 400°F oven for 5-7 minutes on a baking sheet. For extra crunch, place the pizza directly on the oven rack. Microwaving works in a pinch (30 seconds), but it makes the crust rubbery. Store leftovers in an airtight container to maintain freshness.

- 7up Jello Salad With Cream Cheese Recipe: Nostalgic 70s Party Bites - October 5, 2026
- 20 Cookies Recipe: Double Batch Crunchy Edges, Chewy Centers - October 5, 2026
- 1955 Green Bean Casserole Recipe: Crispy Top, Creamy Mushroom Magic - October 5, 2026