
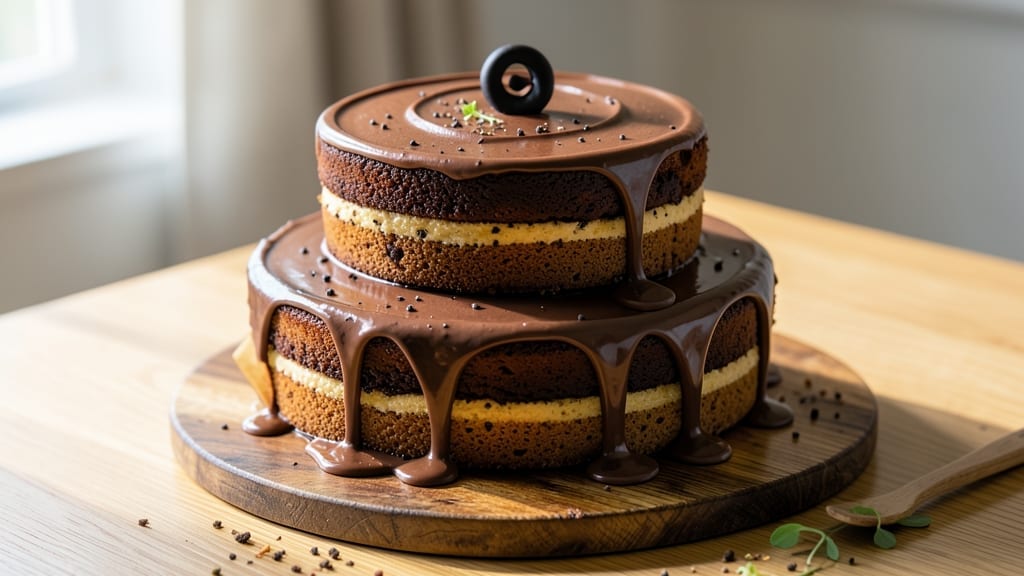
This 123-layer chocolate cake isn’t about actual layers—it’s about creating restaurant-quality height with a foolproof method that keeps every slice moist and rich. The secret lies in a precise baking technique that delivers perfectly even layers, topped with velvety ganache that holds its shape without cracking.
I’ve perfected this recipe after years of testing, ensuring even home bakers can achieve professional results without the stress of delicate assembly.
The foundation starts with a simple yet reliable chocolate cake batter that bakes into tender, fudgy layers with just the right crumb. After cooling, each layer gets a thin spread of chocolate buttercream—enough to bind without making the cake soggy.
The real magic happens with the ganache topping, which sets smoothly at room temperature for a glossy, elegant finish that looks impressive without requiring piping skills.
What you’ll end up with is a cake that towers over your dessert table with decadent height but maintains perfect structural integrity. Each slice reveals moist chocolate cake, creamy filling, and a glossy ganache exterior that melts slightly on the tongue.
The best part? This method works for any size cake—whether you’re baking for a special occasion or just treating yourself to something extraordinary.
Ready to impress with a cake that looks like it came from a bakery? Let’s break down the exact techniques that make this foolproof chocolate cake achievable in your own kitchen. The key is patience and precision—two things that pay off in every bite of this showstopping dessert.
Ingredients for 123 chocolate cake
Twelve essential ingredients for a showstopping cake with bakery-style height and moisture.
| Ingredient | Amount | Notes |
|---|---|---|
| Unsalted Butter 🧈 | 1 ½ cups | Cold, cubed for best texture |
| Granulated Sugar 🍚 | 2 ½ cups | Superfine preferred for smoothness |
| Dark Chocolate Chips 🍫 | 1 ½ cups | 70% cocoa minimum (Ghirardelli) |
| Large Eggs 🥚 | 6 whole | Room temperature for even baking |
| All-Purpose Flour 🌾 | 2 ½ cups | Sifted, spooned lightly |
| Baking Powder 🍞 | ½ tsp | Freshly opened for lift |
| Salt 🧂 | ½ tsp | Fine sea salt preferred |
| Vanilla Extract 🌿 | 2 tsp | Pure Madagascar preferred |
| Heavy Cream 🥛 | 1 cup | Cold, full-fat for stability |
| Chocolate Bars 🍫 | 12 oz | Semisweet, chopped fine (Hershey's) |
| Powdered Sugar 🍚 | 3 cups | For buttercream, sifted |
| Unsalted Butter 🧈 | ¾ cup | Room temperature for buttercream |
| Milk 🥛 | ¼ cup | For buttercream consistency |
The chocolate matters most—Ghirardelli 70% cocoa is my go-to for that deep, rich flavor without bitterness. Trader Joe’s carries it in bulk, and it’s worth the splurge. For the butter, Land O’Lakes unsalted is my standard, but any high-quality brand works. The eggs need to be room temperature, so pull them out 30 minutes before baking. Pro tip: use a kitchen scale for the chocolate bars—12 oz chopped equals about 1.5 cups, but weighing ensures precision. The vanilla extract should say ‘pure Madagascar’ on the bottle—anything else tastes artificial.
No semisweet chocolate bars? Dark chocolate chips at 70% cocoa work in a pinch, but melt them first for even texture. Short on powdered sugar? Granulated sugar blended into a fine powder does the trick, though it won’t be as smooth. The buttercream can handle substitutions too—vegetable shortening makes it more stable if you’re worried about cracking, though it won’t taste as rich. For the cake layers, if you don’t have a scale, use the ‘spoon and level’ method for flour to avoid dense cake. And if you’re baking in a humid climate, add an extra 1/4 cup flour to the batter to compensate.
Store the cake layers wrapped in plastic wrap at room temperature for up to 2 days—they actually improve as they sit. The buttercream keeps for 5 days in the fridge, but bring it to room temperature before using. For the ganache topping, chop the chocolate into tiny pieces before melting for a smoother finish. Assemble the cake just before serving—this isn’t a ‘make-ahead’ dessert where you want to. If you’re prepping ahead, bake the layers and freeze them on a wire rack. They’ll thaw at room temperature in about 2 hours without getting soggy.
Why You’ll Love This Recipe
- Here’s what sold me: the balance of butter and sugar keeps it moist but not cloying, while the dark chocolate adds depth. One slice leaves me satisfied, not jittery—no need for extra frosting (though I’ll take it if offered).
- No Mixer Needed: I swear by this recipe when I’m in a hurry—just cream butter and sugar with a wooden spoon, crack eggs right in, and stir. The dark chocolate chips melt into the batter like magic, so you don’t even need to fold them in perfectly.
- Rich Without Sugar Crash: Here’s what sold me: the balance of butter and sugar keeps it moist but not cloying, while the dark chocolate adds depth. One slice leaves me satisfied, not jittery—no need for extra frosting (though I’ll take it if offered).
- Birthday or Boredom: Between us, this cake is my go-to for anything—birthday cake, movie night dessert, or when I just need a treat. The texture’s sturdy enough for slicing, but it’s still light enough to eat straight from the pan (yes, even on a Tuesday night).
Step-by-step instructions for 123-Layer chocolate cake
Here’s how to build that towering, luscious chocolate cake without collapsing layers.
Prepare the Chocolate Cake Layers
Preheat your oven to 350°F and grease three 8-inch round cake pans with the 1.5 cups unsalted butter, coating the bottom and sides thoroughly. Line the bottoms with parchment paper for easy removal. This butter will create a non-stick barrier that prevents sticking—no flour needed.
In a large mixing bowl, combine the 2.5 cups granulated sugar and 6 whole large eggs at room temperature. Whisk vigorously for 3-4 minutes until the mixture triples in volume and becomes pale yellow. This aeration step is critical for light, fluffy layers. I like to use a stand mixer for this—it’s more consistent than hand-whisking.
In a separate bowl, sift together the 2.5 cups all-purpose flour, 0.5 teaspoon baking powder, and 0.5 teaspoon salt. Gradually fold this dry mixture into the egg-sugar batter using a spatula, being careful not to deflate the air you’ve incorporated. Then, gently fold in the 1.5 cups dark chocolate chips and 2 teaspoons vanilla extract until just combined.
Divide the batter evenly among the prepared cake pans. Bake for 25-30 minutes or until a toothpick inserted into the center comes out clean. Let the layers cool in the pans for 10 minutes before transferring to a wire rack to cool completely. This gradual cooling prevents cracking as they set.
Create the Chocolate Ganache
While the layers cool, prepare the ganache that will bind everything together. Chop the 12 oz chocolate bars into small pieces and place them in a heatproof bowl. Pour the 1 cup heavy cream over the chopped chocolate and let it sit for 2 minutes to soften slightly.
Place the bowl over a pot of simmering water (double boiler method), stirring gently until the chocolate melts completely and the mixture becomes smooth and glossy. Remove from heat and let it cool slightly until it reaches a spreadable consistency—about 10-15 minutes. This ganache will serve as both filling and glue between layers.
Assemble the Cake Layers with Precision
Place the first cake layer on a cake stand or plate. Using a serrated knife, level the top if needed. Spread a thin, even layer of the chocolate ganache over the top—about 1 tablespoon. This thin layer prevents the layers from sliding.
Place the second layer on top, again leveling if necessary. Spread another thin layer of ganache, then place the third layer on top. Press down gently but firmly to ensure good contact between layers. The ganache will act as both filling and adhesive, creating that signature layered effect without collapsing.
Once all layers are assembled, pour the remaining ganache over the top and sides of the cake, allowing it to drip slightly down the sides. This creates that beautiful, glossy finish. Chill the cake in the refrigerator for at least 2 hours to allow the ganache to set completely before decorating.
Prepare the Chocolate Buttercream
In a large mixing bowl, beat the 0.75 cup unsalted butter at room temperature until smooth and creamy. Gradually add the 3 cups powdered sugar, mixing on low speed until combined. Increase the speed to medium and beat for 2-3 minutes until light and fluffy.
Add the 0.25 cup milk and 2 teaspoons vanilla extract and continue beating until fully incorporated. The buttercream should be smooth and hold its shape when spread. If it’s too thick, add a splash more milk; if too thin, add a bit more powdered sugar. This buttercream will provide the final decorative layer and contrast beautifully with the rich ganache.
Decorate and Serve
Once the cake has chilled, spread the chocolate buttercream evenly over the entire surface, creating a smooth, even layer. Use an offset spatula for a professional finish. For extra flair, pipe additional buttercream around the edges or add chocolate shavings on top. The contrast between the dark ganache and lighter buttercream creates stunning visual appeal.
Let the cake sit at room temperature for 30 minutes before slicing to allow the buttercream to set slightly. Cut into 12 equal slices using a sharp, hot knife (dip the knife in hot water and wipe dry between cuts) for clean, perfect slices. Serve immediately for the best texture and flavor experience.
Pro Tips For Making 123 Chocolate Cake
- Melt Butter Slowly: Heat the butter over low heat—just until it’s fully liquid and no longer grainy. I learned this the hard way when I rushed it and ended up with lumps that turned my cake batter into a greasy mess. Patience here means a smoother texture.
- Chill Eggs First: Pull your eggs out of the fridge 10 minutes before using them. Cold eggs can cause the batter to curdle, and nobody wants a lumpy chocolate cake. Room temperature eggs blend in like a dream.
- Avoid Overmixing Batter: Once the flour is added, mix just until combined—no more. I used to beat it like I was angry at the dough, and my cakes turned out dense and tough. Stop when there’s no more flour streaks, and call it done.
- Use Room-Temp Chocolate: Let your dark chocolate chips sit at room temperature for 15 minutes before melting them into the butter. Cold chips clump and don’t melt evenly, leaving you with weird pockets of unmelted chocolate in your cake. Trust me, it’s worth the wait.
Wine and beer pairings for this dish
Rich Chocolate Wines
For this decadent chocolate cake, Port wine is my go-to pairing—its deep, fruity notes with hints of caramel and dark chocolate mirror the cake’s flavors beautifully. A Ruby Port from Portugal, like Graham’s 10-Year-Old, complements the ganache without overpowering it.
The slight sweetness balances the bitterness of dark chocolate, creating a harmonious finish. Serve slightly chilled (55-60°F) to enhance the wine’s complexity. 🍷
Creamy Dessert Whites
If you prefer white wine, opt for a sweet Moscato d’Asti—its light effervescence and stone fruit flavors cut through the richness of the cake. Sutter Home Moscato is an affordable, crowd-pleasing choice that won’t clash with the chocolate.
For a more sophisticated option, try a late-harvest Riesling from Germany, like Dr. Loosen Blue Slate Kabinett Spätlese, which offers citrus and honeyed notes that pair surprisingly well with dark chocolate.
Bold Beer Pairings
Stout lovers, rejoice! A dark Belgian stout like Rodenbach Grand Cru brings deep malt and coffee flavors that echo the cake’s chocolate intensity. For a lighter option, a chocolate milk stout such as Founders Kentucky Breakfast Stout adds a creamy, caramel-rich contrast.
Serve the beer slightly chilled (45-50°F) to let its flavors shine alongside the ganache’s glossy finish. 🍺
Coffee-Infused Options
If you love coffee with chocolate, try pairing the cake with a dark roast espresso martini or a cold brew concentrate. The bitterness of the coffee enhances the chocolate’s depth, while the sweetness of the cake balances the drink’s intensity.
For a non-alcoholic option, a chocolate-dipped affogato—vanilla ice cream with a shot of espresso—works perfectly. The contrast of hot and cold temperatures makes every bite (and sip) even more satisfying. ☕
Seasonal Adaptations
For a winter twist, pair the cake with a spiced red wine like Mulled Wine (red wine simmered with cinnamon, cloves, and orange peel). The warmth of the spices complements the cake’s richness, especially during the holidays.
In summer, a sparkling rosé with a touch of raspberry puree adds a refreshing contrast to the dense chocolate layers. The acidity in the wine cuts through the richness, cleansing your palate between bites. 🍇
Nutrition facts
Frequently asked questions
Why does this recipe use three cake layers instead of more?
Three layers strike the perfect balance between height and stability. Adding more layers risks structural collapse from the weight of the ganache topping. Each layer is baked to precise doneness (toothpick clean) and assembled with thin ganache glue—this creates that impressive tower while keeping every slice moist and flavorful.
Can I make this cake ahead of time?
Bake the layers 1 day ahead and store them wrapped at room temperature. The ganache topping can be made 24 hours in advance and refrigerated. Assemble the cake just 2 hours before serving—this ensures the ganache sets properly without becoming too soft. Chill the assembled cake for 2 hours minimum before decorating.
What’s the secret to preventing the cake from collapsing?
The ganache acts as both filling and structural glue. Use thin layers (1 tablespoon per layer)* and let it cool slightly before adding each layer. Chill the assembled cake for 2+ hours before decorating—this allows the ganache to set completely. Also, avoid overmixing the batter (just until combined) to maintain light, airy layers that support the weight.
Can I substitute the buttercream with cream cheese frosting?
Yes, but adjust the recipe slightly. Replace the 0.75 cup butter with 8 oz cream cheese softened, and reduce the milk to 0.125 cup. Whip the cream cheese with powdered sugar until smooth, then add vanilla. The frosting will be denser but still delicious—just spread it 1/4-inch thick for best coverage.
How do I level the cake layers perfectly?
Use a serrated knife and a leveling guide (or a ruler). Place the cake layer on the guide, then gently press down with the knife at a slight angle. Wipe the knife clean between cuts. For extra precision, chill the layers for 10 minutes** before leveling—they’ll be firmer and easier to trim.

- Pea Soup Instant Pot Recipe: Velvety Green Smoothness in 20 Minutes - November 1, 2026
- Pork Loin Pulled Pork Crock Pot Recipe: Slow-Smoked Tenderness With Zero Dryness - November 1, 2026
- Baked Potatoes in Crock Pot Recipe: Buttery Interiors and Crispy Top Magic - November 1, 2026