
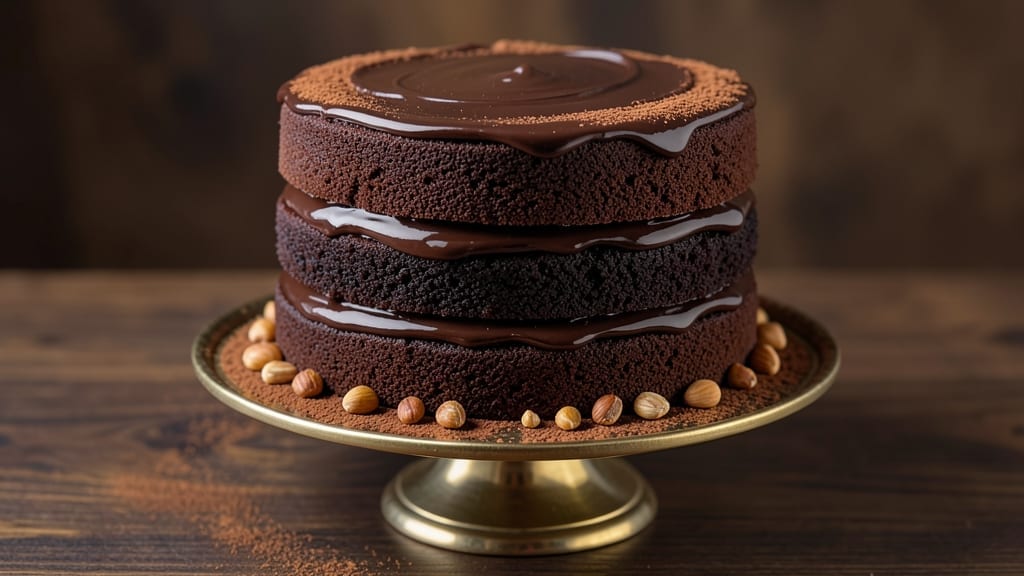
This 3 layer moist chocolate cake recipe delivers the perfect trifecta of textures—fudgy base, creamy middle, and fluffy top—without a single dry crumb. The secret lies in precise mixing methods and strategic chilling, ensuring each layer stays luscious while maintaining structure.
I’ve baked this cake for countless celebrations, and it never fails to impress, even with picky eaters.
What sets this recipe apart is the three-stage baking approach: the first layer bakes slightly longer for that dense, fudgy texture, while the top layers stay lighter and airy. Between each layer, a rich chocolate ganache binds everything together without sogginess, creating a harmonious balance of flavors and textures.
The key to success? Patience—letting the cake cool completely before assembly prevents cracking.
By the time you’re done, you’ll have a showstopping dessert with a glossy chocolate frosting that’s easy to spread and adds that final touch of elegance. This cake holds its shape beautifully, making it ideal for slicing without losing its integrity.
Whether it’s for a birthday, anniversary, or just because, this recipe guarantees a moist, decadent center that tastes homemade—no bakery needed.
The best part? This method is foolproof for beginners and restaurant-quality for experienced bakers. With clear instructions and time-saving tips, you’ll master the art of layering without the stress. Let’s get baking—your taste buds will thank you.
Ingredients for 3 layer moist chocolate cake
These precise ingredients create the perfect trifecta of textures in every slice.
| Ingredient | Amount | Notes |
|---|---|---|
| All-Purpose Flour 🌾 | 3 ½ cups | Sifted for light texture |
| Unsweetened Cocoa Powder 🍫 | 1 cup | High-quality Dutch-processed |
| Granulated Sugar 🍚 | 2 ½ cups | Superfine preferred for smoothness |
| Light Brown Sugar 🍚 | 1 cup | Packed firmly for moisture |
| Baking Soda 🧂 | 1 ½ tsp | Freshly measured for lift |
| Salt 🧂 | 1 ½ tsp | Fine sea salt preferred |
| Instant Espresso Powder ☕ | 1 tsp | Enhances chocolate depth |
| Vanilla Extract 🌿 | 2 tbsp | Pure Madagascar bourbon |
| Whole Milk 🥛 | 1 ¾ cups | Room temperature for best mixing |
| Vegetable Oil 🫒 | 1 cup | Light, neutral flavor |
| Large Eggs 🥚 | 3 whole | Room temperature, separated |
| Dark Chocolate Chips 🍫 | 2 cups | 70% cacao minimum for fudgy base |
| Heavy Whipping Cream 🥛 | 1 ½ cups | Cold for ganache stability |
| Unsalted Butter 🧈 | 1 ½ cups | Room temperature for smooth frosting |
| Powdered Sugar 🍚 | 4 cups | Sifted for fluffy frosting |
The cocoa powder makes all the difference here—Valrhona or Guittard are my go-tos, but any high-quality Dutch-processed brand works. The instant espresso powder might seem like a small detail, but it deepens that chocolate flavor without bitterness. For the brown sugar, pack it firmly into the measuring cup—this ensures the right moisture level for that perfect crumb. The vegetable oil keeps the cake tender without adding dairy flavor. If you’re in a pinch, melted butter works, but the texture will be slightly denser. Eggs should be room temperature—cold eggs cause the batter to curdle. I always buy extra-large eggs for this recipe—they create a lighter texture.
No instant espresso powder? 1 tsp strong brewed coffee works in a pinch, but it won’t have the same depth. Running short on vanilla? Vanilla bean paste adds those little specks of joy, but pure extract is fine too. The dark chocolate chips need to be 70% cacao or higher—anything lower and the base layer loses its fudgy magic. For the ganache, chop the chocolate finely before melting—it melts more evenly. The heavy cream should be cold but not icy when added to the chocolate. If you’re worried about the cake being too rich, reduce the chocolate chips to 1.5 cups—the middle layer will still be decadent without overwhelming.
This cake needs time to shine. Let the layers cool completely before assembly—at least 2 hours at room temperature, then refrigerate overnight. The ganache will set properly, and the flavors meld beautifully. Store the fully assembled cake in the fridge for up to 5 days, or freeze for 3 months if you’re prepping ahead. I always bake the layers the day before—it’s one less thing to worry about on celebration day. The frosting can be made a day ahead too, just whip it up right before spreading. For extra shine, brush the top with a little alcohol-based syrup (equal parts water and vodka or rum) before serving.
Why You’ll Love This Recipe
- Here’s what sold me: the granulated sugar keeps it airy, but the brown sugar? That’s where the deep, caramel-rich flavor hides. One bite and you’ll forget about store-bought cakes—honestly, it’s dangerously good.
- No-Fuss Layers: I swear by the cocoa powder and brown sugar combo—it’s the secret to that perfectly dense yet tender crumb. No fancy techniques, just mix, bake, repeat. Three layers in one pan? That’s my kind of shortcut.
- Fudgy Yet Light: Here’s what sold me: the granulated sugar keeps it airy, but the brown sugar? That’s where the deep, caramel-rich flavor hides. One bite and you’ll forget about store-bought cakes—honestly, it’s dangerously good.
- Party Ready: Birthdays, potlucks, or just because—this cake holds up like a champ. Slice it the day after, and it’s still moist. (Yes, even on a Tuesday night.) Plus, the layers? They’re easy to decorate, so you can keep it simple or go all out.
Step-by-step instructions for 3 layer moist chocolate cake
Here’s how to build a decadent chocolate cake with a fudgy base, creamy middle, and light top layer.
Prepare the Fudgy Base Layer
Preheat your oven to 350°F and grease three 6-inch round cake pans, lining the bottoms with parchment paper. In a large mixing bowl, whisk together the 3.5 cups all-purpose flour, 1 cup unsweetened cocoa powder, 1.5 tsp baking soda, 1.5 tsp salt, and 1 tsp instant espresso powder. Sift the dry ingredients together to remove any lumps and ensure even distribution.
In a separate large bowl, combine the 2.5 cups granulated sugar, 1 cup light brown sugar, 1 cup vegetable oil, 1.75 cups whole milk, the 2 tbsp vanilla extract, and the 3 whole large eggs at room temperature. Beat with an electric mixer on medium speed for 2-3 minutes until the mixture is smooth and fully combined. Gradually add the dry ingredients to the wet mixture, mixing on low speed just until incorporated.
Fold in the 2 cups dark chocolate chips by hand using a silicone spatula, ensuring even distribution throughout the batter. Divide the batter evenly among the prepared cake pans and smooth the tops with a spatula. Bake for 25-30 minutes, or until a toothpick inserted into the center comes out clean. Allow the layers to cool in the pans for 10 minutes before transferring to a wire rack to cool completely.
Create the Creamy Middle Layer
While the first layer cools, prepare the creamy middle layer by melting the 1.5 cups heavy whipping cream and the 2 cups dark chocolate chips together in a heatproof bowl set over a pot of simmering water (double boiler). Stir gently until the chocolate is completely melted and the mixture is smooth. Remove from heat and let it cool to room temperature, stirring occasionally to prevent a skin from forming.
Once the first cake layer is completely cool, spread a thin layer of the chocolate ganache on the bottom layer to help it adhere to the next layer. Place the second cake layer on top, repeating the process with another thin layer of ganache. This middle layer will provide the signature creaminess that sets this cake apart from traditional chocolate cakes.
Assemble the Cake with Fluffy Top Layer
Prepare the final layer by beating the 1.5 cups unsalted butter (softened to room temperature) and the 4 cups powdered sugar together with an electric mixer until light and fluffy, about 3-5 minutes. Gradually add the remaining 1.5 cups heavy whipping cream (chilled) and mix until fully incorporated. Add the 2 tbsp vanilla extract and mix until smooth.
Place the third cake layer on top of the middle layer and spread the fluffy buttercream evenly over the top and sides of the cake. Use a spatula to create a smooth finish, ensuring the buttercream covers the entire surface. Chill the cake in the refrigerator for at least 1 hour before serving to allow the flavors to meld and the cake to set properly.
Final Touches and Serving
Once the cake has chilled, you can decorate it with additional chocolate shavings, powdered sugar dusting, or fresh berries for a beautiful presentation. Serve slices at room temperature to fully appreciate the contrast between the fudgy base, creamy middle, and fluffy top layer. This cake is best enjoyed within 2-3 days of baking, as the moisture content will begin to diminish over time.
Pro Tips For Making 3 Layer Moist Chocolate Cake
- Sift That Cocoa: I learned this the hard way—lumpy cocoa powder makes a dense, uneven cake. Sift it with the flour and baking soda first, then whisk the dry mix before adding wet ingredients. That way, you avoid pockets of undissolved cocoa and guarantee a smooth, tender crumb.
- Whisk the Eggs First: Don’t just crack eggs into the batter—whisk them with the sugars until they’re pale and thick. This step incorporates air, which lightens the cake layers and prevents that heavy, brick-like texture. (Yes, even if you’re impatient like me.)
- Rotate the Pans: Chocolate cake browns faster in the middle. After 20 minutes, rotate the pans 180 degrees and tent with foil if the edges are set but the center’s still jiggly. This evens out the bake and keeps the layers from drying out while the middle catches up.
- Fold in the Butter: Skip the food processor—melt the butter first, then let it cool slightly before folding it into the batter. Cold butter creates pockets, and overmixing turns the cake tough. A rubber spatula and gentle swirls keep it rich and moist. (Your future self will thank you.)
Dietary considerations for this recipe
Gluten-Free Adaptation
Replace the 3.5 cups all-purpose flour with 3 cups gluten-free 1:1 baking flour (like Bob’s Red Mill) mixed with ½ cup cornstarch for structure. Use xanthan gum (¼ tsp) if your blend doesn’t include it—this prevents crumbling.
For extra moisture, add 2 tbsp applesauce to the batter. Bake the gluten-free layers 2-3 minutes longer at 350°F since they brown faster. 🌾
Dairy-Free Options
Swap whole milk for 1.75 cups unsweetened almond milk (or oat milk) and replace unsalted butter with 1.5 cups dairy-free butter (like Miyoko’s). For the ganache, use 1.5 cups full-fat coconut cream instead of heavy whipping cream—chill it before mixing with chocolate.
The frosting stays fluffy with 1.5 cups coconut cream whipped to stiff peaks. Test for doneness with a toothpick—dairy-free cakes often need 5 extra minutes in the oven.
Lower Sugar Version
Reduce granulated sugar to 1.5 cups and brown sugar to ½ cup, then add ¼ cup monk fruit sweetener (like Lakanto) to maintain moisture. Use 1 cup Greek yogurt (instead of milk) for protein balance.
For the ganache, mix 1 cup dark chocolate chips with 1 cup light coconut milk—this cuts sugar by 30% while keeping richness. The cake may be slightly denser, so bake the layers 1-2 minutes less to avoid dryness.
Nut-Free Considerations
Ensure all chocolate chips and cocoa powder are nut-free certified (check labels for cross-contamination warnings). Use sunflower seed butter (like SunButter) in place of vegetable oil—mix ½ cup sunflower seed butter with ½ cup melted coconut oil for the same moisture.
For the frosting, replace powdered sugar with 4 cups coconut sugar (whipped with buttercream) to avoid nut traces. Always bake in a clean oven and use separate utensils to prevent cross-contact.
Vegan Modifications
Replace eggs with 3 tbsp ground flaxseed mixed with 9 tbsp water (let sit for 5 minutes to gel). Use vegan butter (like Earth Balance) and aquafaba (3 tbsp, whipped to stiff peaks) in the frosting instead of cream.
For the ganache, melt 2 cups vegan dark chocolate with 1.5 cups coconut cream. Vegan layers bake 3-5 minutes longer—check at 30 minutes with a toothpick. Chill the cake 2 hours before slicing to set the aquafaba frosting properly.
Nutrition facts
Frequently asked questions
Why does this recipe use three different baking times for each layer?
This creates the signature texture contrast! The first layer bakes 25-30 minutes for a dense, fudgy base, while the top two layers bake 20-25 minutes for a lighter crumb. The middle layer gets its creaminess from ganache, not baking time. This method prevents all layers from drying out while maintaining structural integrity.
Can I make this cake a day ahead?
In fact, it’s recommended. Assemble the cake completely and refrigerate overnight. The flavors meld beautifully, and the ganache sets properly. Bring it to room temperature for 1-2 hours before serving to enjoy the perfect texture contrast between layers.
How do I prevent the layers from shifting when stacking?
Let each layer cool completely before assembly, then place them on a wire rack over a baking sheet. Spread a thin layer of ganache (about 1/8-inch thick) on each layer before stacking. Use a cake turntable or level plate to keep everything aligned. Chill the assembled cake for 1 hour before frosting to prevent sliding.
What’s the best way to store leftovers?
Keep the cake refrigerated in an airtight container for up to 5 days. For longer storage, wrap each layer individually in plastic wrap, then place the entire cake in a freezer bag. Thaw overnight in the fridge before serving. To revive texture, sprinkle slices with a little water and cover with plastic wrap for 10 minutes in the microwave.
Can I use this recipe for a gluten-free version?
Yes! Replace the all-purpose flour with 3 cups gluten-free 1:1 baking flour plus ½ cup cornstarch, and add ¼ tsp xanthan gum if your blend doesn’t contain it. Bake the layers 2-3 minutes longer at 350°F since they brown faster. The moisture level may require 2 tbsp applesauce added to the batter for optimal texture.

- 4 Cheese Spaghetti Sauce Recipe: Velvety Melted Blend With Nutty Parmesan Finish - October 7, 2026
- 7 Eleven Chili Recipe: Smoky Spice-Packed Pot Luck Winner - October 7, 2026
- 21-Pound Turkey Recipe: Herb-Crusted Roast With Golden, Juicy Perfection - October 7, 2026