
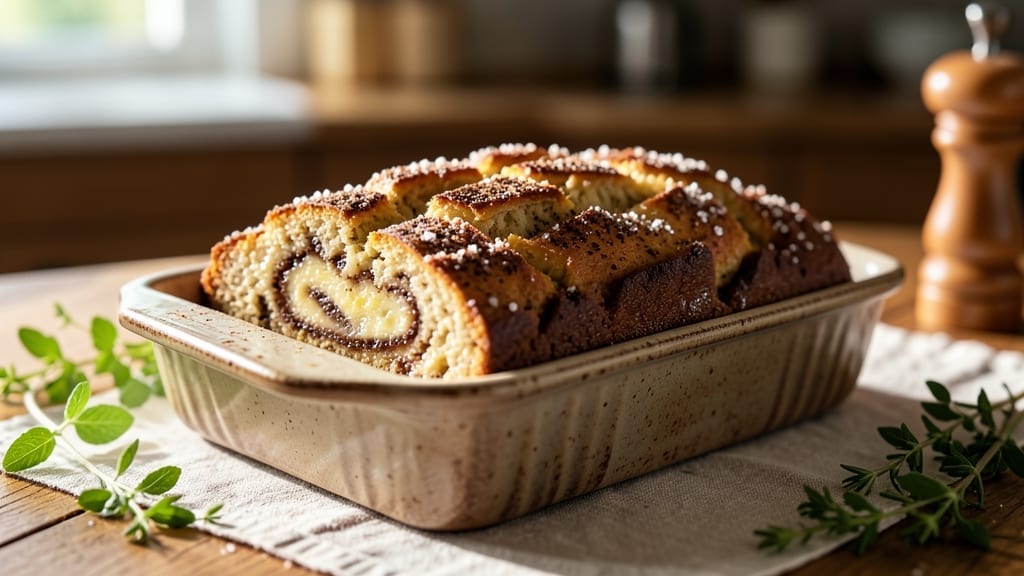
This 13×9 banana bread recipe delivers the perfect balance of moist crumb and warm spice notes that make every slice irresistible. 💛 The secret lies in ripe bananas, melted butter, and a precise blend of spices that create that signature homestyle flavor.
I’ve baked this recipe countless times, and it never fails to disappear from the pan. What sets this apart is the texture—tender yet slightly dense, with a golden crust that cracks just enough to peek at the soft interior.
The warm cinnamon and nutmeg infuse every bite, while a touch of baking soda ensures that moist, cake-like crumb we all love. It’s the kind of banana bread that tastes like nostalgia in every forkful.
By the time you pull it from the oven, you’ll have a loaf that’s perfectly domed, with a crackly top and edges that pull away just enough to reveal that moist, spiced goodness inside.
The aroma alone will have everyone gathering around the kitchen, and the first slice will disappear faster than you can say “second helping.” This recipe is perfect for breakfast, dessert, or anytime you need a comforting treat. Let’s get baking!
Ingredients for 13×9 banana bread
Ripe bananas, warm spices, and a tender crumb—here’s what makes this banana bread irresistible.
| Ingredient | Amount | Notes |
|---|---|---|
| Ripe Bananas 🍌 | 3 medium | Spotty skin preferred |
| Unsalted Butter 🧈 | ½ cup | Melted, full-fat preferred |
| Granulated Sugar 🍚 | 1 cup | White or brown sugar |
| Packed Brown Sugar 🍚 | ½ cup | Light or dark brown |
| Large Eggs 🥚 | 2 whole | Room temperature preferred |
| All-Purpose Flour 🌾 | 1 ½ cups | Sifted for best texture |
| Baking Soda 🧂 | 1 tsp | Freshly opened |
| Ground Cinnamon 🌿 | 2 tsp | Freshly ground preferred |
| Ground Nutmeg 🌿 | ½ tsp | Freshly grated nutmeg |
| Salt 🧂 | ½ tsp | Fine sea salt preferred |
| Vanilla Extract 🌸 | 1 tsp | Pure vanilla extract |
| Walnut Pieces 🥜 | ½ cup | Chopped, optional topping |
| Powdered Sugar 🍚 | 2 tbsp | For dusting top |
The bananas are the star—look for those with black spots (that’s where the sweetness hides). Trader Joe’s or your local grocery store usually has the ripest ones. I always buy a few extra because they disappear fast. The butter? Full-fat makes all the difference—don’t skimp here. For the sugars, I use half white and half brown to balance the sweetness. The flour? King Arthur brand if you want to splurge, but any all-purpose works. Sifting it cuts down on lumps and gives you that perfect tender crumb.
No vanilla extract? Vanilla bean paste works great or even a splash of vanilla sugar. Short on walnuts? Chopped pecans or even chocolate chips are perfect swaps. The nutmeg is key—if you don’t have ground, freshly grated nutmeg (from a whole nutmeg) has way more flavor. For the baking soda, check the expiration date—old baking soda loses its power. And if you’re out of powdered sugar for dusting, a quick pulse in the food processor turns regular sugar into a fine powder.
This loaf keeps beautifully—3-4 days at room temperature wrapped in plastic, or 1 week in the fridge. For longer storage, slice and freeze portions for up to 3 months. I always bake an extra loaf because it reheats perfectly—just pop slices in the toaster or microwave for 10-15 seconds. The aroma alone will have everyone asking for seconds.
Why You’ll Love This Recipe
- No Mash Required: I swear by this trick—just toss those ripe bananas straight into the bowl with the rest. No food processor, no sticky mess, and honestly? The texture comes out better than when I overthink it.
- Butter-Sweet Balance: That combo of brown sugar and granulated sugar? It’s the secret weapon. The brown sugar caramelizes into little pockets of richness, while the butter keeps it moist without being greasy. (Yes, even on a Tuesday night.)
- Weeknight Meal Prep: Bake it once, slice it up, and store those portions for breakfasts or snacks all week. The crust stays fresh for days, and I’ve even wrapped slices in foil for my kids’ lunches—no reheating needed.
- Budget-Friendly Staples: You’re using ingredients you already own: bananas that are too ripe, butter from the fridge, and sugar from the pantry. No specialty items, no wasted money—just pure, reliable comfort food that won’t break the bank.
Step-by-step instructions for 13×9 banana bread recipe
Here’s how to bake the perfect banana bread with a moist crumb and warm spice notes.
👨🍳 Step 1: Mash the Bananas and Mix Wet Ingredients
Start by mashing the 3 medium ripe bananas in a large mixing bowl until completely smooth. I like to use a fork for this—it gives you just enough texture without overworking the fruit. The bananas should be free of any lumps, with a consistency similar to applesauce.
Add the melted 0.5 cup unsalted butter to the mashed bananas and mix until fully combined. Then stir in the 1 cup granulated sugar and 0.5 cup packed brown sugar until everything is evenly incorporated. The mixture should be thick and slightly sticky at this point. Add the 2 whole large eggs one at a time, mixing well after each addition.
Finally, stir in the 1 tsp vanilla extract and set the bowl aside. Here’s the thing—room temperature eggs blend more smoothly, but if yours are cold, don’t worry. Just let the mixture sit for a few minutes while you prepare the dry ingredients.
👨🍳 Step 2: Combine Dry Ingredients and Fold into Wet Mixture
In a separate medium bowl, whisk together the 1.5 cups all-purpose flour, 1 tsp baking soda, 2 tsp ground cinnamon, 0.5 tsp ground nutmeg, and 0.5 tsp salt. Sifting the flour first helps prevent lumps in your final batter. I always give this a good stir to distribute the spices evenly.
Gradually add the dry ingredients to the wet mixture in the large bowl, folding gently with a spatula until just combined. You’re looking for a thick, smooth batter with no flour streaks remaining. Overmixing develops gluten, which can make your banana bread dense instead of tender.
Fold in the 0.5 cup walnut pieces at the end—this ensures they’re evenly distributed throughout the batter. If you’re using walnuts, I recommend chopping them first for a more consistent texture. The nuts add a lovely crunch that contrasts beautifully with the soft crumb.
🔥 Step 3: Prepare the Pan and Bake
Preheat your oven to 350°F and grease a 13×9-inch baking pan thoroughly with butter or cooking spray. I like to use parchment paper on the bottom for easy removal later. Pour the batter into the prepared pan and smooth the top with a spatula.
Bake for 50-60 minutes until a toothpick inserted in the center comes out clean and the edges are golden brown. Here’s where patience pays off—don’t open the oven door early to check. The bread needs time to rise properly in the oven, and peeking too soon can cause it to sink.
I know it seems like forever, but trust the process. Your banana bread is done when the top springs back when gently pressed and the internal temperature reaches 200°F. The warm spice aroma will fill your kitchen—worth every minute of waiting!
🍽️ Step 4: Cool and Serve
Remove the banana bread from the oven and let it cool in the pan for 10 minutes. This resting period allows the bread to set slightly before you transfer it to a wire rack. I usually dust the warm top with the 2 tbsp powdered sugar right after removing it from the oven—this creates that beautiful, sweet crust we all love.
Let the bread cool completely before slicing. I know it’s tempting to cut into it warm, but waiting ensures clean slices and prevents the bottom from falling apart. Once fully cooled, slice into 1-inch thick pieces and serve warm for the best texture.
This banana bread keeps well at room temperature for 2-3 days or can be frozen for up to 3 months. The moist crumb and warm spice notes make every slice worth waiting for—trust me, you’ll want to bake this again soon!
Pro Tips For Making 13×9 Banana Bread
- MEASURE BUTTER COLD: Take the unsalted butter straight from the fridge—no softening needed. I used to melt it first, thinking it’d mix better, but cold butter creates pockets of fat that make the bread actually moist, not greasy. Cut it into chunks and let the oven’s heat do the work.
- MASH BANANAS WELL: Skip the food processor—use a sturdy fork and really work those bananas until they’re smooth and nearly liquid. Lumps mean uneven texture, and you’ll end up with dry spots in the middle. If the batter looks too thick, add a splash of milk (or even water) to loosen it up.
- DON’T OVERMIX THE BATTER: Mix just until the flour is barely incorporated—maybe 10-12 strokes. Overmixing develops gluten, and your banana bread will turn out dense and tough instead of tender. The second the flour disappears, stop. Your future self will thank you.
- CHECK DONENESS WITH A TOOTHPICK: The recipe might say 50-55 minutes, but ovens lie. Insert a toothpick into the center—it should come out with moist crumbs, not wet batter or raw flour. If it’s sticky, cover with foil and bake another 5-10 minutes. Underbaking is the fastest way to ruin a loaf.
Common mistakes when making perfect results
Overmixing the Batter
This is the #1 mistake I see in home bakers—overmixing develops gluten, which turns your tender crumb into a dense brick. Once your dry ingredients are folded into the wet mixture, stop mixing immediately when there are no more flour streaks visible.
I promise you won’t overdevelop the gluten if you fold just until combined. 💛
Underripe Bananas
Using firm bananas is a fast track to dry, bland banana bread. Look for bananas with black spots—that’s where the natural sugars concentrate. If your bananas aren’t ripe enough, place them in a paper bag with an apple overnight.
The ethylene gas from the apple will speed up the ripening process.
Skipping the Pan Grease
A dry, cracked crust or bread sticking to the pan are dead giveaways you skipped this step. Generously grease your 13×9-inch pan with butter or use baking spray, then line the bottom with parchment paper for easy removal.
I also recommend flouring the pan lightly after greasing for extra insurance against sticking.
Opening the Oven Too Soon
Peeking at your banana bread before the 50-minute mark causes it to sink dramatically. The bread needs that initial time to set properly. If you must check, do it through the oven window instead of opening the door. The internal temp should reach 200°F before declaring it done.
Incorrect Oven Temperature
Your oven might read 350°F but actually run hotter or cooler. Invest in an oven thermometer to verify accuracy. If your bread browns too quickly, reduce the temp to 325°F. If it’s undercooked after 60 minutes, increase to 375°F next time.
Slicing Too Soon
Cutting into warm banana bread creates messy, gummy slices. Always let it cool completely on a wire rack before slicing. The 10-minute rest in the pan followed by full cooling prevents the bottom from falling apart. I know it’s tempting, but trust me—waiting makes all the difference. ✨
Nutrition facts
Frequently asked questions
Can I use this recipe with unripe bananas?
Not ideal! This recipe relies on ripe bananas with black spots for that signature sweetness and moisture. If yours aren’t ripe, place them in a paper bag with an apple overnight—the ethylene gas will speed up ripening. For unripe bananas, expect a denser texture and less flavor.
What’s the difference between this and regular banana bread?
This version uses a 13×9-inch pan for a wider loaf with a taller rise, plus extra spices like nutmeg for deeper flavor. The batter is also slightly thicker, creating that perfect tender crumb. Regular recipes often use 9×5-inch pans and may lack the spice complexity.
Can I substitute butter with oil?
You can try, but butter adds richness and flavor that oil can’t match. If substituting, use 0.5 cup melted coconut or vegetable oil (no need to melt butter). Your bread will still be moist, but the texture may be slightly denser. For best results, stick with butter.
How do I make this gluten-free?
Replace the 1.5 cups all-purpose flour with a 1:1 gluten-free baking flour blend (like Bob’s Red Mill). Add 0.5 tsp xanthan gum to help bind the batter. You may also need to reduce other liquids slightly—start with 0.25 cup less milk if using. Test first for perfect texture.
Why did my banana bread sink in the middle?
This usually happens from opening the oven door too soon (before 50 minutes) or underbaking. Let it bake fully until a toothpick comes out clean. Also check your oven temp—if it runs hot, reduce to 325°F. A water bath (placing pan in a larger pan with hot water) can also help prevent sinking.

- 6 Oz Chocolate Chip Cookie Recipe: Perfectly Balanced Crispy Edges and Chewy Hearts - September 25, 2026
- 6-Inch Coffee Cake Recipe: Vanilla Bean Swirls and Buttery Streusel Topping - September 25, 2026
- 1 Hour Soup Recipe: Velvety Richness Without the Wait - September 25, 2026