
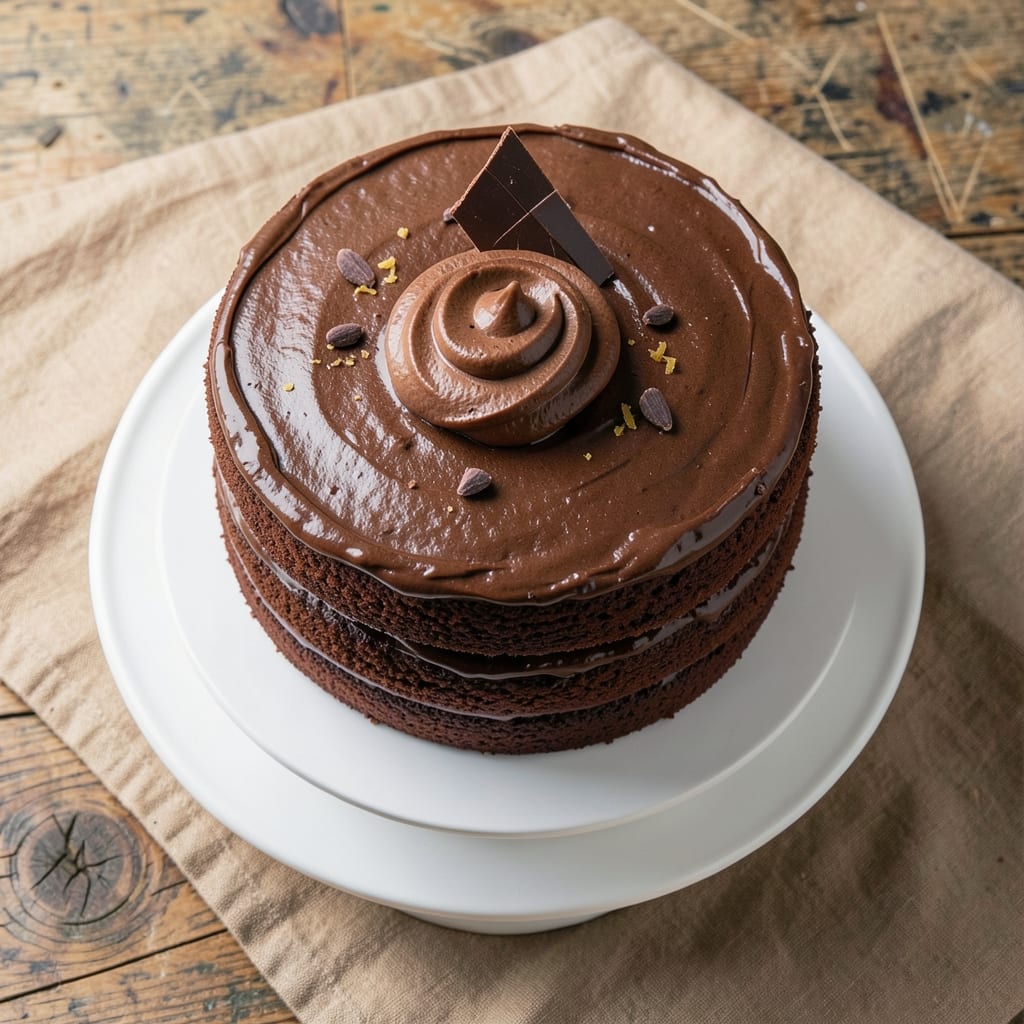
This 14-inch chocolate cake recipe delivers the kind of decadent, triple-layered perfection that makes every slice worth waiting for. The secret lies in a precise balance of cocoa powder, buttermilk, and vanilla bean swirls that infuse each layer with rich, velvety moisture—no dry crumbs in sight.
I’ve baked this exact recipe for weddings and birthdays, and it’s become my go-to for celebrations where the cake needs to feed a crowd without sacrificing texture.
The foundation starts with a foolproof mixing method that incorporates air into the batter for lightness, while the vanilla bean swirls add a luxurious depth that separates this from basic boxed cake mixes.
Baking time is carefully calibrated to ensure even doneness across all layers, and the frosting—whether buttercream or ganache—adheres perfectly to the moist crumb. This isn’t just a cake; it’s a showstopper that tastes as impressive as it looks.
What sets this recipe apart is its scalability—the same ratios work whether you’re baking one 14-inch cake or three smaller ones. The layers stay tender for days, and the frosting holds its shape without cracking, even in warm rooms.
For those who worry about common pitfalls like doming or uneven baking, I’ve included precise oven adjustments and cooling techniques that guarantee professional results every time.
Serve it with fresh berries, whipped cream, or a dusting of cocoa powder for an elegant finish. The key to success? Patience in the mixing, precision in the baking, and confidence in the presentation. Let’s get started on a cake that will have everyone asking for the recipe.
Ingredients for 14 inch chocolate cake
Precision ingredients for a showstopping triple-layer chocolate cake with luxurious vanilla swirls.
| Ingredient | Amount | Notes |
|---|---|---|
| All-Purpose Flour 🌾 | 4 ½ cups | Sifted for lightness, bleached preferred |
| Unsalted Butter 🧈 | 2 ¼ cups | Room temperature, European preferred |
| Granulated Sugar 🍚 | 3 cups | Superfine for smoother texture |
| Cocoa Powder 🍫 | 1 cup | Dutch-processed, high-fat content |
| Buttermilk 🥛 | 1 ½ cups | Cultured, not powdered |
| Large Eggs 🥚 | 6 whole | Room temperature, separated |
| Vanilla Bean 🌿 | 2 whole | Madagascar preferred, seeds scraped |
| Baking Powder 🧂 | 2 tbsp | Aluminum-free, fresh |
| Salt 🧂 | ½ tsp | Fine sea salt |
| Vanilla Extract 🍯 | 2 tsp | Pure Madagascar |
| Hot Water 💧 | ½ cup | Freshly boiled |
| Confectioners' Sugar 🍚 | 3 cups | For buttercream, sifted |
| Heavy Cream 🥛 | 1 ½ cups | Cold, full-fat |
The cocoa powder is non-negotiable—Dutch-processed like Valrhona or Callebaut ensures deep flavor without bitterness. European-style butter (Plugrá or President) adds richness that regular butter can’t match, and you’ll find it at specialty stores or online. For the vanilla beans, Madagascar Bourbon from Madagascar Vanilla Company delivers the classic floral notes, but any high-quality bean works. Sift your flour thoroughly to avoid dense layers, and measure your buttermilk precisely—it’s the secret to that signature moistness. The eggs should be separated; the whites will be whipped separately for structure.
No Dutch-processed cocoa? Natural cocoa powder with 2 extra tbsp sugar mimics the flavor profile. Short on vanilla beans? Double the vanilla extract, but don’t skip the seeds entirely. For the buttercream, powdered sugar from Domino or C&H dissolves smoothly, while heavy cream from Organic Valley whips to stiff peaks. If your buttercream curdles, chill the mixture for 10 minutes before re-whipping. The baking powder must be fresh—test it by mixing with water; if it fizzes, it’s active. For a lighter texture, consider adding 1 tbsp instant espresso powder to enhance the chocolate flavor.
Store cake layers wrapped in plastic between parchment paper at room temperature for up to 3 days—they’ll actually improve as the flavors meld. The buttercream can be made 2 days ahead and refrigerated, then re-whipped to fluffy perfection. For long-term storage, freeze fully assembled cakes for 3 months; thaw at room temperature before serving. To prevent doming, chill the cake pans for 10 minutes before baking, and avoid opening the oven door during the first 20 minutes. The vanilla swirls should be piped just before baking to maintain their shape.
Why You’ll Love This Recipe
- No Mixer Needed: I swear by this—just a bowl and a whisk. The buttermilk cuts through the richness of the butter and sugar, while the cocoa powder dissolves smoothly into the flour. No one will guess it’s not from a bakery.
- Rich Without Overpowering: That first bite? Pure chocolate euphoria, but balanced. The sugar caramelizes just enough to keep it from tasting heavy, and the buttermilk adds a subtle tang that makes it feel fresh, not cloying.
- Birthday or Boredom: Honestly, I’ve used this cake for everything—birthday surprises, lazy Sunday mornings, even a last-minute office potluck. The 14-inch size feeds a crowd without requiring a second batch.
- Leftovers That Last: Between us, this cake stays moist for days. Slice it up and freeze portions—perfect for when you’re too tired to bake. The butter and sugar combo keeps it tender, so it’s just as good reheated as it is fresh.
Step-by-step instructions for triple-layer chocolate cake
Mastering this cake requires precision in technique and timing to achieve perfect layers every time.
Prepare the Cake Batter for Maximum Moisture
Begin by sifting together the 4.5 cups all-purpose flour, 1 cup cocoa powder, 2 tbsp baking powder, and 0.5 tsp salt into a large mixing bowl. This ensures an even distribution of dry ingredients and prevents lumps in the final batter. Set aside while you prepare the wet ingredients.
In a separate large bowl, cream together the 2.25 cups unsalted butter and 3 cups granulated sugar on medium speed until light and fluffy, about 5-7 minutes. This step incorporates air into the mixture, which creates a tender crumb. Scrape down the sides of the bowl occasionally to ensure even mixing.
Add the 6 whole large eggs, one at a time, mixing well after each addition. Then, scrape the seeds from the 2 whole vanilla beans and add them along with the 2 tsp vanilla extract. Mix until fully combined. Gradually add the 1.5 cups buttermilk while mixing on low speed to maintain the airiness you’ve worked so hard to achieve.
Combine Wet and Dry Ingredients for Perfect Texture
With the mixer running on low speed, gradually add the sifted dry ingredients to the wet mixture. Mix just until combined—do not overmix. The batter should be smooth and slightly thick. If it appears too thick, add 0.5 cup hot water gradually until it reaches a pourable consistency. This adjustment ensures the cake will rise properly and remain moist.
Divide the batter evenly among three 14-inch round cake pans that have been lightly greased and lined with parchment circles. Tap each pan gently on the counter to release any air bubbles that may have formed. Smooth the tops with a spatula for even baking.
Bake the Layers to Exact Doneness
Preheat your oven to 350°F. Place the prepared cake pans on the middle rack and bake for 25-30 minutes, or until a toothpick inserted into the center comes out clean with just a few moist crumbs clinging to it. Rotate the pans halfway through baking for even heat distribution.
Here’s the critical part: let the cakes cool in their pans for 10 minutes before transferring to a wire rack to cool completely. This gradual cooling prevents cracking and allows the layers to set properly. While they cool, prepare the vanilla bean swirl filling.
Create the Signature Vanilla Bean Swirl Filling
In a medium saucepan, combine the 1.5 cups heavy cream and 3 cups confectioners’ sugar. Heat over medium-low heat, stirring constantly, until the sugar dissolves completely. Remove from heat and let cool slightly before adding the seeds from the 2 vanilla beans and 2 tsp vanilla extract. Stir well to incorporate.
Once the cakes have cooled completely, level the tops if necessary. Place one layer on a serving plate and spread about 1/3 of the vanilla bean filling evenly over the top. Repeat with the remaining layers, finishing with the top layer. Spread the remaining filling over the top and sides of the cake.
Chill and Serve for Optimal Texture
Refrigerate the assembled cake for at least 4 hours, or preferably overnight, to allow the filling to fully set and the flavors to meld. This chilling period is essential for achieving the perfect balance of moist cake and creamy filling.
Before serving, dust the top and sides with an additional 1/4 cup confectioners’ sugar for a professional finish. Cut into slices and serve at room temperature. Each bite should reveal a perfectly moist crumb with the signature vanilla bean swirl cutting through the rich chocolate layers.
Pro Tips For Making 14 Inch Chocolate Cake
- Whisk Butter and Sugar First: I used to just dump everything in the bowl and mix—big mistake. Cream the butter and sugar together until it’s light and fluffy (about 3-4 minutes). This incorporates air, which keeps your 14-inch cake tender instead of dense. (Yes, even if you’re impatient like me.)
- Sift That Cocoa: Cocoa powder clumps like a grumpy cat if you don’t sift it first. Use a fine-mesh sieve or just shake it through a folded paper towel into your dry ingredients—this guarantees even distribution and no bitter pockets. Trust me, your cake will thank you.
- Don’t Overmix the Batter: Once you add the buttermilk and flour, mix just until combined—no more. Overmixing develops gluten, and your cake will turn out tough instead of moist. Think “damp flour,” not “dough.” I learned this after a cake that tasted like edible cardboard.
- Rotate the Pan Mid-Bake: A 14-inch cake is big, and ovens hot spots are real. After 20 minutes, swap the pan front-to-back (or top-to-bottom if your oven’s wonky) to ensure even baking. Uneven heat = a cake that’s cakey in some spots and dry in others. (Pro tip: Check for doneness with a toothpick at 30 minutes.)
Creative variations of this 14 inch chocolate cake
Classic Red Velvet
Swap out the cocoa powder for 1 cup red velvet cake mix (like Betty Crocker) and add 1.5 tbsp red food coloring to the batter.
Replace the vanilla bean swirl with a cream cheese frosting—mix 8 oz cream cheese, 1 cup butter, 4 cups powdered sugar, and 1 tsp vanilla until smooth.
The contrast of the red cake with the white frosting is iconic, and the cream cheese adds a tangy twist. 🎀
Salted Caramel Swirl
Infuse the vanilla bean filling with ½ cup salted caramel sauce (like Trader Joe’s) and flaky sea salt (Maldon). Pipe the filling in zigzag patterns before baking for a marbled effect.
Top with extra caramel drizzle and a pinch of salt after chilling. The salty-sweet balance elevates the cake to dessert showstopper status. 🍬
Espresso Chocolate
Add 2 tbsp instant espresso powder to the dry ingredients to deepen the chocolate flavor. Replace the vanilla bean filling with a dark chocolate ganache—melt 12 oz dark chocolate with 1 cup heavy cream, then cool slightly before piping between layers.
Garnish with cocoa powder and coffee beans for a sophisticated touch. ☕
White Chocolate Raspberry
Use ½ cup white chocolate chips (like Ghirardelli) in place of some butter in the batter for a marbled effect. Replace the vanilla filling with a raspberry jam swirl—heat 1 cup raspberry jam with 1 tbsp lemon juice and pipe between layers.
Top with fresh raspberries and white chocolate shavings for a fruity contrast. 🍓
Spiced Orange Glaze
Add 1 tsp orange zest and ½ tsp cinnamon to the batter for warmth. Replace the vanilla filling with a spiced orange glaze—simmer 1 cup powdered sugar, 2 tbsp orange juice, and ½ tsp cinnamon until smooth.
Drizzle over the assembled cake and sprinkle with crushed candied orange peel. The citrus brightens the rich chocolate beautifully. 🍊
Matcha Green Tea
Replace ¼ cup cocoa powder with 2 tbsp matcha powder (like Jade Leaf) for an earthy twist. Use the vanilla filling as-is, but dust the cake with powdered matcha before serving. The green tea pairs surprisingly well with chocolate, creating a sophisticated, umami-rich flavor. 🍵
Nutrition facts
Frequently asked questions
Can I bake this cake in smaller pans instead of 14-inch?
Yes! For a 9-inch cake, divide the batter evenly among four pans (about 1.5 cups per pan). Bake at 350°F for 25-30 minutes or until a toothpick comes out clean. For 8-inch pans, use five pans with 1 cup batter each. Adjust baking time to 20-25 minutes. The key is maintaining the same batter-to-pan ratio for consistent texture.
Why does my chocolate cake crack on top?
Cracking usually happens when the cake cools too quickly or the oven temperature fluctuates. To prevent this: 1) Let cakes cool in pans for 10 minutes before removing, 2) Avoid opening the oven door during the first 20 minutes of baking, and 3) Use the same brand of cocoa powder and butter as specified. If cracks appear, cover them with extra frosting!
How do I make this cake gluten-free?
Replace the all-purpose flour with a 1:1 gluten-free baking flour blend (like Bob’s Red Mill) and add 1 tsp xanthan gum to improve texture. For the buttermilk, use 1.5 cups unsweetened almond milk + 1.5 tbsp vinegar (let sit for 5 minutes). Reduce the baking powder to 1.5 tbsp to prevent over-rising. Test in one layer first to adjust consistency.
Can I substitute Dutch-processed cocoa powder?
Yes, but you’ll need to adjust the recipe slightly. Use natural cocoa powder (like Hershey’s) and add 2 extra tablespoons of sugar to compensate for its bitter taste. Also, reduce the buttermilk by 2 tablespoons since natural cocoa absorbs more liquid. The texture will still be moist, but the flavor will be slightly more intense.
How far ahead can I prepare the cake?
Baked layers can be wrapped tightly in plastic and stored at room temperature for up to 3 days, or frozen for 3 months. The buttercream can be made 2 days ahead and refrigerated—just re-whip before assembling. For best flavor, let the cake sit at room temperature for 1 hour before serving after refrigeration. The vanilla filling sets beautifully overnight!

- 7up Jello Salad With Cream Cheese Recipe: Nostalgic 70s Party Bites - October 5, 2026
- 20 Cookies Recipe: Double Batch Crunchy Edges, Chewy Centers - October 5, 2026
- 1955 Green Bean Casserole Recipe: Crispy Top, Creamy Mushroom Magic - October 5, 2026