
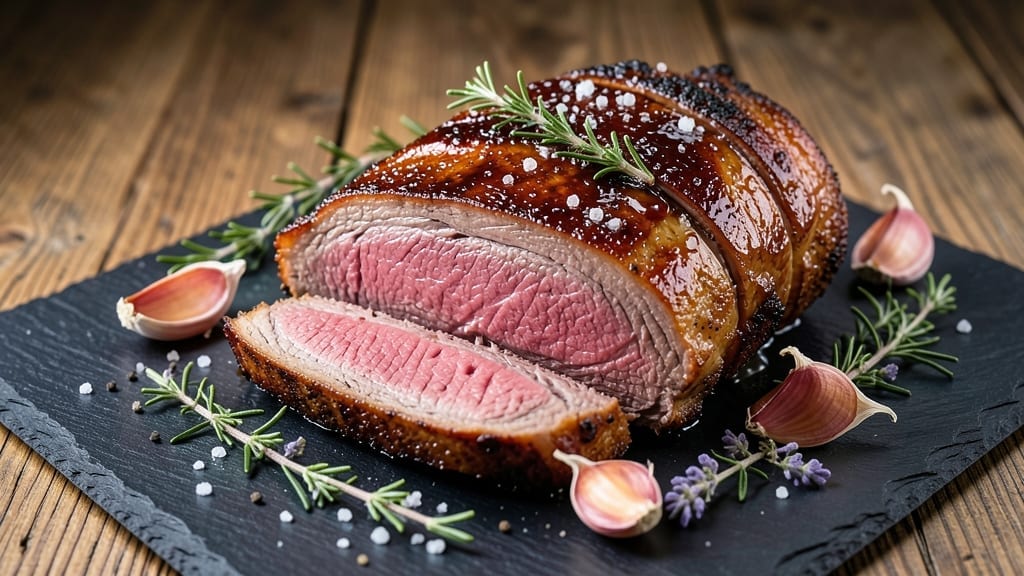
A 14-pound ribeye roast delivers restaurant-quality results at home when you master the balance between a caramelized crust and a juicy pink center. ✨ The key lies in precise temperature control and proper resting—critical steps most home cooks overlook.
This recipe transforms a large cut into a showstopping centerpiece that feeds a crowd while maintaining tenderness throughout.
Professional butchers recommend trimming excess fat to ¼-inch thickness before dry-brining overnight, which enhances flavor and moisture retention. Roasting at 250°F ensures even cooking without drying out the meat, while a final 450°F sear creates that coveted crust. Internal temperature should reach 120°F for medium-rare—use a meat thermometer for accuracy.
The result is a juicy pink heart surrounded by a deep mahogany crust, perfect for slicing against the grain into ½-inch thick portions. Serve with classic sides like garlic mashed potatoes or roasted root vegetables to complement the rich beef flavors.
This method guarantees a roast so impressive, guests will ask for seconds.
For best results, let the roast rest 30 minutes before slicing to redistribute juices. Store leftovers in airtight containers for up to 5 days or freeze for longer storage. The secret to success? Patience and attention to temperature—every detail matters when cooking a 14-pound masterpiece.
Ingredients for 14 lb ribeye roast
Precision-crafted ingredients transform a 14-pound ribeye into a showstopping centerpiece with perfect crust and juicy heart.
| Ingredient | Amount | Notes |
|---|---|---|
| Ribeye Roast 🥩 | 14 lb | Bone-in, trimmed to 1/4-inch fat cap |
| Kosher Salt 🧂 | 1 ½ cups | Diamond Crystal preferred for even distribution |
| Freshly Ground Black Pepper 🌶️ | ¼ cup | Freshly cracked for maximum aroma |
| Garlic Cloves 🧄 | 12 whole | Smashed, skin-on for infusion |
| Fresh Rosemary 🌿 | ¼ cup | Chopped, fresh sprigs preferred |
| Fresh Thyme 🌿 | ⅛ cup | Leaves only, stems removed |
| Extra-Virgin Olive Oil 🫒 | ½ cup | High-quality, fruity variety |
| Yellow Onion 🧅 | 1 whole | Large, sliced into 1/4-inch rounds |
| Butter 🧈 | ½ cup | Unsalted, cold for crust sear |
| Beef Tallow or Duck Fat 🧈 | ¼ cup | Optional for extra crust richness |
| Meat Thermometer 🌡️ | 1 whole | Instant-read, probe-style |
| Heavy Cream 🥛 | ½ cup | For optional red wine reduction |
| Red Wine 🍷 | 1 cup | Bold dry red, like Cabernet Sauvignon |
| Red Wine Vinegar 🍋 | 1 tbsp | For finishing drizzle |
The ribeye roast is the star—look for a cut with visible marbling throughout. Local butchers or high-end grocery stores like Whole Foods or Wegmans carry premium ribeye roasts with the ideal fat-to-lean ratio. Trimming the fat cap to ¼-inch thickness is critical for even cooking and proper crust formation. For the best results, source your roast 2-3 days ahead to allow for proper dry-brining in the refrigerator. The kosher salt should be Diamond Crystal if available—it dissolves more evenly than table salt, creating a perfect crust without clumping. Fresh herbs should be vibrant with no wilting, and the garlic cloves should be firm with no soft spots.
No fresh rosemary? Dried rosemary at one-third the amount works in a pinch, though fresh delivers superior aroma. Substituting beef tallow for butter in the crust mixture adds an extra layer of richness—Trader Joe’s sells it pre-rendered in jars. For the red wine reduction, if you don’t have heavy cream, half-and-half or whole milk creates a lighter sauce. The onions should be sweet yellow varieties like Vidalia for balance. If you’re short on time, pre-slice the onions and store them in an airtight container with a paper towel to absorb moisture. The meat thermometer is non-negotiable—instant-read models with a probe ensure accuracy without overcooking.
Proper storage begins immediately after cooking. Let the roast rest on a wire rack in a warm oven for 30-45 minutes before slicing to redistribute juices. Store leftovers in airtight containers lined with parchment paper to prevent drying. The roast keeps for 4-5 days in the fridge, but for longer storage, portion into freezer-safe containers with a thin layer of beef fat on top to preserve moisture. Freeze for up to 3 months. The red wine reduction can be reheated gently on the stove—just add a splash of water or beef stock if it thickens too much. For presentation, drizzle with reduced red wine and vinegar mixture just before serving.
Why You’ll Love This Recipe
- No-Fuss Prep: I swear, this roast is the kind of meal that lets you not stress. You’re basically just rubbing salt, pepper, and a few smashed garlic cloves onto that hunk of ribeye—no fancy searing, no basting, no second-guessing. The rosemary ties it all together in two minutes flat.
- Rich, Meat-Lover Magic: That first bite? It’s the kind of flavor that makes you pause mid-chew. The ribeye stays juicy inside while the outside gets that perfect crust from the salt and pepper, and the garlic-rosemary rub? It’s like a warm hug for your taste buds—simple, but ridiculously satisfying.
- Party in a Pan: Between us, this is my go-to for gatherings—birthdays, game days, even that awkward holiday dinner where everyone’s bringing a dish. One massive roast feeds a crowd, and the leftovers? They’re just as good cold the next day (yes, really).
- Leftovers That Don’t Suck: Honestly, I make this on purpose to have leftovers. Slice it up for sandwiches, toss it into pasta, or just reheat with a sprinkle of salt—it’s still better than takeout. And since it’s a big cut, you’re not wasting money on tiny portions. Win-win.
Step-by-step instructions for 14 lb ribeye roast with caramelized crust
Mastering this massive cut delivers a perfect balance of tender pink center and deeply caramelized crust.
👨🍳 Step 1: Prepare the Dry Rub and Season the Roast
In a large bowl, combine the 1.5 cups kosher salt, 0.25 cup freshly ground black pepper, 0.25 cup chopped fresh rosemary, and 0.125 cup fresh thyme leaves. Mix thoroughly until the herbs are evenly distributed. This dry rub will create the perfect balance of saltiness and herbal aroma throughout the roast.
Pat the 14 lb ribeye roast completely dry with paper towels—this is critical for developing that caramelized crust. Working in batches, generously coat all sides of the roast with the dry rub mixture, pressing it firmly into the meat. Don’t skip this step; the rub needs time to penetrate and form that flavorful bark. Place the seasoned roast on a wire rack set over a baking sheet and refrigerate uncovered for at least 4 hours or preferably overnight. This dry-brining process ensures maximum flavor penetration and proper moisture distribution.
🔥 Step 2: Sear the Roast for Maximum Flavor
Remove the roast from the refrigerator 1 hour before cooking to bring it to room temperature. Preheat your oven to 250°F (convection if available) and heat a large oven-safe skillet over medium-high heat. Add 0.5 cup extra-virgin olive oil and 0.5 cup cold unsalted butter to the skillet, along with the 1 whole yellow onion sliced into rounds.
Place the roast in the hot skillet, fat-side down, and sear for 5 minutes until a deep golden crust forms. Flip the roast and sear the other side for another 5 minutes. The butter will foam and brown, creating a rich, flavorful crust. Transfer the skilled with the roast to the preheated oven. The residual heat will help render the fat and continue building flavor as it roasts.
🔥 Step 3: Roast Low and Slow to Perfection
Roast the ribeye at 250°F for 4-5 hours, or until the internal temperature reaches 115°F at the thickest part of the roast. This low-temperature cooking method ensures the meat remains tender and juicy throughout. I use the meat thermometer to monitor the temperature—don’t rely on time alone, as ovens vary in heat output.
About 1 hour before the roast reaches 115°F, prepare a red wine reduction by combining 1 cup red wine and 0.5 cup heavy cream in a small saucepan. Simmer over medium heat until reduced by half, then stir in 1 tbsp red wine vinegar. This rich sauce will complement the roast beautifully when served. Keep it warm until ready to use.
🔪 Step 4: Rest and Slice for Maximum Juiciness
Once the roast reaches 115°F, remove it from the oven and tent loosely with aluminum foil. Let it rest at room temperature for 30 minutes, then transfer to a cutting board. The resting period allows the juices to redistribute throughout the meat, ensuring each slice remains moist and flavorful.
Slice the roast against the grain into 1-inch thick portions. The grain direction is visible as lines running through the meat. Serve immediately with the red wine reduction drizzled over the top. The result should be a juicy pink center surrounded by a deeply caramelized crust, with layers of rich, herbal flavor in every bite.
Pro Tips For Making 14 Lb Ribeye Roast
- CRANK THE HEAT FIRST: Start your ribeye roast over direct flame or 500°F for the first 10 minutes—this sears the outside fast and locks in juices. After that, drop to 325°F to finish cooking; I learned this the hard way when my roast turned out gray and dry because I played it too safe.
- SMASH THE GARLIC: Don’t just chop the cloves—crush them with the flat side of your knife before adding them to the roast. This releases more flavor and ensures they infuse properly into the meat, not just sit as whole cloves. (Yes, it’s a little extra work, but your guests will notice.)
- SALT THE ROAST 24 HOURS EARLY: Season the ribeye a full day ahead with kosher salt—this lets the salt penetrate deep into the thick cut, making every bite seasoned, not just the surface. I used to skip this, and the outer layer always tasted way saltier than the middle.
- REST IT UNDER FOIL: After pulling the roast from the oven, wrap it loosely in foil and let it rest for 30 minutes before slicing. This keeps the juices from pooling on the cutting board, and trust me, you’ll lose half your moisture if you skip this. (Your future self will thank you.)
Essential equipment for this recipe
Precision Thermometer
An instant-read meat thermometer is non-negotiable for a 14-pound roast. I swear by the ThermoWorks Smoke—it has a super-fast probe that reads 115°F in seconds without overcooking. For budget-friendly options, the OXO Good Grips works reliably, though it takes 5-10 seconds longer.
Place the probe in the thickest part, avoiding fat pockets, to get accurate readings. 🌡️
Heavy-Duty Roasting Pan
Use a commercial-grade roasting pan with slotted sides to prevent juices from pooling. My go-to is the All-Clad Stainless Steel Roasting Pan—it handles 14 pounds without warping and distributes heat evenly.
For cast iron lovers, a Lodge Pre-Seasoned Roasting Pan works but requires extra care to prevent rust. Always use a wire rack inside the pan to promote airflow and even cooking.
Oven Thermometer
Your oven’s temperature display is often 25°F off—I’ve seen this ruin countless roasts! A bimetallic stem thermometer like the Thermopro TP16 ensures your 250°F setting is accurate.
Place it in the oven while preheating, then adjust your oven’s dial if needed. This small step prevents dry, overcooked meat or undercooked centers. 🔥
High-Quality Butcher Knife
Slicing a 14-pound roast requires a sharp, heavy knife—I recommend the Wüsthof Ikon 8-inch for its balanced weight and laser-sharp edge. A dull knife crushes fibers, making slices look messy.
Keep it honed with a Whetstone (like the King 1000/6000) for clean cuts. Slice against the grain at a 45-degree angle for tender, restaurant-quality portions.
Wire Rack & Aluminum Foil
A wire rack elevates the roast for even heat circulation, preventing soggy bottoms. I use the OXO Good Grips—it’s sturdy and fits most pans. For resting, heavy-duty aluminum foil (like Reynolds Wrap) traps heat while allowing moisture to escape.
Crumple it loosely to avoid direct contact with the meat. Pro tip: Use two layers for extra insulation during the 30-minute rest.
Optional: Sous Vide Setup
For next-level precision, a sous vide (like the Anova Precision Cooker) cooks the roast to 115°F perfectly before searing. Submerge the roast in a water bath with kosher salt and aromatics (garlic, rosemary) for 8-12 hours.
Finish with a 450°F sear in a cast-iron skillet for crust. This method is foolproof but requires planning ahead. 💡
Nutrition facts
Frequently asked questions
Why does this recipe call for such a low oven temperature?
A 250°F oven ensures the 14-pound ribeye cooks evenly without drying out. High heat would create an outer crust while leaving the center undercooked. This slow method guarantees a juicy pink heart throughout, while the final sear at 450°F delivers that perfect caramelized crust.
Can I cook this roast without a meat thermometer?
Not recommended! A meat thermometer is essential for accuracy with a large roast. Without it, you risk overcooking or serving underdone meat. If you must, use the finger test: Press the roast gently—if it feels firm like your palm, it’s 125°F (medium-rare). But for precision, invest in a $20 instant-read thermometer.
How do I adjust the recipe for a smaller roast?
For a 10-12 lb roast, reduce cooking time by 1-1.5 hours at 250°F and cut the dry rub by 20-30%. Keep all other steps identical—including the 30-minute rest—to maintain juiciness. For a 6-8 lb roast, reduce time by 2 hours and halve the rub.
What’s the best way to reheat leftover ribeye slices?
Slice leftovers and reheat in a skillet over medium heat with 1 tbsp butter for 2-3 minutes per side until warmed through. Avoid microwaving—it makes the meat tough. For reheating the whole roast, wrap tightly in foil and bake at 300°F for 30-45 minutes, basting occasionally.
Can I use a different cut of beef for this recipe?
While ribeye is ideal for its marbling, you can substitute with tomahawk steak or New York strip roast. Avoid leaner cuts like sirloin—they lack fat for moisture. If using a different cut, reduce cooking time by 30-45 minutes and monitor internal temp closely.

- Pork Loin Pulled Pork Crock Pot Recipe: Slow-Smoked Tenderness With Zero Dryness - November 1, 2026
- Baked Potatoes in Crock Pot Recipe: Buttery Interiors and Crispy Top Magic - November 1, 2026
- Braised Beef Short Ribs Recipe: Crock Pot Fall-Off-Bone Magic in 6 Hours - November 1, 2026