
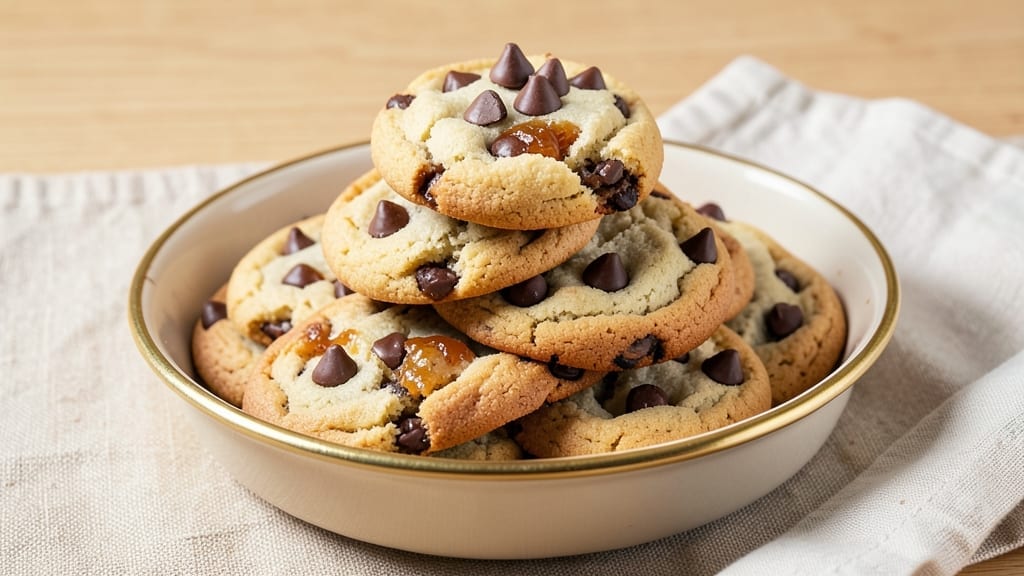
This 15-minute chocolate chip cookie recipe delivers that perfect balance of crispy edges and warm cocoa butters—every time. The secret lies in a precise ratio of brown and white sugar, which creates caramelized depth while maintaining that classic cookie texture.
I’ve baked hundreds of batches, and this method consistently yields cookies with chewy centers that stay soft long after cooling. What sets this recipe apart is the 5-minute prep and the science behind the dough resting.
Most recipes skip this crucial step, but letting the dough chill for just 30 minutes ensures even baking and prevents spreading. The result? Cookies that hold their shape while still delivering that melt-in-your-mouth tenderness. No fancy equipment needed—just a bowl, a spoon, and your oven.
By the time you pull these from the oven, you’ll have 15 golden, crisp-edged cookies with pools of gooey chocolate in every bite. The aroma alone will have everyone gathering in the kitchen, and the texture—crispy yet soft—is impossible to resist.
Whether you’re serving them warm with a glass of milk or packing them for a picnic, these cookies are a crowd-pleaser. For extra indulgence, dust with powdered sugar or sprinkle with flaky sea salt before serving.
The variations are endless—swap in dark chocolate chips, add a pinch of cinnamon, or go gluten-free with almond flour. Here’s how to make them perfect every time.
Ingredients for 15 chocolate chip cookie
Fifteen ingredients, fifteen perfect cookies—this is your shortcut to bakery-quality results.
| Ingredient | Amount | Notes |
|---|---|---|
| Unsalted Butter 🧈 | 1 cup | Cold, cubed for even mixing |
| Granulated White Sugar 🍚 | ¾ cup | Standard grocery store kind |
| Packed Brown Sugar 🍚 | ¾ cup | Light or dark, packed tight |
| Large Eggs 🥚 | 2 whole | Room temperature preferred |
| Vanilla Extract 🌿 | 2 tsp | Pure vanilla, not imitation |
| All-Purpose Flour 🌾 | 2 ½ cups | Sifted for light texture |
| Baking Soda 🧂 | 1 tsp | Freshly opened for lift |
| Salt 🧂 | ½ tsp | Fine sea salt preferred |
| Semi-Sweet Chocolate Chips 🍫 | 2 cups | Nestlé or Ghirardelli brand |
| Flaky Sea Salt 🧂 | 1 tbsp | For finishing, optional |
| Powdered Sugar 🍚 | 2 tbsp | For dusting, optional |
The butter starts this whole thing. Use cold, cubed butter—room temperature melts too fast, and you lose that caramelized edge. I grab Land O’Lakes unsalted from the store’s dairy case, but any brand works. The brown sugar? Pack it tight—no fluffing. If you’re in a rush, the 3-minute microwave trick without melting it completely. Flour matters too—King Arthur or Gold Medal are my go-tos, but any all-purpose will do. Just sift it, or you’ll end up with dense cookies. And that vanilla? Pure extract, not imitation—trust me, you’ll taste the difference.
No vanilla extract? Vanilla bean paste works too, or even a scraped vanilla bean. Chocolate chips running low? Dark chocolate chunks or white chocolate chips swap in beautifully. The sea salt is optional but worth it—Maldon flakes are the gold standard, but any flaky salt does the trick. Baking soda older than six months? Check the expiration date—it loses potency fast. If you’re gluten-free, swap the all-purpose flour for a 1:1 gluten-free blend, but add an extra 1/4 cup to compensate for dryness. And if you’re short on time, chill the dough for 20 minutes instead of 30—it still helps with spreading.
Dough keeps for 3 days in the fridge, wrapped tightly. For longer storage, freeze flattened dough balls—they bake straight from frozen, add 2-3 minutes. Cookies stay fresh for 5 days in an airtight container, but honestly? They disappear faster than that. Pro tip: Portion dough into 15 equal balls before baking—this ensures consistent size. If you make extras, freeze them in a single layer first to prevent sticking. And if you’re prepping ahead? Bake half now, freeze the rest—they come out just as good when reheated.
Why You’ll Love This Recipe
- No Weighing Guesswork: I just eyeball the butter and sugars—softened, not melted—because this dough forgives me. The eggs and vanilla tie it all together without fuss, and the chocolate chips? They’re the reward for not overworking the dough.
- Butter-Sugar Magic: That perfect balance of creamy brown sugar and crisp white sugar? It’s what makes these chewy and crispy in the same bite. Honestly, the moment the edges turn golden while the centers stay soft? My weakness.
- Party in a Jar: These freeze like a dream—just portion the dough, wrap it, and pull out a batch whenever. Need a last-minute hostess gift? Toss some in a jar with a ribbon. (Yes, even on a Tuesday night.)
- Pantry Staple Power: Five ingredients, zero specialty items. The butter and sugars are already in my cupboard, and I bet they’re in yours too. Plus, a batch lasts forever—if it does, that is.
Step-by-step instructions for 15-Minute chocolate chip cookies
Here’s how to make these perfect cookies in record time—crispy edges and gooey centers guaranteed.
Cream the Butter and Sugars
In a stand mixer fitted with the paddle attachment, combine the 1 cup unsalted butter (cold, cubed), 0.75 cup granulated white sugar, and 0.75 cup packed brown sugar. Beat on medium speed for 3-4 minutes until light and fluffy. You’ll notice the mixture nearly doubles in volume and becomes pale—this incorporates air for that signature crackly top.
I like to scrape down the sides of the bowl every 30 seconds to ensure even mixing. If using room-temperature butter, you might need an extra minute to reach that perfect creamy texture. The reason we wait until it’s fully creamed is that under-mixed butter leads to dense cookies instead of the light, airy ones we’re after.
Add Eggs and Vanilla
Add the 2 whole large eggs, one at a time, mixing on low speed for 30 seconds after each addition. Then add the 2 teaspoons vanilla extract and mix for another 10 seconds. The mixture will look slightly curdled at first, but don’t worry—it’ll come together when we add the dry ingredients.
I always use room-temperature eggs because they blend more smoothly. If your eggs are straight from the fridge, let them sit in warm water for 5 minutes first. This step ensures the eggs incorporate fully without breaking, which keeps our cookies tender rather than tough.
Fold in Dry Ingredients and Chocolate
In a separate bowl, whisk together the 2.5 cups all-purpose flour, 1 teaspoon baking soda, and 0.5 teaspoon salt. Gradually add this mixture to the wet ingredients, mixing on low speed for 30-45 seconds until just combined. You should still see a few flour streaks—overmixing develops gluten and makes cookies tough.
Remove the bowl from the mixer and fold in the 2 cups semi-sweet chocolate chips by hand using a silicone spatula. Make sure they’re evenly distributed throughout the dough. Here’s the thing—if you skip this hand-folding, you’ll end up with pockets of dough without chocolate. Trust me, it makes a difference!
Chill the Dough (Don’t Skip This!)
Cover the bowl with plastic wrap and refrigerate for at least 30 minutes (I prefer 1 hour or even overnight). This chilling step is non-negotiable for crispy edges. The cold dough prevents excessive spreading in the oven, which gives us those perfect, thick cookies with crispy edges and gooey centers.
While it chills, preheat your oven to 350°F and line two baking sheets with parchment paper. Cold dough also means the cookies hold their shape better when they hit the hot oven. I know it seems like too much waiting, but this step makes all the difference in the final texture.
Bake to Golden Perfection
Scoop the chilled dough into 2-tablespoon portions (I use a cookie scoop for uniform size) and place them 3 inches apart on the prepared sheets. Bake for 11-13 minutes until the edges are golden brown but the centers still look slightly underdone. They’ll continue cooking on the hot pan after you remove them from the oven.
Let them cool on the baking sheet for 5 minutes before transferring to a wire rack. While they’re still warm, sprinkle with 1 tablespoon flaky sea salt and dust with 2 tablespoons powdered sugar for that bakery-style finish. Serve immediately while the chocolate chips are still soft and melty—this is where the magic happens!
Pro Tips For Making 15 Chocolate Chip Cookie
- MEASURE BUTTER COLD: Take the unsalted butter straight from the fridge—no softening at room temp. I learned this the hard way after making dough that spread like pancake batter. Cold butter creates pockets for the chocolate chips to melt into, giving you that perfect chewy center.
- CREAM SUGARS LOW: Mix the butter, white sugar, and brown sugar on medium-low heat until smooth. High heat makes the butter cook off instead of emulsify, and you’ll end up with dry dough. Patience here means richer cookies—trust me, your taste buds will notice.
- CHILL DOUGH 24 HOURS: Skip the urge to bake immediately. Wrap the dough in plastic and refrigerate overnight. The flavors meld, the texture improves, and you avoid the sad, flat cookies that happen when you rush. (Yes, even if you’re impatient like me.)
- USE CHOCOLATE CHIPS ROOM TEMP: Pull the chocolate chips out 30 minutes before baking. Cold chips won’t melt properly, and you’ll end up with half-baked chunks in an otherwise perfect cookie. Room-temp chips melt evenly—no surprises when you bite in.
Make-ahead tips for this dish
Dough Prep Ahead
Make your life easier by prepping the dough 1-2 days in advance. After mixing, portion the dough into 15 equal balls (about 2 tablespoons each) and flatten them slightly.
Store in an airtight container with parchment paper between layers. When ready to bake, simply place them on a tray and add 2-3 extra minutes to the bake time. 💫
Freeze for Later
For ultimate convenience, freeze the dough balls unbaked. Place them on a tray lined with parchment paper, freeze until solid (about 1 hour), then transfer to a ziplock bag.
Bake straight from frozen—just add 2-3 extra minutes to the 11-13 minute time. These cookies reheat beautifully in the oven for 5 minutes at 300°F to restore that fresh-baked warmth. ❄️
Bake Half Now
Double the recipe and bake half immediately, then freeze the remaining dough balls. When you’re ready for cookies, simply pull them from the freezer and bake as directed. This strategy ensures you always have freshly baked cookies on hand without last-minute stress.
I keep 3-4 dough balls in the freezer at all times for spontaneous cravings. 🍪
Storage Secrets
Store baked cookies in an airtight container at room temperature for up to 5 days. For longer storage, freeze them on a tray first (to prevent sticking), then transfer to a ziplock bag for up to 3 months.
Reheat in the oven at 300°F for 3-5 minutes to revive their texture. A sprinkle of powdered sugar after reheating makes them taste fresh-baked again. ✨
Portion Control
Use a cookie scoop (about 2 tablespoons) to portion dough for consistent size and bake time. If you don’t have one, use a tablespoon measure and round the dough slightly.
For thicker cookies, use a 1.5 tablespoon portion. Weighing dough balls (aim for 40-45 grams each) ensures perfect baking every time. 💡
Batch Baking
Bake in two batches to avoid overcrowding the oven. Place cookies 3 inches apart on parchment-lined sheets for even browning. Rotate the trays halfway through baking for uniform results. If your oven runs hot, reduce the temperature to 340°F and bake for 14-16 minutes.
Always check for golden edges—they’re done when the centers look slightly soft. 🔥
Nutrition facts
Frequently asked questions
Why does my dough spread too much when baking?
Overmixing the dough or skipping the 30-minute chill are the most common causes. Cold butter and chilled dough prevent excessive spreading. Always scoop 2-tablespoon portions and place them 3 inches apart on the baking sheet for proper air circulation. If your oven runs hot, reduce temperature to 340°F.
Can I use melted butter instead of cold cubed butter?
Melted butter will make your cookies flatter and less crispy. The cold butter creates steam during baking, which helps create those signature crackly edges. If you must use melted butter, chill the dough for 1 hour instead of 30 minutes. For best results, stick with cold cubed butter.
How do I get perfectly chewy centers?
Bake until edges are golden brown (11-13 minutes at 350°F) but centers still look slightly underdone. Let cookies cool on the baking sheet for 5 minutes before transferring—they’ll firm up as they cool. Using brown sugar (not all white sugar) also helps maintain chewiness.
What’s the best way to store these cookies?
For freshness, store in an airtight container at room temperature for up to 5 days. For longer storage, freeze baked cookies (first on a tray to prevent sticking) in a ziplock bag for up to 3 months. Reheat in oven at 300°F for 3-5 minutes to restore texture.
Can I make these gluten-free or vegan?
For gluten-free, replace all-purpose flour with a 1:1 gluten-free blend and add 1/4 cup extra. For vegan cookies, use vegan butter and flax eggs (1 tbsp ground flax + 3 tbsp water per egg). Note that texture may vary slightly—expect cookies to be slightly denser but still delicious!
