
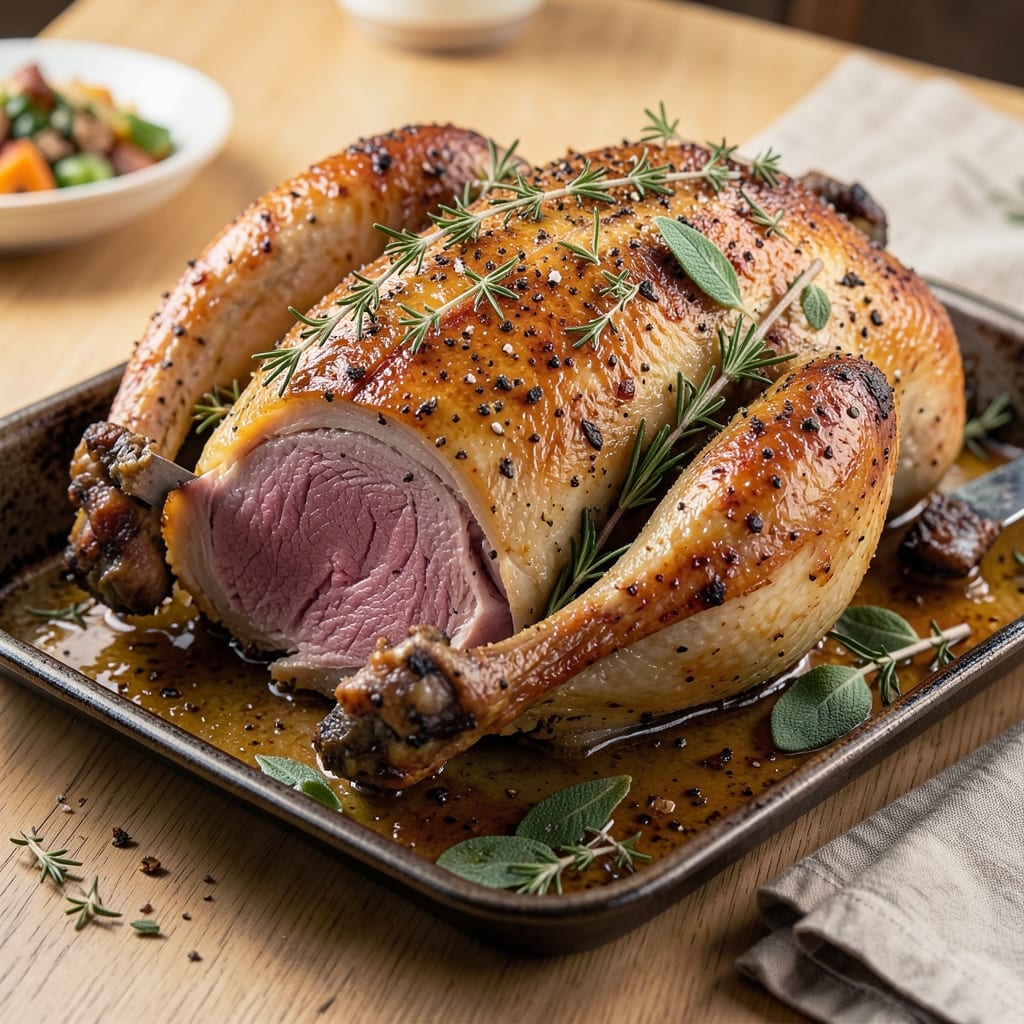
A 15 lb roast turkey transforms any holiday table with its golden skin and perfectly juicy meat—this recipe delivers both without the guesswork. The secret lies in a dry brine overnight, which ensures moisture retention and crispy skin that rivals professional results.
Most home cooks overlook this step, but it’s what separates good from exceptional.
This method uses a simple seasoning blend of salt, pepper, and herbs, then relies on precise oven temperature control to achieve a juicy center while developing that coveted mahogany skin.
We’ll guide you through the exact timing for your oven, including when to start basting and how to know when it’s truly done—no more dry turkey here.
By the time you carve into this turkey, you’ll have a bird with a crispy, golden exterior that shatters at the touch and meat so tender it falls apart with the slightest pressure. The aroma alone will have everyone gathering at the table long before it’s ready to serve.
Pair this turkey with classic sides like honey-glazed carrots and garlic mashed potatoes for a complete holiday meal. The leftovers reheat beautifully, making this the perfect centerpiece for celebrations of any size.
Ingredients for 15 lb roast turkey
Fifteen pounds of turkey, a dry brine, and these simple seasonings create showstopping holiday centerpiece.
| Ingredient | Amount | Notes |
|---|---|---|
| Fresh Whole Turkey 🦃 | 15 lb | Unstuffed, giblets removed |
| Kosher Salt 🧂 | ½ cup | Diamond Crystal preferred |
| Freshly Ground Black Pepper 🌶️ | 2 tbsp | Coarse grind preferred |
| Fresh Thyme Sprigs 🌿 | 10 whole | Stems removed for seasoning |
| Fresh Rosemary Sprigs 🌿 | 5 whole | Freshly cut from stems |
| Fresh Sage Leaves 🌿 | 10 whole | Large, tender leaves |
| Unsalted Butter 🧈 | ½ cup | Cold, cubed for basting |
| Garlic Cloves 🧄 | 6 cloves | Smashed for flavor infusion |
| Fresh Parsley Sprigs 🌿 | 5 whole | For garnish, stems removed |
| Lemon Juice 🍋 | 2 tbsp | Freshly squeezed |
| Vegetable Oil 🫒 | ¼ cup | For roasting pan |
| Water 💧 | 1 cup | For roasting pan |
| Onion Slices 🧅 | 1 whole | For roasting pan base |
| Carrot Slices 🥕 | 2 whole | For roasting pan base |
| Celery Stalks 🥬 | 2 whole | For roasting pan base |
The turkey is the star, so pick one with good marbling—that white fat between the muscles means juicier meat. Most grocery stores carry fresh turkeys this time of year, but Costco or Whole Foods often have better quality. Look for a bird that feels heavy for its size and has a vibrant, slightly pinkish skin color. If you’re buying frozen, thaw it in the fridge for 24 hours per 4-5 pounds. The herbs? Fresh is non-negotiable here—dried just won’t give you that same aromatic punch. I always grab extra because half goes in the cavity, half gets tucked under the skin.
No fresh thyme? Dried works at half the amount, but it won’t be the same. Running low on butter? Olive oil or duck fat works too—just don’t skip the basting. The garlic can be roasted whole with the turkey if you’re feeling lazy, but smashing it first lets the flavor really infuse. For the roasting pan base, any veggies work—whatever you’ve got in the fridge. The key is getting that pan juices going for extra flavor. And if you’re worried about drying out, baste every 30 minutes starting at the 2-hour mark.
Turkey can be brined overnight in the fridge—no need to wash it before roasting. The skin will be golden and crispy without any extra oiling. Leftovers reheat beautifully—cover with foil and bake at 325°F for 30 minutes—and keep for 3-4 days in the fridge. For a crowd, portion into containers with gravy and sides. The turkey itself will keep 2 days unrefrigerated if absolutely necessary, but honestly, it won’t last that long with this recipe.
Why You’ll Love This Recipe
- I’ll be real: this turkey feeds a crowd and gives you days of lunches without a struggle. Slice it for sandwiches, shred it for soup, or just reheat it straight-up—it’s that good.
- Just Four Ingredients: Honestly, that’s all you need—turkey, salt, pepper, and a handful of fresh herbs. No brines, no basting drama, just good old-fashioned flavor with minimal fuss.
- Herb-Crusted Magic: Between us, that rosemary and thyme tucked under the skin? It turns a simple roast into something that tastes like it spent hours in a fancy kitchen. Crispy skin, juicy meat—no shortcuts, just results.
- Leftovers That Shine: I’ll be real: this turkey feeds a crowd and gives you days of lunches without a struggle. Slice it for sandwiches, shred it for soup, or just reheat it straight-up—it’s that good.
Step-by-step instructions for juicy roast turkey
Here’s how to transform a simple turkey into a showstopping centerpiece with crispy skin and moist meat.
Prepare the Turkey for Maximum Flavor and Crisp
Start by removing the turkey from the refrigerator and letting it sit at room temperature for 30 minutes. This ensures even cooking throughout. Pat the turkey completely dry with paper towels—this is critical for crispy skin. I mean REALLY dry, especially in the cavity and under the wings where moisture tends to hide.
Next, season the turkey generously with the 0.5 cup kosher salt and 2 tablespoons freshly ground black pepper. Work the seasoning into the skin and under the skin as well. Then stuff the cavity with the 10 whole fresh thyme sprigs, 5 whole fresh rosemary sprigs, and 10 whole fresh sage leaves. This herb bundle will infuse the meat with aromatic flavors as it cooks.
Create the Roasting Pan Setup
Place the 1 whole onion slices, 2 whole carrot slices, and 2 whole celery stalks in the bottom of a roasting pan to create a flavorful base. This aromatic vegetable trio is called a “sachet” and will add depth to your turkey. Pour the 0.25 cup vegetable oil and 1 cup water into the pan—this creates a self-basting environment that keeps the turkey juicy.
Position a roasting rack inside the pan and place the seasoned turkey breast-side up on the rack. The rack allows hot air to circulate underneath, preventing soggy skin. Rub the skin with the 0.5 cup cold unsalted butter and sprinkle with the 6 smashed garlic cloves and 2 tablespoons lemon juice. This butter basting will give you that golden, crispy skin we’re after.
Roast at High Heat for Crispy Skin
Preheat your oven to 425°F while the turkey comes to room temperature. When ready, slide the turkey into the oven and roast for 45 minutes. This high-heat start creates that perfect crispy skin before we lower the temperature for even cooking.
After 45 minutes, reduce the oven temperature to 325°F. Continue roasting for 2.5 to 3 hours, or until the internal temperature reaches 165°F in the thickest part of the thigh. The turkey is done when the juices run clear and the skin is deep golden brown. Don’t open the oven during cooking—every time you peek, you lose heat and moisture.
Baste and Finish for Maximum Juiciness
About 1 hour before the turkey is done, start basting every 20 minutes with the pan juices. Use a spoon to scoop up the flavorful liquid and pour it over the turkey, focusing on the breast to keep it moist. This basting ensures every bite is juicy and full of flavor.
When the turkey reaches 165°F, remove it from the oven. Tent loosely with foil and let it rest for 30 minutes before carving. This resting period allows the juices to redistribute throughout the meat, preventing dry slices. During this time, you can make gravy from the pan drippings if desired.
Carve and Serve with Herb Garnish
After resting, carefully remove the herb bundle from the cavity. Use kitchen shears to trim any excess fat from the skin. Carve the turkey by making a deep cut between the breast and thigh, then slice each breast meat against the grain into ½-inch thick slices.
Garnish the platter with the 5 whole fresh parsley sprigs and serve immediately. The turkey should have crispy, golden skin that gives way to perfectly juicy meat underneath. Each slice should be moist and flavorful, with that perfect balance of herb-infused seasoning.
Pro Tips For Making 15 Lb Roast Turkey
- Brine Overnight: I learned this the hard way—salting a 15-pounder dry won’t penetrate deep enough. Toss the turkey in a mix of 1 gallon water, 1 cup kosher salt, and ½ cup sugar (yes, sugar—it helps seasoning stick) for 12–24 hours. The meat stays juicy, and the herbs (thyme/rosemary) cling better when you tuck them under the skin later. No brining? At least salt the cavity generously and let it sit uncovered in the fridge for 4 hours before roasting.
- Skip the Stuffing: Stuffing traps moisture and turns the turkey into a soggy science experiment. Instead, roast the turkey stuffing-free, then serve it alongside. If you’re stubborn, at least use a removable herb pouch (cheesecloth + thyme/rosemary tied with twine) so you’re not digging out dampened herbs. Your turkey will thank you with crisp skin and even cooking.
- Use a Meat Thermometer: Guessing with a knife? Stop. A 15-pounder needs to hit 165°F in the thickest part of the thigh before you call it done. Start checking at 2.5 hours—most ovens run hot, and by the time the breast reaches 165°, the thighs will be overcooked. If the breast browns too fast, tent it loosely with foil to slow the process.
- Dry the Skin First: Pat the turkey completely dry with paper towels—especially the skin—before salting and roasting. I was skeptical until I tried it: the skin crisps up like a restaurant-quality roast instead of staying sticky. Pro move: Let it air-dry uncovered in the fridge for 1–2 hours post-brining (or pre-salting) for extra crispiness. No time? At least blot it dry right before roasting.
Pro cooking tips for this recipe
Dry Brine Secrets
The overnight dry brine is where the magic happens—I swear by this method for that restaurant-quality skin. Pat the turkey completely dry, then rub it with 0.5 cup kosher salt (Diamond Crystal preferred) and 2 tbsp freshly ground black pepper.
Place it on a rack in a shallow pan and refrigerate uncovered for 12-24 hours. This draws out moisture from the surface, creating the perfect canvas for crispy skin while keeping the meat incredibly juicy. 💫
High Heat Start
Don’t be afraid of that high-heat blast! After your 45-minute 425°F start, the skin will develop those coveted golden-brown patches. I use a Meater thermometer to monitor the skin temperature—it should reach 350°F before lowering the oven to 325°F. This two-stage cooking prevents overcooking while building that perfect crust.
Basting Like a Pro
Timing is everything when basting. Start with the 0.5 cup cold butter mixed with pan juices about 1 hour before the turkey finishes. Use a spoon to baste every 20 minutes, focusing on the breast and wing tips where skin tends to dry out.
Pro tip: Keep your basting spoon in the oven with the turkey—it stays hot and ready for action.
Temperature Precision
Your turkey is done when the thigh reaches 165°F—not the breast! Use a meat thermometer in the thickest part of the thigh (avoid touching bone). The breast will continue cooking during resting.
I’ve seen many cooks overcook their turkey by relying on time alone—don’t make that mistake! A ThermoWorks Smoke thermometer gives you instant, accurate readings.
Resting Period
This is the most overlooked step, but it’s absolutely critical. After removing the turkey from the oven, tent it loosely with foil and let it rest for 30 minutes. This allows juices to redistribute throughout the meat.
I know it’s tempting to carve immediately, but trust me—your turkey will be infinitely more flavorful if you wait. The skin will stay crispy while the meat stays juicy. 💪
Pan Juice Magic
Don’t pour out those pan juices! They’re packed with flavor from the turkey and aromatic vegetables. After removing the turkey, place the roasting pan on the stovetop over medium heat. Add 2 tbsp flour and 2 cups turkey or chicken stock to make gravy.
The vegetables can be discarded or composted—they’ve done their job. This gravy will elevate your turkey from good to spectacular.
Nutrition facts
Frequently asked questions
How long should I let a 15 lb turkey rest before carving?
Always let your turkey rest for 30 minutes after removing it from the oven. This crucial step allows the juices to redistribute, ensuring every slice stays moist. Tenting it loosely with foil keeps the skin crispy while the meat stays juicy. Skipping this will leave you with dry turkey—don’t make that mistake!
What’s the best way to keep turkey skin crispy?
Start with a 425°F oven for 45 minutes to render fat and create a golden crust. Pat the turkey bone-dry before seasoning, and rub it with cold butter during cooking. Avoid opening the oven door—every peek lets heat escape, making skin soggy. The high-heat start is your secret weapon for crispy perfection!
Can I cook a 15 lb turkey without a meat thermometer?
You can estimate, but a thermometer is ideal. For a 15 lb turkey, plan for 3.5-4 hours total cooking time (including the 45-minute high-heat start). Check doneness by inserting a knife into the thigh—juices should run clear. The breast should reach 165°F in the thickest part. Without a thermometer, you risk overcooking the breast while the thigh stays underdone.
How do I make gravy from the pan drippings?
After removing the turkey, place the roasting pan on the stovetop over medium heat. Discard the vegetables, then whisk in 2 tablespoons flour and 2 cups turkey or chicken stock to thicken. Simmer for 5-7 minutes until the gravy coats the back of a spoon. Strain if you prefer a smooth texture. This simple method captures all the turkey’s rich flavors for a perfect finishing touch!
What sides pair best with a 15 lb roast turkey?
Classic pairings include honey-glazed carrots, garlic mashed potatoes, and roasted Brussels sprouts. For a festive spread, add cranberry sauce, stuffing, and a fresh green salad. The key is balancing rich flavors with lighter sides. Gravy is a must—it ties everything together beautifully. Don’t forget warm dinner rolls for soaking up those delicious juices!

- 6 Oz Chocolate Chip Cookie Recipe: Perfectly Balanced Crispy Edges and Chewy Hearts - September 25, 2026
- 6-Inch Coffee Cake Recipe: Vanilla Bean Swirls and Buttery Streusel Topping - September 25, 2026
- 1 Hour Soup Recipe: Velvety Richness Without the Wait - September 25, 2026