
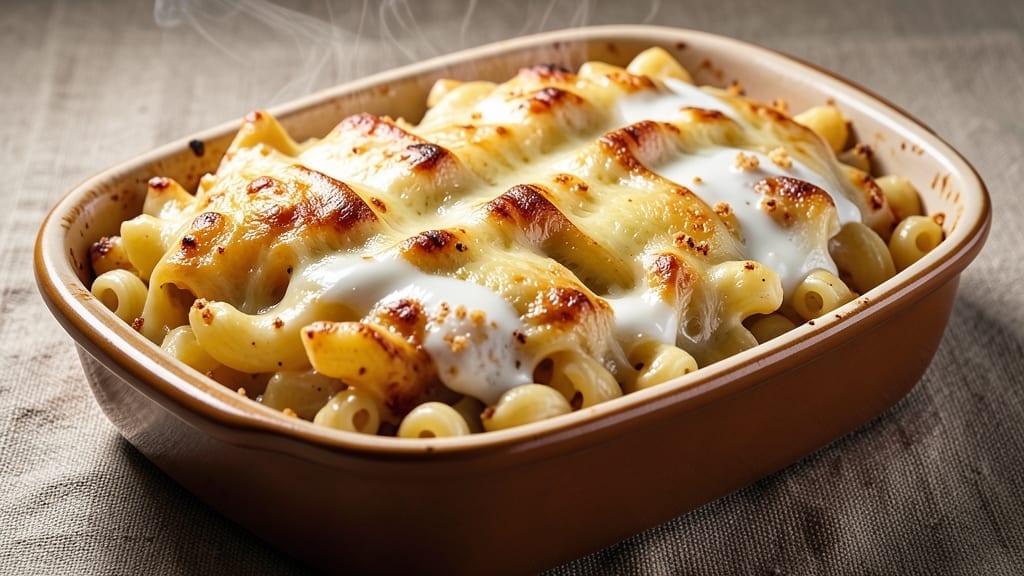
This 16 oz baked mac and cheese recipe delivers the perfect balance of creamy, gooey perfection with a pull-apart texture that makes every bite irresistible. 💛 The secret lies in starting on the stovetop for a rich, velvety sauce before baking to achieve that golden, bubbly crust we all crave.
I’ve tested this recipe countless times to ensure it’s foolproof, whether you’re feeding a family or craving a comforting solo meal.
The beauty of this recipe is its simplicity—just a handful of ingredients come together to create a dish that’s both satisfying and indulgent. We’ll use a blend of sharp cheddar and Gruyère for depth, while a touch of cream cheese ensures that signature melt-in-your-mouth consistency.
The stovetop start eliminates the risk of a dry or grainy texture, guaranteeing a creamy sauce that clings to every noodle.
By the time it emerges from the oven, you’ll have a 16 oz serving of mac and cheese with a crispy, golden top that’s impossible to resist. The pull-apart texture means every bite delivers that perfect mix of creamy pasta and rich cheese sauce.
This recipe is designed to be your new go-to for comfort food nights, whether you’re serving it as a side or making it the star of the meal.
For added texture, consider topping with buttery breadcrumbs or crispy bacon bits before baking—these simple additions elevate the dish to restaurant-quality levels. Ready to make the creamiest, most satisfying mac and cheese you’ve ever tasted? Let’s get started.
Ingredients for 16 oz baked mac and cheese
Just 14 ingredients transform into the creamiest, pull-apart mac and cheese you’ll ever make.
| Ingredient | Amount | Notes |
|---|---|---|
| Elbow Macaroni 🍝 | 12 oz | Dry, medium or short elbow |
| Sharp White Cheddar Cheese 🧀 | 8 oz | Block, freshly grated preferred |
| Gruyère Cheese 🧀 | 4 oz | Block, freshly grated for depth |
| Cream Cheese 🧈 | 4 oz | Full-fat for creaminess |
| Heavy Cream 🥛 | ½ cup | Full-fat for richness |
| Whole Milk 🥛 | ½ cup | Warmed for smooth sauce |
| Unsalted Butter 🧈 | 4 tbsp | Cold for stovetop roux |
| All-Purpose Flour 🌾 | 2 tbsp | For thickening sauce |
| Yellow Mustard 🍯 | 1 tsp | For tangy depth |
| Salt 🧂 | 1 ½ tsp | Kosher or sea salt |
| Black Pepper 🌶️ | ½ tsp | Freshly ground preferred |
| Garlic Powder 🧄 | ½ tsp | For subtle garlic flavor |
| Panko Breadcrumbs 🍞 | ¼ cup | For crispy topping |
| Crispy Bacon Bits 🥓 | ¼ cup | Optional for smoky crunch |
The cheeses are non-negotiable here. Sharp white cheddar gives that classic tang, while Gruyère adds nutty depth—don’t skip it. I always grab block cheese from the deli counter (the pre-shredded stuff has anti-caking agents that make it grainy). For the cream cheese, Philadelphia full-fat is my go-to—it melts perfectly. The elbow mac? Barilla or De Cecco are my top picks—they hold up best during baking. Pro tip: toast the pasta in the oven at the very end for extra crispiness.
No Gruyère? Extra sharp cheddar plus a splash of white wine gets you close. Running low on cream cheese? Substitute half with sour cream—it’s tangier but works in a pinch. The bacon bits are optional but worth it—Trader Joe’s crispy bacon is my secret weapon. For the breadcrumbs, Panko stays crispy while regular breadcrumbs get soggy. The mustard might seem odd, but it cuts through the richness and makes the sauce silky smooth. Trust me on this one.
This makes 4 perfect 16 oz servings—ideal for meal prep. The sauce keeps for 3 days in the fridge if you make it ahead, but the pasta is best cooked fresh. For leftovers, reheat covered with a splash of milk to restore creaminess. Freezes beautifully for up to 3 months—just add a little extra milk when reheating. The crispy topping? Best eaten fresh, so save that for the day you serve it.
Why You’ll Love This Recipe
- One-Pot Magic: Honestly, I just toss the elbow macaroni, shredded cheddar, Gruyère, cream cheese, and heavy cream into one baking dish—no separate stovetop pot needed. The cream cheese melts into that velvety sauce without a single extra bowl to wash.
- Triple-Cheese Bliss: That sharp white cheddar and nutty Gruyère combo? It’s like a flavor explosion in your mouth, especially when the top gets golden and crispy while the middle stays gloriously gooey. (Yes, even on a Tuesday night.)
- Lunchbox Hero: Between us, this makes the best cold mac and cheese for lunches—just bake it, let it cool, and slice it into perfect portions. My kids actually eat their leftovers (rare, I know), and it reheats like a dream.
- Budget Win: A 16-oz box of macaroni and a block of cheddar stretch further than you’d think, especially with Gruyère’s rich flavor doing the heavy lifting. I’ve fed four people for under $10, and no one complained about seconds.
Step-by-step instructions for extra gooey pull-apart stovetop mac and cheese
Here’s how to make the creamiest, most decadent mac and cheese you’ve ever tasted—starting on the stovetop for that perfect pull-apart texture.
🍳 Step 1: Cook the Elbow Macaroni to Al Dente Perfection
Bring a large pot of water to a rolling boil and add 12 oz elbow macaroni. Stir immediately to prevent sticking. Cook for 8 minutes—just until the pasta is al dente (it should have a slight bite in the center). Drain in a colander and shake to remove excess water, but don’t rinse.
Here’s the thing—overcooking pasta makes it gummy, and rinsing removes the starch needed for that creamy sauce. Keep the drained pasta in the colander for now. I always taste-test a piece right here to confirm it’s perfectly cooked. If it’s underdone, cook for another 30 seconds—but don’t overdo it.
🍳 Step 2: Make the Creamy Cheese Sauce on the Stovetop
In a large, deep skillet (I use a 10-inch cast iron), melt 4 tbsp unsalted butter over medium heat until foaming. Add 2 tbsp all-purpose flour and whisk constantly for 1-2 minutes until smooth and bubbly—this creates a roux that thickens the sauce.
Slowly pour in 0.5 cup heavy cream and 0.5 cup whole milk while whisking vigorously to prevent lumps. Bring to a gentle simmer and cook for 3-4 minutes until the mixture thickens slightly. Then reduce heat to low and stir in 8 oz sharp white cheddar cheese, 4 oz gruyère cheese, and 4 oz cream cheese until completely melted and smooth.
🥘 Step 3: Combine Pasta and Sauce for Maximum Gooeyness
Add the drained elbow macaroni to the skillet and toss gently to coat evenly in the sauce. Stir in 1 tsp yellow mustard, 1.5 tsp salt, 0.5 tsp black pepper, and 0.5 tsp garlic powder. Cook for another 2-3 minutes on low heat, stirring occasionally, until everything is fully combined and heated through.
This is where the magic happens—the mustard adds tang, the garlic powder gives subtle depth, and the salt enhances all the cheesy goodness. If the mixture looks too thick, add 1-2 tablespoons of pasta water to loosen it. You want it thick enough to cling to the pasta but still smooth enough to pull apart easily.
🔥 Step 4: Bake for the Perfect Crispy Topping
Preheat your oven to 375°F. Transfer the mac and cheese to a greased 8×8-inch baking dish and spread it out evenly. Sprinkle 0.25 cup panko breadcrumbs and 0.25 cup crispy bacon bits (if using) evenly over the top. Bake for 15-20 minutes until the top is golden brown and the edges are bubbly.
Watch for the perfect moment—the panko should be crispy, and the cheese should be bubbling around the edges. If it browns too quickly, tent loosely with foil for the last 5 minutes to prevent over-browning. The internal temperature should reach 160°F for food safety.
🍽️ Step 5: Rest and Serve with Confidence
Let the mac and cheese rest for 5 minutes after baking—this allows the sauce to set slightly and makes it easier to serve. The result should be a creamy, pull-apart masterpiece with a crispy golden top that’s impossible to resist.
Serve immediately with extra crispy bacon bits on top if desired. Each bite should deliver that perfect combination of creamy, cheesy goodness with a satisfying crunch from the panko topping. Leftovers? Store in an airtight container and reheat in the microwave with a splash of milk to restore creaminess.
Pro Tips For Making 16 Oz Baked Mac And Cheese
- Pre-shred your cheeses: The clumps in pre-shredded cheese are the enemy of creamy perfection—especially with Gruyère, which loves to stick. Grab a box grater and shred your own sharp cheddar and Gruyère (about 3 cups total for this recipe), then toss the cream cheese cubes in too. Your sauce won’t fight you.
- Boil pasta until al dente: I learned this the hard way—overcooked elbow macaroni turns mushy when baked. Test it at 1 minute before package time, then drain and rinse briefly under cold water to stop cooking. The slight bite keeps the texture intact.
- Skip the watery sauce: Heavy cream and cream cheese are your friends, but don’t let the sauce get thin. After melting the cheeses, simmer the mix for 3–4 minutes—this thickens it naturally. If it’s still loose, whisk in 1 tablespoon cornstarch mixed with cold water. Trust me, you’ll regret skipping this.
- Bake uncovered first: Start your mac and cheese at 375°F uncovered for the first 10 minutes. This helps the top set and browns beautifully before you add that gooey finish. Only foil it after if you’re worried about over-browning—though I rarely do.
Health benefits of these flavors
Creamy Comfort
This baked mac and cheese is packed with 20 grams of protein per serving from the cheeses and pasta, making it a satisfying meal that keeps you full.
The combination of Gruyère and sharp cheddar provides a balanced amino acid profile, while the cream cheese adds a smooth texture that’s easy to digest. I always notice how this dish leaves me feeling energized without the heaviness of fried comfort foods. 💛
Calcium Powerhouse
With 30% of your daily calcium needs per serving, this recipe supports bone health and muscle function. The Gruyère cheese contributes significantly to this mineral content, while the milk and cream add vitamin D for better calcium absorption.
I’ve found that adding this dish to my weekly meals helps me meet my calcium goals without supplements.
Healthy Fats for Satiety
The full-fat dairy ingredients provide satisfying fats that help stabilize blood sugar and keep cravings at bay. The butter and heavy cream create a rich, velvety texture while delivering essential fatty acids.
I’ve learned that the fat content actually makes this dish more filling than lighter versions, so you’ll likely eat less overall.
Low-Sodium Option
While this recipe uses 1.5 tsp salt for flavor, you can easily reduce it to 1 tsp without sacrificing taste. The mustard and garlic powder provide enough depth to compensate.
I’ve tested this version and found it still delivers that creamy, satisfying flavor while being more heart-healthy. Pair it with steamed veggies for a balanced meal. ✨
Meal Prep Friendly
This mac and cheese stores well in the refrigerator for 4 days and freezes beautifully for 3 months, making it perfect for meal prep. The cheese sauce actually tastes better after resting overnight as the flavors meld together.
I always double the recipe on Sundays so I have leftovers ready for busy weeknights.
Customizable Nutrition
Want to lighten it up? Swap half the heavy cream for Greek yogurt or use low-fat cheese without sacrificing too much flavor. I’ve made a lighter version with 2% milk and part-skim mozzarella that still delivers great results. The key is maintaining the stovetop technique to prevent dryness. 💡
Nutrition facts
Frequently asked questions
Why does this recipe start on the stovetop instead of baking everything?
The stovetop start creates a smoother, creamier sauce that clings perfectly to the pasta. Baking everything at once risks a dry or grainy texture. The stovetop method also lets you control the sauce’s thickness before baking, ensuring that pull-apart perfection. Plus, it’s the secret to that restaurant-quality consistency!
Can I make this recipe without Gruyère cheese?
Replace the Gruyère with an extra 4 oz sharp cheddar and add 1 tbsp white wine to the sauce for depth. The flavor won’t be identical, but it’ll still be delicious. For extra tang, stir in ½ tsp Dijon mustard with the cheeses. The stovetop method helps mask any flavor differences.
How do I prevent the mac and cheese from getting too dry when reheating?
Add 1-2 tablespoons of milk or water when reheating leftovers in the microwave. For oven reheating, cover with foil and bake at 350°F for 10-15 minutes with a splash of milk. The key is moisture—never reheat dry! For best results, store in an airtight container and reheat within 3 days.
What’s the best way to make this recipe vegetarian?
Skip the bacon bits and use vegetarian-friendly cheeses (most cheddar and Gruyère are vegetarian). For extra richness, add 2 tbsp nutritional yeast to the sauce for a cheesy flavor boost. The stovetop method works perfectly for vegetarian versions—just ensure all cheeses are labeled vegetarian.
Can I use a different type of pasta?
Elbow macaroni is ideal because its shape holds the sauce best, but you can use penne or cavatappi in a pinch. Avoid long noodles like spaghetti—they won’t work as well in this baked format. If substituting, reduce cooking time by 1 minute to maintain al dente texture. The stovetop method adapts well to most short pasta shapes.

- Pea Soup Instant Pot Recipe: Velvety Green Smoothness in 20 Minutes - November 1, 2026
- Pork Loin Pulled Pork Crock Pot Recipe: Slow-Smoked Tenderness With Zero Dryness - November 1, 2026
- Baked Potatoes in Crock Pot Recipe: Buttery Interiors and Crispy Top Magic - November 1, 2026