
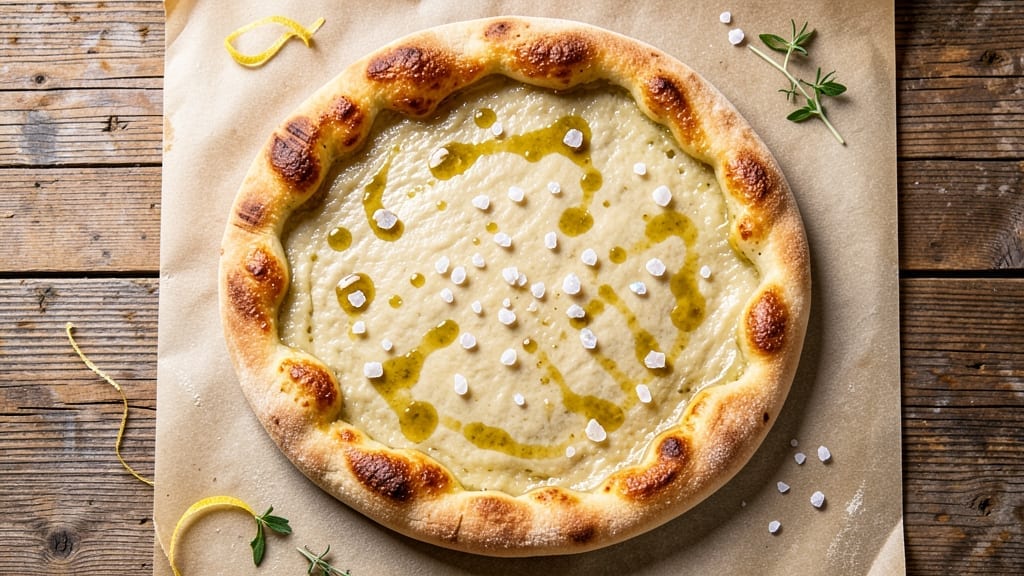
This 18-hour pizza dough recipe delivers the kind of perfect crust—crispy yet chewy, with a flavor depth that rivals your favorite pizzeria. The secret lies in an overnight cold fermentation that transforms simple ingredients into a dough with incredible texture and complexity.
I’ve perfected this method after years of experimenting, and it never fails to impress, whether you’re making Neapolitan-style pies or classic New York slices.
The beauty of this recipe is its simplicity: no kneading required, just mix, rest, and let time do the work. The 18-hour cold proof develops gluten slowly, creating a lighter, more digestible crust with a rich, slightly tangy flavor.
This method also reduces the risk of overproofing, making it foolproof for home cooks. The dough is incredibly forgiving, so even if you’re new to pizza-making, you’ll achieve professional results.
By the time you pull that dough from the fridge, it’ll be ready to shape and top with your favorite ingredients—think classic margherita, spicy arrabbiata, or loaded veggie pies. The crust will be golden and blistered from the oven, with a chewy interior that holds up perfectly to any toppings.
This isn’t just pizza dough; it’s the foundation for a restaurant-quality meal you can make at home.
Once you try this method, you’ll never go back to quick-rise dough again. The flavor and texture are worth the wait, and the process is surprisingly hands-off. Let’s get started on creating the best pizza crust you’ve ever made.
Ingredients for 18 hour pizza dough
Eight simple ingredients transform into the perfect pizza crust after 18 hours of magic.
| Ingredient | Amount | Notes |
|---|---|---|
| All-Purpose Flour 🌾 | 3 ½ cups | High-protein preferred for chewy crust |
| Active Dry Yeast 🍞 | ¼ tsp | Ensure it's fresh and active |
| Granulated Sugar 🍚 | 1 tbsp | Feeds yeast for fermentation |
| Warm Water 💧 | 1 ¼ cups | 105-110°F for optimal yeast activation |
| Extra-Virgin Olive Oil 🫒 | 1 tbsp | High-quality for flavor richness |
| Kosher Salt 🧂 | 1 tsp | Diamond Crystal preferred |
| Semolina Flour 🌾 | ¼ cup | For dusting work surface |
| Cornmeal 🌽 | ¼ cup | For pizza peel preparation |
The flour choice is non-negotiable here—high-protein (12-13%) gives that perfect chewy bite. King Arthur or Caputo are my go-tos; they’re worth the investment for this recipe. Yeast is the unsung hero—fresh yeast from the refrigerated section (not the canned kind) ensures it’s active. For the olive oil, California Olive Ranch or Colavita deliver that fruity depth that makes all the difference. If you’re feeling fancy, grab a 100% Italian Tipo 00 flour for authentic Neapolitan flavor, but all-purpose works beautifully too.
No yeast on hand? Instant yeast works 1:1, but fresh is ideal. Short on sugar? Honey at half the amount adds a subtle floral note. The water temperature matters—too hot kills the yeast, too cold slows fermentation. 105-110°F is perfect; if unsure, test with your finger—should feel warm but not hot. For the semolina, Barilla is my go-to, but any brand works. Cornmeal? Stone-ground is best, but regular works in a pinch. Pro tip: Mix the dry ingredients first to avoid lumps when adding liquids—saves cleanup later.
This dough keeps beautifully—up to 48 hours in the fridge if you’re prepping ahead. For best results, let it sit at room temperature for 30 minutes before shaping. The longer it rests, the better it gets. Portion into 4 equal balls for easy handling. If you won’t use all the dough at once, freeze the extras for up to 3 months—thaw overnight in the fridge before using. Trust me, leftovers taste even better the second day.
Why You’ll Love This Recipe
- Chewy Gold Standard: That long fermentation? It’s magic. The yeast and sugar work their magic overnight, creating a dough so tender and airy it practically melts in your mouth. The olive oil keeps every bite moist—no dry crust here.
- Party-Ready Anytime: Make a double batch on Sunday, and you’ve got pizza for game nights, lazy Mondays, or impromptu dinner guests. Between us, this dough lasts days in the fridge—perfect for when life gets busy.
- Budget Stretch: Five ingredients, zero specialty items. A single batch feeds four, and the leftovers? Freeze them for next month. I’ve made this dough for years—it’s my wallet’s best friend.
Step-by-step instructions for 18-Hour pizza dough: crusty, chewy perfection without kneading
Here’s how to create restaurant-quality pizza dough that develops incredible flavor and texture overnight.
Activate the Yeast for Maximum Flavor Development
In a small bowl, combine the 1.25 cups warm water (between 105-110°F) with the 1 tbsp granulated sugar and 0.25 tsp active dry yeast. Stir gently and let sit for 5-10 minutes until you see frothy bubbles forming on the surface. This confirms your yeast is alive and ready to work its magic.
I always test my yeast first by dropping a pinch into warm water with sugar—if it bubbles within 2-3 minutes, it’s fresh. The sugar here isn’t just for flavor; it jumpstarts fermentation by feeding the yeast immediately. Don’t skip this step—proper yeast activation is what gives your dough its signature chewy texture after 18 hours.
Mix the Dough with Minimal Handling
In a large mixing bowl, combine the 3.5 cups all-purpose flour and 1 tsp kosher salt. Create a well in the center and pour in the yeast mixture along with the 1 tbsp extra-virgin olive oil. Using a wooden spoon or your hands, gently mix until just combined—you’ll still see dry flour patches. This is intentional; we want to preserve gluten development during the long fermentation.
The dough will be shaggy at this stage, almost like wet sand. Resist the urge to overwork it. Over-kneading now would create too much gluten, resulting in a tougher crust. Instead, let the gluten develop naturally during the long fermentation period. Once mixed, cover the bowl loosely with plastic wrap or a damp towel and let it rest at room temperature for 1 hour.
Perform the First Stretch-and-Folds for Gluten Development
After the initial rest, wet your hands slightly and reach into the bowl. Grab one side of the dough and gently stretch it upward while rotating the bowl. Fold the stretched dough over itself and press down lightly. Repeat this process 4-5 times, rotating the bowl each time to ensure even gluten development. This technique, called stretch-and-fold, strengthens the gluten structure without requiring kneading.
I perform these folds every 30 minutes for a total of 3-4 rounds. Each fold builds elasticity in the dough, which translates to that perfect chewy texture in your final pizza. After the final fold, cover the bowl again and let it rest at room temperature for 18 hours. This long fermentation period is what creates the complex flavors and open crumb structure that sets this dough apart from quick methods.
Shape and Prepare the Dough for Toppings
After the 18-hour fermentation, the dough will have nearly doubled in size and will be bubbly and slightly sticky. Turn it out onto a surface lightly dusted with 0.25 cup semolina flour (this prevents sticking and adds a nice texture). Gently press down on the dough to release any large air bubbles, then divide it into 4 equal portions (about 8 ounces each) for your 4 servings.
To shape each ball, cup your hands over the dough and gently rock it back and forth while stretching upward. This creates surface tension that helps the dough hold its shape. Once shaped into balls, place them on a tray dusted with 0.25 cup cornmeal (this prevents sticking and adds a lovely crunch when baking). Cover loosely and let them rest at room temperature for 1-2 hours before using. This final rest allows the dough to relax and develop even more flavor.
Bake for Perfect Crust and Chewy Texture
Preheat your oven to its highest setting (500°F or higher if possible) with a pizza stone or baking sheet inside. Once hot, roll out each dough ball on a floured surface to your desired thickness—typically 12 inches for a classic pizza. Transfer to parchment paper and slide onto the hot stone or sheet.
Bake for 10-15 minutes until the crust is golden brown and slightly puffed in spots. The edges should be crispy while the center remains soft and chewy. Watch carefully—high heat is key here. Once baked, remove from the oven and immediately add your toppings and sauce. The residual heat will finish cooking everything perfectly without drying out the crust.
Pro Tips For Making 18 Hour Pizza Dough
- Measure Water Precisely: That 110°F warm water isn’t just a suggestion—use a thermometer. I learned this the hard way when my yeast took forever to activate because my “warm” was actually bathwater temperature. Too hot kills it, too cool makes it sluggish. Aim for 110°F and let it sit for 5 minutes before mixing.
- Skip the Sugar Shortcut: Granulated sugar isn’t just filler—it feeds the yeast. If you’re tempted to skip it or use honey, don’t. The sugar kickstarts fermentation faster, especially in an 18-hour cold proof. Trust the recipe: 1 tablespoon is enough to get the party started.
- Oil the Bowl First: Dough sticks like glue to plastic or glass. Before mixing, coat your bowl with 1 tablespoon of extra-virgin olive oil—rub it in with your fingers so it’s even. This prevents a sticky mess when you turn it out later. (Yes, even if you’re using a dough scraper.)
- Cold Proof in Fridge: The fridge isn’t just for storage—it’s your dough’s best friend. Place the covered bowl in the coldest part of your fridge (usually the back shelf) and resist the urge to peek. Cold slows fermentation evenly, giving you that perfect chewy texture. No need to wake it up early.
Regional styles of this recipe
Neapolitan Style
For an authentic Neapolitan experience, swap the all-purpose flour for 100% Tipo 00 flour like Caputo. This creates a thinner, more delicate crust with a crispy yet tender texture.
After your 18-hour cold proof, shape the dough into 12-inch rounds with slightly thicker edges—this creates the iconic “cornicione” (crust puff). Bake in a 900°F wood-fired oven for 60-90 seconds (yes, seconds!) to achieve that signature char.
If you don’t have a wood-fired oven, use your broiler on high for the final 2 minutes to mimic the effect. Top with San Marzano tomatoes, fresh mozzarella di bufala, basil, and a drizzle of extra-virgin olive oil.
New York Thin Crust
Transform this dough into classic New York-style slices by rolling it ⅛-inch thick and baking on a preheated pizza stone at 500°F for 10-12 minutes. The long fermentation gives you a crispy yet flexible crust that holds up to heavy toppings like pepperoni, sausage, and extra cheese.
For the ultimate NY slice, fold the crust into a half-moon shape before baking—this creates the iconic “folded slice” look. Use a heavy-hand with cheese: blend mozzarella with provolone for that signature melty, stretchy texture. Serve with a side of garlic knots for the full experience.
Roman-Style Pizza
Roman pizza, or “pizza al taglio,” is baked in a rectangular shape and cut into squares. Divide your dough into 2 large rectangles (about 16×12 inches) and bake at 500°F for 12-15 minutes on a pizza peel dusted with semolina flour.
Top with ricotta cheese, cured meats like guanciale, and fresh herbs like rosemary or thyme. The long fermentation gives this style a lighter, airier crust that’s perfect for sharing.
For extra authenticity, add a sprinkle of Pecorino Romano before baking—it adds a sharp, salty contrast to the sweet ricotta.
Detroit-Style Deep Dish
Give your dough a Detroit twist by pressing it into a 12-inch cast-iron skillet coated with olive oil. Bake uncovered at 475°F for 10 minutes to create a crispy, caramelized crust on the bottom.
Then, add a layer of tomato sauce, mozzarella, sausage crumbles, and a final layer of cheese. Cover the skillet and bake for another 15-20 minutes until bubbly and golden. The long fermentation ensures the cheese melts perfectly without making the crust soggy.
Serve with a side of giardiniera for that classic Detroit heat.
White Pizza Variations
Skip the tomato sauce entirely and go for a creamy white pizza by spreading a layer of ricotta or burrata on your shaped dough. Top with fontina cheese, caramelized onions, and fresh herbs like chives or thyme.
The 18-hour fermentation enhances the richness of the dairy, creating a luxurious crust that pairs perfectly with proscuitto or mushrooms. For a vegan twist, use cashew ricotta and nutritional yeast for a cheesy flavor without dairy.
Bake as usual and finish with a drizzle of truffle oil for an elevated touch.
Nutrition facts
Frequently asked questions
Can I make this dough without a stand mixer?
This recipe requires minimal handling—just mix the ingredients until combined, then perform gentle stretch-and-folds by hand. The dough’s gluten develops naturally during the 18-hour fermentation, so no kneading or mixer is needed. A wooden spoon or your hands work perfectly for mixing.
What if my kitchen isn’t warm enough for the initial yeast activation?
No problem! If your kitchen is cold, simply place the yeast mixture in a warm spot like near the oven (with the oven off) or on top of your fridge for 5-10 minutes. The water should feel warm to the touch but not hot—around 105-110°F. Yeast works best in this temperature range for optimal activation.
How do I know if my dough is overproofed after 18 hours?
Overproofed dough will look very puffy with large holes and may feel limp when pressed gently. If this happens, don’t panic! Simply shape the dough quickly and bake immediately—it’ll still taste great. For best results, keep the dough covered in the fridge if your kitchen is warm, as heat speeds up fermentation.
Can I use this dough for calzones or stuffed pizza?
Yes, this dough works beautifully for calzones! After the 18-hour fermentation, divide the dough into 4 equal portions and roll each into a thin circle. Fill with your favorite ingredients (ricotta, mozzarella, and meats work well), fold into half-moons, seal the edges, and bake as usual. The long fermentation gives you a tender, flavorful crust that holds up perfectly to filling.
Why does my dough smell sour after 18 hours?
A slight tangy aroma is normal and actually desirable! This indicates healthy fermentation from the yeast and natural acids developing in the dough. If it smells strongly vinegary or unpleasant, your kitchen may have been too warm. The flavor should balance out during baking—don’t worry, it’s not spoiled!

- Pea Soup Instant Pot Recipe: Velvety Green Smoothness in 20 Minutes - November 1, 2026
- Pork Loin Pulled Pork Crock Pot Recipe: Slow-Smoked Tenderness With Zero Dryness - November 1, 2026
- Baked Potatoes in Crock Pot Recipe: Buttery Interiors and Crispy Top Magic - November 1, 2026