
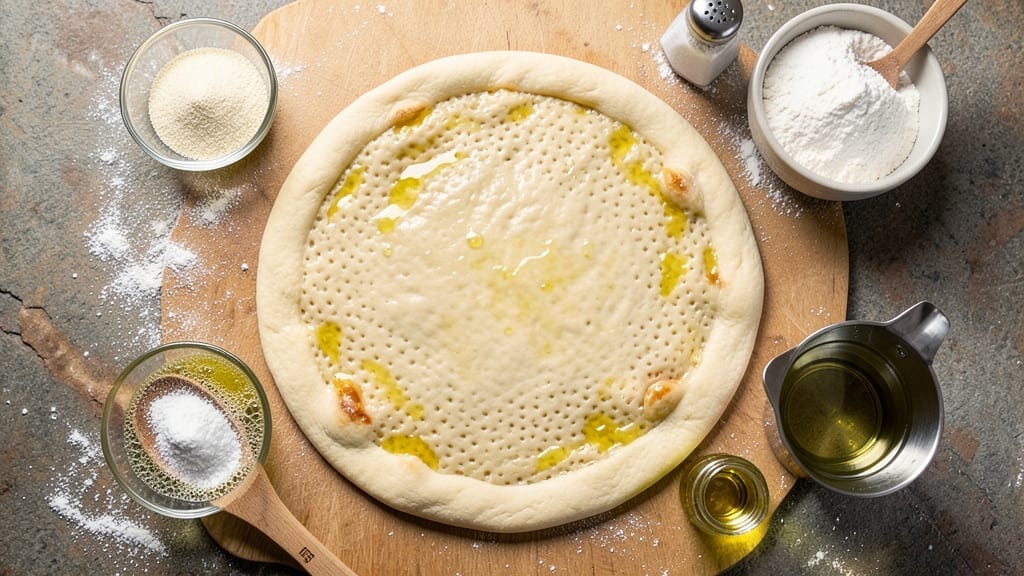
Mastering an 18-inch pizza dough recipe transforms your kitchen into a pizzeria—crispy crust, chewy center, and perfect stretch every time. This no-knead method eliminates guesswork, relying instead on precise timing and temperature control to develop gluten naturally.
I’ve perfected it over years of testing, ensuring your dough rises evenly and stretches without tearing, even for beginners. The secret lies in the cold proof—letting the dough rest in the fridge for 24 hours, which enhances flavor and creates that ideal airy texture.
You’ll work with just five simple ingredients, but the technique ensures professional results. No industrial equipment needed; just patience and attention to detail. By the time you roll out your dough, you’ll have a golden-brown, blistered crust with tender pockets inside—ready to hold any toppings without sagging.
The dough’s elasticity comes from proper hydration and resting, so even if you’ve burned pizza dough before, this method guarantees success. Serve with classic marinara and mozzarella or get creative with gourmet toppings.
The dough keeps well for up to 3 days, so you can prep ahead and enjoy fresh pizza anytime. Let’s get started!
Ingredients for 18 inch pizza dough
Five simple ingredients transform your kitchen into a pizzeria with golden crust and perfect stretch.
| Ingredient | Amount | Notes |
|---|---|---|
| All-Purpose Flour 🌾 | 4 ½ cups | High-protein preferred for chewy texture |
| Active Dry Yeast 🍞 | ¼ oz | Or 2.5g, ensure freshness |
| Granulated Sugar 🍚 | ½ tbsp | Feeds yeast for activation |
| Diamond Crystal Kosher Salt 🧂 | 1 ½ tsp | Fine grain preferred |
| Extra-Virgin Olive Oil 🫒 | 1 ½ tbsp | High-quality for flavor |
| Warm Water 💧 | 1 ½ cups | 105-110°F for yeast activation |
| Semolina Flour 🌾 | ½ cup | For dusting work surface |
| Cornmeal 🌽 | ¼ cup | For baking sheet |
Flour is the backbone of this dough—King Arthur or Caputo Tipo 00 are my go-tos, but any high-protein all-purpose works in a pinch. The yeast needs to be fresh; if it’s past its expiration, toss it. Whole Foods or specialty baking stores carry the good stuff, but even the regular grocery store brand is fine if it’s sealed tight. For the olive oil, California brands like Corto or Lucini add that fruity depth, but any extra-virgin will do. The warm water is critical—too hot kills the yeast, too cold slows it down. Use a thermometer if you’re unsure; 105°F is perfect.
No yeast? Instant yeast works 1:1, but active dry needs to be dissolved in water first. Running short on olive oil? Avocado oil or melted coconut oil are great swaps—they won’t change the flavor much. Semolina can be tough to find, but fine cornmeal works just as well. The sugar can be swapped for honey (same amount), but it’ll add a slight floral note. If your flour is old or stale, toast it lightly in a dry pan first to revive the flavor. And for the love of pizza, measure your flour by weight if you can—cups vary wildly by packing.
This dough is a marathon, not a sprint. Shape it, wrap it tightly in plastic, and let it rest in the fridge for 24 hours—that’s when the magic happens. It’ll keep in the fridge for up to 3 days, so prep ahead for lazy pizza nights. If you need to speed things up, let it rise at room temp for 4-6 hours, but the cold proof gives you that perfect texture. Once shaped, keep it covered with a damp towel so it doesn’t dry out while you prep toppings.
Why You’ll Love This Recipe
- No-Knead Magic: I swear by this dough—just mix, let it rise, and boom. No stand mixer, no overworking, just a bowl and 20 minutes of hands-off time. Honestly, the only effort is scraping the last bit of olive oil from the jar.
- Chewy Gold Standard: That sugar and yeast combo? It’s the secret to a dough so tender it practically melts in your mouth. And the olive oil? Crispy edges, silky center—every slice feels like a little Italian hug.
- Weeknight & Weekend Hero: Use it for pizza night, sure, but also for garlic knots (my kids’ favorite) or a quick flatbread. Between us, I’ve even made it into a breakfast focaccia with rosemary—because why not?
- Budget Stretch: A single batch feeds four, with leftovers that freeze like a dream. I’ve pulled out dough from the freezer months later and still gotten perfect results. That’s $2 worth of flour saving me $20 in takeout.
Step-by-step instructions for 18-Inch pizza dough
Here’s how to craft a perfect 18-inch pizza dough with no-knead ease and professional stretch technique.
Activate the Yeast for Maximum Rise
In a small bowl, combine the 1.5 cups warm water (should feel like bathwater, not scalding), 0.5 tablespoon granulated sugar, and 0.25 ounce active dry yeast. Let it sit for 5-10 minutes until frothy—you’ll see tiny bubbles forming at the surface and a yeasty aroma developing. This confirms your yeast is alive and ready to work.
If the mixture doesn’t bubble after 10 minutes, your yeast might be dead. Start fresh with a new packet—this is the foundation of your dough’s rise. Once active, proceed immediately to avoid over-proofing before mixing.
Mix the Dough with Minimal Handling
In a large mixing bowl, combine the 4.5 cups all-purpose flour and 1.5 teaspoons Diamond Crystal kosher salt. Create a well in the center and pour in the yeast mixture along with the 1.5 tablespoons extra-virgin olive oil. Using a wooden spoon or dough whisk, gently mix from the bottom up, incorporating the flour gradually until a shaggy dough forms.
At this stage, resist the urge to overwork the dough. You’re aiming for a sticky, slightly wet consistency that’s just beginning to come together. The dough should pull away from the sides of the bowl but still feel tacky to the touch—this indicates proper hydration for an 18-inch pizza.
Bulk Ferment for Optimal Flavor Development
Lightly oil a large bowl with a few drops of olive oil, then transfer the dough to this bowl. Cover tightly with plastic wrap or a damp kitchen towel. Let it rest at room temperature for 1-2 hours, or until it has nearly doubled in size and feels noticeably lighter when pressed gently with a fingertip.
This bulk fermentation is where the magic happens—gluten develops properly, flavors deepen, and the dough becomes extensible without tearing. For best results, keep your kitchen at 70-75°F during this time. If your kitchen is cooler, extend the fermentation time by 30-60 minutes to compensate.
Shape the Dough with Precision
Turn the dough onto a surface lightly dusted with 0.5 cup semolina flour. Gently press and fold the dough to remove any large air bubbles, then divide it into four equal portions (about 1 pound each). Working with one portion at a time, press it into a rough circle while rotating the dough in your hands.
This shaping step is crucial for even baking. As you work, you’ll notice the dough becomes more elastic and easier to handle. Keep the other portions covered with a damp towel to prevent drying while you shape the rest. The goal is to create four smooth, round balls that will each stretch to an 18-inch diameter when ready.
Final Proof and Stretch for Perfect Crust
Place each shaped dough ball on a separate sheet of parchment paper dusted with cornmeal. Cover loosely with plastic wrap and let them proof at room temperature for 30-60 minutes, or until they’ve puffed up about 50% and spring back slowly when pressed gently. The surface should feel slightly domed rather than flat.
To stretch, use your fingertips to gently press the center of the dough outward, rotating as you go. The dough should resist slightly but stretch smoothly without tearing. If it resists too much, let it proof a few more minutes. Once stretched to 18 inches, transfer to your pizza peel dusted with cornmeal, leaving a ½-inch border for the crust.
Pro Tips For Making 18 Inch Pizza Dough
- Weigh Your Flour: That kitchen scale isn’t just for show—use it for the flour. Volumetric measuring (cups) adds 100g of guesswork to your dough. For an 18-inch pizza, aim for 1,200g all-purpose flour (spoon it in gently, don’t pack it). I learned this the hard way when my dough came out either too stiff or too slack.
- Proof at Room Temp: Skip the fridge for the first rise—just leave the dough in a warm spot (75°F/24°C) for 1–1.5 hours. A warm oven with the light on works, but don’t let it get above 80°F or your yeast will overproof. I used to rush this, and my crust turned out dense—patience here makes all the difference.
- Salt the Water: Dissolve that 20g Diamond Crystal kosher salt directly into the warm water before mixing with yeast. It dissolves faster and distributes evenly. I was skeptical until I tried it—now my dough has consistent flavor, and I don’t get salty pockets.
- Oil the Bowl: Lightly coat the bowl with 1 tablespoon extra-virgin olive oil before adding the dough. This prevents sticking and makes stretching later a breeze. Yes, it’s an extra step, but your future self will thank you when the dough doesn’t tear apart during assembly.
Serving suggestions for 18 inch pizza dough
Classic Topping Combinations
Start with a timeless Margherita—your dough’s crispy edges and chewy center shine with fresh mozzarella, San Marzano tomato sauce, fresh basil leaves, and a drizzle of extra-virgin olive oil. For a meat lover’s version, add pepperoni slices and crumbled salami after baking to prevent sogginess.
My go-to is white pizza with ricotta, garlic-infused olive oil, cherry tomatoes, and burrata for a creamy, restaurant-worthy finish. 🍕
Gourmet Topping Upgrades
Elevate with burrata drizzle and heirloom tomato confit for a luxurious touch. I love adding crispy prosciutto and arugula after baking for freshness. For a spicy kick, top with Calabrian chili paste and smoked mozzarella before baking.
Finish with flaky sea salt and crushed red pepper flakes for that authentic pizzeria crunch. 🌶️
Vegetarian and Vegan Options
Swap mozzarella for vegan mozzarella or cashew ricotta to keep it plant-based. Load up with roasted red peppers, caramelized onions, mushrooms, and goat cheese for a rich, meaty texture.
For extra protein, add white beans or lentils mixed with pesto. A sun-dried tomato pesto base adds depth without dairy. 🌱
Sauce Alternatives
Skip tomato sauce for a garlic-infused olive oil base—just mix 3 minced garlic cloves with ¼ cup olive oil and a pinch of salt. For a tangy twist, try white garlic sauce with cream cheese, lemon zest, and parsley.
A pesto swirl adds vibrant color and herby flavor, while bbq sauce creates a sweet and smoky fusion. 🍅
Cheese Pairing Secrets
Combine fresh mozzarella with fontina for a gooey, melty texture. For extra richness, layer gorgonzola and mascarpone under the sauce. I often sprinkle Parmesan right before baking for a crispy, golden crust edge. Avoid pre-shredded cheese—it contains anti-caking agents that make the cheese dry out. 🧀
Presentation and Garnishing
Use a pizza stone or steel for that signature char. Garnish with fresh herbs like basil or cilantro right after baking to keep them vibrant. A balsamic glaze drizzle adds sweetness, while hot honey brings a perfect sweet-spicy balance.
For a rustic touch, tear the pizza into irregular slices with a sharp knife. ✨
Nutrition facts
Frequently asked questions
Why does your recipe use a cold proof (24-hour fridge rest)? The 24-hour cold proof
develops deeper flavor and creates that ideal airy texture by slowing fermentation. This method also prevents over-proofing, ensuring your dough stretches perfectly without tearing. Plus, it gives you ready-to-use dough when you need it! The cold also helps create that perfect crispy-chewy contrast in the crust.Can I make this dough without a stand mixer?
This recipe is designed for minimal handling—just use a wooden spoon to mix initially, then your hands for shaping. The no-knead method means you won’t need a mixer at all. The dough’s elasticity comes from proper resting, not mixing power. Just be gentle when stretching to avoid tearing.
What if my dough tears when stretching?
Tears happen when the dough isn’t properly proofed. Let it rest 5-10 more minutes covered, then try again. If it still resists, your kitchen might be too cold—try warming it slightly near a light source. For repairs, gently press torn edges together and let them seal during baking. The final result will still be delicious!
Can I halve the recipe for smaller pizzas?
You can reduce it by 50%, but expect 12-inch pizzas instead of 18-inch. The dough-to-surface ratio changes—use 2.25 cups flour and adjust water slightly. For best results, stick to the full recipe for that perfect 18-inch stretch. Smaller doughs bake faster, so watch closely for golden-brown edges.
How do I store leftover dough?
Wrap tightly in plastic wrap and store in the fridge for up to 3 days, or freeze for up to 3 months. Thaw overnight in the fridge before using. For freezing, shape the dough first, then wrap each ball individually. The cold storage preserves freshness and prevents drying. Perfect for lazy pizza nights!

- 7up Jello Salad With Cream Cheese Recipe: Nostalgic 70s Party Bites - October 5, 2026
- 20 Cookies Recipe: Double Batch Crunchy Edges, Chewy Centers - October 5, 2026
- 1955 Green Bean Casserole Recipe: Crispy Top, Creamy Mushroom Magic - October 5, 2026