
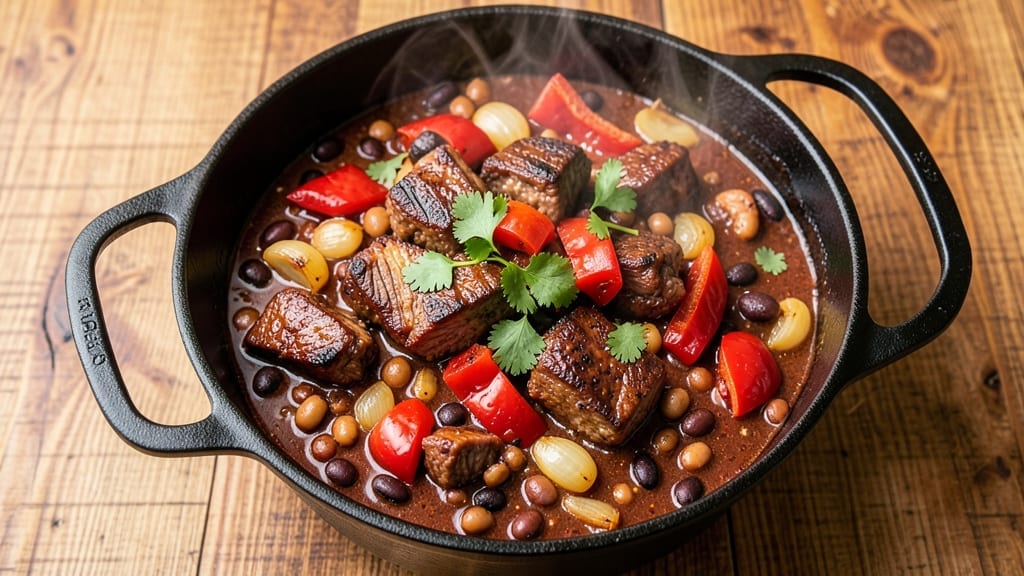
An 18-quart chili recipe isn’t just dinner—it’s a weekend project that transforms your home into the heart of any gathering. This isn’t your average chili; it’s a spice-packed, meaty masterpiece designed to feed a crowd while keeping flavors deep and complex. The key?
Slow simmering, layered spices, and a foolproof technique that ensures every bite delivers bold, smoky satisfaction without burning out your kitchen. What sets this apart is the balance: tender beef and beans melt into a thick, velvety broth, while spices like cumin, chili powder, and smoked paprika build flavor gradually.
No shortcuts here—just hours of simmering that turn tough cuts into fork-tender perfection. The result? A pot so rich, guests will ask for seconds before the first bowl is even empty. This chili isn’t just about quantity—it’s about restaurant-quality depth.
The secret lies in the aromatic base: onions, garlic, and bell peppers caramelized until they’re sweet and sticky, forming the foundation for layers of heat and smokiness. Serve it with sharp cheddar, sour cream, and crisp tortilla chips for the ultimate crowd-pleaser.
Perfect for game days, potlucks, or holiday feasts, this recipe scales effortlessly. Double the batch if you’re feeling ambitious—leftovers taste even better the next day. Let’s make a chili worth the wait.
Ingredients for 18 quart chili
Eighteen quarts of bold flavors—this isn’t just chili, it’s a weekend project worth every spoonful.
| Ingredient | Amount | Notes |
|---|---|---|
| Chuck Roast 🥩 | 8 lb | Trimmed of excess fat, cut into 1-inch cubes |
| Yellow Onions 🧅 | 4 whole | Medium size, roughly chopped |
| Red Bell Peppers 🌶️ | 3 whole | Seeded, chopped into 1-inch pieces |
| Garlic Cloves 🧄 | 12 cloves | Minced finely for aromatic base |
| Canned Kidney Beans 🌱 | 4 cans | 15 oz each, drained and rinsed |
| Canned Black Beans 🌱 | 4 cans | 15 oz each, drained and rinsed |
| Canned Pinto Beans 🌱 | 4 cans | 15 oz each, drained and rinsed |
| Tomato Paste 🍅 | 2 cans | 6 oz each, unsweetened |
| Chili Powder 🌶️ | ¾ cup | Medium heat, not cayenne |
| Ground Cumin 🌿 | ½ cup | Freshly toasted preferred |
| Smoked Paprika 🌶️ | ¼ cup | For deep smoky flavor |
| Dried Oregano 🍃 | ⅛ cup | Mexican oregano if available |
| Salt 🧂 | 2 tbsp | Diamond Crystal preferred |
| Black Pepper 🌶️ | 1 tbsp | Freshly cracked preferred |
| Cayenne Pepper 🔥 | 1 tsp | Adjust for heat preference |
| Beef Broth 💧 | 4 cups | Low sodium, homemade preferred |
| Dark Brown Sugar 🍯 | ¼ cup | For subtle sweetness |
| Apple Cider Vinegar 🍏 | 2 tbsp | For depth of flavor |
The beef is non-negotiable here—chuck roast delivers that melt-in-your-mouth tenderness. Costco or Sam’s Club are your best bets for bulk pricing, but any grocery store will have it. Grab the biggest roast you can find—8 lbs minimum—and cube it yourself for even cooking. The onions and bell peppers? Yellow onions add sweetness while the red bells bring a touch of brightness. Char them slightly on the grill or stovetop if you’re feeling fancy (trust me on this). For the beans, low-sodium cans cut down on extra salt later, but rinse them thoroughly regardless—no one wants mushy beans in their chili.
No chuck roast? Ground beef (80/20 blend) works in a pinch, but it won’t have the same depth. Running low on spices? Penzeys sells bulk spices that’ll last you years, but the grocery store stuff is fine if it’s fresh. The tomato paste can be swapped for crushed tomatoes (4 cans, 28 oz each), but paste gives you that concentrated umami punch. For the beans, lentils or extra pinto beans stretch the recipe further if you’re feeding a bigger crowd. And if you’re worried about heat, skip the cayenne entirely—this chili will still pack serious flavor without it.
This chili tastes even better the next day, so make it ahead if you can. Store in large, airtight containers—I like the 5-quart Cambro containers for easy serving. Keeps in the fridge for 5-6 days or freezes beautifully for up to 6 months. For serving, preheat your bowls—it’s a chili, not soup. And pro tip: Garnish with fresh cilantro or chopped green onions right before serving. The colors make it look just as good as it tastes.
Why You’ll Love This Recipe
- One-Pot Simplicity: I swear by this recipe because it’s honestly the kind of meal where you just dump everything in—no fancy techniques. Chuck roast slow-cooks until tender, onions caramelize right in the pot, and the bell peppers add just enough sweetness without extra chopping. (Yes, even on a Tuesday night when I’d rather be scrolling than stirring.)
- Deep, Layered Richness: That slow-cooked chuck roast? It practically falls apart, soaking up the spices and turning into the most satisfying, melt-in-your-mouth texture. The garlic and onions build this warm, aromatic base that makes every spoonful feel like a hug—especially when the beans add that hearty, creamy contrast.
- Meal Prep MVP: This recipe is my go-to for game days, potlucks, or lazy Sundays because it scales perfectly—18 quarts means you can feed a crowd or freeze half for later. I’ll be real: my freezer’s always stocked with this because reheating it later tastes just as good as the day it’s made.
- Budget-Friendly Feast: Chuck roast and canned beans stretch this into a full meal without breaking the bank, and the flavors get better as it sits. Honestly, the second day is often my favorite—even my picky teenage son asks for seconds. It’s the kind of dish that makes grocery day feel like a win.
Step-by-step instructions for 18-Quart chili
Here’s how to build a chili so bold it’ll feed a crowd without breaking the bank.
Brown the Chuck Roast for Deep Flavor
Heat a large Dutch oven or heavy pot over medium-high heat. Add the 8 lb chuck roast cut into 1-inch cubes and sear undisturbed for 3-4 minutes per side until deeply browned. This step creates the Maillard reaction that builds complex flavors.
Work in batches if needed to avoid overcrowding. Once browned, remove the meat and set aside. You want those pieces to stay warm while you build the base—just cover them loosely with a clean kitchen towel. Don’t skip this step; it’s the foundation of your chili’s depth.
Sauté the Aromatic Base
In the same pot, add 4 whole yellow onions chopped and 3 whole red bell peppers in 1-inch pieces. Cook for 5-6 minutes until the onions soften and the peppers begin to caramelize. This should happen over medium heat—too high and they’ll burn before softening.
Add the 12 cloves garlic cloves that have been minced finely and cook for another 30 seconds until fragrant. Here’s where the magic happens: you’re building layers of flavor that will carry through the entire cook. If the vegetables stick, add a splash of beef broth to deglaze and scrape up those browned bits.
Build the Spice Foundation
Reduce heat to medium-low and stir in the 0.75 cup chili powder, 0.5 cup ground cumin, 0.25 cup smoked paprika, and 0.125 cup dried oregano. Cook for 1 minute to toast the spices and release their essential oils. This step ensures you get maximum flavor from your spices.
Add the 2 tbsp salt, 1 tbsp black pepper, and 1 tsp cayenne pepper. Stir well to distribute the spices evenly throughout the vegetable mixture. The spices should be evenly coated and smell intensely aromatic. If you’re sensitive to heat, reduce the cayenne to ½ tsp—you can always add more later.
Combine All Ingredients
Return the browned chuck roast to the pot. Add the 4 cans kidney beans, 4 cans black beans, and 4 cans pinto beans (all drained and rinsed), the 2 cans tomato paste, and the remaining 4 cups beef broth. Stir everything together until the tomato paste dissolves completely and all ingredients are well incorporated.
Add the 0.25 cup dark brown sugar and 2 tbsp apple cider vinegar. The vinegar might seem odd, but it brightens the flavors and balances the richness. The sugar adds subtle sweetness that rounds out the heat. Stir well and bring the entire mixture to a gentle simmer over medium heat.
Slow Simmer for Maximum Tenderization
Once the chili comes to a simmer, reduce heat to low and cover partially. Let it cook for 3-4 hours (or up to 5 hours for even more tender meat). The chili should bubble gently—you’re looking for a slow cook that allows the flavors to meld without curdling the beans.
After 2 hours, check the seasoning and adjust if needed. The chili will reduce slightly as it cooks, so taste it at the halfway mark. If it needs more salt, add it gradually. Stir occasionally to prevent sticking, but don’t over-stir—this can break down the meat fibers. The chili is done when the chuck roast is fork-tender and the flavors are rich and cohesive.
Pro Tips For Making 18 Quart Chili
- Sear the Chuck Roast First: I learned this the hard way—skipping the sear means flavorless chili. Cut the chuck roast into 1.5-inch chunks, then cook them in batches over high heat until deeply browned on all sides. That crust locks in flavor and makes the whole pot taste better. (Yes, even if you’re impatient like me, don’t rush this.)
- Char the Onions and Peppers: Don’t just chop and dump—blackened edges make all the difference. Slice onions and bell peppers into strips, then cook them until the edges turn dark and slightly crispy. This adds depth that raw veggies never will. (Your future self will notice.)
- Drain and Rinse the Beans: Canned beans taste like tin if you don’t rinse them first. Drain them well, then give them a quick cold-water rinse to cut the metallic aftertaste. Trust me, this small step keeps the chili from tasting like a can opened in 1998.
- Simmer Low and Slow: After browning the meat and veggies, bring the chili to a boil, then drop the heat to the lowest setting you can stand. Let it bubble gently for at least 2 hours—this breaks down the meat and blends flavors. Skipping this step means tough, flavorless chunks. (I know, I know, but trust the process.)
Serving suggestions for 18 quart chili
Classic Toppings
Start with the classics: sharp cheddar cheese (I love Lone Star brand) shaved over each bowl adds a creamy contrast to the smoky chili. A dollop of sour cream or Mexican crema cools the heat, while crushed tortilla chips on top add satisfying crunch.
For extra texture, sprinkle fresh cilantro or green onions—they brighten the dish with freshness. 🌿
Crunchy Additions
For serious crunch lovers, try toasted pepitas (pumpkin seeds) or crushed Fritos—they bring a nutty, salty kick. I also recommend avocado slices for a creamy, rich element that pairs perfectly with the hearty chili. If you want something heartier, crumbled bacon or chorizo adds smoky depth and protein. 🥓
Spicy Finishes
If your crowd loves heat, serve pickled jalapeños or hot sauce (like Cholula or Tapatío) on the side. For a smoky kick, drizzle chipotle in adobo sauce (blended with a splash of broth) over the top.
A pinch of smoked sea salt on freshly toasted cornbread takes it to another level. 🌶️
Bread & Sides
Serve with warm cornbread (my go-to is Jiffy mix with a splash of buttermilk) or crusty sourdough for dipping. For a lighter option, Mexican street corn salad (grilled corn, cotija cheese, lime, and chili powder) cuts through the richness. Cilantro-lime rice is another crowd-pleaser that balances the bold flavors. 🍞
Drink Pairings
A cold Mexican lager like Modelo Especial or Pacifico cleanses the palate between bites. For a non-alcoholic option, sparkling limeade or Mexican Coke adds effervescence that contrasts the chili’s depth. A smoky margarita (with tequila and lime) elevates the experience for a festive touch. 🍺
Make-Ahead Garnishes
Prep toppings in advance for easy serving: Store cheese and sour cream in small bowls, and keep chips in a large bowl with a lid. Pickled onions (quick-pickle red onions in vinegar and sugar) add tangy crunch without wilting.
Fresh herbs like cilantro should be added just before serving to keep them vibrant. 💡
Nutrition facts
Frequently asked questions
Can I substitute ground beef for chuck roast in this recipe?
Yes, but expect a slightly different texture. Use 8 lbs ground beef (80/20 blend) for best results—it’ll be more tender than chuck but still flavorful. Brown it thoroughly before adding other ingredients to develop that rich, meaty depth. The cooking time will be shorter (2-3 hours instead of 3-4 hours) since ground beef cooks faster.
How do I adjust the heat level for picky eaters?
Start by reducing the cayenne pepper to ½ teaspoon or omit it entirely. For extra mildness, add 1 extra cup of dark brown sugar or ½ cup apple cider vinegar—both help balance heat. If the chili still feels too spicy after cooking, stir in 1-2 tablespoons of sour cream or Mexican crema at the end to cool it down.
What’s the best way to reheat large batches of chili?
For the best texture, reheat chili in small portions over low heat on the stovetop, stirring frequently to prevent scorching. If using a slow cooker, cook on low for 2-3 hours with the lid slightly ajar. Never microwave directly from the fridge—transfer to a microwave-safe bowl first and reheat in 1-minute intervals, stirring between each. Add a splash of beef broth if it gets too thick.
Can I make this chili in a slow cooker or Instant Pot?
For a slow cooker, brown the meat first, then combine all ingredients and cook on low for 8 hours or high for 4-5 hours. For an Instant Pot, use the Sauté function to brown the meat and sauté veggies, then pressure cook on high for 30 minutes (natural release). The Instant Pot version will be slightly thinner—reduce it uncovered on the stove afterward if needed. Both methods work well!
Why does my chili taste bland after cooking?
Bland chili usually means the spices weren’t toasted enough or the meat didn’t brown properly. Next time, toast the spices for 2 minutes before adding liquids, and brown the meat in batches until deeply caramelized. Also, check your salt—add 1 extra teaspoon per quart if needed after cooking. A splash of apple cider vinegar or hot sauce can also brighten flavors in a pinch.

- Baked Potatoes in Crock Pot Recipe: Buttery Interiors and Crispy Top Magic - November 1, 2026
- Braised Beef Short Ribs Recipe: Crock Pot Fall-Off-Bone Magic in 6 Hours - November 1, 2026
- Crock Pot Cocoa Recipe: Velvety Warmth With Hidden Spice Magic - November 1, 2026