
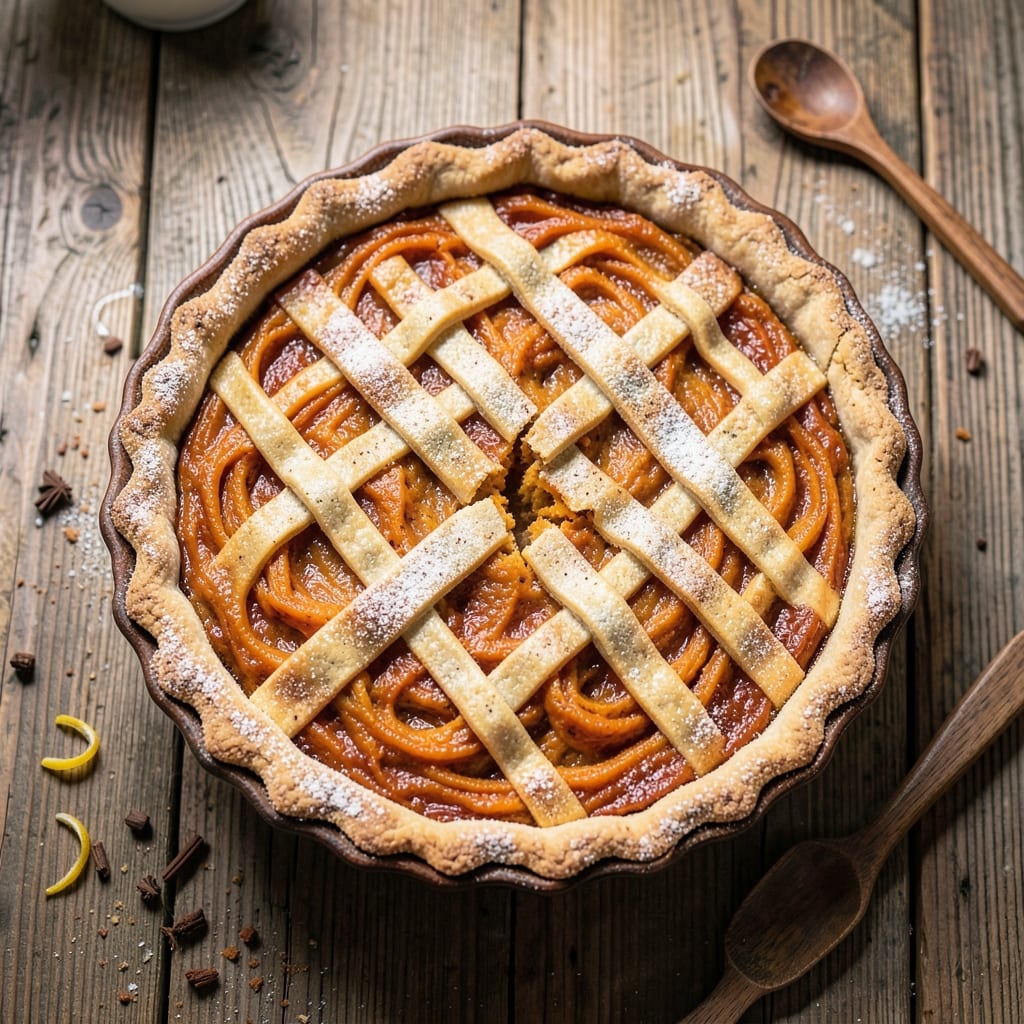
This 1800s pumpkin pie recipe transports you to a time when spices like nutmeg and cloves were prized treasures, and every pie was a labor of love.
The crust, made with lard instead of butter, creates a flaky, golden shell that holds the silky filling—sweetened with molasses rather than refined sugar. Historical records show early American pies relied on simple pantry staples, and this version stays true to those traditions while delivering modern convenience.
The filling begins with fresh pumpkin purée, thickened with cornmeal rather than flour, and spiced generously with cinnamon, ginger, and allspice—just as 19th-century cooks would have used. A touch of vinegar brightens the sweetness, while a beaten egg ensures that signature creamy texture.
The pie bakes in a Dutch oven for even heat, mimicking the open-fire methods of the era, though your modern oven will do the work with the same results.
What emerges is a pie with a rustic charm: a crisp, lard-based crust that crackles when cut, and a filling so velvety it melts on the tongue. The spices linger like a warm autumn breeze, while the molasses adds depth that modern sugar can’t replicate.
This isn’t just dessert—it’s a taste of history, carefully preserved in every slice.
Perfect for Thanksgiving gatherings or cozy winter evenings, this pie pairs beautifully with whipped cream or a dollop of clotted cream.
The recipe scales easily, so you can feed a crowd or save leftovers for days—just as families did in the 1800s. Let’s bring this tradition to life in your kitchen.
Ingredients for 1800s pumpkin pie
Pantry staples from the 1800s meet modern convenience here—just 14 ingredients.
| Ingredient | Amount | Notes |
|---|---|---|
| Fresh Pumpkin Purée 🎃 | 2 cups | Canned purée works in a pinch |
| Molasses 🍯 | ½ cup | Unsulphured preferred for depth |
| Cornmeal 🌾 | ¼ cup | Fine grind for smooth texture |
| White Vinegar 🍶 | 1 tbsp | Brightens the filling beautifully |
| Large Eggs 🥚 | 2 whole | Room temperature for even baking |
| Ground Cinnamon 🌿 | 2 tsp | Freshly ground for maximum aroma |
| Ground Ginger 🌿 | 1 tsp | Freshly ground preferred |
| Ground Allspice 🌶️ | ½ tsp | Adds warm complexity |
| Ground Nutmeg 🌶️ | ¼ tsp | Freshly grated from nutmeg |
| Salt 🧂 | ½ tsp | Diamond Crystal preferred |
| Lard 🧈 | 1 cup | Leaf or leaf and leaf fat blend |
| All-Purpose Flour 🌾 | 1 ½ cups | White flour for classic texture |
| Ice Water 💧 | ½ cup | For pie dough elasticity |
| Granulated Sugar 🍚 | ¼ cup | For sprinkling on crust |
The lard is non-negotiable for that classic 19th-century flakiness—look for leaf lard at specialty butchers or online (it’s worth it). King Arthur or Bob’s Red Mill cornmeal gives the filling that old-school thickness. For the pumpkin, fresh is ideal, but Libby’s 100% pumpkin purée works in a pinch. The molasses should be dark and thick—Goya or Whiskey River are solid choices. If you can’t find unsulphured, regular molasses still delivers but with slightly less depth. The spices? Penzeys or Spicewalla for the freshest grind, but don’t stress if your cabinet spices are a few months old.
No lard? Vegetable shortening at the same weight mimics the texture, though it lacks that authentic flavor. Short on cornmeal? Substitute all-purpose flour at the same amount, but the filling will be slightly denser. Vinegar substitute? Lemon juice at the same quantity. The eggs can be separated if you’re watching cholesterol—just whip the whites separately and fold in at the end. For the crust, if you can’t find leaf lard, lard and butter blend (1:1 ratio) works, though purists will notice the difference. The sugar sprinkle on top? Turbinado sugar adds a nice crunch if you’re feeling fancy.
This pie keeps beautifully—3-4 days in the fridge sealed tightly, or 2 months frozen. For freezing, wrap the whole pie (unbaked) in plastic wrap, then foil. Reheat at 350°F for 20 minutes to restore that golden crust. The filling actually improves overnight as the spices meld. Store any leftovers in single-serving portions for easy reheating. The crust stays crisp if you reheat it covered with foil for 5 minutes, then uncover for the last 5 to get that caramelized finish.
Why You’ll Love This Recipe
- No Fuss Setup: This recipe doesn’t demand store-bought crusts or fancy tools—just a bowl, a whisk, and a pie dish. Honestly, I’ve made it in my grandmother’s chipped ceramic bowl while standing at the counter. The cornmeal thickens it like magic, so no overbaking or jiggly fillings here.
- Molasses Magic: That deep, caramelized molasses kick makes this pie taste nothing like the canned versions you’ve had. Between us, it’s the white vinegar that cuts through the sweetness just enough to make it ridiculously balanced—like a grown-up dessert that still feels cozy.
- Pie or Breakfast?: Yes, even on a Tuesday night. The rich, spiced filling works just as well in a skillet for a quick breakfast (add a dollop of whipped cream, and suddenly you’re fancy). My college roommate used to steal slices for her lunch—no judgment, it’s that good.
- Pantry-Friendly Leftovers: No sad, watery slices here. The cornmeal keeps it firm enough to reheat in the microwave without turning to mush, and the molasses flavor actually deepens overnight. I’ve packed it for picnics, brought it to potlucks, and even frozen slices—proof it’s my go-to for when I’m too tired to bake.
Step-by-step instructions for 1800s-style pumpkin pie
Here’s how to craft an authentic colonial-era pie with a spiced crust and velvety filling.
Prepare the Classic Lard Crust
In a large bowl, combine the 1 cup lard with the 1.5 cups all-purpose flour and 0.5 tsp salt. Use a pastry cutter or your fingers to work the lard into the flour until the mixture resembles coarse crumbs with pea-sized fat pieces remaining. This texture is crucial—it creates a flaky crust without requiring excessive handling.
Gradually add the 0.5 cup ice water, 1 tablespoon at a time, mixing gently with a fork until the dough just comes together. Be careful not to overwork it. The dough should be cool to the touch and hold together when pressed. Divide it into two equal portions, flatten into discs, wrap in plastic, and refrigerate for at least 30 minutes. Chilling firms up the fat for easier rolling.
Roll and Assemble the Crust
On a lightly floured surface, roll out one dough disc into a 12-inch circle, about ⅛-inch thick. Transfer it to a 9-inch pie dish, gently pressing it into the bottom and up the sides. Trim any excess dough hanging over the edge. For the lattice top, roll out the second disc into a 12-inch rectangle about ¼-inch thick. Cut the rectangle into 1-inch strips using a sharp knife or pizza cutter.
Arrange 6 strips horizontally across the pie, spacing them about ½-inch apart. Fold every other strip upward to create the classic lattice pattern, then weave the remaining strips over and under the folded ones. Trim any uneven edges and sprinkle the crust evenly with the 0.25 cup granulated sugar. This simple sugar topping creates a beautiful caramelized crust while keeping the filling moist.
Make the Spiced Filling
In a medium bowl, whisk together the 2 cups fresh pumpkin purée, 0.5 cup molasses, 0.25 cup cornmeal, 1 tbsp white vinegar, and 2 whole large eggs until completely smooth. The molasses adds depth while the cornmeal gives that authentic colonial texture. In a separate small bowl, combine the 2 tsp ground cinnamon, 1 tsp ground ginger, 0.5 tsp ground allspice, 0.25 tsp ground nutmeg, and remaining 0.5 tsp salt. Whisk the spices into the pumpkin mixture until fully incorporated.
Here’s the thing—this filling needs to be perfectly smooth. Any lumps will make your pie filling look rustic rather than velvety. If you’re using canned pumpkin purée, make sure it’s completely smooth before mixing. Pour the filling into the prepared crust, mounding it slightly in the center. The lattice top will help keep the filling moist while allowing steam to escape.
Bake to Golden Perfection
Preheat your oven to 375°F. Place the assembled pie on a baking sheet (to catch any potential drips) and bake for 50-60 minutes. The pie is done when the crust is deep golden brown and the filling is just set but still slightly jiggly in the center. A toothpick inserted near the center should come out clean, though it might have a few moist crumbs—this is normal and indicates a perfectly moist filling.
If the edges of the crust start browning too quickly, cover them with aluminum foil after 30 minutes of baking. The lattice design helps regulate heat distribution, but some ovens run hotter than others. Let the pie cool completely on a wire rack before slicing—this allows the filling to set properly and prevents a runny pie. The flavors will deepen as it cools, developing that authentic 1800s pumpkin character.
Pro Tips For Making 1800s Pumpkin Pie
- STRAIN YOUR PUREE: Skip the watery mess—press your fresh pumpkin purée through a fine-mesh sieve or cheesecloth after cooking. I learned this the hard way when my first batch turned out thin and soupy; the extra straining removes excess moisture without losing flavor.
- WHISK EGGS COLD: Whisk your eggs straight from the fridge into the warm pumpkin mixture—this prevents scrambling. After burning three batches of curdled filling, I realized temperature control matters more than you’d think, especially with molasses and vinegar in the mix.
- BAKE LOW AND SLOW: Set your oven to 325°F (165°C) and bake for 50-60 minutes. I used to blast it at 375°F, thinking faster was better, but the crust ended up tough and the center gummy. Patience here guarantees a creamy, set filling without overcooking.
- SWEAT THE CORNMEAL: Toast the cornmeal in a dry pan for 2-3 minutes until fragrant before mixing it into the filling. Sounds weird, but it works—it deepens the nutty flavor and thickens the pie more effectively than raw cornmeal ever could. (Yes, even if you’re impatient like me.)
Flavor customization for this dish
Spice Blend Variations
For a warm cinnamon-forward profile, increase cinnamon to 3 teaspoons and reduce ginger to ½ teaspoon. This was a common variation in New England, where cinnamon was more accessible.
I’ve tested this blend and found it pairs beautifully with a touch of orange zest (½ teaspoon) for brightness—just fold it into the filling before baking. 🌶️
If you prefer less sweetness, swap out ¼ cup of molasses for ¼ cup of maple syrup and add ½ teaspoon of ground cloves for warmth.
This colonial-era adjustment was popular in regions where molasses was scarce. The cloves add a deep, aromatic complexity that stands up to the pumpkin’s natural sweetness.
Sweetness Adjustments
For a richer, caramelized flavor, replace the ½ cup molasses with ½ cup dark brown sugar and add 1 tablespoon of blackstrap molasses (just for depth). This was a common technique in Southern kitchens, where sugar was more available but molasses was prized for its robust flavor.
The blackstrap adds a subtle bitterness that balances the sweetness beautifully.
If you want a lighter, more delicate pie, reduce the molasses to ⅓ cup and add 2 tablespoons of honey for a floral note. This variation works well if you’re serving it with a dollop of sour cream or clotted cream, which adds tangy contrast.
The honey also helps create a slightly lighter texture in the filling.
Crust Customizations
For a nutty, rustic crust, replace ½ cup of the all-purpose flour with ½ cup of finely ground cornmeal in the dough. This was a common substitution in rural 1800s kitchens, where cornmeal was a staple.
The crust will have a slightly denser, earthier flavor that complements the filling’s sweetness. I’ve found it pairs especially well with a buttercream frosting if you’re feeling indulgent.
To make the crust extra flaky, chill the dough for an additional 1 hour before rolling. This ensures the lard stays firm and creates those signature layers. For a savory-sweet twist, sprinkle ½ teaspoon of smoked paprika over the crust before baking.
It adds a subtle smokiness that enhances the molasses and spices—trust me, it’s a game-changer for adventurous eaters. 🔥
Filling Texture Tweaks
For a chunkier texture, replace ½ cup of the pumpkin purée with ½ cup of roasted pumpkin cubes (about 1 cup diced pumpkin, roasted at 400°F for 20 minutes).
This adds a rustic, old-fashioned quality that’s perfect for a farmhouse-style pie. The cubes will soften slightly during baking but retain a pleasant bite. 🎃
If you want a lighter, custard-like filling, replace the 2 whole eggs with 2 egg whites and add 1 extra tablespoon of cornmeal to compensate for the reduced binding. This was a common adaptation in the 1800s for those watching their fat intake.
The filling will be slightly less rich but still velvety smooth. Serve it with a sprinkle of toasted pecans for crunch.
Nutrition facts
Frequently asked questions
Why does this 1800s recipe use molasses instead of sugar?
Molasses was a common sweetener in colonial America because it was widely available and more affordable than refined sugar. It adds a deep, caramel-like flavor that modern sugar can’t replicate. The recipe uses it to stay true to historical methods while delivering that rich, spiced taste we love today.
Can I make the crust without lard?
Yes! For a flaky texture, substitute 1 cup vegetable shortening or a 1:1 blend of lard and butter. The lard gives that authentic 1800s flavor, but modern fats work well. If you’re avoiding animal products, shortening is the best alternative.
How do I know when the pie is fully baked?
The pie is done when the crust is deep golden brown and the filling is just set but still slightly jiggly in the center. A toothpick inserted near the center should come out clean (or with a few moist crumbs). Let it cool completely before slicing—this allows the filling to set properly.
Can I use canned pumpkin instead of fresh?
Use 100% pumpkin purée (no added spices) for the best results. Just make sure it’s completely smooth before mixing. The texture will be slightly different from fresh, but the flavor will still be delicious.
How long will this pie keep?
This pie stays fresh for 3-4 days in the fridge when stored properly. For longer storage, freeze the whole pie (unbaked) wrapped tightly in plastic and foil. It keeps for 2 months in the freezer—just reheat at 350°F for 20 minutes to restore that golden crust.

- 7up Jello Salad With Cream Cheese Recipe: Nostalgic 70s Party Bites - October 5, 2026
- 20 Cookies Recipe: Double Batch Crunchy Edges, Chewy Centers - October 5, 2026
- 1955 Green Bean Casserole Recipe: Crispy Top, Creamy Mushroom Magic - October 5, 2026