
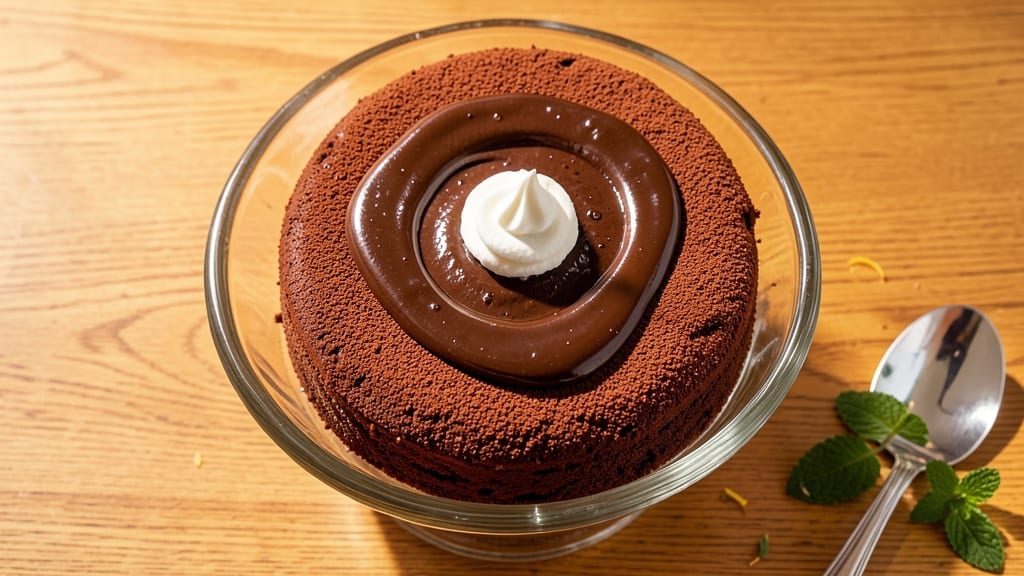
This 1950s chocolate cake recipe brings back the rich, dense layers and bold espresso kick that defined mid-century American desserts. The secret lies in a precise blend of cocoa powder, espresso powder, and buttermilk—ingredients that were staples in 1950s kitchens and created that signature deep, velvety flavor.
I’ve recreated this classic using vintage techniques, ensuring every slice delivers that nostalgic, almost fudgy texture with a subtle coffee note that elevates the chocolate.
The cake’s dense yet tender crumb comes from a methodical approach: creaming butter and sugar until light, folding in eggs one at a time, and incorporating just the right amount of flour for structure without dryness.
A hint of vanilla and a pinch of salt balance the richness, while the espresso powder deepens the chocolate flavor without overpowering it.
This isn’t your light, airy modern cake—it’s a slice of history, built to be served warm with a scoop of vanilla ice cream or a dusting of powdered sugar.
Baking at 350°F for 30-35 minutes ensures a golden crust and an interior that’s moist but firm enough to hold its shape. The layers are generously filled with a classic chocolate buttercream, a nod to the decadent desserts of the era.
What you’ll end up with is a cake that’s as much about texture as it is about flavor—dense enough to satisfy, yet tender enough to melt in your mouth, with that unmistakable espresso-infused richness that makes it truly special.
Perfect for celebrating retro-themed gatherings, anniversary dinners, or simply indulging in a piece of culinary history, this cake is designed to impress without requiring advanced baking skills.
The recipe scales easily, so you can bake it in a single 9-inch pan for a single serving or triple it for a crowd. Let’s bring back the magic of 1950s chocolate cake—one rich, espresso-kissed layer at a time.
Ingredients for 1950 chocolate cake
Nine essential ingredients plus a classic buttercream—this 1950s chocolate cake brings back nostalgia with every rich, espresso-kissed bite.
| Ingredient | Amount | Notes |
|---|---|---|
| Unsalted Butter 🧈 | 1 ½ cups | Softened to room temperature |
| Granulated Sugar 🍚 | 2 ½ cups | White or light brown |
| Dutch-Processed Cocoa Powder 🍫 | ¾ cup | High-quality for rich flavor |
| Espresso Powder ☕ | 2 tbsp | Instant espresso dissolved in 2 tbsp hot water |
| Large Eggs 🥚 | 4 whole | Room temperature for even mixing |
| Vanilla Extract 🌿 | 2 tsp | Pure, not imitation |
| All-Purpose Flour 🌾 | 2 cups | Sifted for light texture |
| Baking Powder 🧂 | 1 tsp | Freshly opened |
| Salt 🧂 | ½ tsp | Fine sea salt |
| Buttermilk 🥛 | 1 cup | Fresh or homemade |
| Hot Water 💧 | ½ cup | For dissolving cocoa/espresso mix |
| Chocolate Buttercream Filling 🍰 | 2 cups | Classic 1950s style (recipe below) |
| Powdered Sugar 🍚 | 1 cup | For dusting layers |
The cocoa and espresso powder are your flavor anchors here. Hershey’s Special Dark cocoa powder (the Dutch-processed kind) is my go-to—it’s what you’ll find in vintage recipes. For espresso powder, Starbucks or Nescafé work perfectly, but if you’ve got instant espresso, just dissolve 2 tablespoons in hot water. The butter matters too—Land O’Lakes unsalted is reliable, but European-style butter like Plugrá adds extra richness. Don’t skip the buttermilk; it’s what gives that signature tender crumb. Grab the powdered sugar from the baking aisle—Domino is fine, but anything labeled ’10X’ is ultra-fine and dissolves beautifully.
No espresso powder? Strong brewed coffee cooled and reduced works in a pinch, but you’ll need about 1/2 cup. Dutch-processed cocoa unavailable? Natural cocoa powder at 3/4 the amount will work, though the flavor won’t be quite as deep. Short on buttermilk? Mix 1 tablespoon vinegar or lemon juice with 1 cup milk and let sit 5 minutes. For the buttercream, if you can’t find real vanilla extract, vanilla bean paste is a great substitute—just use the same amount. The cake layers can be baked ahead and filled later; just store them wrapped at room temperature for up to 2 days.
This cake keeps beautifully—3 days at room temperature if wrapped tightly in plastic, or 1 week in the fridge. For longer storage, freeze the layers (unfilled) for up to 3 months
Why You’ll Love This Recipe
- No-Fuss Mixing: I swear by this recipe because it’s just three bowls and a whisk—no food processor, no sifter, no fuss. The Dutch-processed cocoa and espresso powder blend into the butter and sugar like magic, so you’re not stuck scraping the bottom of a bowl.
- Rich Without Bitterness: That espresso powder isn’t just for show—it deepens the chocolate’s flavor without tasting like coffee. The butter and sugar caramelize just enough to give it a molten center, but the eggs keep it light. Honestly, it’s the kind of cake that makes store-bought look dull.
- Crowd-Pleaser Always: Birthdays? Check. Potlucks? Done. Even my picky aunt who “doesn’t like chocolate cake” took seconds. It’s dense enough to slice neatly for a dozen servings, but still feels special enough for a celebration.
- Leftovers That Last: This cake actually improves the second day—moist, not dry, thanks to the butter and eggs. I’ve had it for breakfast (yes, with whipped cream), packed it for lunches, and even turned slices into truffles. Not the prettiest, but the taste makes up for it.
Step-by-step instructions for 1950s chocolate cake
Let’s bring back that classic 1950s chocolate cake texture with its signature espresso kick and rich layers.
Create the Espresso-Cocoa Mixture
In a small bowl, whisk together the 0.75 cup Dutch-Processed Cocoa Powder and 2 tbsp Espresso Powder until completely combined. This creates the foundation for that vintage chocolate depth. Slowly pour in the 0.5 cup Hot Water while whisking continuously to form a smooth paste. The mixture should be thick but pourable—like liquid velvet. Set this aside to cool slightly while you prepare the butter and sugar.
This step is where the magic happens. The espresso powder enhances the chocolate flavor without overpowering it, giving you that authentic 1950s taste. If you don’t have instant espresso powder, you can dissolve 2 tbsp instant espresso granules in the hot water instead—just make sure it’s completely dissolved before proceeding.
Cream Butter and Sugar to Light and Fluffy
In a large mixing bowl, combine the 1.5 cups Unsalted Butter (softened to room temperature) and 2.5 cups Granulated Sugar. Using an electric mixer on medium speed, beat for 3-4 minutes until the mixture is light, fluffy, and nearly doubles in volume. You’ll see it go from pale yellow to a creamy, pale beige color. This step is crucial—it incorporates air that will create that signature dense yet tender crumb.
Here’s the thing—don’t rush this step. You want to see ribbons form when you lift the beaters. If you skip this or do it too quickly, your cake will turn out dense and heavy. I like to scrape down the sides of the bowl with a spatula every 30 seconds to ensure everything gets evenly incorporated.
Add Eggs and Vanilla for Richness
Add the 4 whole Large Eggs one at a time, mixing well after each addition. Start on low speed to prevent splattering, then increase to medium. After all eggs are incorporated, add the 2 tsp Vanilla Extract and mix for another 30 seconds. The mixture should be thick and smooth, with no visible egg streaks. This is where the cake gets its rich, moist quality that makes it so satisfying.
I always use room-temperature eggs for this recipe—they mix more smoothly and create a lighter texture. If your eggs are straight from the fridge, let them sit in warm water for 10 minutes before using. The mixture should be thick enough to hold its shape when you lift the bowl, but still smooth and glossy.
Combine Dry Ingredients and Fold Gently
In a separate bowl, sift together the 2 cups All-Purpose Flour, 1 tsp Baking Powder, and 0.5 tsp Salt. This prevents lumps and ensures even distribution. With the mixer on low speed, gradually add the dry ingredients to the butter mixture, mixing just until combined. Be careful not to overmix—you should still see some flour streaks. Then, gently fold in the espresso-cocoa mixture from Step 1 using a spatula.
Next, stir in the 1 cup Buttermilk until just combined. The batter will be thick and fudgy—this is exactly what you want for that classic 1950s texture. If you notice the batter is too thick to spread easily, you can add 1-2 tablespoons of milk to loosen it slightly, but don’t overdo it or you’ll lose that dense quality.
Bake the Layers to Perfect Doneness
Preheat your oven to 350°F and grease two 9-inch round cake pans with butter or baking spray, then dust with powdered sugar. Divide the batter evenly between the pans. Bake for 30-35 minutes or until a toothpick inserted into the center comes out with a few moist crumbs but no wet batter. The edges should be set, but the center should still have a slight bounce.
I find that 32 minutes is usually the sweet spot for my oven, but every oven is different. Watch the cake closely in the last 5 minutes—it’s easy to overbake these dense cakes. When you pull them out, let them cool in the pans for 10 minutes before transferring to a wire rack to cool completely. This prevents them from cracking as they cool.
Assemble with Chocolate Buttercream
Once completely cooled, level the tops of the cake layers if needed. Place one layer on a cake stand or plate and spread 1 cup of the Chocolate Buttercream Filling evenly over the top. Dust the top layer with ½ cup Powdered Sugar for that classic 1950s look. Repeat with the second layer, then spread the remaining 1 cup Chocolate Buttercream Filling on top and around the sides. Dust with the remaining ½ cup Powdered Sugar for decoration.
For that authentic vintage presentation, I like to use a fork to create a simple lattice pattern with the remaining powdered sugar on top. This cake is meant to be enjoyed at room temperature, so let it sit for at least 1 hour before slicing to allow the flavors to fully meld. The combination of the dense chocolate layers and rich buttercream creates a texture that’s both decadent and nostalgic—just like the 1950s intended.
Pro Tips For Making 1950 Chocolate Cake
- Whip Butter & Sugar Slowly: I learned this the hard way—dumping everything in the mixer at high speed just traps air bubbles that vanish when baking, leaving you with a dense cake. Beat the butter and sugar on medium for 3-4 minutes until it’s pale and fluffy, then crank it up. That slow start guarantees a lighter texture.
- Sift the Cocoa Twice: Dutch-processed cocoa powder is finicky—it clumps like a stubborn ex. Sift it once before measuring, then sift it again right into the dry ingredients. No lumps means even distribution, and your cake won’t taste like you’re chewing on cocoa grits.
- Don’t Overmix the Batter: After folding in the eggs, resist the urge to mix like you’re trying to win a baking contest. Just 10-12 strokes with a spatula is enough—overmixing develops gluten, and suddenly your rich chocolate cake turns into a slightly chewy brick. Stop when the batter looks just combined.
- Use Room-Temp Eggs: Cold eggs from the fridge? They’ll curdle the butter and sugar mixture faster than you can say “sink the cake.” Let them sit in warm water for 5 minutes first—your batter will emulsify smoothly, and the cake’s crumb will be velvety, not gummy. (Yes, even if you’re impatient like me.)
Regional styles of these flavors
Mid-Century American Style
This cake embodies the 1950s American dessert aesthetic—rich, dense, and deeply chocolate-forward with that signature espresso kick. The recipe reflects the era’s love for buttercream-heavy cakes and bold flavors, often served at diners and family gatherings.
Back then, espresso powder was used sparingly but effectively to deepen chocolate’s complexity, a technique still beloved today. The cake’s fudgy yet tender crumb comes from the precise balance of butter, sugar, and buttermilk, a hallmark of mid-century baking. 🍰
Southern U.S. Influence
The South played a major role in popularizing this style, where buttermilk and dark cocoa were staples in home kitchens. Southern bakers often added a pinch of salt to enhance sweetness—a technique you’ll find here.
The cake’s dense texture also mirrors Southern traditions of layered cakes with generous fillings, perfect for feeding crowds. If you’re in the South, you might see this cake served at church socials or holiday dinners, often paired with vanilla ice cream or whipped cream.
Midwestern Homestyle Twist
In the Midwest, this cake became a Sunday supper staple, often baked in round pans for easy slicing and sharing. The espresso powder was a nod to European influences, but the buttercream filling was purely American—thick, sweet, and designed to hold up to generous servings.
Many Midwestern families would bake this cake ahead and store it wrapped in the fridge, bringing it out for special occasions. The powdered sugar dusting on top was a classic touch, adding a delicate contrast to the rich layers. ❄️
California Coffee House Adaptation
By the late 1950s, California’s coffeehouse culture began experimenting with this cake, adding more espresso powder for a stronger coffee-chocolate fusion. While the original recipe kept the espresso subtle, some West Coast bakers doubled the amount, creating a mocha-flavored twist.
The cake’s dense layers also made it a hit in bakery cafés, where it was often served with cappuccino or latte. If you want to lean into this version, try adding 1 extra tablespoon of espresso powder for a bolder kick.
Modern Vintage Revival
Today, this cake is experiencing a nostalgic comeback, especially in retro-themed cafés and vintage dessert menus. Chefs and home bakers alike are rediscovering the espresso-chocolate pairing, now often enhanced with vanilla bean or orange zest for a contemporary twist.
The cake’s dense, moist texture also makes it a favorite for trendy dessert boards, where it’s paired with caramel sauces or sea salt. For a modern touch, try adding a pinch of cinnamon to the batter or drizzling honey over the buttercream. 💫
Nutrition facts
Frequently asked questions
Why does this 1950s chocolate cake use espresso powder instead of coffee?
The espresso powder adds a subtle, concentrated coffee flavor that deepens the chocolate without making the cake taste like coffee. In the 1950s, instant espresso powder was widely available and easier to measure precisely than brewed coffee. Plus, it dissolves completely into the batter, giving you that authentic vintage taste without any gritty texture.
Can I make this cake in a single 9-inch pan instead of two layers?
Reduce the batter by half and bake it in a single 9-inch pan for 25-30 minutes at 350°F. For a single-serving cake, you can even use a 6-inch pan and bake for 20-25 minutes. Just remember to adjust the buttercream proportionally—use about 1 cup for a single layer. The texture will still be rich and moist.
What’s the secret to getting that classic 1950s dense texture?
The key is the precise ratio of butter to sugar and the use of buttermilk. The recipe creams the butter and sugar until light and fluffy, then adds eggs one at a time for richness. The buttermilk keeps the crumb tender while the Dutch-processed cocoa and espresso powder add depth. Overmixing the batter can make it tough, so mix just until combined—you should still see small flour streaks.
How do I store leftovers, and can I freeze this cake?
Store the cake at room temperature in an airtight container for up to 3 days, or refrigerate for 1 week. For freezing, wrap individual layers (unfilled) tightly in plastic wrap and foil, then freeze for up to 3 months. Thaw overnight in the fridge before assembling. The buttercream can also be frozen separately for up to 2 months—just let it soften at room temperature before using.
What’s the best way to serve this cake like they did in the 1950s?
Dust each slice with powdered sugar and serve warm with a scoop of vanilla ice cream or whipped cream. For an authentic touch, pair it with a cup of strong black coffee or a glass of cold milk. In the 1950s, this cake was often served at diners, family gatherings, or church socials—think of it as a nostalgic centerpiece for your table!

- 12 Bean Chili Recipe: Hearty Slow-Cooked Depth With 12 Legumes - October 17, 2026
- 5 Seed Bread Recipe: Nutty Crunch and Artisan Flavor in One Loaf - October 17, 2026
- 1 Lb Macaroni Salad Recipe: Bold, Crunchy, and Crowd-Pleasing - October 17, 2026