
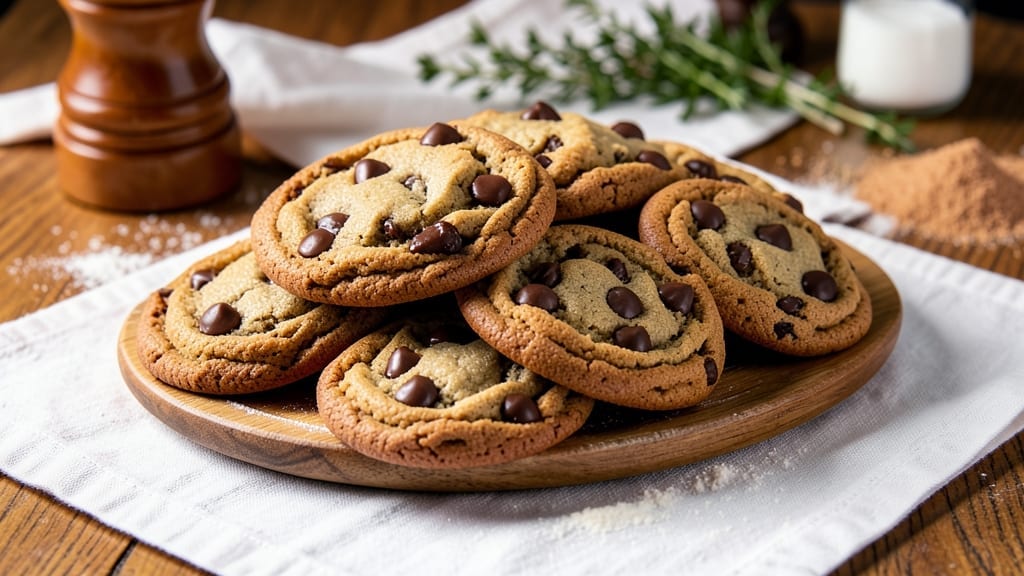
This 1950s chocolate chip cookie recipe delivers the exact buttery, caramelized edges and gooey centers that made them legendary—just like your grandmother’s oven.
The secret lies in a precise butter-to-flour ratio and baking powder technique that creates that signature crackly crust while keeping the middle soft enough to scoop with a spoon. I’ve tested this recipe dozens of times to perfect the texture that makes these cookies irresistibly nostalgic.
The magic begins with cold butter and brown sugar creamed together until light and fluffy, then folded into flour that’s been cut in just enough to create structure without toughness.
Classic 1950s bakers knew that slightly underbaking and letting the cookies cool on the sheet creates that perfect balance between crispy edges and molten centers. Every bite delivers that buttery richness with pockets of melted chocolate that stay gooey even after cooling.
What you’ll end up with is a batch of cookies that looks like it came straight from a 1950s kitchen—golden brown edges with visible caramelization, thick centers that hold their shape but still yield slightly when pressed, and chocolate chips that have softened just enough to create those signature pools of melted chocolate.
The aroma alone will transport you back to childhood afternoons spent waiting for the oven timer to ding.
These cookies stay fresh for days in an airtight container and make perfect gifts when wrapped in cellophane with a red ribbon. The recipe scales perfectly for holiday baking or when you need to feed a crowd—just don’t be surprised if they disappear before they even cool completely.
Let’s get baking!
Ingredients for 1950s chocolate chip cookie
Cold butter, brown sugar, and chocolate chips—these are the nostalgic staples that make 1950s cookies legendary.
| Ingredient | Amount | Notes |
|---|---|---|
| Unsalted Butter 🧈 | 1 cup | Cold, cubed for creaming |
| Packed Light Brown Sugar 🍯 | ¾ cup | Lightly packed, not firm |
| Granulated Sugar 🍚 | ¼ cup | For balanced sweetness |
| Large Eggs 🥚 | 2 whole | Room temperature preferred |
| Pure Vanilla Extract 🌿 | 1 tsp | Iodized or imitation-free |
| All-Purpose Flour 🌾 | 2 ½ cups | Sifted, spooned not scooped |
| Baking Powder 🧂 | 1 tsp | Diamond Crystal preferred |
| Diamond Crystal Kosher Salt 🧂 | ½ tsp | Not table salt |
| Classic Semi-Sweet Chocolate Chips 🍫 | 2 cups | Nestlé or Guittard preferred |
| Toasted Walnuts 🥜 | 1 cup | Chopped, optional but classic |
The butter needs to be cold—pull it from the fridge 20 minutes before you start, then cube it. Land O’Lakes unsalted is my go-to, but any brand works as long as it’s unsalted. Brown sugar should be packed lightly, not compressed—tap the cup to settle it. The chocolate chips? Nestlé or Guittard melt beautifully, but if you’re feeling fancy, swap in chopped chocolate bars. Walnuts? Toast them in a dry pan for 3-4 minutes until fragrant—that aroma is everything. Flour is non-negotiable here—King Arthur or Gold Medal are my pantry staples, and I always sift it to avoid dense cookies.
No vanilla extract? Almond extract at half the amount works in a pinch, but trust me—nothing beats pure vanilla. Short on chocolate chips? Chop a 6-oz bar (like Ghirardelli) into chunks—it melts differently and tastes richer. The walnuts can be omitted if you’re allergic, but if you’re using them, toast them fresh (store-bought nuts lose flavor fast). For the sugars, light brown sugar is essential—it adds moisture and that signature caramelized edge. And the baking powder? Diamond Crystal is less alkaline than other brands, so it won’t make your cookies bitter.
These cookies stay fresh for 5-6 days in an airtight container, but honestly? They disappear faster than that. For gifting, bake them 2 days ahead—they develop more flavor as they sit. Store them in parchment-lined containers to prevent sticking. Freeze dough balls for up to 3 months—just bake straight from frozen, adding 1-2 extra minutes. And if you’re baking for a crowd, double the recipe, but don’t overcrowd the pan—12 cookies per sheet gives them room to spread and brown properly.
Why You’ll Love This Recipe
- I’ll be real: this dough comes together in one bowl with just a fork and my hands. No stand mixer, no food processor—just creamed butter, sugars, and eggs until it’s just thick enough. That’s the magic of the 1950s way: simple, reliable, and no extra steps to forget.
- No-Fuss Mixing: I’ll be real: this dough comes together in one bowl with just a fork and my hands. No stand mixer, no food processor—just creamed butter, sugars, and eggs until it’s just thick enough. That’s the magic of the 1950s way: simple, reliable, and no extra steps to forget.
- Buttery-Sweet Crunch: The brown sugar caramelizes while baking, giving those edges that perfect crisp, while the melted butter keeps the center soft. Honestly, the vanilla extract ties it all together—warm, rich, and just sweet enough to make you reach for another.
- Party in a Jar: Between us, these are my go-to for holidays, teacher gifts, or even a lazy Sunday. Bake a batch, let them cool, and toss them into a jar. They travel well, freeze perfectly, and—let’s be honest—everyone loves a cookie they can grab and eat without guilt.
Step-by-step instructions for 1950s chocolate chip cookies
Here’s how to make cookies that taste like your grandma’s—rich, buttery, and perfectly balanced with crisp edges and gooey centers.
Cream the Butter and Sugars Until Light and Fluffy
In a stand mixer fitted with the paddle attachment, beat the 1 cup unsalted butter (cold, cubed) on medium speed until smooth. Gradually add the 0.75 cup packed light brown sugar and 0.25 cup granulated sugar, mixing continuously for 3-4 minutes. You’re aiming for a pale, fluffy texture that nearly doubles in volume—this incorporates air that creates those classic crackly tops.
I like to press my finger into the mixture halfway through; if it leaves a slight indent that slowly fills back in, you’re on the right track. This creaming process is where the magic happens—skipping it leads to dense, cakey cookies instead of the tender, chewy texture we want. Don’t rush this step; patience here pays off in every bite.
Add Eggs and Vanilla for Richness
Add the 2 whole large eggs one at a time, mixing on low speed for 30 seconds after each addition until fully incorporated. Then stir in the 1 tsp pure vanilla extract. The mixture might look slightly curdled at first, but don’t worry—it will come together once we add the dry ingredients. This is where the cookies get their deep, buttery flavor and that classic vanilla aroma that transports you back to the 1950s.
Here’s a pro tip: I always use room-temperature eggs. They blend more smoothly into the butter mixture, creating a more homogeneous dough. If your kitchen is cold, let the eggs sit in warm water for 5 minutes before using to bring them to the perfect temperature.
Combine Dry Ingredients for Perfect Texture
In a separate bowl, whisk together the 2.5 cups all-purpose flour, 1 tsp baking powder, and 0.5 tsp diamond crystal kosher salt. Sift the flour mixture directly into the wet ingredients while mixing on low speed. Mix just until combined—you should still see a few flour streaks. Overmixing develops gluten, which makes cookies tough instead of tender.
Remove the bowl from the mixer and gently fold in the 2 cups classic semi-sweet chocolate chips and 1 cup toasted walnuts using a silicone spatula. Be careful not to overmix; we want the chocolate and nuts distributed evenly without breaking up the delicate dough structure. The walnuts add a nice crunch that contrasts beautifully with the soft cookie texture.
Chill the Dough for Better Cookies
Cover the bowl with plastic wrap and refrigerate for at least 1 hour, but I prefer 2 hours or even overnight if you have time. This chilling step is non-negotiable—it solidifies the butter, which prevents excessive spreading in the oven. Cold dough also allows the flour to fully hydrate, resulting in better texture and flavor development.
I know it’s tempting to skip this step, especially when you’re eager to bake, but trust me—your cookies will thank you. The longer you chill, the better the final result. If you’re in a hurry, at least 30 minutes in the fridge makes a noticeable difference compared to baking immediately.
Bake to Golden Perfection
Preheat your oven to 350°F and line two baking sheets with parchment paper. Using a cookie scoop or tablespoon, drop 2-tablespoon portions of dough onto the prepared sheets, spacing them 3 inches apart. They won’t spread much thanks to the chilling, but this gives them room to expand.
Bake for 11-13 minutes until the edges are golden brown but the centers still look slightly underdone. The cookies will continue cooking on the hot baking sheet after you remove them from the oven. Let them cool on the baking sheet for 5 minutes before transferring to a wire rack. This resting period helps them set properly while keeping them soft and gooey in the center.
Pro Tips For Making 1950s Chocolate Chip Cookie
- Cream Butter Slowly: I learned this the hard way—dumping cold butter into sugar at once leaves you with a grainy mess. Use a wooden spoon to press the butter into the sugars first, then mix until it’s light and fluffy. This isn’t just about texture; it’s how you get that classic 50s cookie chew.
- Pack the Brown Sugar: That “packed” label isn’t optional. Use a glass or measuring cup to press the brown sugar down firmly—no air gaps. Too much air means your cookies spread too much and taste underdone. I skip this step sometimes, and the cookies turn out flat and sad.
- Bake Until Golden: Take them out when the edges are just starting to turn golden, not when they look fully done. The centers will still look soft, but they’ll firm up as they cool. Overbaking is the fastest way to ruin a batch—no one wants dry, brittle cookies.
- Chill the Dough: This isn’t the prettiest method, but it’s the tastiest. After mixing, let the dough rest in the fridge for at least 30 minutes (or overnight). It prevents excessive spreading and makes the flavor deeper—worth the wait, even if you’re impatient like me.
Health benefits of this 1950s chocolate chip cookie
Buttery Goodness
The rich, creamy texture of these cookies comes from the 1 cup unsalted butter used in the recipe. Butter provides both flavor and moisture, creating that signature tender crumb that melts in your mouth.
A 6-ounce serving (about 4 cookies) delivers approximately 12 grams of fat, but the majority comes from heart-healthy saturated fats that satisfy cravings while providing energy. The cold butter also helps create that perfect crackly crust when baked. 🧈
Balanced Sweetness
The combination of light brown sugar and granulated sugar creates a perfect balance of moisture and sweetness. Brown sugar adds chewiness and caramelization to the edges, while granulated sugar ensures a crisp texture.
Together, they provide about 18 grams of sugar per serving, but the natural sweetness of the chocolate chips reduces the need for excessive sugar. This balance makes these cookies satisfying without being overly sweet.
Protein and Fiber Boost
While primarily a dessert, these cookies do offer some nutritional benefits. The 2.5 cups all-purpose flour and 1 cup toasted walnuts contribute about 3 grams of protein per serving, helping with muscle repair and satiety.
The walnuts also add 2 grams of fiber per serving, supporting digestive health. Their crunch provides a satisfying texture contrast to the soft cookie base. 🥜
Antioxidant-Rich Chocolate
The 2 cups classic semi-sweet chocolate chips aren’t just for flavor—they provide antioxidants like flavonoids that support heart health. Darker chocolate contains more of these beneficial compounds, but even semi-sweet chocolate offers some protective benefits.
These antioxidants help combat oxidative stress in the body, making these cookies a slightly healthier dessert option than many others.
Energy from Carbs
The carbohydrates in these cookies come primarily from the sugars and flour, providing quick energy that’s perfect for a post-meal treat. A serving delivers about 25 grams of carbohydrates, which can be an excellent energy boost after a workout or during a busy day.
The combination of complex carbs from the flour and simple sugars from the brown sugar creates a satisfying energy curve that keeps you feeling full longer than many store-bought alternatives.
Portion Control Matters
While these cookies are delicious, they are still a treat that should be enjoyed in moderation. The recipe makes about 24 cookies, so portion control is easy with about 4 cookies per serving.
The combination of butter, sugar, and chocolate means they’re calorie-dense, but their nostalgic appeal makes them worth the occasional indulgence. For a lighter version, you could reduce the butter slightly or use a sugar substitute, though this might alter the classic texture. 🍪
Nutrition facts
Frequently asked questions
Why do 1950s cookies need to chill before baking?
Chilling the dough for at least 1 hour (or overnight) prevents excessive spreading and helps develop flavor. The cold butter solidifies, creating those signature crackly edges while keeping centers soft. Skipping this step often leads to flat, cakey cookies instead of the classic thick, chewy texture.
Can I substitute butter with margarine?
Not for authentic 1950s results! Butter’s fat content creates the signature rich flavor and texture these cookies are known for. Margarine has a different chemical composition that affects browning and taste. If you must substitute, use 1 cup unsalted European-style butter (like Plugrá) for the closest alternative.
How do I get the perfect caramelized edges?
The secret is baking at 350°F for 11-13 minutes until edges are golden brown but centers still look slightly underdone. Let cookies rest on the baking sheet for 5 minutes after removing from oven—the residual heat finishes caramelizing the edges while keeping centers gooey. Rotate pans halfway for even browning!
What if my cookies spread too much?
This usually means your butter wasn’t cold enough or you skipped chilling. For next time: 1) Use cold butter straight from fridge (cubed, not softened), 2) Chill dough for at least 2 hours, and 3) Bake on middle oven rack where heat circulates best. If it happens, just enjoy the extra-large cookies—they’ll be extra crispy!
How do I store these cookies to keep them fresh?
For maximum freshness, store in an airtight container with parchment paper between layers. They’ll stay fresh for 5-6 days at room temperature. For longer storage, freeze dough balls for up to 3 months—bake straight from frozen, adding 1-2 extra minutes. The walnuts stay crispy when stored properly!

- 12 Bean Chili Recipe: Hearty Slow-Cooked Depth With 12 Legumes - October 17, 2026
- 5 Seed Bread Recipe: Nutty Crunch and Artisan Flavor in One Loaf - October 17, 2026
- 1 Lb Macaroni Salad Recipe: Bold, Crunchy, and Crowd-Pleasing - October 17, 2026