
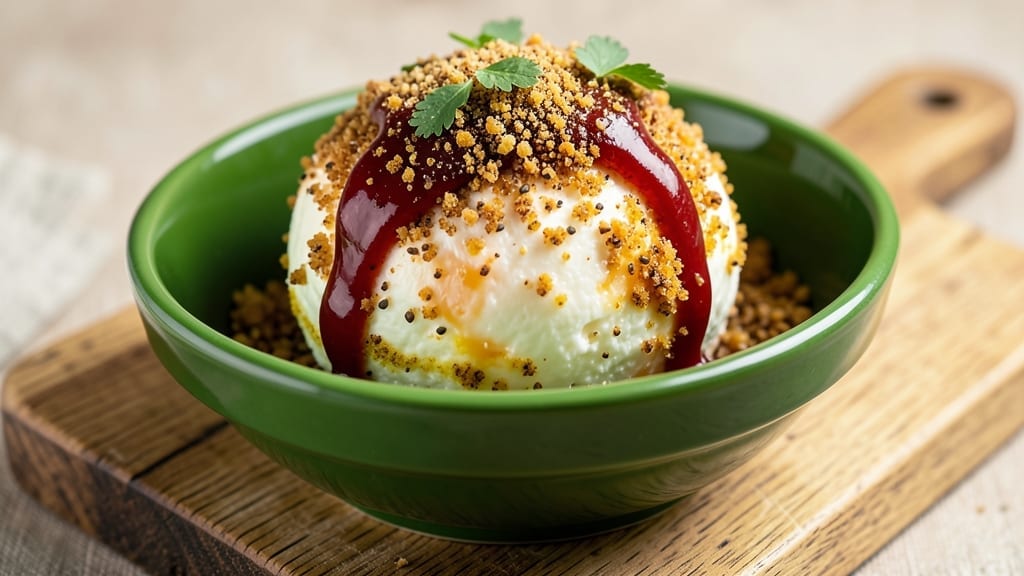
This 1960s cheese ball recipe brings back the nostalgic charm of retro party spreads with its crispy, golden coating and creamy, savory center. 💛 The secret lies in the perfect balance of sharp cheddar, tangy cream cheese, and a crunchy breadcrumb crust that holds up beautifully—just like the classics from decades past.
Whether you’re hosting a themed gathering or simply craving a taste of mid-century hospitality, this dish delivers that satisfying crunch and rich flavor combination that never goes out of style.
The beauty of this recipe is its simplicity—no fancy equipment or complicated techniques required. You’ll mix the cheese filling, shape it into a classic ball, then coat it in a crispy breadcrumb mixture before baking to golden perfection.
The result is a showstopping centerpiece that doubles as a delicious snack, perfect for pairing with mustard, crackers, or even serving as a unique appetizer at your next gathering. It’s the kind of dish that brings people together, sparking conversations and nostalgia with every bite.
What makes this cheese ball truly special is how it captures the essence of 1960s entertaining—elegant yet effortless, rich yet balanced, and undeniably shareable. The crispy exterior gives way to a creamy, cheesy interior that melts in your mouth, creating a texture contrast that’s pure satisfaction.
This isn’t just a recipe; it’s a trip back in time, wrapped in a modern twist that keeps it fresh and exciting for today’s tastes.
Once baked, let it cool slightly before slicing into wedges for easy serving. These cheese ball bites are perfect for parties, game days, or even as a fun snack to enjoy while watching old movies.
The retro appeal shines through in every detail, from the classic presentation to the timeless flavors that never fail to impress. Let’s bring this nostalgic favorite back to life!
Ingredients for 1960s cheese ball
These nostalgic ingredients bring back the golden age of party snacks with crispy crunch and creamy cheesy goodness.
| Ingredient | Amount | Notes |
|---|---|---|
| Sharp Cheddar Cheese 🧀 | 16 oz | Block, freshly grated (not pre-shredded) |
| Cream Cheese 🧀 | 8 oz | Full-fat, room temperature |
| Mayonnaise 🥫 | ½ cup | Regular or light mayo |
| Worcestershire Sauce 🍶 | 1 tbsp | For tangy depth |
| Dried Mustard 🌶️ | 1 tsp | For classic flavor |
| Garlic Powder 🧄 | ½ tsp | Freshly ground preferred |
| Onion Powder 🧅 | ½ tsp | For subtle sweetness |
| Salt 🧂 | ½ tsp | Kosher or sea salt |
| Black Pepper 🌶️ | ¼ tsp | Freshly ground for heat |
| Panko Breadcrumbs 🍞 | 2 cups | Extra-crispy preferred |
| Butter 🧈 | 2 tbsp | Melted, for binding |
| Paprika 🌶️ | 1 tsp | Smoked for retro color |
The cheddar is non-negotiable—sharp, block-style makes all the difference. Kraft is your friend here—their classic sharp cheddar has that perfect tang. Cream cheese should be full-fat and room temperature—microwave it for 10 seconds if it’s cold. For the Worcestershire, Lea & Perrins is the retro classic, but any good brand works. The mayo? Duke’s or Hellmann’s both nail that creamy texture. Pro tip: if your breadcrumbs seem dry, toss them with a dash of melted butter before coating for extra crispiness.
No panko? Regular breadcrumbs plus a pinch of baking powder for lift. Short on smoked paprika? Regular paprika plus a pinch of liquid smoke gets you close. The dried mustard can be swapped for Dijon mustard at half the amount, but trust me, the powdered version gives that authentic 60s vibe. If you’re feeling fancy, add 1 tbsp grated Parmesan to the cheese mix for an extra umami kick. And if you’re making this ahead? Double the recipe—it freezes beautifully for last-minute parties.
Shape the cheese ball on parchment paper—it keeps the breadcrumbs from sticking like glue. Bake until golden, then let it cool 10 minutes before slicing—this gives the coating time to set properly. Store leftovers in an airtight container for up to 5 days, or freeze portions for 3 months. For serving, mustard, crackers, and pickles are classic pairings—set up a little retro spread and watch it disappear!
Why You’ll Love This Recipe
- No Mixing Needed: I swear by this recipe because it’s literally just folding ingredients together—no food processor, no stress. That sharp cheddar and creamy tang from the mayo blend effortlessly, and honestly? My hands do all the work while I sip coffee and scroll.
- Umami Bomb: The Worcestershire and mustard give this cheese ball a serious depth—salty, tangy, with just a hint of heat that lingers. It’s the kind of flavor that makes you reach for another cracker without even thinking, and it’s all from those two little bottles in your pantry.
- Party Host Hack: This is my go-to for game days, potlucks, or even a lazy Sunday spread. Roll it in chopped nuts or seeds if you’re feeling fancy, but even plain, it disappears fast. Between us? I’ve used it to fill in for a main dish more times than I can count.
- Pantry Goldmine: Sharp cheddar and cream cheese are already cheap staples, and mayo? Always on hand. This recipe turns dollar-store ingredients into something that tastes like you slaved over it—no fancy cheeses or specialty tools required. Leftovers? They last a week, and I’ve never met a sandwich that didn’t improve with a smear of this stuff.
Step-by-step instructions for 1960s cheese ball
Let’s bring back that nostalgic party flavor with this easy, crunchy cheese ball that’s perfect for gatherings!
👨🍳 Step 1: Mix the Creamy Cheese Base
In a large mixing bowl, combine the 16 oz freshly grated sharp cheddar cheese and 8 oz room-temperature cream cheese. I like to use my hands for this part—it helps break up any cheese clumps and creates a smoother texture. Work the cheeses together until they form a uniform, crumbly mixture.
Next, add the 0.5 cup mayonnaise, 1 tbsp Worcestershire sauce, 1 tsp dried mustard, 0.5 tsp garlic powder, 0.5 tsp onion powder, 0.5 tsp salt, and 0.25 tsp black pepper. Mix everything thoroughly with a wooden spoon or your hands until you have a smooth, cohesive dough. This is where all the classic flavors come together—don’t rush this step!
🥘 Step 2: Shape and Chill the Cheese Ball
Once the mixture is completely combined, use your hands to shape it into a ball. I press gently to compact it, then roll it between my palms to create a smooth surface. It’s okay if it’s not perfectly round at first—we’ll refine it after chilling.
Wrap the cheese ball tightly in plastic wrap and refrigerate for at least 2 hours (or up to 24 hours). This chilling time is crucial—it allows the flavors to meld together and makes the cheese ball easier to handle when we add the coating. I know it’s tempting to skip this step, but trust me, it makes all the difference!
🍳 Step 3: Prepare the Crunchy Coating
While the cheese ball chills, melt the 2 tbsp butter in a small saucepan over low heat. Once melted, remove from heat and stir in the 1 tsp smoked paprika and 2 cups panko breadcrumbs. Mix well to distribute the paprika evenly through the breadcrumbs—this gives that beautiful retro color we’re after.
Spread the coated breadcrumbs on a baking sheet and set aside. The butter will help bind the coating to the cheese ball, creating that perfect crunchy texture. If you’re short on time, you can skip melting the butter and just mix the paprika directly with the panko, but the butter really makes the difference!
🥘 Step 4: Coat and Serve the Cheese Ball
After chilling, remove the cheese ball from the refrigerator and unwrap it. Dip the entire surface into the butter-paprika panko mixture, pressing gently to ensure an even coating. Roll it between your palms to help the coating adhere, then place it seam-side down on a parchment-lined plate.
Press down lightly on the cheese ball to help the coating stick, then refrigerate for another 30 minutes to set. This final chilling helps the coating crisp up and makes it easier to slice. Once set, use a sharp knife to cut the cheese ball into 1-inch thick slices or party-sized cubes. Serve immediately for the best texture!
Pro Tips For Making 1960s Cheese Ball
- Chill the Cheese First: Take your sharp cheddar and cream cheese blocks straight from the fridge—no thawing, no room temp nonsense. Cold cheese blends smoother and doesn’t turn greasy when you mix in mayo and Worcestershire. I learned this the hard way after one batch turned into a sad, oily lump.
- Grate, Don’t Dice: Skip the knife for sharp cheddar—grate it fine instead. It melts faster into the cream cheese, distributes evenly, and avoids those stubborn cheese clumps that ruin texture. A box grater does the job in seconds, and your mixture will be silky, not streaky.
- Measure Worcestershire Precisely: One teaspoon of Worcestershire sauce is all you need—any more and the tang overpowers the cheddar. Use a measuring spoon, not a splash from the bottle, or you’ll end up with a cheese ball that tastes like a pub snack gone wrong.
- Shape It Tight, Then Roll: Pack the mixture firmly into a ball before rolling it in dried mustard—this keeps it from falling apart. Wet your hands slightly to prevent sticking, then roll it like you’re wrapping a present. No gaps, no crumbles.
Make-ahead tips for this dish
Freezer Prep Ahead
Make this cheese ball a week in advance by assembling it completely, then freezing it before baking. Wrap the shaped cheese ball tightly in plastic wrap, then place it in a freezer bag with all the air squeezed out.
Label with the date—it keeps for up to 3 months without losing texture. When ready to serve, thaw in the fridge overnight, then coat and bake as directed. The flavors deepen during freezing, making it even more delicious! ❄️
Baking Shortcut
For a quicker version, skip the second chilling step after coating. Bake the cheese ball immediately after coating—just reduce baking time to 25-30 minutes instead of the full 35-40 minutes.
The coating will still crisp up nicely, though it may not be quite as firm. This works perfectly for last-minute parties when you’re short on time.
Portion Control
Divide the cheese mixture into 4 equal portions before shaping into a ball. Wrap each portion tightly in plastic and freeze for 1 hour to firm up. Coat and bake each portion separately—this makes serving easier and lets you customize coatings (e.g., half with paprika, half with extra garlic powder).
Perfect for feeding a crowd without stress! 🍽️
Reheating Leftovers
Store leftovers in an airtight container for up to 5 days. To reheat, wrap slices in foil and warm in a 350°F oven for 5-8 minutes until heated through.
For microwave reheating, cover with a damp paper towel and heat in 20-second bursts until warm. The coating stays crispy when reheated this way—avoid microwaving uncovered slices.
Party Platter Prep
For a retro 1960s spread, arrange cheese ball slices on a large platter with classic accompaniments: mustard cups, pickle spears, and round crackers. Add a small bowl of hot sauce and sour cream for dipping.
Set up a DIY station with small plates and napkins—guests will love assembling their own bites. This presentation brings the nostalgia to life! 💛
Double Batch Hack
Double the recipe for large gatherings, but use two 9-inch round cake pans instead of one. Press the cheese mixture into the pans, coat with breadcrumbs, then bake for 20-25 minutes at 350°F.
Once cooled, slice into wedges for easy serving. This method creates uniform slices and makes plating effortless for buffet-style events.
Nutrition facts
Frequently asked questions
Can I make this cheese ball without panko breadcrumbs?
If you don’t have panko, use regular breadcrumbs mixed with 1 tsp baking powder for extra crispiness. For a retro twist, try crushed Ritz crackers or even cornflakes for a different texture. Just make sure to coat the cheese ball thoroughly and press the crumbs firmly to help them stick.
Why does my cheese ball get crumbly after baking?
Crumbly texture usually means the cheese mixture wasn’t chilled long enough before coating. Always refrigerate the shaped cheese ball for at least 2 hours (overnight is best) to let the flavors meld and the mixture firm up. If it’s still crumbling after baking, try pressing the slices gently when serving to help them hold together.
What’s the best way to store leftover cheese ball slices?
Store slices in an airtight container between layers of parchment paper to maintain crispiness. They’ll keep for 5 days at room temperature or up to 3 months in the freezer. For reheating, wrap slices in foil and warm at 350°F for 5-8 minutes—this keeps the coating crispy rather than soggy.
Can I make this cheese ball ahead of time for a party?
This recipe is perfect for making ahead! Shape the cheese ball and freeze it completely (uncoated) for up to 3 months. Thaw overnight in the fridge, then coat and bake as directed. For even better flavor, let it sit at room temperature for 30 minutes before serving so the cheeses soften slightly and the flavors bloom.
What are the best dips to serve with this cheese ball?
Classic 1960s pairings include yellow mustard, sour cream, or spicy ketchup. For extra nostalgia, serve with pickle spears or sliced dill pickles. The tangy contrast cuts through the richness perfectly—plus, it makes for a fun interactive serving experience at parties!

- Pea Soup Instant Pot Recipe: Velvety Green Smoothness in 20 Minutes - November 1, 2026
- Pork Loin Pulled Pork Crock Pot Recipe: Slow-Smoked Tenderness With Zero Dryness - November 1, 2026
- Baked Potatoes in Crock Pot Recipe: Buttery Interiors and Crispy Top Magic - November 1, 2026