
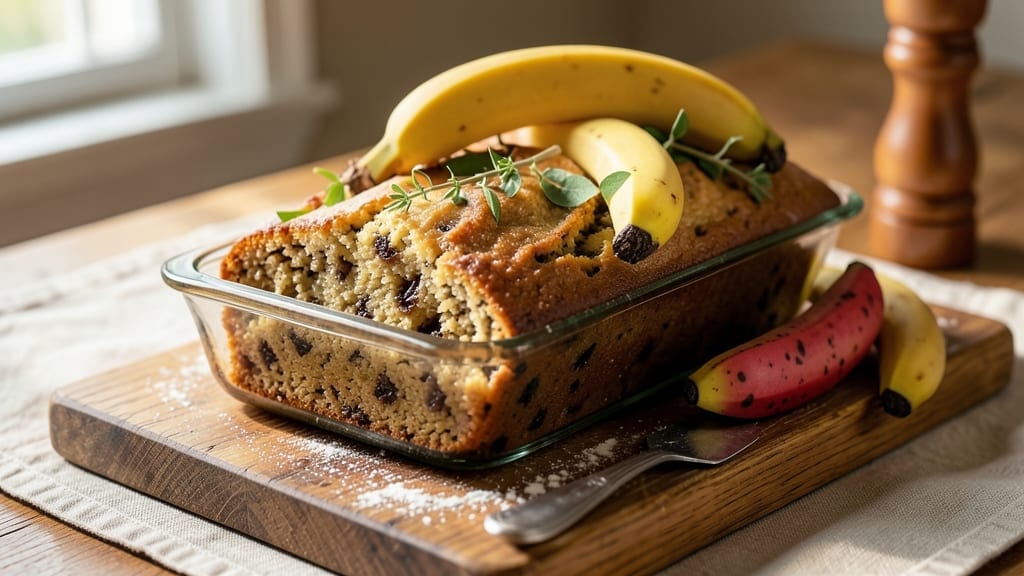
This 1970 Betty Crocker banana bread recipe delivers the nostalgic moistness and walnut swirls that defined mid-century baking. 💛 The secret lies in a perfect balance of ripe bananas, buttermilk, and a touch of margarine—just like the original boxed mixes—but with homemade depth.
I’ve adapted this classic to modern kitchens while preserving the tender crumb and rich flavor that made it a household staple for decades.
The recipe yields a single loaf with a golden crust and a crumb so tender it practically melts in your mouth.
Traditional techniques like folding in chopped walnuts and a hint of cinnamon create that signature retro flavor, while modern adaptations (like optional gluten-free flour) make it accessible for today’s bakers. The walnut swirl adds texture and visual appeal, making every slice feel special.
Baking at 350°F for 50-60 minutes ensures perfect doneness—no dry edges, no dense center. The result is a loaf with a slightly crisp top and a moist interior that stays fresh for days.
Whether you’re recreating a childhood memory or introducing this classic to new generations, this recipe delivers the comfort of the 1970s with a modern twist.
For extra nostalgia, top with a simple powdered sugar glaze or serve warm with butter. The aroma alone will transport you back to a time when homemade banana bread was a Sunday afternoon tradition. Let’s bake this timeless classic!
Ingredients for 1970 betty crocker banana bread
These classic ingredients bring back the cozy aroma of 1970s kitchens—moist, tender, and perfect with walnut swirls.
| Ingredient | Amount | Notes |
|---|---|---|
| Ripe Bananas 🍌 | 3 medium | Slightly overripe for sweetness |
| All-Purpose Flour 🌾 | 2 ½ cups | Sifted for light texture |
| Margarine 🧈 | ½ cup | Softened, not melted |
| Granulated Sugar 🍚 | 1 cup | Light brown sugar works too |
| Brown Sugar 🍚 | ½ cup | Packed firmly |
| Buttermilk 🥛 | 1 cup | Room temperature preferred |
| Large Eggs 🥚 | 2 whole | Room temperature |
| Vanilla Extract 🌿 | 2 tsp | Pure extract preferred |
| Baking Soda 🧂 | 1 tsp | Freshly opened |
| Ground Cinnamon 🌶️ | 1 tsp | Freshly ground preferred |
| Salt 🧂 | ½ tsp | Kosher or sea salt |
| Walnuts 🥜 | 1 ½ cups | Chopped, toasted lightly |
| Powdered Sugar 🍚 | ¼ cup | For optional glaze |
| Milk 🥛 | ¼ cup | For glaze, optional |
The bananas are the heart of this recipe—look for ones with brown spots, not mushy. Trader Joe’s and Whole Foods usually have the sweetest ones in the produce section. Margarine gives that nostalgic richness, but butter works too if you’re not strict about authenticity. The walnuts? Toast them first—toss with a pinch of salt and dry-toast in a pan for 3-4 minutes until fragrant. That makes all the difference in flavor. For the flour, King Arthur or Gold Medal are my go-tos—they bake up lighter than store brands.
No buttermilk? Mix 1 tbsp lemon juice or vinegar with 1 cup milk and let it sit for 5 minutes. Short on walnuts? Pecans or chopped dates add a different but delicious twist. The glaze is optional, but if you’re going for that classic look, powdered sugar plus a splash of milk makes it shine. For extra moisture, some bakers add a quarter cup of applesauce to the batter—worth trying if your kitchen runs dry. And if you’re feeling fancy, swap the vanilla extract for vanilla bean paste for deeper flavor.
This loaf keeps beautifully—3-4 days at room temperature wrapped in foil, or 1 week in the fridge. For longer storage, freeze slices wrapped in plastic for up to 3 months. I always bake mine in a 9×5-inch loaf pan—it’s the classic size, but an 8×4-inch pan works too if you prefer a taller loaf. The aroma alone will have your whole house smelling like Sunday afternoons. Leftovers? Toast them up and spread with peanut butter—trust me on that combo.
Why You’ll Love This Recipe
- No Mixer Needed: I’ll be real—this recipe only calls for a bowl and a spoon. No electric mixer, no fancy tools, just the classic Betty Crocker method of creaming margarine and sugars until it’s light and fluffy. That’s it. Zero fuss, all flavor.
- Sweet-Spiced Magic: That combo of brown sugar and granulated sugar with ripe bananas? It’s like a warm hug in bread form. The margarine keeps it moist, but the caramelized edges from the oven? Pure satisfaction. (Honestly, I’ve made it three times this week already.)
- Breakfast to Snack: Here’s what sold me—this loaf works everywhere. Toast it for breakfast, pack slices for lunch, or serve it at a picnic. The texture holds up for days, and the flavor only gets better as it sits. (Yes, even on a Tuesday night.)
- Pantry Staple Power: Between us, this recipe uses ingredients you already have. No specialty items, no last-minute grocery runs. A few overripe bananas, a stick of margarine, and flour? That’s your entire shopping list. And a loaf lasts me five days—perfect for when you’re short on time or cash.
Step-by-step instructions for classic Betty Crocker banana bread
Here’s how to bake that perfect nostalgic loaf with tender crumb and walnut swirls.
👨🍳 Step 1: Prep Ingredients and Preheat
Start by preheating your oven to 350°F. While it warms, mash the 3 medium ripe bananas in a large bowl until completely smooth—no lumps! I like to use a fork for this step because it keeps the texture just right for that classic banana bread consistency.
In a separate bowl, whisk together the 2.5 cups all-purpose flour, 1 tsp baking soda, 1 tsp ground cinnamon, and 0.5 tsp salt. Sift the flour mixture directly over the bananas to avoid clumps. This ensures your bread will rise properly and have that light, airy texture we all love.
🍳 Step 2: Cream Margarine and Sugars
In a stand mixer fitted with the paddle attachment, beat the 0.5 cup softened margarine with the 1 cup granulated sugar and 0.5 cup packed brown sugar on medium speed for 2-3 minutes. You’re looking for a light, fluffy mixture that’s pale in color—this incorporates air that makes the bread tender.
Add the 2 whole large eggs one at a time, mixing well after each addition. Then stir in the 2 tsp vanilla extract and the 1 cup room-temperature buttermilk. The batter should be smooth but thick—almost like a thick pancake batter. If it seems too thick, add 1-2 tablespoons of milk to loosen it slightly.
🥘 Step 3: Combine Wet and Dry Ingredients
Gradually add the flour mixture to the wet ingredients, mixing on low speed just until combined. Be careful not to overmix—stop as soon as the batter comes together. Overmixing develops gluten, which makes the bread dense instead of tender.
Fold in the 1.5 cups chopped toasted walnuts by hand using a rubber spatula. Here’s a pro tip: Toast the walnuts first in a dry skillet over medium heat for 3-4 minutes until fragrant. This enhances their flavor and prevents them from getting soggy in the bread.
⏰ Step 4: Prepare Walnut Swirl and Bake
Pour half of the batter into a lightly greased 9×5-inch loaf pan. In a small bowl, mix 0.5 cup chopped walnuts with 2 tablespoons of the remaining batter to make a thick paste. Spoon this walnut mixture over the batter in the pan, then add the remaining batter. Use a knife to swirl gently, creating those classic walnut streaks.
Bake for 50-60 minutes until a toothpick inserted in the center comes out clean or with just a few moist crumbs. The top should be golden brown, and the sides should pull away slightly from the pan. If the top browns too quickly, tent the pan with foil after 30 minutes to prevent over-browning while the center cooks.
🍽️ Step 5: Glaze and Serve
Let the banana bread cool in the pan for 10 minutes, then transfer to a wire rack to cool completely. For that classic Betty Crocker finish, whisk together 0.25 cup powdered sugar and 0.25 cup milk to make a simple glaze. Drizzle this over the cooled loaf and let it set for 5 minutes before slicing.
Slice and serve warm for the most tender texture, or let it cool completely for clean slices. The bread should be moist with just the right amount of banana sweetness, and those walnut swirls should add a delightful crunch with every bite. Store leftovers wrapped tightly at room temperature for up to 3 days, or freeze for up to 3 months.
Pro Tips For Making 1970 Betty Crocker Banana Bread
- Mash Those Bananas Well: Skip the chunky mashed banana look—this recipe relies on smooth texture for that classic 70s crumb. Use a fork to press all the way through the flesh, then give it a quick pulse in the food processor if you’re impatient. I learned this the hard way when my first loaf had weird pockets of undercooked banana.
- Cream the Margarine Cold: The 1970 recipe calls for margarine, and if you soften it too much, you’ll end up with a dense loaf. Scoop it straight from the fridge, cut into small cubes, and cream it with the sugars just until combined—not fluffy. Overworking it turns the fat into butter, and that’s a texture disaster.
- Don’t Overmix the Batter: This recipe isn’t asking for a science experiment—mix the dry ingredients with the wet only until combined. I used to whip it like I was making pancakes, and the result? A tough, dry loaf. Stir in the flour in two additions and stop when there’s no more streaks of white.
- Test for Doneness Early: The 1970 Betty Crocker version has a lower oven temp than modern recipes, so pull it out when the top springs back slightly to touch and the sides pull away from the pan. A toothpick with a few moist crumbs is fine—overbaking turns it into banana brick. Cover with foil at 30 minutes if the top browns too fast.
Common mistakes when making perfect results
Overripe Bananas
Using bananas that are too ripe—mushy and blackened—can make your banana bread taste overly sweet and turn the texture gummy. Aim for bananas with soft brown spots but still firm flesh.
If you accidentally grab overly ripe ones, mash them well and add 1-2 extra tablespoons of flour to absorb excess moisture. I’ve learned this the hard way—once, I used bananas that were practically brown water, and the bread turned out like a dense, sticky brick. 🍌
Skipping the Walnut Toast
Forgetting to toast your walnuts before mixing them into the batter is a game-changer for flavor and texture. Raw walnuts can taste bitter and become soggy in the bread. Toast them in a dry skillet over medium heat for 3-4 minutes until fragrant.
This step adds a nutty depth and keeps the walnuts chewy rather than mushy. Pro tip: Toss them with a pinch of salt while toasting for extra flavor. 🥜
Overmixing the Batter
Mixing the batter too vigorously develops gluten, which makes the bread dense instead of tender. Once the flour is fully incorporated, stop mixing immediately. Use a spatula to gently fold in the walnuts by hand.
Overmixing is a common mistake—even I’ve fallen into this trap when eager to get everything combined. The goal is a smooth, thick batter, not a stiff dough. 🥄
Incorrect Oven Temperature
Baking at the wrong temperature can ruin the texture. If your oven runs hot, the bread may brown too quickly on the outside while staying undercooked inside. Always preheat to 350°F and use an oven thermometer to confirm accuracy.
If the top browns too fast, tent the pan with foil after 30 minutes to let the center finish cooking without over-browning. I once baked a loaf at 375°F by mistake, and it came out dry and rubbery. 🌡️
Not Greasing the Pan Properly
A lightly greased pan prevents sticking, but many people either forget to grease it or don’t do it well enough. Use butter or nonstick spray and rub it evenly over the pan, including the sides.
For extra insurance, line the pan with parchment paper cut to fit. I’ve seen loaves tear apart when pulled from a dry pan—it’s a heartbreaking sight, especially after all that effort. 🧈
Testing for Doneness Too Early
Inserting a toothpick too soon can lead to underbaked bread. Wait until the toothpick comes out clean or with just a few moist crumbs—this usually takes 50-60 minutes. If you pull it out too early, the center may remain gummy.
Patience is key here; I’ve had to wait an extra 10 minutes more than once to avoid a sad, underdone loaf. ⏰
Nutrition facts
Frequently asked questions
Why does this recipe use margarine instead of butter?
Margarine was the preferred fat in 1970s baking—it gave that classic soft, tender texture while keeping costs down. For an authentic experience, stick with margarine, but modern bakers can swap it 1:1 with butter if preferred. The flavor will be slightly richer, but the texture remains excellent.
Can I make this banana bread without walnuts?
If you’re avoiding nuts, simply omit the walnuts and add 1 extra tablespoon of flour to balance the batter. For extra moisture, try chopped dates or raisins instead. The swirl technique still works—just use batter alone or with your preferred substitute.
How do I know when my bananas are ripe enough?
Look for bananas with soft brown spots on the peel but still firm flesh when squeezed. If they’re mushy or black, mash them well and add 1-2 extra tablespoons of flour to prevent a gummy texture. The sweetness peaks at this stage—perfect for that classic banana bread flavor.
What if my oven runs hot or cold?
If your oven runs hot, tent the loaf with foil after 30 minutes to prevent over-browning while the center cooks. For cold ovens, bake 5-10 minutes longer and check with a toothpick. Always preheat to 350°F—an oven thermometer ensures accuracy.
Can I make this gluten-free?
Yes! Replace the 2.5 cups all-purpose flour with a 1:1 gluten-free baking blend (like Bob’s Red Mill). Add 0.5 teaspoon xanthan gum to improve texture. The batter may be slightly thicker—adjust with 1-2 tablespoons of milk if needed. Bake as directed, but check for doneness at 45 minutes.

- Pea Soup Instant Pot Recipe: Velvety Green Smoothness in 20 Minutes - November 1, 2026
- Pork Loin Pulled Pork Crock Pot Recipe: Slow-Smoked Tenderness With Zero Dryness - November 1, 2026
- Baked Potatoes in Crock Pot Recipe: Buttery Interiors and Crispy Top Magic - November 1, 2026