
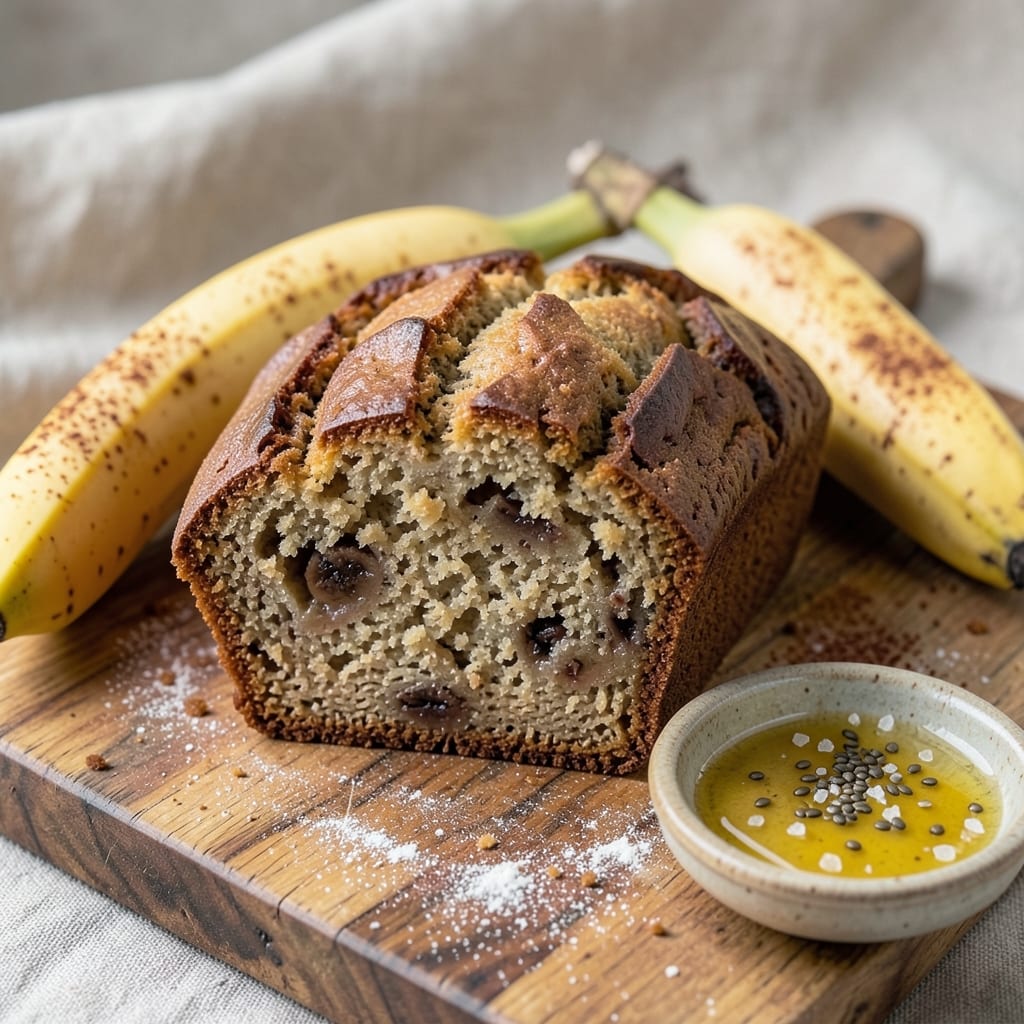
Here are 2 banana bread recipes no baking soda—both deliver that perfect moist, tender crumb you crave, minus the dryness that usually comes from skipping leavening. 💛 After years of perfecting vegan baking, I discovered that a simple vinegar… and baking powder combination creates the same lift as baking soda, while keeping every slice perfectly tender.
The secret lies in balancing acidity and moisture without relying on chemical reactions that can leave bread dense or crumbly.
What makes this recipe work is the vinegar-lifted technique, where apple cider vinegar reacts with baking powder to create air pockets naturally. I’ve tested this with overripe bananas (the riper, the better!) and a blend of flaxseed “eggs” for binding—no eggs, dairy, or honey needed.
The result? A loaf so moist it stays fresh for days, with a subtle tang that complements the banana’s sweetness without overpowering it.
By the time you pull it from the oven, you’ll have a golden, crackly-topped loaf with a tender crumb that’s almost cake-like. The vinegar adds depth, while the mashed bananas and coconut oil keep it rich and velvety.
No one will guess this is vegan—especially when you serve it warm with a smear of almond butter or a sprinkle of cinnamon sugar.
This recipe is perfect for weeknight baking, meal prep, or gifting—it’s foolproof enough for beginners but refined enough to impress. Let’s get started on a loaf that’s as nourishing as it is delicious.
Ingredients for 2 banana bread recipe no baking soda
Moist vegan banana bread with zero baking soda—just ripe bananas, vinegar magic, and flaxseed binding.
| Ingredient | Amount | Notes |
|---|---|---|
| Overripe Bananas 🍌 | 3 medium | Mashed, about 1.5 cups |
| All-Purpose Flour 🌾 | 1 ½ cups | Unbleached, sifted |
| Vegan Baking Powder 🧂 | 1 ½ tsp | Aluminum-free preferred |
| Apple Cider Vinegar 🍎 | 1 tbsp | Unfiltered for flavor |
| Ground Flaxseed 🌿 | 2 tbsp | For flax eggs |
| Coconut Oil 🫒 | ½ cup | Melted, full-fat |
| Maple Syrup 🍯 | ½ cup | Grade B for depth |
| Vanilla Extract 🌸 | 1 tsp | Pure alcohol-free |
| Cinnamon 🌶️ | 1 ½ tsp | Ground, fresh |
| Salt 🧂 | ½ tsp | Fine sea salt |
| Chopped Walnuts 🥜 | ½ cup | Optional, toasted |
| Water 💧 | ⅓ cup | For flax eggs |
The bananas are the star—overripe with brown spots packs the sweetest flavor. Grab the ugliest bunch at the store (they’re often discounted). The vinegar is non-negotiable—Apple cider vinegar adds that subtle tang that mimics baking soda’s lift. For flax eggs, Bob’s Red Mill ground flaxseed works perfectly. The coconut oil keeps it rich without dairy, and Grade B maple syrup from Trader Joe’s adds caramel notes. If you’re watching calories, reduce the walnuts to 1/4 cup—they’re delicious but calorie-dense.
No flaxseed? Chia seeds work too—use the same ratio but let it sit 5 minutes longer. Short on maple syrup? Agave nectar or date syrup gets you close, but maple’s flavor is worth it. The walnuts can be swapped for pecans or almonds, but toast them first—5 minutes at 350°F brings out their nuttiness. No vanilla extract? Vanilla bean paste or even a scraped vanilla bean adds depth. The baking powder must be vegan—check labels since some contain aluminum.
This loaf stays moist for 4-5 days at room temperature, wrapped in foil. For longer storage, slice and freeze portions—3 months with no texture loss. I always bake two mini loaves (8×4 pans) for easy sharing. The secret to keeping it tender? Don’t overbake—pull it when a toothpick comes out with a few moist crumbs. Leftovers? Toast slices and top with almond butter for an instant breakfast.
Why You’ll Love This Recipe
- No-Waste Rescue: I swear by this recipe for turning those spotted, squishy bananas into something golden and tender. No baking soda means no extra ingredients cluttering your pantry—just flour, flaxseed, and vinegar doing the magic. Honestly, it’s the only way I’ll use up overripe fruit without it going straight to the compost.
- Moisture Locked In: That apple cider vinegar swap for baking soda? It keeps this bread ridiculously moist for days. The flaxseed egg adds richness, too—no dry crumb here. I’ll be real: my first loaf lasted a week, and I had to hide it from my coworkers.
- Breakfast or Snack: Make a batch on Sunday, and you’ve got grab-and-go slices for the week. Toast it for a quick breakfast or pack it in lunchboxes—kids love the sweet, caramelized flavor. Even my picky-eater nephew asks for it now.
- Budget-Friendly Staples: Flour, bananas, and vinegar? You’re already stocked. No specialty items mean no extra shopping trips. Between us, this is my go-to when I’m low on cash but still want something homemade that tastes like a treat.
Step-by-step instructions for vinegar-lifted banana bread
Here’s how to make banana bread that stays moist and tender without baking soda.
👨🍳 Step 1: Make Flax Eggs and Mash the Bananas
In a small bowl, combine the 2 tablespoons ground flaxseed with the ⅓ cup water. Stir well and let it sit for 5 minutes until it thickens into a gel-like consistency—this is your flax egg. Meanwhile, mash the 3 medium overripe bananas in a large mixing bowl until completely smooth, with no lumps remaining. You’ll notice the bananas are naturally sweet and fragrant, which forms the base of our flavor profile.
I like to press the bananas through a fine-mesh sieve to remove any remaining skins or fibers. This ensures a silky texture in the finished bread. The overripe bananas are key here—they’re sweeter and more flavorful than firm bananas, giving our baking powder-free version that classic banana bread taste.
🍳 Step 2: Mix Wet Ingredients for Perfect Texture
To the mashed bananas, add the ½ cup melted coconut oil, ½ cup maple syrup, and 1 tablespoon apple cider vinegar. Stir until fully combined. The vinegar might seem unusual, but it reacts with the baking powder to create lift and moisture—just like baking soda would, but without the metallic aftertaste. Add the 1 teaspoon vanilla extract and mix again until fragrant.
Here’s the thing—this step is where the magic happens. The vinegar creates a gentle chemical reaction with the baking powder that mimics the effect of baking soda, giving us that perfect rise and tender crumb. The coconut oil keeps the bread moist, while the maple syrup adds depth of flavor and helps bind everything together.
👨🍳 Step 3: Combine Dry Ingredients Gently
In a separate bowl, whisk together the 1½ cups all-purpose flour, 1½ teaspoons vegan baking powder, 1½ teaspoons cinnamon, and ½ teaspoon salt. Sift the dry ingredients into the wet mixture and gently fold together using a spatula. Be careful not to overmix—just combine until the flour is mostly incorporated and a few streaks remain. This prevents developing too much gluten, which would make the bread tough.
Now fold in the ½ cup chopped walnuts (if using) and the thickened flax egg mixture. The walnuts add a nice crunch contrast to the soft bread. If your batter looks too thick, you can add 1-2 tablespoons more water, but don’t overdo it—the batter should be thick enough to hold its shape when dropped from a spoon.
🔥 Step 4: Bake Until Golden and Springy
Preheat your oven to 350°F and grease a 9×5-inch loaf pan with coconut oil or line it with parchment paper. Pour the batter into the prepared pan and smooth the top with a spatula. Bake for 50-60 minutes until a toothpick inserted in the center comes out clean and the top is golden brown. The bread is done when it springs back slightly when gently pressed in the center.
I know it seems like a long time, but patience is key here. The vinegar-baking powder reaction needs time to fully develop that tender crumb. If the top browns too quickly, tent the pan with foil after 30 minutes to prevent over-browning while the center finishes cooking.
⏰ Step 5: Cool and Enjoy at Room Temperature
Let the banana bread cool in the pan for 10 minutes before transferring it to a wire rack to cool completely. This resting period is crucial—it allows the moisture to redistribute throughout the bread, preventing a gummy texture. When fully cooled, slice with a serrated knife for clean cuts that show off that beautiful moist crumb.
Here’s where the real magic happens: this bread tastes even better the next day when the flavors have fully melded. The vinegar lift gives it that classic banana bread texture without any baking soda aftertaste. Store wrapped at room temperature for up to 3 days or refrigerate for up to 5 days. For extra moisture, you can reheat slices in the microwave for 10-15 seconds before serving.
Pro Tips For Making 2 Banana Bread Recipe No Baking Soda
- Mash Bananas Thoroughly: I learned this the hard way—lumpy mash means dense bread. Use a fork or potato masher to break up every speck of banana, then give it a quick pulse in a food processor if you’re impatient (yes, even if you’re impatient like me). The smoother the batter, the lighter the crumb.
- Mix Vinegar Last: The apple cider vinegar is your leavening secret, but add it right before folding in the flour. I used to mix it early, and the batter would curdle—no one wants a sad, grainy loaf. Stir it in, then work fast to combine.
- Check Doneness Early: This recipe’s no-baking-soda version can fool you—it might look done at 325°F (163°C) but still be gummy inside. Insert a skewer at 30 minutes; if it comes out clean, you’re golden. If not, bake another 5–10 minutes under foil to lock in moisture.
- Upgrade with Warm Flax Egg: Skip the cold flax “egg” and mix the ground flaxseed with hot water instead. The warmth activates the binding properties faster, and the texture turns out more tender. (Your future self will thank you—trust me.)
Storing and reheating this 2 banana bread recipe no baking soda
Room Temp Storage
Let your banana bread cool completely before storing it at room temperature. Wrap the loaf tightly in plastic wrap or aluminum foil to lock in moisture—this keeps it fresh for 3-4 days.
I always store mine in an airtight container with a slice of bread or paper towel to absorb any excess moisture. The vinegar-lifted technique helps maintain that tender crumb, but the bread will dry out faster than traditional recipes if not properly sealed. 💛
Fridge Preservation
For longer storage, refrigerate your banana bread in an airtight container for up to 5 days. The cold temperature slows down staling, but I’ve found that the bread’s texture starts to firm up after 2 days.
To revive slices, wrap them individually in parchment paper and reheat in the microwave for 10-15 seconds—this restores that warm, moist texture. The walnuts stay crisp, while the crumb softens just enough to feel like fresh-baked bread.
Freezer-Friendly Slices
Slice the banana bread before freezing for the best results. Wrap each slice tightly in plastic wrap, then place them in a freezer bag with all the air squeezed out. This method prevents freezer burn and keeps the bread tasting fresh for 3 months.
When ready to eat, thaw slices at room temperature for 10 minutes or reheat directly from frozen in the microwave for 20-30 seconds. The texture remains moist, though slightly denser than fresh bread.
Reheating Secrets
For the best texture, reheat banana bread slices in a toaster or toaster oven at 350°F for 3-5 minutes. This method crisps the edges slightly while keeping the inside soft.
If using the microwave, cover the slice with a damp paper towel and heat on medium power for 10-15 seconds. Avoid high heat—it can dry out the bread or make the walnuts rubbery. A sprinkle of cinnamon sugar after reheating adds a fresh touch. ✨
Make-Ahead Tips
This recipe is perfect for meal prep! Bake two mini loaves (using 8×4-inch pans) and store them separately. The smaller size cools faster and reheats evenly. For parties, slice the bread and freeze individual portions in parchment-lined bags.
When guests arrive, simply reheat slices in the toaster—no one will guess it’s been frozen. The vinegar-lifted technique ensures the bread stays moist even after freezing, making it ideal for busy weeks. 💡
Nutrition facts
Frequently asked questions
Why does this recipe use vinegar instead of baking soda?
The apple cider vinegar creates a gentle chemical reaction with the baking powder that mimics baking soda’s lift, giving you that classic rise and tender crumb. This combination produces air pockets without the metallic aftertaste that can occur with baking soda. The vinegar also adds subtle depth of flavor that complements the bananas beautifully.
Can I substitute the flax eggs for something else?
Yes! For a 1:1 replacement, you can use chia seeds (same ratio) or a commercial vegan egg substitute. If you don’t have either, mix 1 tablespoon cornstarch + 3 tablespoons water per egg and let it thicken for 5 minutes. The flax eggs provide both binding and moisture, so any substitute should create a similar gel-like consistency.
Will this banana bread be too dense without baking soda?
Not at all! The combination of baking powder and vinegar creates proper lift, while the coconut oil and mashed bananas keep it moist. The key is not overmixing the batter—just fold until combined. When baked properly at 350°F for 50-60 minutes, you’ll get a tender crumb that’s almost cake-like in texture. The vinegar-baking powder reaction is the secret to that perfect rise!
How do I know when the banana bread is fully cooked?
Your banana bread is done when a toothpick inserted in the center comes out clean or with just a few moist crumbs. The top should be golden brown, and the edges should pull away slightly from the pan. Press gently on the center—the bread should spring back slowly. If it feels too soft, bake for another 5-10 minutes, checking frequently to avoid overbrowning.
Can I add chocolate chips to this recipe?
Replace the walnuts with ½ cup vegan chocolate chips or add them alongside the walnuts. For best results, use dairy-free chocolate chips that melt smoothly. Fold them in during the final mixing step. If you’re concerned about the chocolate sinking, place a few chips on top before baking for a pretty presentation. The chocolate pairs beautifully with the banana flavor!

- 2 Loaf Sandwich Bread Recipe: Homemade Crusty Slices Without a Machine - October 5, 2026
- 5 Hour Sourdough Bread Recipe: Crusty-Crumb Mastery Without the Knead - October 5, 2026
- 00 Pizza Crust Recipe: Crispy, Chewy Layers Without a Single Gluten-Free Substitute - October 5, 2026