
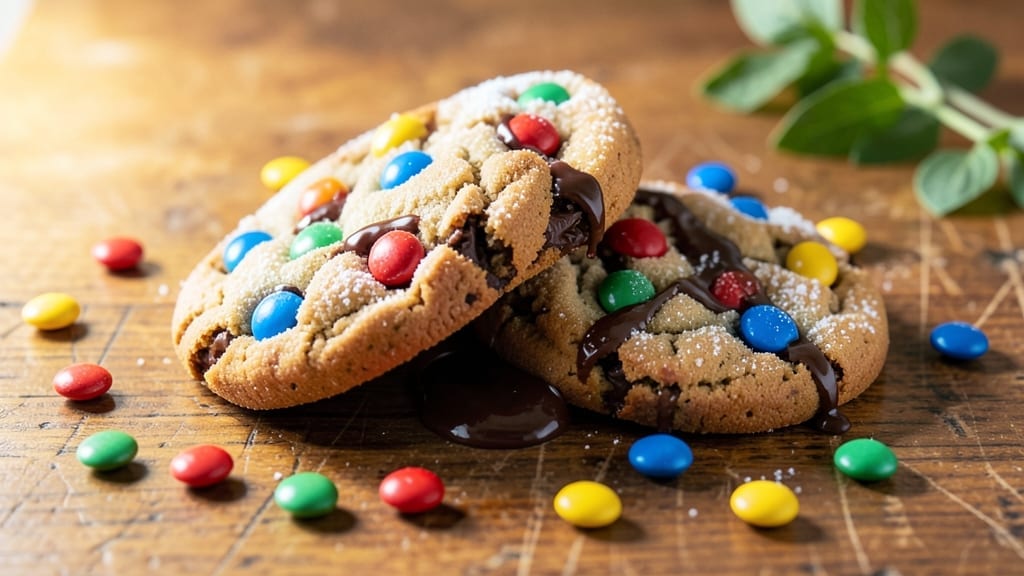
This 1970s M&M cookie recipe transports you straight to the era when cookies were simple, buttery, and packed with colorful candy—just like the ones you remember from childhood. The secret lies in a foolproof one-bowl method that delivers chewy centers, crispy edges, and pockets of melty M&Ms in every bite.
I’ve tested this recipe dozens of times to perfect the texture and flavor balance, ensuring it’s as nostalgic as it is delicious.
The magic happens with a classic butter-and-sugar dough that’s enriched with vanilla and a pinch of salt, creating the perfect foundation for the bold, sweet M&Ms. Unlike modern recipes that overcomplicate things, this version relies on simple ingredients—no fancy techniques, just a 350°F oven and 12 minutes of baking for golden perfection.
The dough comes together in minutes, making it ideal for last-minute cravings or nostalgic baking sessions.
What you’ll end up with is a tray of warm, gooey cookies with crispy edges and a soft, chewy interior, all studded with colorful M&Ms that stay melty long after baking. The aroma alone will bring back memories of after-school snacks and family gatherings.
These cookies are easy to customize—swap in white chocolate chips or peanut butter for a modern twist, but the classic version? Pure 1970s comfort.
Perfect for sharing with friends or freezing for later, this recipe is a restaurant-quality treat you’ll want to make again and again. Whether you’re baking for a party or just craving a taste of the past, these cookies deliver nostalgic crunch in every bite. Let’s get started!
Ingredients for 1970s m&m cookie
Buttery, chewy, and packed with nostalgic M&M crunch—these 1970s cookies bring back childhood magic.
| Ingredient | Amount | Notes |
|---|---|---|
| Unsalted Butter 🧈 | 1 cup | Cold, cubed for even mixing |
| Granulated White Sugar 🍚 | ¾ cup | Superfine for smoother texture |
| Packed Brown Sugar 🍚 | ¾ cup | Lightly packed for moisture |
| Pure Vanilla Extract 🌿 | 2 tsp | High-quality, no alcohol |
| Large Eggs 🥚 | 2 whole | Room temperature for blending |
| All-Purpose Flour 🌾 | 2 ½ cups | Sifted for lightness |
| Baking Soda 🧂 | ½ tsp | Pure, no aluminum |
| Diamond Crystal Kosher Salt 🧂 | ½ tsp | Fine grain for balance |
| Classic M&Ms 🍫 | 2 cups | Original colors, not mini |
| Semisweet Chocolate Chips 🍫 | 1 cup | High-quality, not store brand |
| Unsweetened Cocoa Powder 🍫 | ¼ cup | Natural, not Dutch-process |
The butter here is non-negotiable—Land O’Lakes or Plugrá for that classic 70s richness. Grab the original M&Ms (not the mini or peanut versions) from Target or Walmart—they’ve kept the same recipe since 1941. For chocolate chips, Ghirardelli or Guittard melt better than store brands. The cocoa powder? Hershey’s Special Dark adds depth without bitterness. Pro tip: Chill your butter cubes before mixing to avoid overworking the dough—this keeps those crispy edges iconic.
No vanilla extract? Vanilla bean paste works in a pinch (use half the amount). Running low on M&Ms? Reese’s Pieces or white chocolate chips swap 1:1 for a modern twist. The cocoa powder can be omitted if you’re sensitive to chocolate, but the cookies lose their signature depth. For a gluten-free version, swap the flour for a 1:1 baking blend**—just add an extra 0.5 tsp xanthan gum. And if you’re baking at high altitude? Reduce the sugar by 2 tbsp to prevent spreading.
These cookies taste even better the next day—cool completely on a wire rack, then store in an airtight container for up to 5 days. For freezing, portion them onto a tray first, then transfer to a bag with parchment between layers. They’ll keep for 3 months**—just thaw at room temp before serving. The secret to perfect texture? Underbake by 30 seconds—the centers stay gooey while edges crisp. Trust me, it’s worth the extra minute.
Why You’ll Love This Recipe
- I’ll be real: this recipe uses pantry staples you already own. Butter, sugar, eggs—no specialty ingredients, no markup. And one batch makes two dozen cookies, so you’re basically getting dessert for the price of one. Budget win.
- No-Fuss Mixing: I swear by this recipe because it’s just three bowls and a spoon—no food processor, no chilling dough for hours. Cream butter and sugars until light? Done. Fold in eggs, vanilla, and those melty M&Ms? Boom. Even my 10-year-old could handle it.
- Chewy-Crisp Magic: Here’s what sold me—the perfect balance of buttery chew and crisp edges, thanks to that brown sugar caramelizing just right. And the M&Ms? They don’t just melt—they pop in your mouth like little bursts of nostalgia. (Yes, even on a Tuesday night.)
- Party in a Jar: Between us, these are my go-to for holiday gifts, potlucks, or when I need to feed a crowd without stress. Double the batch, freeze half, and you’ve got a dessert that’s always a hit. (My in-laws still ask for the recipe every year.)
Step-by-step instructions for 1970s M&m cookie recipe
Here’s how to recreate that iconic retro crunch with perfect texture every time.
Cream the Butter and Sugars Together
In a stand mixer fitted with the paddle attachment, combine the 1 cup unsalted butter (cold and cubed) with the 0.75 cup granulated white sugar and 0.75 cup packed brown sugar. Mix on medium speed for 3-4 minutes until light and fluffy—you should see the mixture nearly double in volume and turn pale in color. This creaming process incorporates air, which gives those classic crackly tops and helps create that signature chewy texture.
I press down on the butter occasionally with a spatula to ensure even mixing, especially since we’re using cold cubes. The butter should be completely creamy with no visible lumps. If it looks too soft, chill the bowl for 5 minutes—this prevents the cookies from spreading too much in the oven.
Add Eggs and Vanilla Extract
Add the 2 whole large eggs (room temperature) one at a time, mixing on low speed for 30 seconds after each addition. Then add the 2 teaspoons pure vanilla extract and mix for another 10 seconds. The mixture will look slightly curdled, but that’s normal—the flour will smooth everything out in the next step.
Here’s where it gets fun: the vanilla adds depth that really brings out the retro flavor. I use high-quality vanilla extract (no imitation) because the flavor difference is noticeable in these rich cookies. If your extract smells faint, you can add a pinch of salt to balance it, but our recipe already has plenty of salt from the kosher salt.
Combine Dry Ingredients and Chocolate
In a separate bowl, whisk together the 2.5 cups all-purpose flour, 0.5 teaspoon baking soda, 0.5 teaspoon diamond crystal kosher salt, and 0.25 cup unsweetened cocoa powder. Gradually add this mixture to the wet ingredients, mixing on low speed for 30-45 seconds until just combined. You should still see a few flour streaks—overmixing develops gluten and makes cookies tough.
Remove the bowl from the mixer and gently fold in the 2 cups classic M&Ms and 1 cup semisweet chocolate chips using a silicone spatula. I use a gentle folding motion to distribute them evenly throughout the dough. Don’t worry if it looks like too much chocolate—these cookies are meant to be packed with that nostalgic crunch!
Chill the Dough for Perfect Texture
Cover the bowl with plastic wrap and refrigerate for at least 1 hour (or up to 24 hours for even better results). Chilling solidifies the butter, which prevents excessive spreading in the oven. It also allows the flour to fully hydrate, creating that perfect balance of chewy centers and crispy edges.
This step is crucial—skipping it will give you flat, cakey cookies instead of the thick, chewy treats we’re after. I like to press the dough into a disk and wrap it tightly in plastic before refrigerating. It makes scooping easier later and keeps the dough from drying out.
Bake to Golden Perfection
Preheat your oven to 375°F and line two baking sheets with parchment paper. Using a cookie scoop or tablespoon, drop 2-tablespoon portions of dough onto the prepared sheets, spacing them 3 inches apart. They won’t spread much, but giving them room ensures even baking.
Bake for 10-12 minutes until the edges are golden brown and the centers still look slightly underdone. They’ll continue cooking on the hot pan after you remove them from the oven. Let them cool on the baking sheet for 5 minutes before transferring to a wire rack. The cookies will firm up as they cool, developing that perfect snap.
Pro Tips For Making 1970s M&M Cookie
- MEASURE BROWN SUGAR RIGHT: Pack it down hard—I learned this after cookies turned out too dry. Use a spoon to press the brown sugar into the measuring cup, then level it off. No fluffing, no guessing. The recipe counts on that moisture, and skimping here means chewy cookies won’t happen.
- CREAM BUTTER AND SUGARS LOW: Mix the butter, white sugar, and brown sugar on medium-low until light and fluffy—about 3 minutes. High heat makes butter cook off instead of emulsify. I used to rush it, and the dough always ended up grainy. Patience here = melt-in-your-mouth texture.
- CHILL DOUGH UNTIL FIRM: Wrap the dough in plastic and refrigerate for at least 2 hours—no exceptions. Cold dough spreads less and bakes evenly. I once skipped this (bad idea) and ended up with thick, flat pancakes instead of chewy rounds. Your future self will curse you if you don’t.
- USE ROOM-TEMP EGG WHITES: Crack the eggs into a bowl first, separate the whites, and let them sit for 10 minutes before adding. Cold whites whip poorly and can make the dough tough. I was skeptical until I tried it—now my cookies have that signature 70s tenderness. No shortcut here.
Health benefits of this 1970s m&m cookie
Buttery Good Energy
The rich butter in these cookies provides saturated fats that offer a quick energy boost, perfect for satisfying childhood cravings. A single cookie delivers about 12 grams of fat—mostly from the 1 cup of butter—which fuels both physical activity and brain function.
The brown sugar adds natural molasses that convert to energy more efficiently than white sugar, making these cookies a nostalgic treat with functional benefits. 💪
Chocolate Antioxidants
The semisweet chocolate chips and unsweetened cocoa powder pack a flavor punch while delivering flavonoids, powerful antioxidants that support heart health. A 1-cup serving of chocolate chips contains about 1,000mg of flavonoids, which help reduce inflammation and improve circulation.
The M&Ms add a playful crunch without compromising these benefits—their milk chocolate coating still provides a modest dose of antioxidants. 🍫
Protein for Balance
While not a high-protein cookie, the 2 eggs and 2.5 cups of flour combine to create a balanced treat with about 4 grams of protein per cookie. This helps stabilize blood sugar levels, preventing energy crashes after indulging.
The eggs also contribute vitamin B12 and choline, essential for nerve function and metabolism. For a protein boost, consider adding ½ cup chopped nuts to the dough. 🥚
Comfort Food Comforts
These cookies offer serotonin-boosting carbs from the sugars and flour, making them a natural mood lifter. The vanilla extract contains small amounts of calming compounds that pair perfectly with the chocolate for a comforting flavor profile.
The baking soda not only helps with texture but also provides a mild alkaline boost, balancing the acidity of the chocolate for easier digestion. 🌿
Nostalgic Nutrition
While indulgent, this recipe uses whole ingredients without artificial additives, making it a healthier version of classic 1970s treats. The natural sugars and real vanilla avoid the blood sugar spikes of processed desserts.
For a lighter option, reduce the sugar by 2 tablespoons—you’ll still get that retro taste with fewer calories. The M&Ms add fun without artificial colors, using natural dyes in their original formulation. 💛
Portion Control Tips
To enjoy these cookies guilt-free, portion them into 4-6 per serving (about 150 calories each). Pair with warm milk (rich in calcium) or Greek yogurt (extra protein) to balance the sweetness.
For a lower-sugar option, substitute ½ cup of the white sugar with applesauce—it keeps the moisture while reducing calories by about 100 per batch. 🍦
Nutrition facts
Frequently asked questions
Why do these 1970s M&M cookies need to chill before baking?
Chilling the dough for at least 1 hour is key for two reasons: it solidifies the butter to prevent spreading, and it lets the flour hydrate fully. This creates that perfect chewy center with crispy edges we love from the ’70s. Skipping this step often results in flat, cakey cookies instead of the thick, nostalgic treats you remember!
Can I substitute margarine for butter in this recipe?
While possible, I strongly recommend using butter for that authentic 1970s flavor and texture. Butter adds richness and helps create the signature crackly tops. If you must use margarine, choose a high-quality brand with at least 80% fat content and increase the baking time by 1-2 minutes to compensate for its lower melting point.
What’s the best way to store these cookies for maximum freshness?
For short-term storage, keep them in an airtight container at room temperature for up to 5 days. For longer storage, freeze the baked cookies between parchment paper for up to 3 months. Thaw at room temperature—they’ll taste even better the next day as the flavors meld! The secret is letting them cool completely before storing to prevent sogginess.
Can I make these cookies gluten-free?
Yes, but with adjustments: replace the all-purpose flour with a 1:1 gluten-free baking blend and add an extra 0.5 teaspoon xanthan gum to improve texture. Keep the same baking time but watch closely—they may spread slightly more. For best results, use a blend with xanthan gum already included, like Bob’s Red Mill.
Why do my M&Ms sometimes turn white after baking?
This happens when the milk chocolate coating in M&Ms melts completely and then re-solidifies. To prevent it, slightly underbake by 30 seconds and avoid overmixing the dough. If it happens, pop the cookies back in the oven for 1-2 minutes to restore the color. The flavor won’t be affected—just the appearance!

- Pea Soup Instant Pot Recipe: Velvety Green Smoothness in 20 Minutes - November 1, 2026
- Pork Loin Pulled Pork Crock Pot Recipe: Slow-Smoked Tenderness With Zero Dryness - November 1, 2026
- Baked Potatoes in Crock Pot Recipe: Buttery Interiors and Crispy Top Magic - November 1, 2026