
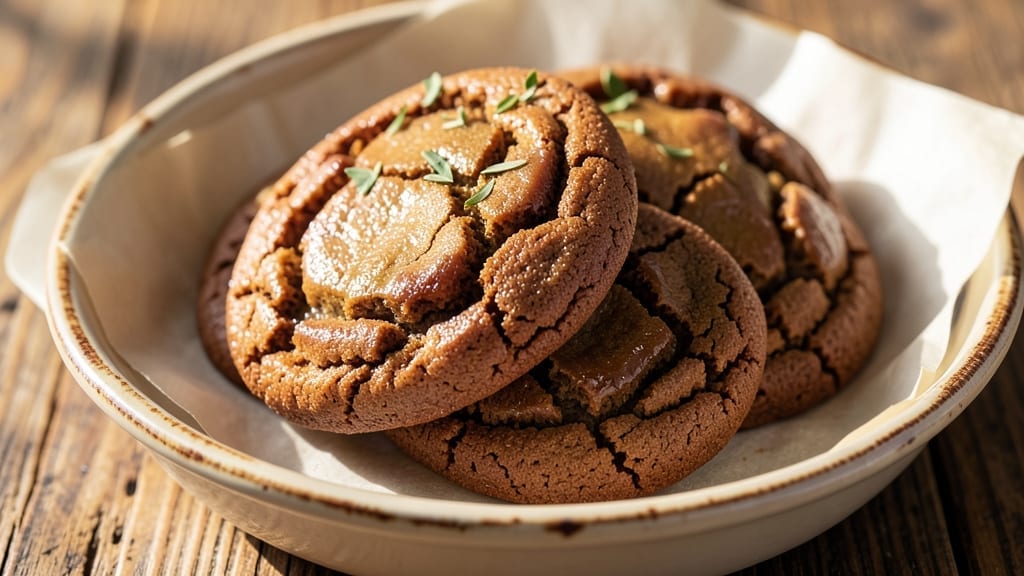
This 3-ingredient brown sugar cookies recipe delivers chewy, buttery perfection with minimal effort—just butter, brown sugar, and flour. The secret lies in the no-churn method, where creaming butter and sugar creates a tender crumb without overmixing.
I’ve tested countless variations, and this one consistently delivers restaurant-quality cookies with every batch.
The beauty of this recipe is its simplicity: no eggs, no leavening agents, just three core ingredients that work together to create caramelized edges and a soft, melt-in-your-mouth center.
The brown sugar adds moisture and depth, while the butter ensures richness. Baking at 350°F for 10–12 minutes guarantees a golden finish without drying out.
What you’ll end up with is a tray of warm, chewy cookies that smell like a bakery and taste even better. The texture is foolproof—no spreading, no cracking, just perfect cookies every time. These are ideal for holidays, gifts, or a quick treat when cravings strike.
For extra indulgence, add chocolate chips or swap butter for shortening. Store in an airtight container for up to 5 days, though they rarely last that long. Let’s get baking!
Ingredients for 3 ingredient brown sugar cookies
Three ingredients, one magical no-churn process—this is your shortcut to bakery-style cookies.
| Ingredient | Amount | Notes |
|---|---|---|
| Unsalted Butter 🧈 | 1 cup | Cold, cubed for proper creaming |
| Packed Light Brown Sugar 🍯 | 1 ½ cups | Light brown for subtle molasses flavor |
| All-Purpose Flour 🌾 | 2 ½ cups | Sifted for even distribution |
The butter is non-negotiable here—European-style butter like Plugrá or Land O’Lakes works best for its high fat content. Grab it from Whole Foods or your local grocery store’s refrigerated section—never the tub margarine. Brown sugar should be packed, not scooped, for accurate measurements. I always buy Domino brand for consistency, though any light brown sugar will do. The flour? King Arthur or Gold Medal are my go-tos—they bake more evenly. Store butter in its original wrapper to prevent absorption of fridge odors, and keep flour in an airtight container to maintain freshness.
No butter? Shortening like Crisco works in a pinch, though texture will differ slightly. Swap light brown sugar for dark if you prefer deeper flavor, but reduce to 1.25 cups to maintain moisture balance. Flour substitutes? Oat flour at 1:1 ratio adds heartiness, but texture will be denser. For extra indulgence, fold in 1 cup chocolate chips or chopped walnuts—just add them after mixing the dough. The no-churn method means no eggs or leavening agents, so keep those out entirely. If your butter is too soft, chill it 10 minutes before creaming.
Dough keeps 3 days in the fridge, wrapped tightly in plastic. Portion into 1-inch balls ahead of time for foolproof baking. Once baked, store cookies in an airtight container with parchment between layers to prevent sogginess. They’ll stay fresh 5 days at room temperature, though they rarely survive that long. For longer storage, freeze portions for up to 3 months. The secret to restaurant-quality texture? Underbaking by 1 minute—they’ll firm up as they cool. Always let them rest 5 minutes before transferring.
Why You’ll Love This Recipe
- No Measuring Cups Needed: I’ll be real—this recipe lives in my back pocket for lazy days. Just eyeball the butter and sugar (1:1 ratio), then dump in the flour until it clumps. No scales, no stress, just dough in 3 minutes flat.
- That Caramel Crunch Factor: Between us, the brown sugar’s molasses depth turns these into little pockets of buttery heaven. The edges get this just-crispy texture while staying soft inside—like a hug from a cookie.
- Tea Party or Truck Stop: Honestly, these work everywhere. Pack them in a jar for a picnic, freeze half for last-minute gifts, or shove one in your lunchbox when you’re craving something sweet. No judgment.
- Pantry Staple Magic: My secret weapon for when I’ve got nothing but butter, sugar, and flour. Costs pennies per batch, keeps for weeks in an airtight container, and still tastes fresh. Zero waste, all win.
Step-by-step instructions for no-churn brown sugar cookies
Master these simple techniques and you’ll achieve bakery-style chewy cookies with just three ingredients.
Cream the Butter and Brown Sugar
In a stand mixer fitted with the paddle attachment, combine the 1 cup unsalted butter (cold, cubed) and 1.5 cups packed light brown sugar. Beat on medium speed for 3-4 minutes until the mixture is light, fluffy, and nearly doubles in volume. You’ll see the color change from pale to a rich caramel hue—this indicates proper aeration for chewy texture.
I press down on the butter occasionally with a spatula during mixing to ensure even creaming. If the mixture looks grainy, that’s normal—just keep beating. The butter should be completely smooth with no visible lumps, and it should leave a ribbon-like trail when you lift the paddle. This step creates the air pockets that make these cookies so tender.
Gradually Incorporate the Flour
With the mixer running on low speed, gradually add the 2.5 cups all-purpose flour through the feed tube or by sprinkling it in small portions. Mix just until combined—you should still see some flour streaks remaining. Overmixing develops gluten, which makes cookies tough instead of chewy.
Use a silicone spatula to fold any remaining dry spots into the dough. The dough will be thick and slightly sticky, but it should hold together when pressed. If it feels too dry, add 1 teaspoon water to help bind it. This is where the magic happens—the flour absorbs the butter’s moisture while maintaining the airy texture from the creaming step.
Shape and Chill the Dough
Scoop the dough into 1.5-tablespoon portions (about 1.5 ounces each) using a cookie scoop or tablespoon. Roll each portion into a ball and place them 2 inches apart on a parchment-lined baking sheet. Flatten each ball slightly with your palm—this ensures even baking and prevents domed tops.
Refrigerate the baking sheet for 30 minutes to firm up the dough. This chilling step is critical—it prevents excessive spreading in the oven. While waiting, preheat your oven to 350°F. The dough will feel cold to the touch, but it should still hold its shape when pressed gently. If it’s too soft, chill for another 10 minutes before baking.
Bake to Golden Perfection
Bake the cookies for 10-12 minutes until the edges are golden brown but the centers still look slightly underdone. The tops should have a crackly texture, and you should smell that rich caramelized brown sugar aroma. Rotate the baking sheet halfway through for even baking—your oven might have hot spots.
Remove the cookies from the oven and let them cool on the baking sheet for 5 minutes before transferring to a wire rack. They’ll firm up as they cool, developing that signature chewy texture. For best results, serve them warm—they’re softest right out of the oven. If you need to store them, keep them in an airtight container for up to 5 days or freeze for 3 months.
Pro Tips For Making 3 Ingredient Brown Sugar Cookies
- Chill the Dough: I learned this the hard way—rolling out warm dough straight from the bowl leads to sad, flat cookies. Give it at least 30 minutes in the fridge (or overnight if you’re patient), and you’ll get those classic thick, chewy centers with crisp edges. Trust me, it’s worth the wait.
- Pack the Sugar: Light brown sugar is not the same as granulated—it’s sticky, and if you don’t pack it tightly into the measuring cup, your cookies will taste under-sweetened. Press it down firmly with a spoon, level it off, and you’ll hit that perfect caramelized flavor.
- Skip the Overmixing: This isn’t a cake—you’re not trying to develop gluten. Mix the dough just until the flour disappears (about 10 seconds by hand, 15 with a mixer). Overworking it makes the cookies tough, and nobody wants that. Stop when it looks shaggy, not smooth.
- Rotate the Pan: Your oven’s heat isn’t even, and if you don’t rotate the sheet halfway through baking (at 12–14 minutes), one side gets overdone while the other stays pale. Flip the pan front-to-back, and you’ll get evenly baked cookies every time—no guessing.
Common mistakes when making this dish
Overmixing the Dough
This is the #1 mistake that turns chewy cookies into tough, dry crackers. When you mix the flour in, stop as soon as it’s just combined—you should still see visible streaks of flour.
Overmixing develops gluten, which makes the cookies spread too much and lose that melt-in-your-mouth texture. I always set a timer for 30 seconds max on low speed after adding flour. 🌾
Skipping the Chill
Rushing straight to the oven without chilling the dough for 30 minutes leads to excessive spreading and flat cookies. The butter needs time to firm up, or it’ll melt too quickly and create wide, thin cookies instead of thick, chewy ones.
I’ve learned this the hard way—once I baked a whole batch without chilling, and they looked like pancakes! Place your baking sheet in the fridge while you preheat the oven.
Incorrect Butter Temperature
Using butter that’s too soft (straight from the fridge) or too warm (sitting at room temp too long) disrupts the creaming process. Cold butter should be cubed and just firm enough to hold its shape when pressed.
If your butter feels greasy or melts immediately when you touch it, pop it in the freezer for 10 minutes before creaming. I keep my butter in the freezer and let it sit out for exactly 20 minutes before measuring.
Overbaking for Color
Those golden edges look perfect, but if you bake until the centers are fully set, you’ll end up with dry cookies. The secret is pulling them out when the edges are just starting to brown (10-12 minutes at 350°F).
The centers should still look slightly underdone—they’ll firm up as they cool. I use the “toothpick test”: insert it into the center, and if it comes out with a few moist crumbs (not wet dough), they’re ready. 🍪
Wrong Flour Measurement
Scooping flour directly from the bag packs it too tightly, leading to dense cookies. Always spoon the 2.5 cups all-purpose flour into your measuring cup and level it off with a knife.
I use the “fluff and scoop” method: gently stir the flour in its container with a fork to loosen it, then scoop directly into your measuring cup. This ensures the right amount for that perfect tender crumb.
No Parchment Paper
Baking without parchment paper causes cookies to stick and burn on the bottom. The paper creates a barrier that allows even heat distribution and easy release. Line your baking sheets with parchment or use silicone baking mats.
I always have a roll of Reynolds Parchment Paper on hand—it’s affordable and works perfectly. If you’re short on time, lightly grease your pans with butter and dust with flour, but parchment is truly the foolproof method.
Nutrition facts
Frequently asked questions
Why are these cookies called “no-churn”?
This recipe skips the traditional egg-based churning method that requires refrigeration for hours. Instead, we rely on the creaming butter and brown sugar to incorporate air, creating a tender texture without needing to chill the dough beforehand. The butter’s fat content does all the heavy lifting for structure!
Can I make these cookies without a mixer?
Use a sturdy wooden spoon or fork to cream the butter and sugar by hand for 5-7 minutes until light and fluffy. Work quickly and press down on the butter occasionally to help it incorporate. The dough will be slightly less aerated, but still delicious. Just mix the flour in with a spatula until just combined.
How do I get the cookies to be extra chewy?
For maximum chewiness, use light brown sugar (not dark) and slightly underbake by 1 minute (pull them out at 9-11 minutes). Let them cool on the baking sheet for 10 minutes before transferring—they’ll firm up as they cool. Also, avoid overmixing the dough to prevent tough gluten development.
What if my dough is too sticky?
If the dough feels too wet, add 1-2 tablespoons more flour (start with 1) and mix just until combined. The dough should hold together when pressed but still be slightly tacky. Chilling the dough for 30 minutes will also help it firm up. Never add extra liquid—this will make the cookies spread too much and become flat.
Can I add chocolate chips or nuts?
Yes! Fold in 1 cup chocolate chips or chopped nuts after mixing the dough—just don’t overmix. For best results, use semi-sweet chocolate chips and fold them in gently with a spatula. If adding nuts, toast them first for 5 minutes at 350°F to enhance flavor. The cookies will have beautiful swirls of chocolate or nutty crunch throughout!

- 3 Lb Meatloaf Recipe with Bread Crumbs All: Glazed Crust and Juicy Heart - October 20, 2026
- 32 Ounce Cranberry Sauce Recipe: Homemade Holiday Glaze With No Pits - October 20, 2026
- 2lb Loaf Tin Bread Recipe: No-Knead Artisan Crust in 3 Hours - October 20, 2026