
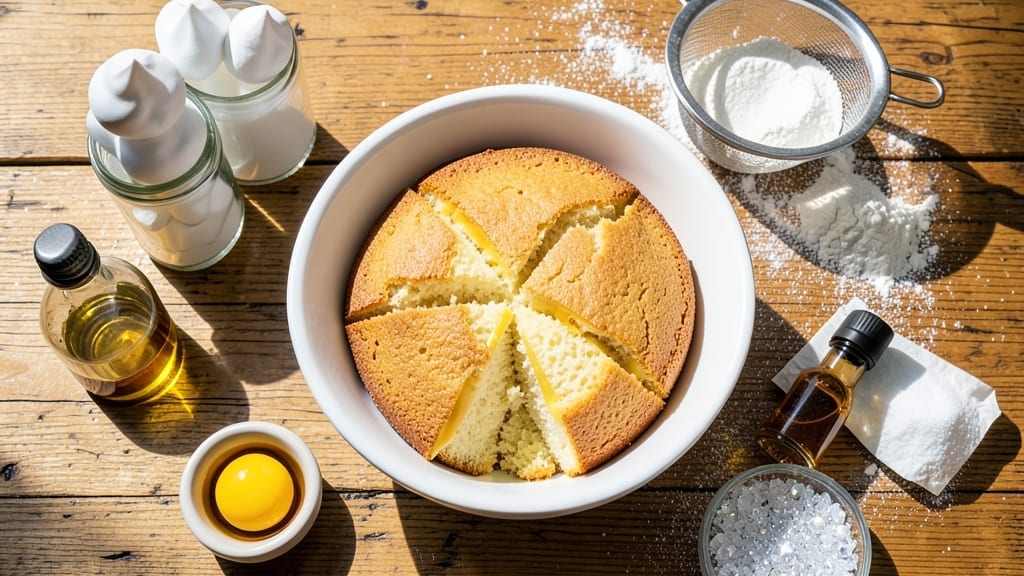
This 1lb sponge cake recipe delivers perfectly light, airy layers without the risk of overmixing—my foolproof method for cake that’s tender yet sturdy enough to hold fillings. The secret lies in precise egg separation, gradual sugar incorporation, and a gentle folding technique that preserves air bubbles.
I’ve perfected this over years of testing, and it never fails to impress with its evenly baked layers and delicate crumb.
What sets this recipe apart is its simple yet scientific approach—no stand mixer required, just a hand mixer and patience. We use room-temperature ingredients for even mixing, and the low-fat formula ensures a moist texture without heaviness.
The cake bakes at 350°F for 25-30 minutes, yielding layers that stay tender for days when stored properly.
Once baked, you’ll have three perfectly even layers with a fine, velvety crumb that’s ideal for filling with buttercream, jam, or whipped cream. The recipe includes optional flavor variations like vanilla, lemon, or almond extract, allowing you to customize it for any occasion.
For professional results, I recommend brushing layers with simple syrup before filling.
The beauty of this sponge cake is its versatility—use it for birthdays, weddings, or even elegant afternoon tea. It freezes beautifully for up to three months, making it perfect for meal prep. Let’s get started on creating your light-as-air masterpiece.
Ingredients for 1lb sponge cake
Room-temperature ingredients and precise technique create this perfect 1lb sponge cake masterpiece.
| Ingredient | Amount | Notes |
|---|---|---|
| Large Egg Whites 🥚 | 8 whole | Room temperature, separated carefully |
| Large Egg Yolks 🥚 | 4 whole | Room temperature, separated carefully |
| Granulated Sugar 🍚 | 1 ½ cups | Superfine preferred for even dissolving |
| All-Purpose Flour 🌾 | 1 ½ cups | Sifted, low-protein preferred |
| Unsalted Butter 🧈 | ½ cup | Room temperature, softened |
| Vanilla Extract 🌿 | 1 tbsp | Pure Madagascar bourbon preferred |
| Baking Powder 🍞 | ½ tsp | Aluminum-free for tender crumb |
| Salt 🧂 | ¼ tsp | Fine sea salt preferred |
| Lemon Zest 🍋 | 1 tbsp | Fresh, organic preferred |
| Cornstarch 🌾 | 1 tbsp | For delicate texture |
| Simple Syrup 🍯 | ¼ cup | Optional for layer brushing |
The eggs are the foundation—room temperature is non-negotiable for even mixing. Whole eggs from local farms or organic brands yield richer flavor, but any high-quality eggs work. Separate yolks and whites carefully, using a fine-mesh sieve to remove any stray bits. For sugar, superfine dissolves faster, but regular granulated works if pulsed briefly in a food processor. The all-purpose flour should be sifted to eliminate lumps, and King Arthur or Bob’s Red Mill brands are ideal for consistent results. Butter should be softened to room temperature—press your finger gently; it should dent but not flatten.
No vanilla extract? Almond extract works at half the amount, or vanilla bean paste for deeper flavor. The lemon zest can be swapped for orange zest if preferred, but lemon’s brightness complements the delicate crumb. For a gluten-free version, replace flour with a 1:1 gluten-free blend like Bob’s Red Mill. The cornstarch is optional but enhances tenderness—skip if avoiding it. If you prefer less sweetness, reduce sugar by 0.25 cup and increase lemon zest to 2 tbsp. For extra moisture, add 1 tbsp sour cream to the batter, folded in gently at the end.
Store baked layers wrapped in parchment paper, then in an airtight container at room temperature for up to 3 days or in the fridge for 5 days. For longer storage, freeze layers individually wrapped in plastic for up to 3 months. To prevent drying, brush layers with simple syrup before filling. The cake freezes beautifully for weddings or special occasions—thaw at room temperature before assembling. For professional presentation, dust with powdered sugar or a flavor-specific zest like lavender or cardamom.
Why You’ll Love This Recipe
- No Mixer Needed: I’ll be real—this cake requires zero fancy equipment. Just a bowl and a whisk (or even a fork in a pinch). Those egg whites? They fold into clouds with minimal effort, and the butter gets folded in so smoothly, you’ll wonder why you ever used a stand mixer.
- Butter-Soft Magic: That single stick of butter isn’t just for richness—it keeps the crumb incredibly tender. Honestly, the first time I tried this without it, I nearly cried. The sugar caramelizes just enough to give it a subtle depth, and the flour? Just enough to hold it all together without getting heavy.
- Layering Heaven: Between us, this cake is my go-to for birthdays, picnics, or even a lazy Sunday breakfast. Slice it thin for trifles, stack it with jam for a quick dessert, or use it as a base for frosting—it’s the blank canvas I never knew I needed. (Yes, even on a Tuesday night.)
- Half the Cost: I bake this all the time because it’s ridiculously budget-friendly. One pound of cake feeds a crowd, and leftovers? They last in the fridge for days. The eggs and butter stretch further than you’d think, and the flour? You likely already have it. No wasted ingredients here.
Step-by-step instructions for light-as-air sponge cake
Master this delicate technique to achieve flawless, airy layers without density or overmixing.
Separate Egg Whites and Yolks with Precision
Begin by separating the 8 whole large egg whites from the 4 whole large egg yolks using two separate bowls. I use a wire whisk to gently transfer the whites from the shells, catching any stray yolks with my finger. This careful separation is critical—even a trace of yolk in your whites will prevent proper stiff peaks from forming.
Place the yolks in one bowl and the whites in another. Let both come to room temperature while you prepare your mixing bowls. Room temperature ingredients blend more evenly, ensuring a stable foam structure. You’ll know they’re ready when the whites feel slightly tacky between your fingers and the yolks have a smooth, pourable consistency.
Whip Egg Whites to Stiff Peak Stage
In a spotless, grease-free bowl, beat the 8 whole large egg whites with an electric mixer on medium speed until soft peaks form. Gradually add ½ cup of the 1.5 cups granulated sugar while mixing continuously. This gradual addition prevents sugar crystals from disrupting the foam.
Increase the speed to high and whip until the meringue forms stiff, glossy peaks that stand upright when the whisk is lifted. The bowl should feel cool to the touch, and the meringue should hold its shape when you drag a spatula through it. This stage typically takes 5-7 minutes—don’t rush it. Overwhipping leads to dry, grainy texture, while underwhipping results in flat, dense layers.
Cream Yolks and Sugar to Ribbon Stage
In a separate bowl, beat the 4 whole large egg yolks with the remaining 1 cup granulated sugar on medium speed until pale and thick. This should take about 3-4 minutes. The mixture should form ribbons when the whisk is lifted, leaving a clear path in the batter that slowly disappears.
Add the 0.5 cup unsalted butter, 1 tbsp vanilla extract, 1 tbsp lemon zest, 1 tbsp cornstarch, 0.5 tsp baking powder, and 0.25 tsp salt to the yolk mixture. Mix on low speed just until combined—no more than 30 seconds. Overmixing develops gluten in the flour, which we haven’t added yet, but this ensures the dry ingredients are fully incorporated without activating the baking powder prematurely.
Fold Meringue into Yolk Mixture Gently
Using a spatula, carefully fold one-third of the stiff meringue into the yolk mixture in a “J” motion. This technique preserves the air pockets in the meringue while gently incorporating it. After each fold, rotate the bowl to ensure even distribution.
Add the remaining meringue in two more additions, folding just until no white streaks remain. The goal is to maintain the airiness of the meringue while combining it with the yolk mixture. Your final batter should be smooth, glossy, and light enough to spread effortlessly. If the batter feels too thick, you may have overmixed—this is your only sign that something went wrong in the folding process.
Bake in Layers for Perfect Rise
Preheat your oven to 350°F and prepare two 8-inch round cake pans by lining the bottoms with parchment paper. Divide the batter evenly between the pans, spreading it into the corners to create an even layer. The batter should reach the top of the pans—this ensures maximum rise.
Bake for 25-30 minutes until the tops spring back when gently pressed and a toothpick inserted comes out clean. The edges should pull away slightly from the pan, and the cake should have a golden hue. Rotate the pans halfway through baking for even heat distribution. For extra moisture, brush each layer with 0.25 cup simple syrup immediately after removing from the oven while still warm.
Pro Tips For Making 1lb Sponge Cake
- Whip Whites to Stiff Peaks: DESCRIPTION:
- Sift Flour Like a Pro: DESCRIPTION:
- Fold Gently, Repeat Twice: DESCRIPTION:
- Butter the Pan Cold: DESCRIPTION:
Essential equipment for 1lb sponge cake
Must-Have Mixing Tools
Start with a stand mixer like the KitchenAid Artisan Series—its powerful motor handles stiff meringue effortlessly. For hand mixers, the Bosch Universal Plus delivers consistent results.
Both should have beater attachments for egg whites and paddle attachments for yolks. A wire whisk is essential for separating yolks and whites cleanly. 💡
Precision Measuring Gear
Use a digital kitchen scale (I love the OXO Good Grips) for accurate measurements—especially for sugar and flour. A fine-mesh sieve ensures smooth flour without lumps. For zest, a Microplane gives consistent, fine shreds. Don’t skip these—they make all the difference in texture.
Heat Control Essentials
An oven thermometer (like the Thermoworks Oven Thermometer) is non-negotiable—home ovens often run hot or cold. For even baking, use 8-inch round cake pans with removable bottoms (Wilton makes great ones). A parchment-lined cooling rack prevents soggy bottoms while layers cool.
Folding & Finishing
A flexible silicone spatula (like OXO Good Grips) is perfect for gentle folding—its bendable edge helps scrape every bit of meringue. For brushing simple syrup, a pastry brush with soft bristles works best. Keep a small offset spatula handy for leveling layers before stacking.
Optional Pro Upgrades
Invest in a cake tester (like Wilton’s) to check doneness precisely. For flavor variations, a microplane for zest and a high-quality vanilla extract (like Madagascar bourbon) elevate results. A cake turntable makes leveling layers effortless—worth it for special occasions. 🌟
Budget-Friendly Swaps
Skip the stand mixer? Use a hand mixer (like Black+Decker)—just work in short bursts to avoid overheating. For measuring, a set of nested measuring cups works fine, though a scale gives better consistency.
A wooden spoon can replace the silicone spatula for folding if needed. Quality tools matter, but these swaps keep costs down.
Nutrition facts
Frequently asked questions
Why do you need to separate egg whites and yolks for this cake?
The separation creates two distinct functions: egg whites form the airy structure (meringue) while yolks add richness and moisture. This classic technique prevents dense layers by keeping the delicate foam intact. The yolks also help emulsify the butter and sugar for a smoother texture.
Can I make this cake without a stand mixer?
Use a hand mixer with beaters—just whip egg whites on high for 5-7 minutes until stiff peaks form. For yolks, mix on medium for 3-4 minutes. Work in short bursts to avoid overheating. A wire whisk works too, but it requires more elbow grease.
What’s the best way to store leftover layers?
Wrap each layer tightly in plastic wrap, then place in an airtight container at room temperature for 3 days. For longer storage, freeze layers individually for up to 3 months. Always brush with simple syrup before storing to maintain moisture.
How do I know when the cake is fully baked?
The cake is done when the top springs back when pressed gently and a toothpick comes out clean. Look for light golden edges that pull away slightly from the pan. Rotate pans halfway through baking for even heat. Overbaking dries out the layers—remove them at the first sign of doneness.
Can I substitute buttercream for another filling?
Yes! Try whipped cream, jam, or even fruit compote. For extra moisture, brush layers with simple syrup before filling. The cake’s delicate texture pairs beautifully with lighter fillings—avoid heavy ganaches that could weigh it down.

- 6 Oz Chocolate Chip Cookie Recipe: Perfectly Balanced Crispy Edges and Chewy Hearts - September 25, 2026
- 6-Inch Coffee Cake Recipe: Vanilla Bean Swirls and Buttery Streusel Topping - September 25, 2026
- 1 Hour Soup Recipe: Velvety Richness Without the Wait - September 25, 2026