
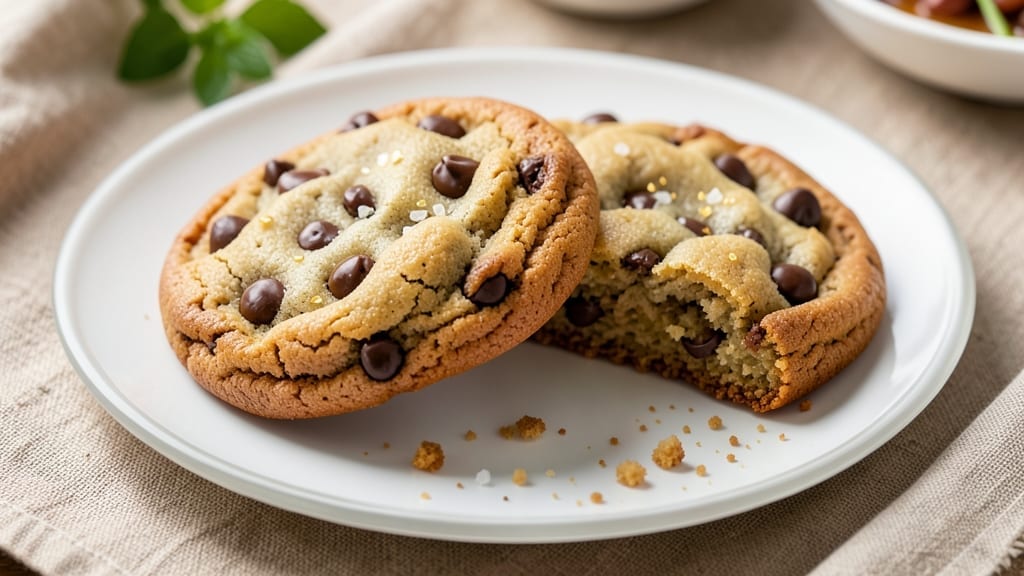
Here’s your 2 big chocolate chip cookie recipe—restaurant-quality cookies with crisp edges, chewy centers, and pools of melty chocolate that vanish in seconds. 💛 The secret lies in precise ingredient ratios and a 30-minute dough chill. ensures thick, sturdy cookies that spread just enough for that perfect balance.
I’ve baked hundreds of batches, and this method never fails to impress, whether you’re feeding a crowd or craving a single indulgent cookie.
The foundation of these cookies is a 1:1:1 ratio of brown sugar to white sugar to butter, creating the ideal caramelized crust and tender interior. Using two types of chocolate chips—semi-sweet and milk—adds depth of flavor, while a pinch of salt enhances every bite.
The dough comes together in 15 minutes, but that chill time is non-negotiable; it’s what transforms a good cookie into a foolproof masterpiece.
By the time they emerge from the oven, your cookies will be golden brown with crisp edges and a soft, chewy center that’s impossible to resist. The chocolate stays gooey, and the aroma fills your kitchen with warmth.
These aren’t just cookies—they’re a textural and flavorful experience that rivals any bakery. Ready to bake?
For extra indulgence, try adding a sprinkle of flaky sea salt on top before baking, or swap in dark chocolate chunks for a richer twist. The dough can be prepped ahead and chilled overnight, making it the perfect make-ahead dessert for parties or last-minute cravings.
Ingredients for 2 big chocolate chip cookie
Double the dough, double the joy—these 24 cookies use premium ingredients for that perfect crunch and chew.
| Ingredient | Amount | Notes |
|---|---|---|
| Unsalted Butter 🧈 | 2 cups | Cold, cubed for even mixing |
| Packed Light Brown Sugar 🍚 | 2 cups | Lightly packed, no clumps |
| Granulated White Sugar 🍚 | 2 cups | Standard grocery store sugar |
| Large Eggs 🥚 | 4 whole | Room temperature preferred |
| Vanilla Extract 🌿 | 2 tsp | Pure, high-quality extract |
| All-Purpose Flour 🌾 | 5 cups | Sifted, spooned lightly |
| Baking Soda 🧂 | 1 tsp | Pure, no aluminum |
| Diamond Crystal Kosher Salt 🧂 | 1 tsp | Fine grain preferred |
| Semi-Sweet Chocolate Chips 🍫 | 3 cups | Enjoy Life brand if nut-free |
| Milk Chocolate Chips 🍫 | 1 ½ cups | Hershey's or Guittard |
| Flaky Sea Salt 🧂 | 1 tsp | For final sprinkle |
The butter matters most—European-style or Irish butter gives the best flavor, but Land O’Lakes or Plugrá work in a pinch. Buy it in 1-pound blocks from Whole Foods or Costco for the freshest, least water content. Brown sugar should be packed lightly—no pressing down hard. For chocolate chips, Enjoy Life brand is my go-to if allergies are a concern, but Ghirardelli or Guittard are premium choices. The 1:1:1 sugar ratio is non-negotiable—it’s what creates that perfect caramelized crust while keeping the center chewy.
No vanilla extract? Vanilla bean paste or 1 tsp vanilla sugar works, but pure extract is ideal. Short on milk chocolate? Swap for white chocolate chips, though the flavor will shift. For flour, King Arthur or Gold Medal are reliable, but any all-purpose works. The baking soda must be fresh—if it smells like vinegar, toss it. Need a nut-free option? Enjoy Life chocolate chips are made in a dedicated facility. And yes, you can use dark chocolate chunks instead of chips if that’s what you’ve got—just chop them yourself for even distribution.
Dough keeps for 48 hours in the fridge, wrapped tightly in plastic. For longer storage, freeze portions for up to 3 months. Baked cookies stay fresh for 5 days in an airtight container, though they’re best enjoyed within 2 days. Pro tip: Underbake slightly—they firm up as they cool. And if you’re making these for a crowd, double the batch—trust me, you’ll want seconds.
Why You’ll Love This Recipe
- No Mixing Madness: I swear by this dough—just creaming butter and sugars until fluffy, then folding in the rest. No stand mixer? A sturdy bowl and your forearm work just fine. (Yes, even on a Tuesday night.)
- Buttery-Sweet Magic: That perfect ratio of brown and white sugar? It’s what makes these cookies chewy on the inside with crisp edges—plus, the vanilla extract really sings when melted into the butter first. Honestly, the first bite is always a test of willpower.
- Party in a Pan: Double the dough, bake it once, and you’ve got a crowd-pleaser that’s half the work. Freeze half the batch for later, and boom—you’ve just saved yourself from last-minute stress. (My go-to for holiday gatherings, because let’s be real, no one turns down a cookie.)
- Budget-Friendly Indulgence: A single batch costs pennies but tastes like you spent hours. Butter and sugar stretch far, and you can even swap in store-brand chips if needed. Between us, these are the cookies I make when I’m broke but still want to feel fancy.
Step-by-step instructions for double-batch chocolate chip cookies
Here’s how to make 24 perfect cookies with that signature chewy center and crispy edges.
👨🍳 Step 1: Cream the Butter and Sugars to Peak Fluffiness
In a stand mixer fitted with the paddle attachment, combine the 2 cups unsalted butter (cold, cubed) with the 2 cups packed light brown sugar and 2 cups granulated white sugar. Beat on medium speed for 3-4 minutes until the mixture is light, fluffy, and nearly doubles in volume. You’ll see it go from pale to a creamy, almost frothy texture—this incorporates air that creates those beautiful crackly tops.
I like to scrape down the sides every 30 seconds to ensure even mixing. The butter should be completely smooth with no graininess, and the sugars fully incorporated. If you’re using room-temperature butter, it’ll blend faster, but cold butter gives better texture control for thicker cookies. Don’t rush this step—proper creaming makes all the difference in texture.
🍳 Step 2: Add Eggs and Vanilla for Perfect Binding
With the mixer running on low speed, add the 4 whole large eggs one at a time, mixing just until each is fully incorporated. After the last egg, add the 2 teaspoons vanilla extract and mix for another 10 seconds. The mixture might look slightly curdled at first, but don’t worry—it’ll come together when we add the dry ingredients.
This is where the magic happens. The eggs provide structure while keeping the cookies tender. Using room-temperature eggs helps them blend smoothly, but if yours are cold, just let them sit at room temperature for 15-20 minutes before adding. The vanilla extract adds depth of flavor that you’ll taste in every bite—don’t skip this step, even if you’re using imitation vanilla.
👨🍳 Step 3: Combine Dry Ingredients for Texture Perfection
In a separate bowl, whisk together the 5 cups all-purpose flour, 1 teaspoon baking soda, and 1 teaspoon diamond crystal kosher salt. Sift the flour first if it’s lumpy, then add the baking soda and salt. This ensures even distribution and prevents pockets of undissolved baking soda that could make your cookies taste bitter.
With the mixer on low speed, gradually add the dry ingredients to the wet mixture. Mix just until combined—you should still see some flour streaks. Overmixing develops gluten, which makes cookies tough. Stop mixing as soon as the dough comes together. This is crucial for maintaining that perfect chewy texture we’re after. The dough will be thick and slightly sticky, which is exactly what we want.
🥘 Step 4: Fold in Chocolate and Chill the Dough
Remove the bowl from the mixer and gently fold in the 3 cups semi-sweet chocolate chips and 1.5 cups milk chocolate chips using a silicone spatula. Be careful not to overmix—the chocolate should be evenly distributed throughout the dough. I like to use a mix of semi-sweet and milk chocolate for that perfect balance of rich and creamy flavors.
Cover the bowl with plastic wrap and refrigerate for at least 1 hour, but ideally 2-3 hours or even overnight. Chilling the dough is non-negotiable—it firms up the butter, prevents excessive spreading, and allows the flour to fully hydrate. This step is what transforms good cookies into exceptional ones. If you’re short on time, you can chill the dough in the freezer for 20-30 minutes, but refrigerating gives the best results.
🔥 Step 5: Bake to Golden Perfection with Crispy Edges
Preheat your oven to 350°F and line two baking sheets with parchment paper. Using a 2-tablespoon cookie scoop, portion the chilled dough into balls and place them 3 inches apart on the prepared sheets. I like to use a scoop for uniform size, but you can also roll the dough into balls by hand—just keep them consistent in size for even baking.
Bake for 11-13 minutes until the edges are golden brown but the centers still look slightly underdone. They’ll continue cooking on the hot pan after you remove them from the oven. The cookies should be soft in the middle with crispy edges—this is the hallmark of a perfect chocolate chip cookie. As soon as they’re done, transfer them to a wire rack and let them cool for 5 minutes before sprinkling with the 1 teaspoon flaky sea salt. Enjoy them warm for the ultimate experience!
Pro Tips For Making 2 Big Chocolate Chip Cookie
- Cream Butter Cold: Take the butter straight from the fridge—no need to soften it first. I learned this the hard way after mixing dough that turned out greasy and spread too much. Cold butter creates pockets for the brown sugar to melt into, giving you that perfect chewy center.
- Pack the Sugar: Light brown sugar clumps like it’s holding a grudge. Use a fork or your hands to press it into the bowl—get those granules breaking up. This ensures even distribution and stops you from under-sweeting the dough. (Yes, even if it feels like overkill.)
- Skip the Overmixing: Mix the dough just until the flour disappears—about 30 seconds after that. I used to beat it like I was punishing it, and the cookies turned out dense and tough. Overmixing develops gluten, and nobody wants a chewy cookie that’s basically a cracker.
- Chill the Dough: Divide the dough into two discs, wrap them in plastic, and refrigerate for at least 2 hours. I know, I know—you want to bake them now. But this prevents spreading, deepens the flavor, and makes the cookies thicker. (Your future self will resist the urge to skip this.)
Dietary considerations for this dish
Gluten-Free Adaptation
Swap the all-purpose flour for a 1:1 gluten-free baking flour blend like King Arthur Measure for Measure or Bob’s Red Mill. These blends include xanthan gum, which mimics gluten’s structure. Use the same 5 cups measurement, but add ½ teaspoon extra xanthan gum if your blend doesn’t contain it.
Chill the dough 30 minutes longer to prevent spreading—gluten-free cookies tend to flatten more. 💫
Vegan Version
Replace the 2 cups butter with 2 cups vegan butter (like Miyoko’s or Earth Balance) or 2 cups coconut oil (solid). Use 4 flax eggs (4 tbsp ground flaxseed + 10 tbsp water, mixed and rested for 5 minutes).
Substitute milk chocolate chips for dairy-free ones (e.g., Enjoy Life or Pascha). The dough will be softer, so flatten balls slightly before baking. 🌱
Nut-Free Options
Stick to Enjoy Life chocolate chips (certified nut-free) and check labels on all ingredients—some vanilla extracts or baking soda brands process near nuts. Use sunflower seed butter (like SunButter) instead of regular butter for a nut-free fat source.
The texture stays chewy, but the flavor gains a subtle toasted note. Always verify facility protocols if allergies are a concern. ✨
Lower Sugar Swaps
Reduce the 2 cups white sugar to 1 cup and replace the rest with 1 cup monk fruit sweetener (like Lakanto) or 1 cup coconut sugar. The brown sugar can stay as-is for moisture.
Cookies will be slightly less crisp but still chewy. Pair with dark chocolate chips (70% cocoa) to balance sweetness. Taste-test and adjust—sweeteners vary in potency. 💡
Dairy-Free Chocolate
For a dairy-free twist, use vegan chocolate chips (e.g., Pascha or Hu) and ensure your butter substitute is dairy-free. The milk chocolate can be replaced with white chocolate chips (like Pascha’s) for a neutral base.
The texture remains identical, but the flavor profile shifts toward caramel and vanilla notes. Always check for hidden dairy in extracts or flours. 🍫
Nutrition facts
Frequently asked questions about double-batch chocolate chip cookies
Why does the dough need to chill for so long?
Chilling the dough for 2-3 hours (or overnight) is crucial for three reasons: it firms up the butter to prevent excessive spreading, allows the flour to fully hydrate for better texture, and gives the chocolate chips time to evenly distribute. Skipping this step results in flat, cakey cookies instead of the thick, chewy ones you want.
Can I use a different type of chocolate besides chips?
For a gooier center, use chopped dark or milk chocolate bars (70% cocoa or less). For a crunchier texture, try chocolate chunks or toffee bits. Just chop the chocolate into ½-inch pieces and fold it in like chips. Pro tip: Use both semi-sweet and milk chocolate for that perfect balance of rich and creamy flavors.
How do I adjust the recipe for smaller or larger batches?
This recipe makes 24 cookies. For 12 cookies, halve all ingredients. For 36 cookies, increase to 3 cups butter, 3 cups brown sugar, 3 cups white sugar, 6 eggs, and 7.5 cups flour. Keep the 1:1:1 sugar ratio and adjust chocolate chips proportionally. Always chill the dough longer for bigger batches to prevent spreading.
My cookies spread too much—what went wrong?
Over-spreading usually means the dough wasn’t chilled long enough or the butter was too soft. Next time, refrigerate the dough for 3+ hours or freeze it for 20 minutes before baking. Also, ensure your butter is cold but not frozen when creaming. Use a 2-tablespoon scoop for uniform size, and place cookies 3 inches apart on the baking sheet.
Can I make these cookies ahead of time?
Yes! The dough can be refrigerated for 48 hours or frozen for 3 months. Baked cookies stay fresh for 5 days in an airtight container, but they’re best enjoyed within 2 days for maximum chewiness. For parties, bake them 1-2 days ahead and reheat at 300°F for 5 minutes to restore warmth and softness.

- Baked Potatoes in Crock Pot Recipe: Buttery Interiors and Crispy Top Magic - November 1, 2026
- Braised Beef Short Ribs Recipe: Crock Pot Fall-Off-Bone Magic in 6 Hours - November 1, 2026
- Crock Pot Cocoa Recipe: Velvety Warmth With Hidden Spice Magic - November 1, 2026