
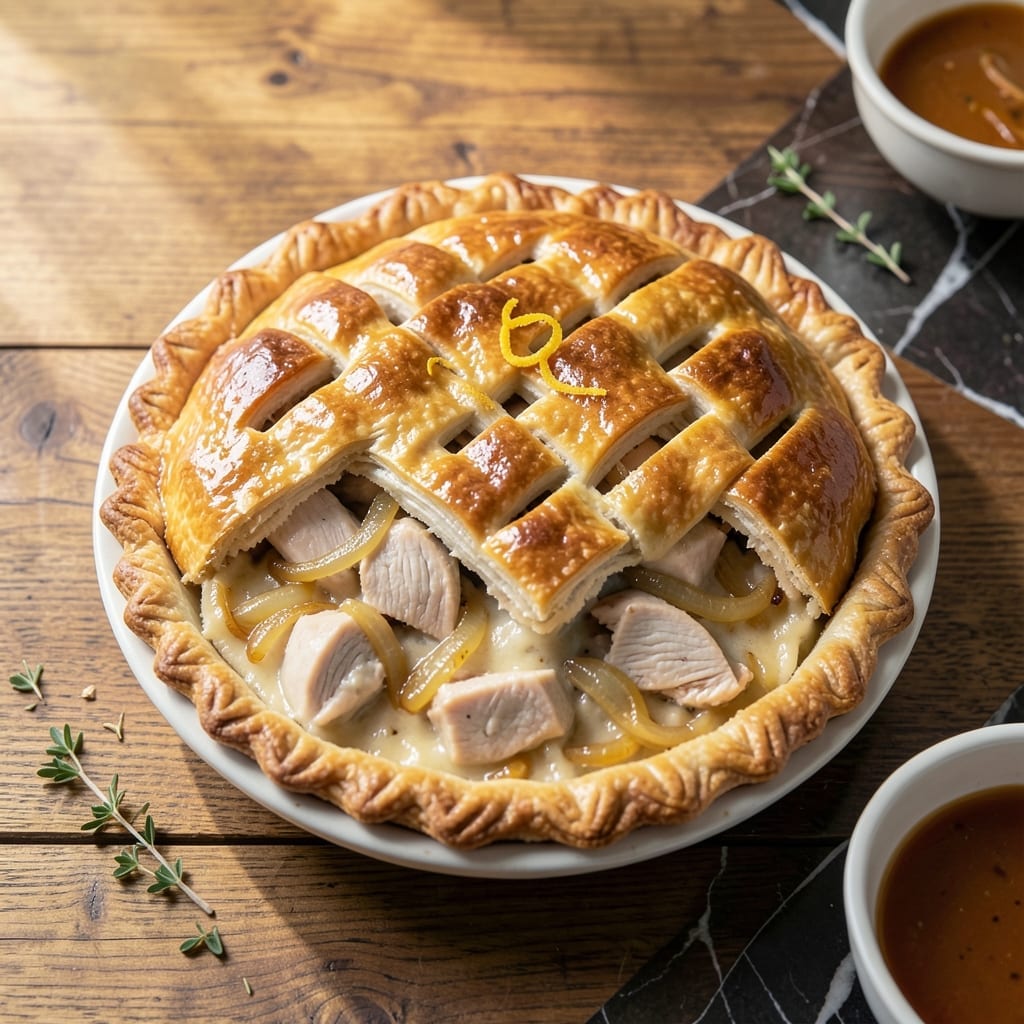
There’s nothing quite like a 2 crust chicken pot pie with its golden, flaky layers encasing a rich, savory filling. This recipe combines tender chicken, hearty vegetables, and a creamy sauce that bakes into pure comfort.
The bottom and top crusts create a perfect balance—crisp and buttery on the outside, while the filling stays thick and flavorful. I’ve refined this method to ensure the crust stays flaky without turning soggy.
Each bite delivers the satisfying crunch of pastry followed by the warm, creamy center. It’s a classic dish that feels special without requiring complicated techniques.
Perfect for family dinners or cozy weekends, this pie is worth every minute of effort.
Ingredients for 2 Crust Chicken Pot Pie
Golden pastry, tender chicken, and hearty vegetables create this comforting classic with perfect balance.
| Ingredient | Amount | Notes |
|---|---|---|
| All-Purpose Flour 🌾 | 2 ½ cups | Divided for crust and filling |
| Unsalted Butter 🧈 | 1 cup | Cold, cubed for flaky crust |
| Ice Water 💧 | ½ cup | For pie dough consistency |
| Salt 🧂 | 1 ½ tsp | Divided for dough and filling |
| Boneless Skinless Chicken Breasts 🍗 | 1 ½ lb | Diced into bite-sized pieces |
| Yellow Onion 🧅 | 1 whole | Medium, finely diced |
| Carrots 🥕 | 2 whole | Peeled and sliced into rounds |
| Celery Stalks 🌿 | 2 whole | Sliced thinly for texture |
| Frozen Peas 🌱 | 1 cup | No need to thaw |
| Garlic Cloves 🧄 | 3 cloves | Minced for depth of flavor |
| Chicken Broth 🍲 | 1 ½ cups | Low-sodium preferred for control |
| Whole Milk 🥛 | ½ cup | For creamy sauce base |
| Heavy Cream 🥛 | ½ cup | Full-fat for richness |
| Fresh Thyme Leaves 🍃 | 2 tsp | Stems removed, chopped |
| Black Pepper 🌶️ | 1 tsp | Freshly ground for best flavor |
The crust demands precision. King Arthur Flour is the gold standard for all-purpose—consistent protein content ensures flakiness. Use European-style butter (higher fat content) like Plugrá for superior layers. The butter must stay cold; I recommend freezing the cubes for 15 minutes before cutting into the flour. For the chicken, air-chilled, hormone-free breasts from Whole Foods yield the most tender results.
No thyme? Dried thyme at one-third the amount works, but fresh has brighter notes. Swap the peas for diced potatoes if preferred—just parboil first. For a richer sauce, replace milk with half-and-half. The broth can be homemade or Swanson’s low-sodium for store-bought. If avoiding dairy, full-fat coconut milk substitutes well for both milk and cream (though flavor shifts slightly).
Assemble the pie just before baking to prevent soggy crust. Refrigerate the dough 30 minutes before rolling. Leftovers keep 3-4 days refrigerated, though the crust softens. Freeze unbaked pies for up to 2 months—thaw overnight before baking.
Why You’ll Love This Recipe
- No-Fuss Crust: I use the same buttery flour crust on top and bottom—no rolling skills needed, just press it in.
- Rich Chicken Filling: The chicken stays tender in that creamy sauce, and the double crust keeps every bite packed with flavor.
- Feeds the Whole Table: I make one big pie for Sunday dinner, then slice leftovers for easy lunches all week.
- Budget Stretcher: Boneless chicken breasts and pantry basics keep costs low, but it tastes like a fancy restaurant meal.
Step-by-Step Instructions for 2 Crust Chicken Pot Pie
Master the technique for achieving golden, flaky layers encasing a creamy, vegetable-packed filling.
Step 1: Prepare the Double Pie Crust
In a large bowl, combine 2.5 cups all-purpose flour with 1 tsp salt. Cut in 1 cup cold unsalted butter, cubed, using a pastry cutter or your fingers until the mixture resembles coarse crumbs with pea-sized butter pieces visible. This creates the flaky layers when baked.
Gradually add 0.5 cup ice water, 1 tablespoon at a time, mixing with a fork until the dough just comes together. Divide the dough into two equal portions, shape into discs, wrap in plastic, and refrigerate for 1 hour. The chilled dough will be easier to roll and won’t shrink during baking.
Step 2: Make the Creamy Chicken and Vegetable Filling
In a large skillet over medium heat, cook 1.5 lb diced boneless skinless chicken breasts until no longer pink, about 6-8 minutes. Remove and set aside. In the same skillet, add 1 whole yellow onion (finely diced), 2 whole carrots (peeled and sliced), and 2 whole celery stalks (thinly sliced). Cook for 5-7 minutes until vegetables soften.
Add 3 cloves garlic cloves (minced) and 2 tsp fresh thyme leaves, cooking for 1 minute until fragrant. Sprinkle 0.5 tsp salt and 1 tsp black pepper over the vegetables. Stir in 1.5 cups chicken broth, 0.5 cup whole milk, and 0.5 cup heavy cream, bringing to a simmer.
Step 3: Thicken the Filling and Add Final Ingredients
Return the chicken to the skillet along with 1 cup frozen peas. Simmer for 5 minutes until the sauce thickens enough to coat the back of a spoon. The filling should be rich and creamy, with vegetables tender but still holding their shape.
Remove from heat and let cool slightly while you roll out the crusts. This prevents the bottom crust from becoming soggy when assembled. Taste and adjust seasoning if needed, remembering that the flavors will concentrate slightly during baking.
Step 4: Assemble and Bake the Pot Pie
On a lightly floured surface, roll out one dough disc to a 12-inch circle and transfer to a 9-inch pie dish. Pour in the cooled filling. Roll out the second dough disc and place it over the filling. Crimp the edges to seal, then cut several slits in the top crust to allow steam to escape.
Bake at 425°F for 35-40 minutes until the crust is golden brown and the filling is bubbling. The top should be deeply golden with visible flaky layers, and the filling should be thick and creamy when a knife is inserted through a vent.
Step 5: Rest and Serve
Let the pot pie rest for 10-15 minutes after removing from the oven. This allows the filling to set slightly, making it easier to slice. The crust will become crisp as it cools, while the filling remains rich and velvety.
Serve warm, with each portion featuring both top and bottom crust layers. The ideal serving will have a crisp, flaky exterior giving way to a creamy, hearty filling packed with tender chicken and vegetables in every bite.
Pro Tips For Making 2 Crust Chicken Pot Pie
- Chill the Dough: Pop your crust dough in the fridge for at least 30 minutes before rolling—this keeps the butter from melting into the flour, which means flakier layers. I learned this the hard way after making tough crusts for years.
- Poach the Chicken: Simmer your chicken breasts in salted water for 12-15 minutes until just cooked through, then shred or cube. This keeps the meat moist and prevents the dry, rubbery texture that ruins pot pie.
- Vent the Top: Cut 3-4 small slits in the top crust before baking to let steam escape. After burning the edges of my first few pies, I finally figured out this simple fix.
- Use Ice Cold Water: When making your crust, use water straight from the ice bath—about 3-4 tablespoons. Warmer water makes the butter soften too fast, and your crust won’t be as tender.
Essential Equipment for 2 crust chicken pot pie
Pie Dish Selection
I always use a 9-inch glass pie dish—it conducts heat evenly and lets you monitor the bottom crust browning. Pyrex is my go-to brand for durability. Avoid dark metal pans as they can cause over-browning before the filling is fully cooked. 💡
Rolling Tools
A French rolling pin without handles gives you better control for thin, even crusts. I pair mine with a silicone pastry mat marked with measurements. For dusting, keep a small bowl of all-purpose flour nearby to prevent sticking.
Pastry Cutters
For cutting cold butter into flour, a pastry cutter with 5 blades works best. I’ve had my OXO Good Grips model for years. If you don’t have one, two forks or your fingertips work in a pinch, but the cutter saves time and effort.
Brush for Finishing
Before baking, brush the top crust with 1 beaten egg yolk mixed with 1 tbsp water for that perfect golden sheen. I use a silicone pastry brush—it’s heat-resistant and easy to clean. This step makes all the difference in appearance.
Cooling Rack
After baking, transfer your pie to a wire cooling rack to prevent the bottom crust from steaming. I recommend a stainless steel rack with a grid pattern. This ensures air circulation on all sides for that crisp texture we love. ❄️
Thermometer Check
For absolute certainty, use an instant-read thermometer to check the filling reaches 165°F in the center. My ThermoWorks ThermoPop gives accurate readings in 3-4 seconds. It’s a small investment for perfect results every time.
Nutrition Facts
Frequently Asked Questions
Can I use store-bought pie crust?
Yes, pre-made crust works in a pinch but won’t be as flaky. Thaw it completely and roll it slightly thinner for even baking. Homemade tastes better but takes more time.
How do I prevent a soggy bottom crust?
Blind-bake the bottom crust for 10 minutes at 425°F before adding filling. Also, cool the filling slightly before assembling to reduce moisture.
Can I make this ahead?
Assemble the pie completely and refrigerate for up to 24 hours before baking. Or freeze unbaked for 2 months, thawing overnight before baking.
What if my filling is too thin?
Simmer it longer to reduce, or mix 1 tbsp cornstarch with 1 tbsp water and stir in before baking. The filling should coat the back of a spoon thickly.

- 4C Bread Crumbs Meatballs Recipe: Crispy Crust and Juicy Centers - September 25, 2026
- 6 Oz Chocolate Chip Cookie Recipe: Perfectly Balanced Crispy Edges and Chewy Hearts - September 25, 2026
- 6-Inch Coffee Cake Recipe: Vanilla Bean Swirls and Buttery Streusel Topping - September 25, 2026