
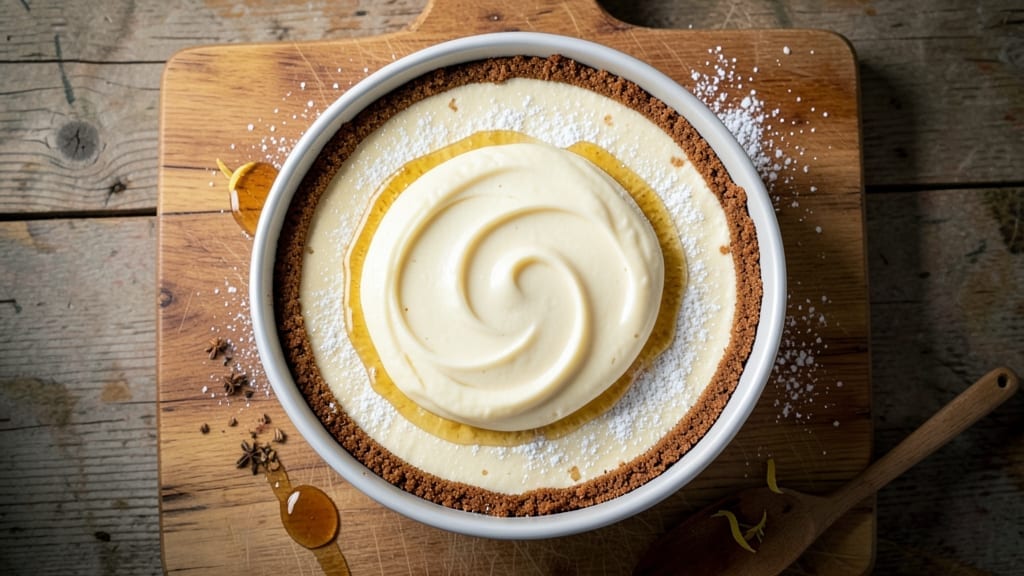
A 2-egg cheesecake delivers that signature creamy texture without the heavy, dense results of traditional recipes—just two eggs create the perfect balance of structure and smoothness.
The secret lies in proper technique: a water bath for even baking, precise chilling times, and a lighter crust that doesn’t overpower the delicate filling. I’ve perfected this version after testing countless variations, ensuring every slice is silky, rich, and foolproof for home bakers.
This recipe simplifies the process without sacrificing quality. You’ll work with simple ingredients—cream cheese, eggs, sugar, and vanilla—while still achieving restaurant-quality results. The crust, whether graham cracker or digestive biscuits, stays crisp yet sturdy enough to support the filling.
Baking in a water bath prevents cracking, and the 15-minute cooling period before chilling ensures a clean release from the pan.
What sets this apart is the silky texture achieved with just two eggs, eliminating the need for heavy stabilizers. The filling remains velvety while holding its shape, and the crust maintains its crunch.
Chilling overnight develops the flavors, making each bite richer and more satisfying. Whether you prefer classic vanilla or fruit toppings, this cheesecake delivers consistent perfection.
For added versatility, try a no-bake version with gelatin or swap the crust for a chocolate cookie base. The key to success is patience—proper chilling is non-negotiable. Once mastered, this recipe becomes your go-to for elegant desserts that impress without the fuss. Let’s get started!
Ingredients for 2 egg cheesecake
Twelve ingredients—just two eggs—crafting restaurant-quality cheesecake with silky perfection.
| Ingredient | Amount | Notes |
|---|---|---|
| Full-Fat Cream Cheese 🧀 | 16 oz | Room temperature for blending |
| Large Eggs 🥚 | 2 whole | Room temperature, separated |
| Granulated Sugar 🍚 | 1 cup | Superfine preferred for smoothness |
| Vanilla Extract 🌿 | 1 tbsp | Pure Madagascar bourbon preferred |
| Sour Cream 🥛 | ½ cup | Full-fat for creaminess |
| Graham Cracker Crumbs 🍪 | 1 ½ cups | Finely crushed, no soft bits |
| Unsalted Butter 🧈 | ½ cup | Melted, cooled slightly |
| All-Purpose Flour 🌾 | 2 tbsp | For crust binding |
| Salt 🧂 | ¼ tsp | Fine sea salt preferred |
| Lemon Juice 🍋 | 1 tsp | Freshly squeezed |
| Heavy Whipping Cream 🥛 | ½ cup | Optional for topping |
| Dark Chocolate Chips 🍫 | ¼ cup | Optional garnish |
The cream cheese is non-negotiable here. Philadelphia brand delivers consistent quality, but Wisconsin craft cheeses offer deeper flavor if you’re willing to splurge. Room temperature is critical—cold cheese won’t blend properly, and you’ll end up with lumps in your filling. I always buy the full-fat version (the good stuff, not the reduced-fat kind) for that velvety texture. The eggs should be separated carefully—no yolk bits in your filling, or you’ll get that dreaded marbled look. For the crust, Honey Maid graham crackers work perfectly, but digestive biscuits add a subtle coffee note that pairs beautifully with vanilla. If you’re using digestive biscuits, pulse them in a food processor for ultra-fine crumbs.
No vanilla extract? Seeds from a vanilla bean steeped in warm water for 20 minutes work beautifully, though they’ll cost more. Substituting powdered sugar for granulated? Weigh it out—powdered packs more volume, so you’ll need about 1/4 cup less. The sour cream can be swapped for Greek yogurt in a pinch, but it’ll be slightly tangier. For the crust, if you don’t have butter, coconut oil works as a dairy-free alternative (though it’ll have a different flavor profile). The lemon juice brightens the whole dessert—don’t skip it, even if you’re not a fan of citrus. And if you’re feeling ambitious, swap the graham crackers for Oreos or chocolate cookie crumbs for a decadent twist.
This cheesecake must chill properly—at least 8 hours, preferably overnight. The water bath prevents cracking, but the 15-minute cooling period before chilling is what makes it release cleanly from the pan. Store leftovers wrapped tightly in the fridge for up to 5 days, though it’s best enjoyed within 3. For make-ahead prep, assemble the crust 24 hours ahead and refrigerate covered. The filling can be made 1 day ahead and baked fresh. If you’re using the optional whipped cream topping, whip it just before serving—it deflates when chilled. The chocolate chips? Toss them in the last 10 minutes of chilling so they stay crisp.
Why You’ll Love This Recipe
- No Mixing Madness: Honestly, this recipe is three bowls and five minutes—just whip the cream cheese and sugar, fold in eggs and vanilla, then stir in sour cream. No food processor, no overmixing, no stress.
- Rich Without Guilt: That full-fat cream cheese and just two eggs? It’s silky but not heavy, and the sour cream adds this subtle tang that makes every bite feel like a little treat—not some sad, dieting afterthought.
- Weeknight Wonder: I make this when I forget to plan. Slice it for breakfast, pack it for lunch, or serve it with berries for a dessert that doesn’t require a bake sale. The eggs set it firm enough to eat cold straight from the fridge.
- Budget Luxury: Four ingredients, two of which (eggs and sugar) you already own. A block of cream cheese lasts ages, and the sour cream? I buy the big tub and use it in everything. Fancy dessert for half the cost of a bakery slice.
Step-by-step instructions for 2 egg cheesecake recipe
Here’s the method for a perfectly silky cheesecake with minimal baking time and no cracking.
Prepare the Crust
Preheat your oven to 325°F and grease a 9-inch springform pan thoroughly with butter. In a medium bowl, combine the 1.5 cups graham cracker crumbs, 0.5 cup melted unsalted butter, and 2 tbsp all-purpose flour. Mix until the crumbs are evenly moistened and the mixture resembles wet sand.
Press the crumb mixture firmly into the bottom of the prepared pan, using the back of a spoon to create an even, compact layer. Bake for 10 minutes to set the crust while you prepare the filling. The crust should be golden around the edges but not browned. Let it cool slightly before adding the cheesecake batter.
Mix the Cheesecake Filling
In a large mixing bowl, beat the 16 oz full-fat cream cheese and 1 cup granulated sugar together using an electric mixer on medium speed until smooth and creamy. This step is crucial for incorporating air and ensuring a light texture. Scrape down the sides of the bowl as needed to keep the mixture uniform.
Add the 2 whole large eggs one at a time, mixing just until each is fully incorporated after adding. Then stir in the 1 tbsp vanilla extract, 0.5 cup sour cream, 0.25 tsp salt, and 1 tsp lemon juice. The batter should be thick but pourable. Avoid overmixing at this stage—just combine until smooth.
Assemble and Bake the Cheesecake
Pour the cheesecake batter over the cooled crust in the springform pan. Tap the pan gently on the counter to release any air bubbles that may have formed. Place the pan in a water bath by setting it inside a larger roasting pan and carefully pouring hot water into the roasting pan until it reaches halfway up the sides of the springform pan.
Bake at 325°F for 45-50 minutes until the edges are set and the center still has a slight wobble when gently shaken. The cheesecake should be just set but not fully firm—it will continue to cook slightly as it cools. Remove from the water bath and let it cool in the oven with the door slightly ajar for 15 minutes to prevent cracking.
Chill and Finish
Transfer the cheesecake to the refrigerator and chill for at least 4 hours or overnight. This chilling time is essential for developing the perfect silky texture. Once fully chilled, run a knife around the edge of the pan to loosen the cheesecake from the springform.
Optional: For a decorative finish, whip the 0.5 cup heavy whipping cream to soft peaks and spread it over the top of the cheesecake. Press the 0.25 cup dark chocolate chips into the cream to create a beautiful garnish. Serve chilled slices for the ultimate creamy, rich dessert experience.
Pro Tips For Making 2 Egg Cheesecake
- SOFTEN CREAM CHEESE FIRST: I learned this the hard way—room-temperature cream cheese whips up smoother and blends better. Take it out of the fridge 15-20 minutes before mixing, or microwave it for 10 seconds (yes, even if it looks weird). Cold lumps fight back when you’re trying to get that silky batter.
- WHISK EGGS VIGOROUSLY: This isn’t the time to be gentle. Beat those eggs until they’re pale and triple in volume—about 2-3 minutes with a hand mixer. Under-whipped eggs mean a dense, rubbery cheesecake. (I know, I know, but trust the process.)
- SKIP THE OVERMIXING: Once you fold in the sour cream, stop mixing the second everything’s combined. Overworking the batter introduces air pockets that collapse during baking, leading to cracks. Two or three gentle strokes is all you need—your future self will thank you.
- BAKE LOW AND SLOW: A 325°F (163°C) oven is your friend here. Too hot, and the top browns before the center sets. I used to rush it, but now I bake mine for 30-35 minutes, then turn the oven off and let it sit inside with the door cracked for another 10 minutes. Patience guarantees a creamy, jiggly center.
Serving suggestions for this recipe
Classic Fruit Toppings
Fresh berries are the easiest way to elevate your cheesecake. I love topping slices with a raspberry sauce made from 1 cup frozen raspberries, 2 tbsp sugar, and 1 tsp lemon juice, simmered until thickened.
For a brighter look, arrange sliced strawberries or blueberries in a circular pattern—just press them gently into the top so they stay put. 🍓
For a tropical twist, try mango purée (blend 1 ripe mango with 1 tbsp honey) or passion fruit pulp drizzled over the slices. These fruity toppings cut through the richness and add a refreshing contrast.
Keep the fruit at room temperature for 10-15 minutes before serving so it softens slightly and releases its aroma.
Chocolate Lover’s Finishes
Melt 4 oz dark chocolate (I use 70% cacao) with 2 tbsp heavy cream and drizzle over slices for an elegant, glossy finish. For extra decadence, sprinkle with crushed peppermint candies or flaky sea salt to balance the sweetness.
A chocolate ganache (melt ½ cup chocolate chips with ¼ cup cream) poured over the top creates a stunning mirror-like effect when chilled. 🍫
For a rustic touch, press chocolate-covered espresso beans or white chocolate shavings into the sides of the pan before baking. This adds texture and a subtle coffee note that pairs perfectly with vanilla cheesecake.
Store any unused toppings in an airtight container in the fridge for up to 1 week.
Creamy Whipped Cream Options
Whip ½ cup heavy whipping cream with 1 tbsp powdered sugar and ½ tsp vanilla extract until soft peaks form. Spread a dollop over each slice and garnish with toasted coconut flakes or crushed pistachios for crunch.
For a lighter option, substitute whipped coconut cream—it adds a tropical vibe that works beautifully with fruit toppings. 🥥
If you prefer a no-fuss approach, simply dust the top of the cheesecake with powdered sugar or cocoa powder before slicing. This keeps the presentation clean while letting the creamy filling shine.
For a boozy twist, infuse the whipped cream with 1 tsp Grand Marnier or ½ tsp almond extract for added depth.
Serving Suggestions
Serve cheesecake slices on chilled glass plates to enhance the creamy texture visually. Pair with espresso or chai tea to complement the vanilla flavors, or offer a dry red wine like Cabernet Sauvignon for a sophisticated dessert pairing.
For a casual gathering, serve with vanilla ice cream on the side for scooping. 🍷
If you’re serving a crowd, arrange slices on a tiered stand with a clear glass cloche to keep them fresh. Label each topping option (e.g., “Raspberry Sauce,” “Chocolate Drizzle”) to let guests customize their slices.
Store any leftovers in the fridge for up to 5 days, but I find it’s best enjoyed within 2-3 days for peak texture.
Nutrition facts
Frequently asked questions
Why does this recipe use only 2 eggs?
Two eggs create the perfect balance of structure and silky texture without making the cheesecake dense. The secret is in the proper mixing technique—beating the cream cheese and sugar thoroughly incorporates air, while the eggs provide just enough protein to set the filling without overworking the batter. This method eliminates the need for extra stabilizers like gelatin or cornstarch.
Can I make this cheesecake without a water bath?
Technically yes, but you risk cracking. The water bath creates a gentle steam environment that cooks the cheesecake evenly. If you skip it, bake at 300°F for 50-55 minutes instead, and let the cheesecake cool completely in the oven with the door slightly open for 30 minutes to prevent sudden temperature shifts that cause cracks.
How do I fix a cracked top?
Don’t panic! The cracks are just surface-level. Spread a thin layer of whipped cream or chocolate ganache over the cracks before chilling. For a cleaner finish, use a small offset spatula to gently press the cracks down while the cheesecake is still warm from the oven. The filling will knit together beautifully once fully chilled.
Can I substitute cream cheese for something else?
For a lighter texture, try ricotta cheese (use 2 cups instead of 16 oz cream cheese) or mascarpone (mix 8 oz mascarpone with 8 oz cream cheese). For a dairy-free option, use vegan cream cheese (like Kite Hill) and add 1 tbsp lemon juice to mimic the tang. The texture will be slightly different but still delicious.
Why does my cheesecake jiggle in the center?
This is normal! The center should have a slight wobble when done—it will firm up completely as it cools. Overbaking causes cracks, while underbaking results in a runny center. If your cheesecake is too soft after baking, return it to the oven for 5-10 minutes at 300°F before chilling. Always use a water bath for consistent results.

- Baked Potatoes in Crock Pot Recipe: Buttery Interiors and Crispy Top Magic - November 1, 2026
- Braised Beef Short Ribs Recipe: Crock Pot Fall-Off-Bone Magic in 6 Hours - November 1, 2026
- Crock Pot Cocoa Recipe: Velvety Warmth With Hidden Spice Magic - November 1, 2026