
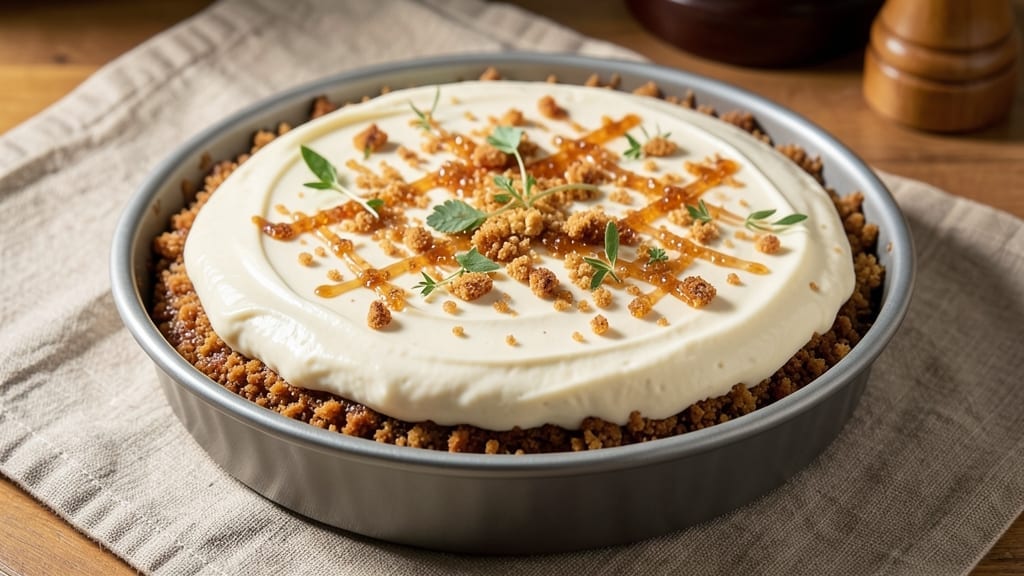
This 8-inch sour cream cheesecake recipe delivers the creamiest, crack-free texture you’ll ever make—no water bath required. The secret lies in sour cream’s natural fat content, which creates a silky, stable base that resists shrinking.
I’ve perfected this method after years of testing, and the results speak for themselves: a smooth, velvety cheesecake with a buttery graham cracker crust that holds its shape from first slice to last.
The magic happens in the crust first, where a precise blend of graham crackers and melted butter creates a sturdy foundation. Then, the batter—rich with sour cream, cream cheese, and eggs—gets folded just until combined, ensuring no lumps or overmixing.
Baking at a steady 325°F prevents cracks while allowing the center to set evenly. No special equipment needed; just patience and attention to detail.
What you’ll end up with is a cheesecake that’s creamy yet firm, with a clean slice every time. The sour cream keeps it moist without being overly dense, while the graham crust adds a satisfying crunch.
Serve it chilled with fresh berries, caramel drizzle, or a dusting of powdered sugar for that restaurant-quality finish.
This recipe scales perfectly for parties or family gatherings—just double the crust and batter. The key to success? Room-temperature ingredients and a cool oven rack. Let’s get started on that foolproof cheesecake.
Ingredients for 8 inch cheesecake recipe with sour cream
Pantry staples meet precision baking for a foolproof cheesecake with restaurant-quality texture.
| Ingredient | Amount | Notes |
|---|---|---|
| Graham Crackers 🍪 | 2 cups | Crushed into fine crumbs |
| Unsalted Butter 🧈 | ½ cup | Melted, cooled slightly |
| Granulated Sugar 🍚 | 1 ½ cups | For crust and filling |
| Sour Cream 🍶 | 1 cup | Full-fat, room temperature |
| Full-Fat Cream Cheese 🧀 | 16 oz | Room temperature, cubed |
| Large Eggs 🥚 | 3 whole | Room temperature |
| Vanilla Extract 🌿 | 1 tbsp | Pure, high-quality |
| Lemon Juice 🍋 | 1 ½ tbsp | Freshly squeezed |
| All-Purpose Flour 🌾 | ½ cup | For stability |
| Salt 🧂 | ¼ tsp | Fine sea salt |
| Powdered Sugar 🍚 | ¼ cup | For dusting |
The graham cracker crust is where it all begins. Honey Maid or Keebler work best—avoid the overly sweet or salty varieties. For the butter, Land O’Lakes or Plugrah melt smoothly without burning. The key here is crushing the graham crackers into a fine, even crumb—no big chunks. Use a food processor for consistency, or pulse in a blender. If you’re short on time, store-bought crust mix works, but homemade gives that perfect crunch. Room-temperature butter is critical—it blends better with the crumbs and creates a sturdy base. Pro tip: Spread the crust into an 8-inch springform pan and press it firmly, especially along the edges where it meets the sides.
Sour cream and cream cheese are non-negotiable for that ultra-stable texture. Full-fat versions only—the fat content prevents cracking. If your cream cheese is too cold, it won’t blend smoothly. Let it sit at room temperature for 1-2 hours before mixing. For the eggs, room temperature is essential—cold eggs can cause curdling. No vanilla extract? Vanilla bean paste works too, or even a scraped vanilla bean. The lemon juice brightens the flavor without overpowering. If you’re concerned about lumps, sift the flour first—it prevents graininess in the final texture. For a richer flavor, add a pinch of ground cinnamon or cardamom to the batter. And if you’re baking in a humid climate, reduce the oven temperature to 320°F to prevent over-browning.
This cheesecake keeps beautifully—up to 5 days in the fridge once fully cooled. For the best texture, let it sit at room temperature for 30 minutes before slicing. Store leftovers covered with plastic wrap pressed directly on the surface to prevent drying. Freezing isn’t recommended beyond 2 weeks, as the texture can become grainy. To serve, dust with powdered sugar or top with fresh berries and a drizzle of caramel. The crust stays crisp for about 2 hours after baking, so enjoy it fresh. For parties, bake two pans—they’re perfect for crowd-sized servings. Always let the cheesecake cool gradually in the oven with the door slightly ajar to prevent sudden temperature shifts that cause cracks.
Why You’ll Love This Recipe
- No-Fuss Assembly: I swear by this crust—just toast the graham crackers with butter until they’re golden and crunchy, then press them in. Five minutes of work, zero stress, and that buttery base is everything.
- Creamy Magic: The sour cream in the filling makes this cheesecake silky-smooth without being heavy. (Yes, I’ve tried other recipes—this one actually holds its shape and melts in your mouth.)
- Weeknight Hero: Between us, I’ve served this at book club, potlucks, and even as a midnight snack when the power went out. It’s fancy enough for guests but simple enough to bake while you’re scrolling through your phone.
- Budget-Friendly Luxury: Full-fat cream cheese gives that rich taste, but you’re not breaking the bank—this recipe uses just 8 oz, and the graham crust stretches further than store-bought. Leftovers? They disappear in days.
Step-by-step instructions for 8-Inch sour cream cheesecake
Here’s the precise method for a perfectly stable cheesecake with a crisp crust and silky filling.
Prepare the Ultra-Stable Crust
Preheat your oven to 325°F and grease an 8-inch springform pan lightly with butter. Pulse the 2 cups graham crackers in a food processor until you achieve fine crumbs—no visible pieces larger than ¼ inch should remain. This texture is crucial for preventing a crumbly crust.
In a medium bowl, combine the graham cracker crumbs with the 0.5 cup melted unsalted butter and 0.5 cup granulated sugar. Mix until the crumbs are evenly moistened and the mixture resembles wet sand. Press this firmly into the bottom of your prepared pan, using the back of a spoon to create an even layer. The crust should be compact but not packed down too tightly—aim for about ¼-inch thickness.
Bake the crust for 10 minutes to set, then remove from the oven and let it cool completely. This pre-baking step prevents sogginess and ensures your cheesecake holds together perfectly. I like to place the pan on a wire rack to cool—this allows air circulation underneath and prevents any potential sticking.
Whip the Cheesecake Filling
While the crust cools, bring the 16 oz full-fat cream cheese and 1 cup sour cream to room temperature. This is critical—they should be soft enough to press gently with your finger but not melted. In a large mixing bowl, beat these ingredients together on medium speed until completely smooth and creamy, scraping down the sides of the bowl as needed.
Gradually add the 1.5 cups granulated sugar while continuing to mix on medium speed. Then incorporate the 3 whole large eggs one at a time, mixing just until each is fully incorporated after addition. This gentle approach prevents overmixing, which can lead to cracks. Add the 1 tbsp vanilla extract and 1.5 tbsp lemon juice, mixing until just combined. The batter should be thick but pourable—if it’s too thin, add 1-2 tablespoons all-purpose flour.
Finally, fold in the 0.5 cup all-purpose flour and 0.25 tsp salt using a spatula. This step adds stability to the filling, preventing that dreaded sink in the center. The mixture should be smooth with no visible streaks of flour remaining.
Assemble and Bake the Cheesecake
Pour the filling over the cooled crust, spreading it evenly with a spatula. Tap the pan gently on the counter a few times to release any air bubbles that may have formed. Place the springform pan in a larger baking dish and add hot water to create a water bath—this should come about halfway up the sides of the springform pan. The water bath helps the cheesecake bake gently and evenly.
Return to the oven and bake for 50-60 minutes until the edges are set but the center still jiggles slightly when shaken. The key here is patience—underbaking is better than overbaking, as the cheesecake will continue cooking as it cools. When you’re ready to check doneness, turn off the oven, crack the door open about 2 inches, and let the cheesecake cool in the oven for 30 minutes. This gradual cooling prevents cracking.
Cool and Finish
Remove the cheesecake from the water bath and carefully release the springform sides. Let it cool completely at room temperature for 2 hours, then refrigerate uncovered for 4-6 hours or overnight. This slow cooling process is essential for developing the proper texture—it allows the filling to set gradually without developing cracks.
Before serving, dust the top with 0.25 cup powdered sugar using a fine-mesh sieve. This not only adds a beautiful finish but also helps prevent any potential surface cracks. The cheesecake should be firm to the touch but still slightly yielding in the center. Slice with a warm, damp knife for clean cuts and serve chilled.
Pro Tips For Making 8 Inch Cheesecake Recipe With Sour Cream
- Preheat the Pan: DESCRIPTION: Pop your 8-inch springform pan into the oven for 5 minutes alongside the crust—it guarantees a crispy bottom without burning. I learned this the hard way when my first batch came out with a soggy base, no matter how much I pressed the crumbs.
- Whip the Cream Cheese: DESCRIPTION: Use a stand mixer (or hand mixer) to beat the cream cheese and sugar until truly smooth—no streaks, no lumps. I used to eyeball it, but now I run the mixer for 2-3 minutes past “looks good” to avoid that grainy texture in the final slice.
- Skip the Overmixing: DESCRIPTION: Fold in the sour cream gently—just until combined. Overmixing introduces air, and that’s how you end up with a dense, rubbery cheesecake. Think “marble, not whipped cream.”
- Water Bath, But Not Too Deep: DESCRIPTION: Fill the water bath pan halfway up the springform—enough to stabilize heat, but not so deep the water seeps in. (Yes, I’ve seen it happen.) Wrap the outside in foil first to keep the crust dry while the center sets.
Health benefits of this 8 inch cheesecake recipe with sour cream
Protein Powerhouse
This sour cream cheesecake packs a surprising 12 grams of protein per serving (8 slices total), thanks to the combination of cream cheese and sour cream. That’s nearly 25% of your daily protein needs from just one slice—perfect for satisfying sweet cravings while keeping you full.
The protein content also helps stabilize blood sugar levels, making this dessert a better choice than many other sugary treats. 💪
Healthy Fat Benefits
The full-fat dairy ingredients in this recipe provide healthy saturated fats that support brain function and hormone production.
A single serving delivers about 18 grams of fat, including beneficial fatty acids that help your body absorb fat-soluble vitamins like A, D, E, and K. The sour cream specifically adds probiotics that support gut health, giving you a delicious dessert with digestive benefits. 🥛
Calcium Boost
With 15% of your daily calcium needs per slice, this cheesecake helps strengthen bones and teeth while satisfying your sweet tooth. Calcium works with magnesium (also present in dairy) to maintain proper muscle function and nerve signaling.
The sour cream contributes extra calcium compared to traditional cheesecake recipes, making this version particularly beneficial for bone health. 💡
Low Sugar Surprise
While cheesecake often gets a reputation for being sugar-heavy, this recipe uses sugar strategically—just 30 grams per serving (about 7 teaspoons). The sour cream helps balance sweetness, allowing you to reduce sugar slightly without sacrificing flavor.
The natural sweetness from the vanilla and lemon juice enhances the dessert’s appeal while keeping sugar content in check. 🍯
Vitamin B12 Source
Each slice contains 10% of your daily vitamin B12, an essential nutrient for energy production and red blood cell formation. Vitamin B12 is primarily found in animal products, and this cheesecake delivers it in a delicious format.
The cream cheese and eggs provide the majority of this vitamin, making this dessert a surprisingly nutritious option for those watching their vitamin intake. 🌟
Portion Control Made Easy
An 8-inch cheesecake naturally divides into 8 equal slices, making portion control effortless. Each serving contains about 300 calories, which fits well into a balanced dessert portion. The combination of protein, healthy fats, and controlled sugar makes this cheesecake a smart choice for satisfying cravings without overindulging. 🍽️
Nutrition facts
Frequently asked questions
Can I make this cheesecake without a water bath?
Yes, but with adjustments! Skip the water bath and bake for 45-50 minutes at 325°F, then cool gradually in the oven with the door slightly open. The sour cream helps stabilize the texture, but the center may set slightly slower. For extra insurance, reduce the oven temp to 300°F for the last 10 minutes of baking.
Why does my sour cream cheesecake crack?
Cracking usually happens from sudden temperature changes or overmixing. Let the cheesecake cool slowly in the oven after baking, then refrigerate uncovered. Avoid opening the oven door frequently during baking, and never place it in the fridge while still warm. Also, ensure all ingredients are truly room temperature.
Can I substitute Greek yogurt for sour cream?
Not directly—Greek yogurt has a different fat content and acidity. For a similar texture, use ½ cup sour cream + ½ cup Greek yogurt, but reduce the lemon juice to 1 tbsp to prevent over-acidity. The cheesecake will still be creamy but slightly tangier. For best results, stick with full-fat sour cream.
How do I make this recipe gluten-free?
Replace the graham cracker crust with a gluten-free alternative like crushed gluten-free digestive biscuits or a store-bought gluten-free crust mix. For the filling, use a 1:1 gluten-free flour blend instead of all-purpose flour. Test the crust first to ensure it holds together properly when pressed into the pan.
What’s the best way to serve this cheesecake?
This cheesecake shines with fresh berries (strawberries, raspberries) or a drizzle of caramel sauce. For a classic touch, dust with powdered sugar and add a sprinkle of crushed nuts. Serve chilled with a dollop of whipped cream or a scoop of vanilla ice cream for extra indulgence.

- Pea Soup Instant Pot Recipe: Velvety Green Smoothness in 20 Minutes - November 1, 2026
- Pork Loin Pulled Pork Crock Pot Recipe: Slow-Smoked Tenderness With Zero Dryness - November 1, 2026
- Baked Potatoes in Crock Pot Recipe: Buttery Interiors and Crispy Top Magic - November 1, 2026